JOYOUS ENDING
I’ve finished the latest piece – the sampler in tribute to the Resident Male’s nascent book Forlorn Toys. He is still writing it, so I won’t give spoilers beyond what I have already cited: the motto, the very obvious panel of aforesaid toys, my attempt at spaceships, and the band with the curious feathery rabbit like creatures.

All in all, I am quite pleased with it. Joy now goes to join my Wall of Shame – the place where my completed but as yet unframed/not-ready-for-public-display pieces live side by side with my unfinished projects. As you know this one like so many others is stitched on reclaimed household linen. I did not notice a bleach-weakened bit along a patch of the edging at the lower left. When that was hooped over and tension applied, the neatly done hem stitching failed, leaving a hole. I will eventually mend that, but other priorities assert themselves.
First among those priorities is a piece I promised to the community of therapists and nurses that tended to me at Vanderbilt Rehab Center at Newport Hospital. It’s fueled by a gift of silk floss from Occupational Therapist Abbey. She admired the work I brought with me intending to stitch. She had an inherited stash of silk threads but no use for it, and asked if I would like it. Always happy to have such things, I agreed, and she sent me a wonderous assortment of Pearsall’s silk floss – long discontinued – in jewel tones.

A princely gift, indeed. And only fitting that I use it for a gift back to the caregivers who got me back on my feet and moving again.
I’ve selected a tinted linen to use as ground for this one. I am not sure who gave me this because I didn’t put a note into the package (possibly my spawn, so apologies if it was). It’s custom dyed Zwiegart 36 count linen (big as logs for me), from Hollis Hands Create – a frosty barely blue tint called Silver Moon.
The first step is to begin the design of the motto. In this case “RELENTLESS FORWARD PROGRESS,” furnished by the Vanderbilt Physical Therapy team. Done. And then to begin thinking about how the rest of the piece will be worked. Not a band sampler this time, it will be a “framed” piece, with one or more bands of design running around all four sides of the motto, complete with corners and any improvisations to make the bands’ designs work out correctly with minimal fudging. Therefore I will be doing a some on-screen work to prepare for this one. More than I would have needed had this been a simple band sampler. For example, those corners will have to be drafted out even if I chose band designs I’ve previously devised. And I will have to plan to use multiple colors effectively because while there are many hues in my bag of silks, there are no duplicates, and most of the skeins are partials. It will be fun to figure out how best to use my limited quantity treasures.
And then there’s selecting a size for the piece and preparing my ground. For that the first bit is to true the edges of the linen cut. To do that I find and pull the warp or weft thread at the narrowest point of the cut, withdrawing it entirely from narrow end across to the widest end. This gives me a clean line along which to cut, and ensures that my edges are parallel. On this piece of ground with one selvedge edge, you can see that the left and right sides perpendicular to the selvedge each are slightly skew, one by about an inch, and the other by about 3/4 of an inch.
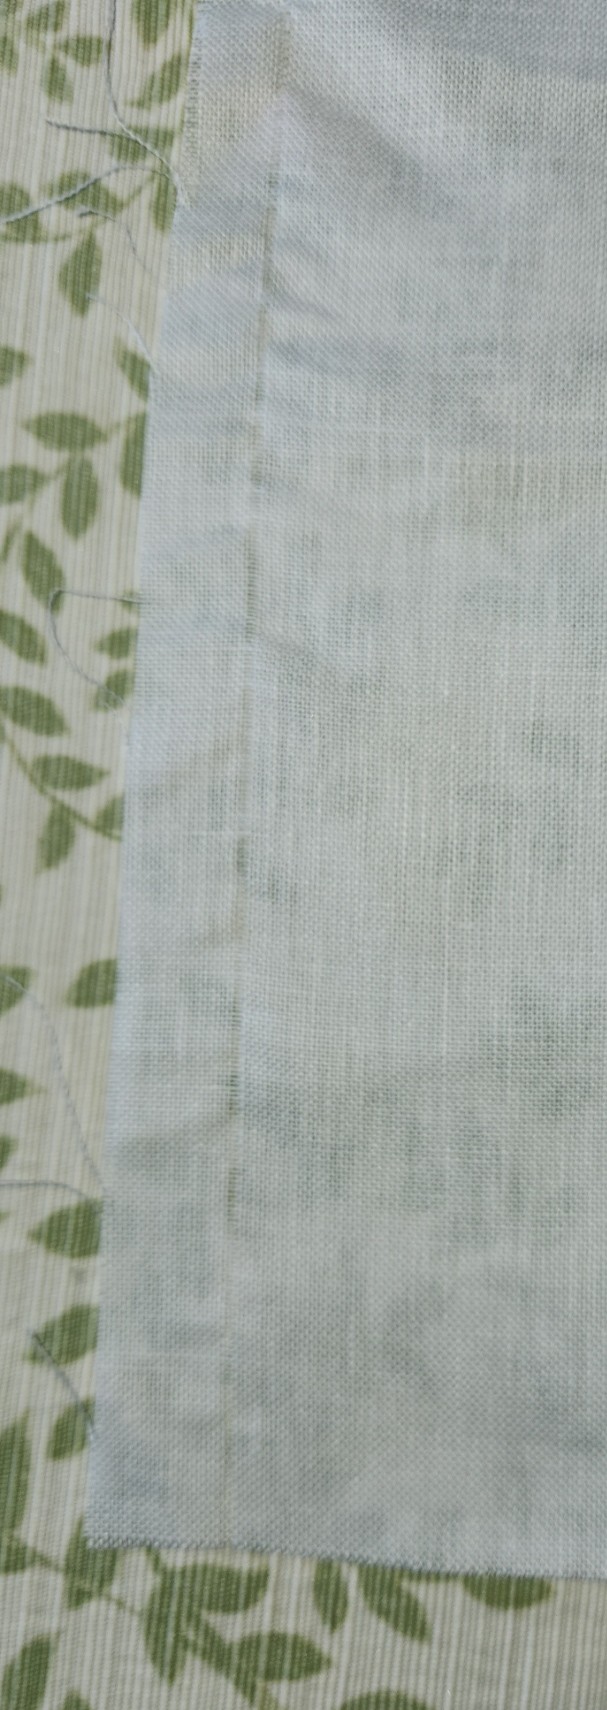
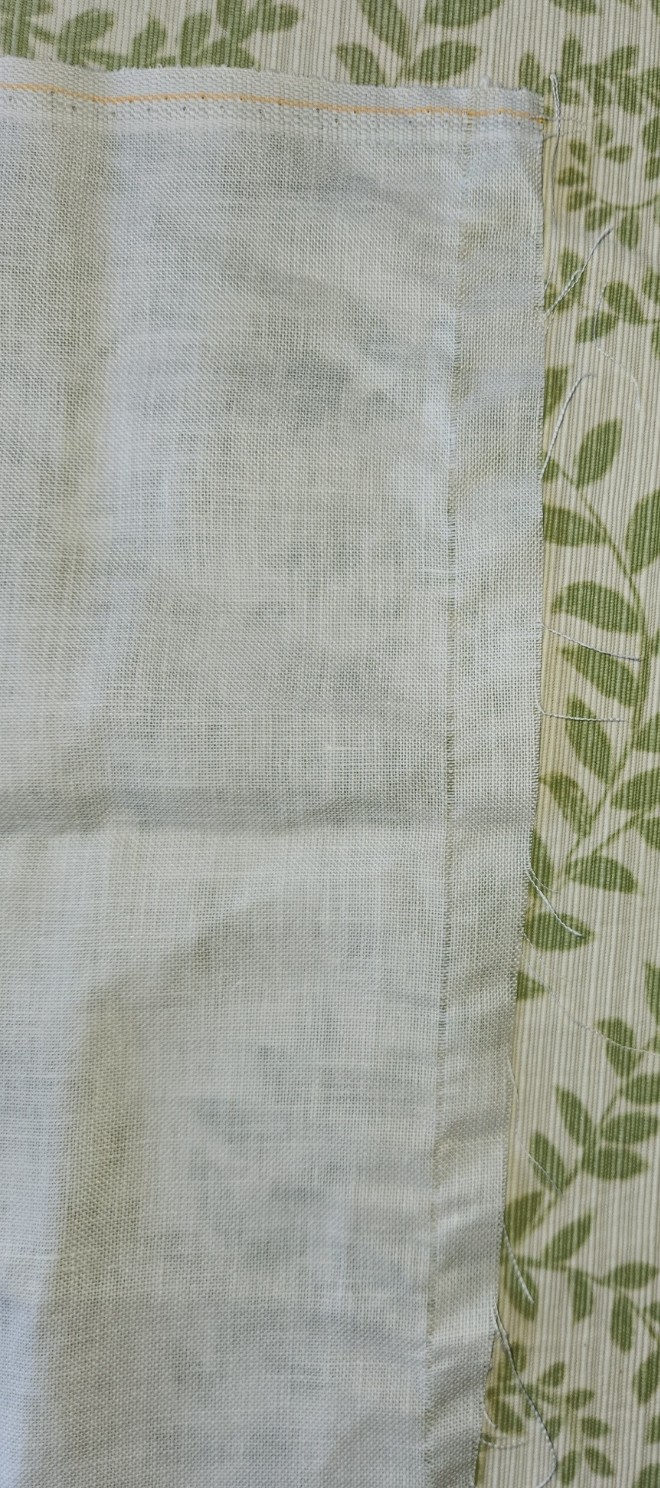
Note that regardless of the retail source, or whether or not the edges are serged or otherwise finished, if I buy a cross bolt full width cut or a fat quarter I always inspect the edges and true them in this manner. I have yet to receive any cut that was done completely congruent with weave direction. Sometimes the deviation is minimal, and there is only an inch or so lost all the way around. Sometimes, especially with lower price precuts sold in big box crafts stores, up to four inches can be wasted all the way around
This is why if you purchase pre-cut yardage, even if you have added on extra width to allow for easy hoop use and framing, it doesn’t hurt to add an additional inch or two all the way around. You never know when you will get a cut so skew that after the cloth is trued parallel to the weave, the cloth ends up being much smaller than you thought you were buying. Charles Craft prepackaged cotton and cotton blend evenweave was notorious for skew cuts. Their products started me doing this “proofing” step, and I have not regretted it since.
I won’t be using this entire fat quarter on this project. I will measure my ground cloth piece after it’s cut and the left and right edges are hemmed. I’ll decide then on the orientation of my sampler, cut my ground accordingly (also on a pulled thread line), and hem that last edge. The remaining bit will be returned to stash. And I will get a start on selecting my framing pattern(s) and drafting up my new corners.
On the non-computer work side, while the design work is going on but after I get my piece of cloth sized and hemmed, I will baste in guidelines: centers and stitching area edges. The final count of the available stitching real estate between the area edge marks will help inform final design tweaks.
I don’t think of all this pre-work as being very complex or onerous. The physical prep is mostly mindless and gives me plenty of headspace for the rest of the planning.
Now off to select my patterns… I toyed with using icons representing progress from sitting to walking, but I decided that was too limiting. The rehab therapies offered go far beyond simple sit to stand to walk, and I wanted the piece to be as inclusive (or non-specific) as possible. And the logos for the various institutions and professional certifications involved are too fussy to be easily charted at my scale. So it’s a mix of florals, geometrics, and possibly a pet or mythical beast or two thrown in. After all, who doesn’t identify with dragons or kittens?
