AND PROGRESS ON OTHER FRONTS
The holidays being party over, our latke party, Christmas Eve feast, present exchanges being done, the luxury of time is creeping back into our daily routine. So I can post about my other two big end of year projects.
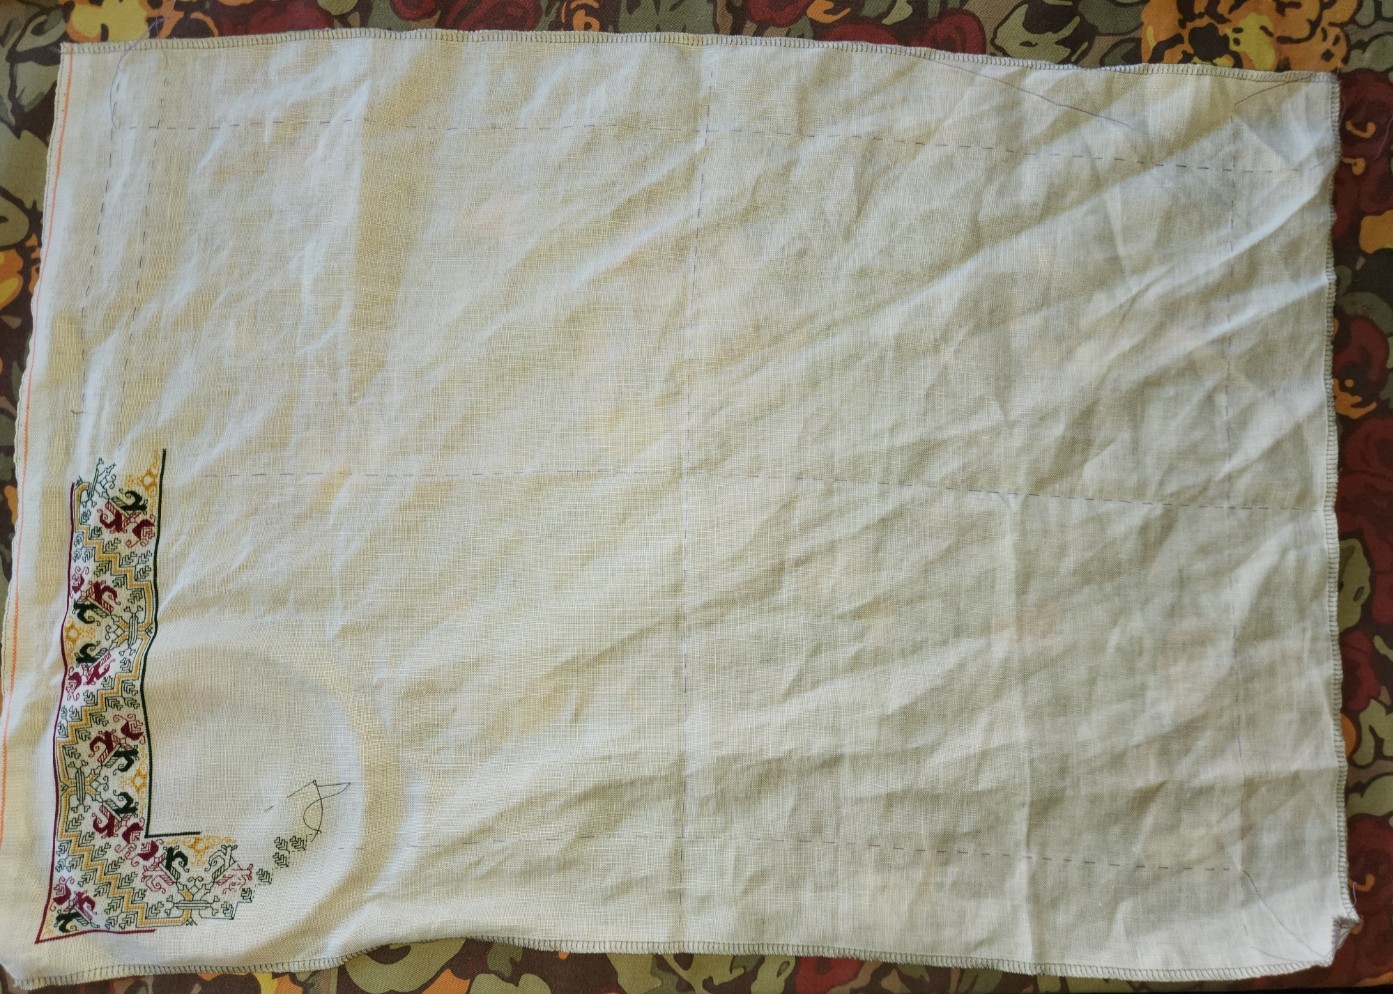
First is my Italian-inspired cloth. Still not sure what I will do with it, although it’s looking likely that it will end up as a piece of honor on a credenza here in the house. I have finished the outer frame. I started this one on 19 September, at the center of the left hand edge, as seen in the photo below. I marched around the perimeter, opting to go a bit shy on the right hand side to preserve use of the “perfect” corner I charted out. I joined up with the starting spot last week via an extended tendril just to confirm the count and that no fudging would be needed. Spot on, no alignment problems at all. I finished out the join and all of the panel detail last night.
And surprise! I’m not done!
I am working a doubled variant of the edge pattern across the center. Possibly flanked by two single panels. I haven’t decided on those yet. I want to capture the spirit of the original, a towel done in Punto Scritto and Punto a Spina Pesce MFA Accession 83.242, Italian, 16th century, silks on linen. The original is quite large, more than four times the size of my rendition.

More on the developing center panel as it grows, of course.
The other big project was my set of frog hats. Five of them have been given to the recipients, all received with delight and enthusiasm. Four shown below, on consenting adults.
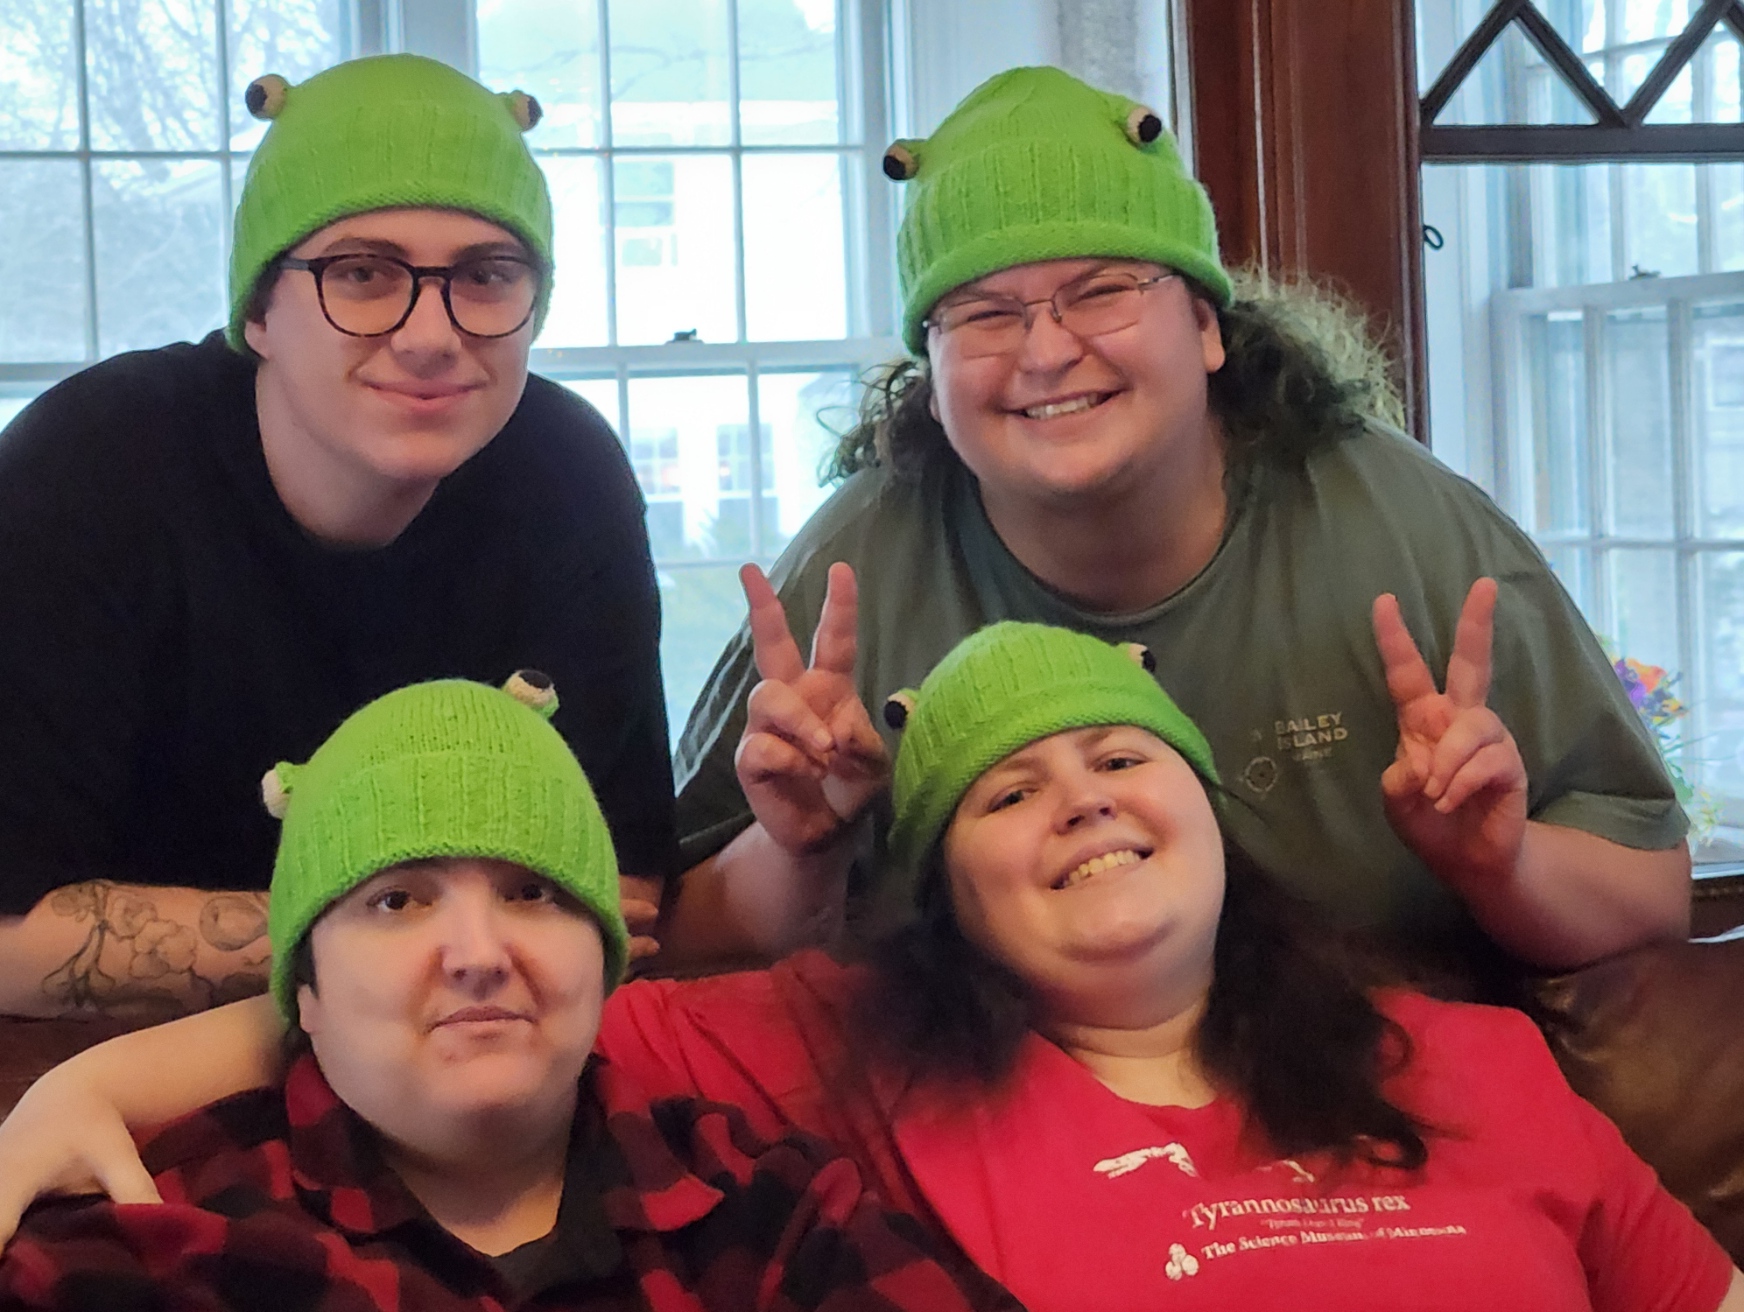
I’ll be finishing up the eyes on the last two this week. I am not sure if I can put out a full method description because it’s a bit complex to explain exactly what I did. But here goes…
First, I knit up seven hats, working in the round on two circular needles, roughly following the general pattern I am using as my source. I’ve used a different cast-on, swapped in K2P2 ribbing for the original K1P1, and arranged the thing so that when the brim is folded, the more attractive side of my cast-on is on the outside of the hat.
Then I took inspiration from a free published pattern for eyeballs, changing the color progression slightly. I used much smaller DPNs for the eyeballs than I used for the hat body, largely to contain the stuffing. Seven hats meant 14 eyes. In retrospect I think I should have made them bigger, but the hat is still true to the concept.
Once the little eyeball spheres were knit, stuffed, and ended off, I had to add eyelids. To do that I used a threaded needle and embroidered backstitch. I looped my backstitches over my DPNs to set up the foundation for a row of knit-on I-Cord. Three needles’ worth, five stitches each. I did this via sewing because picking up stitches across the surface of the eyeball was difficult to do without disturbing the stuffing.
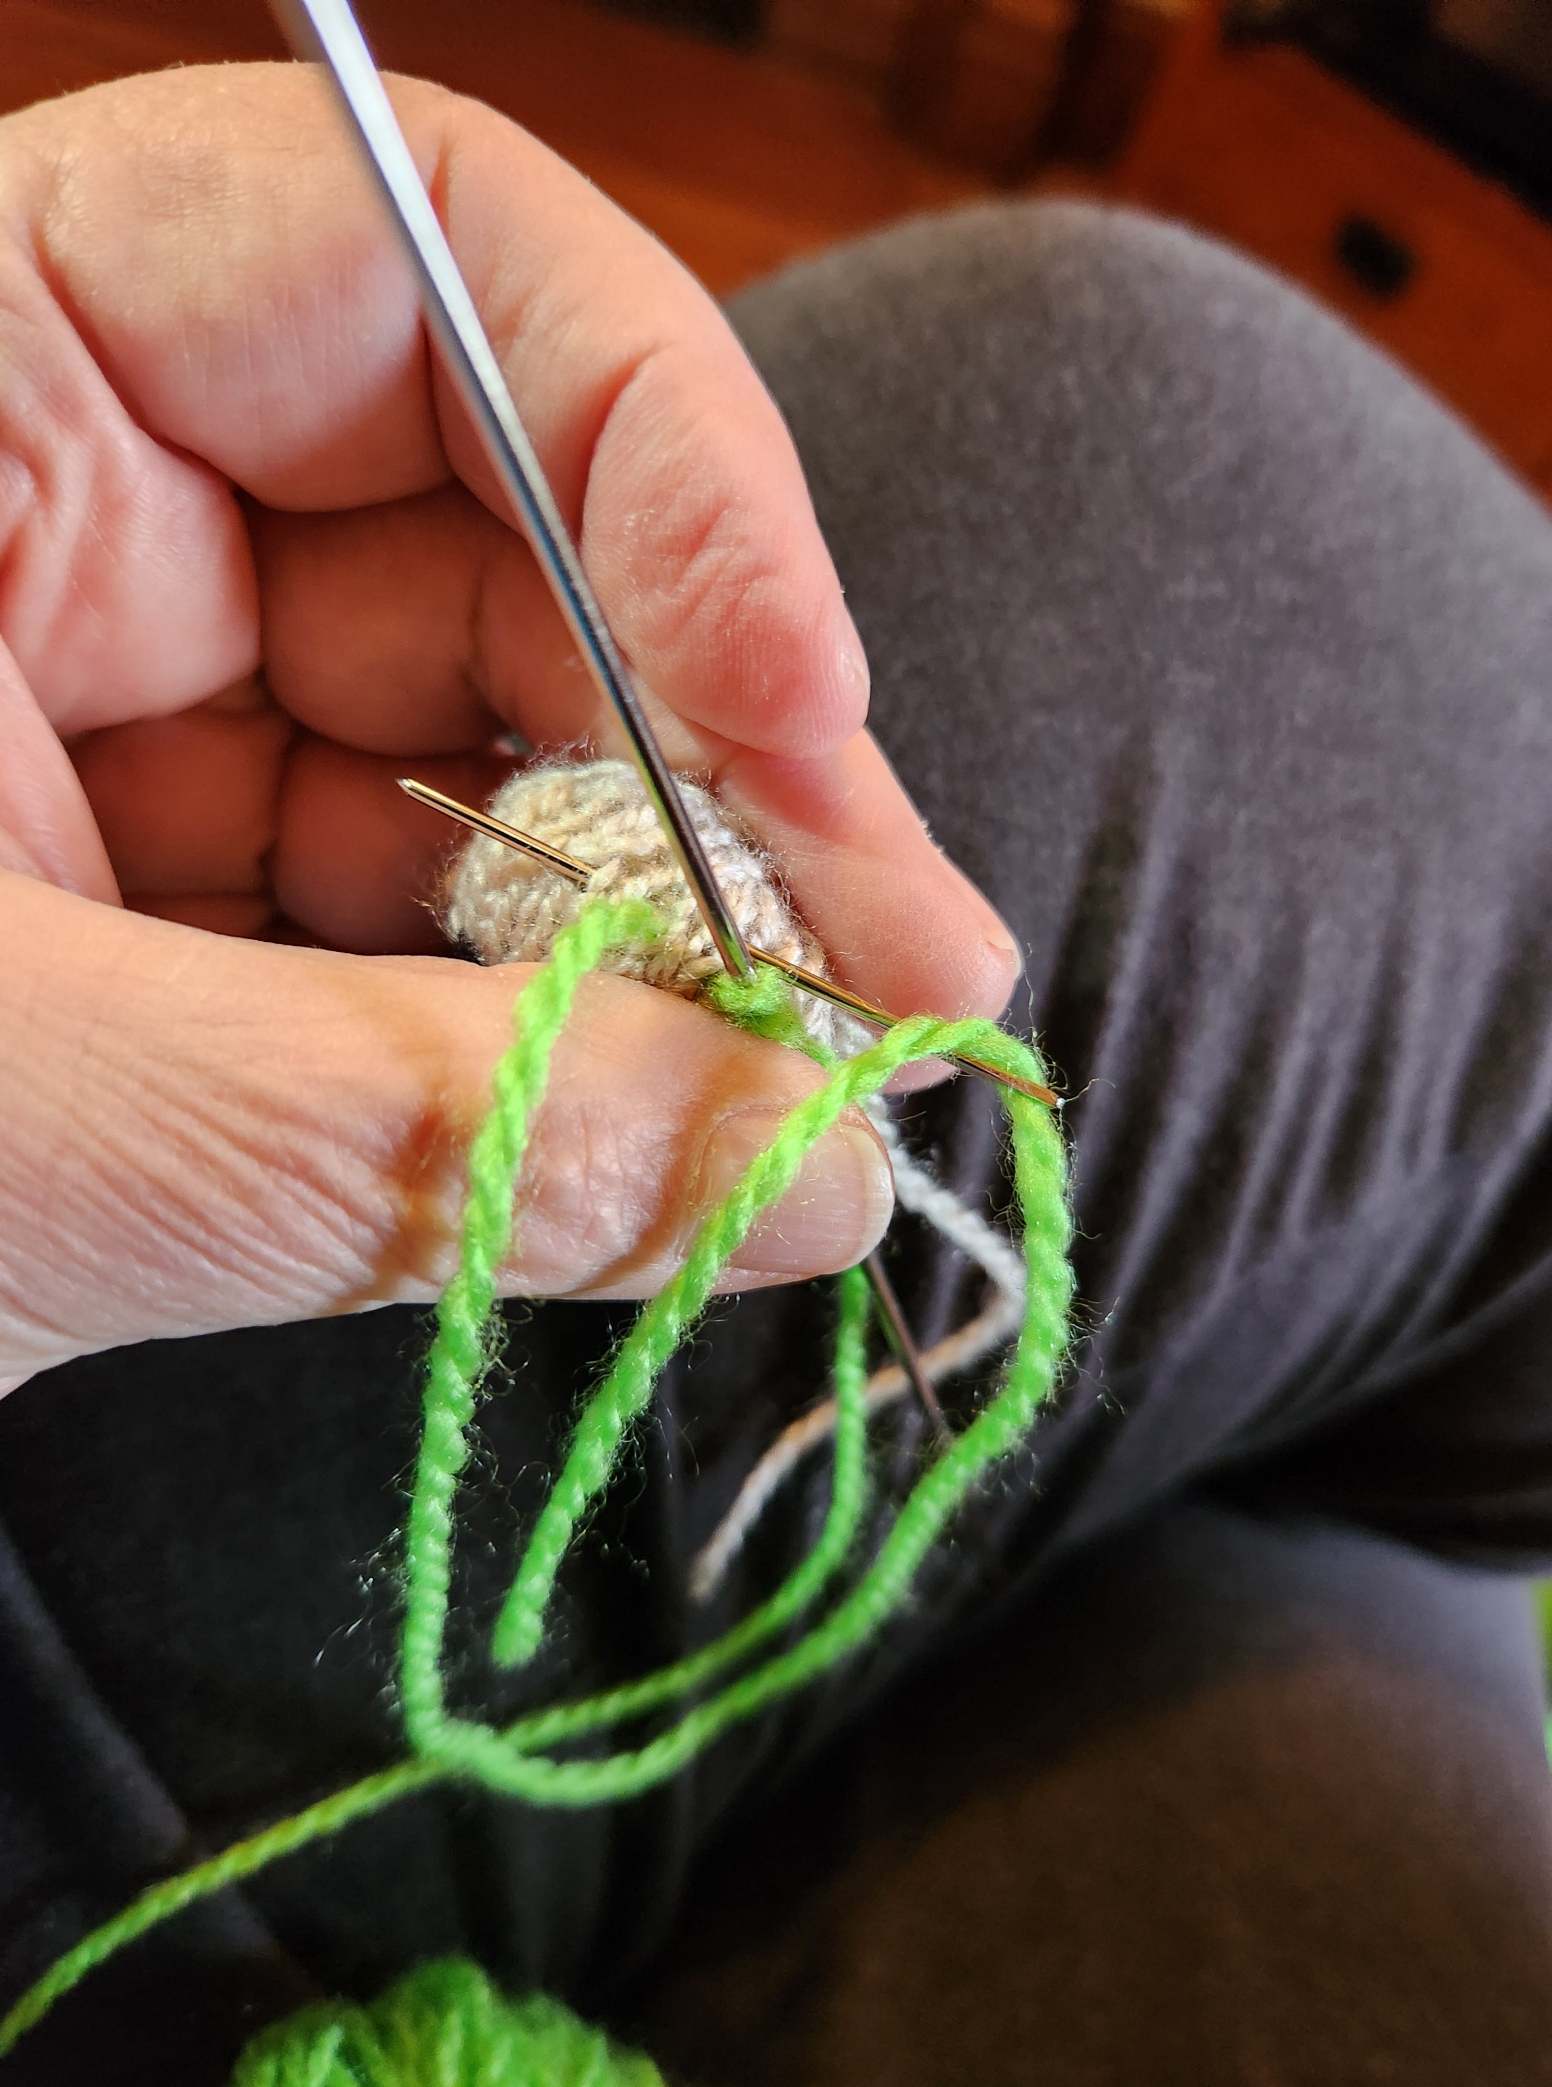
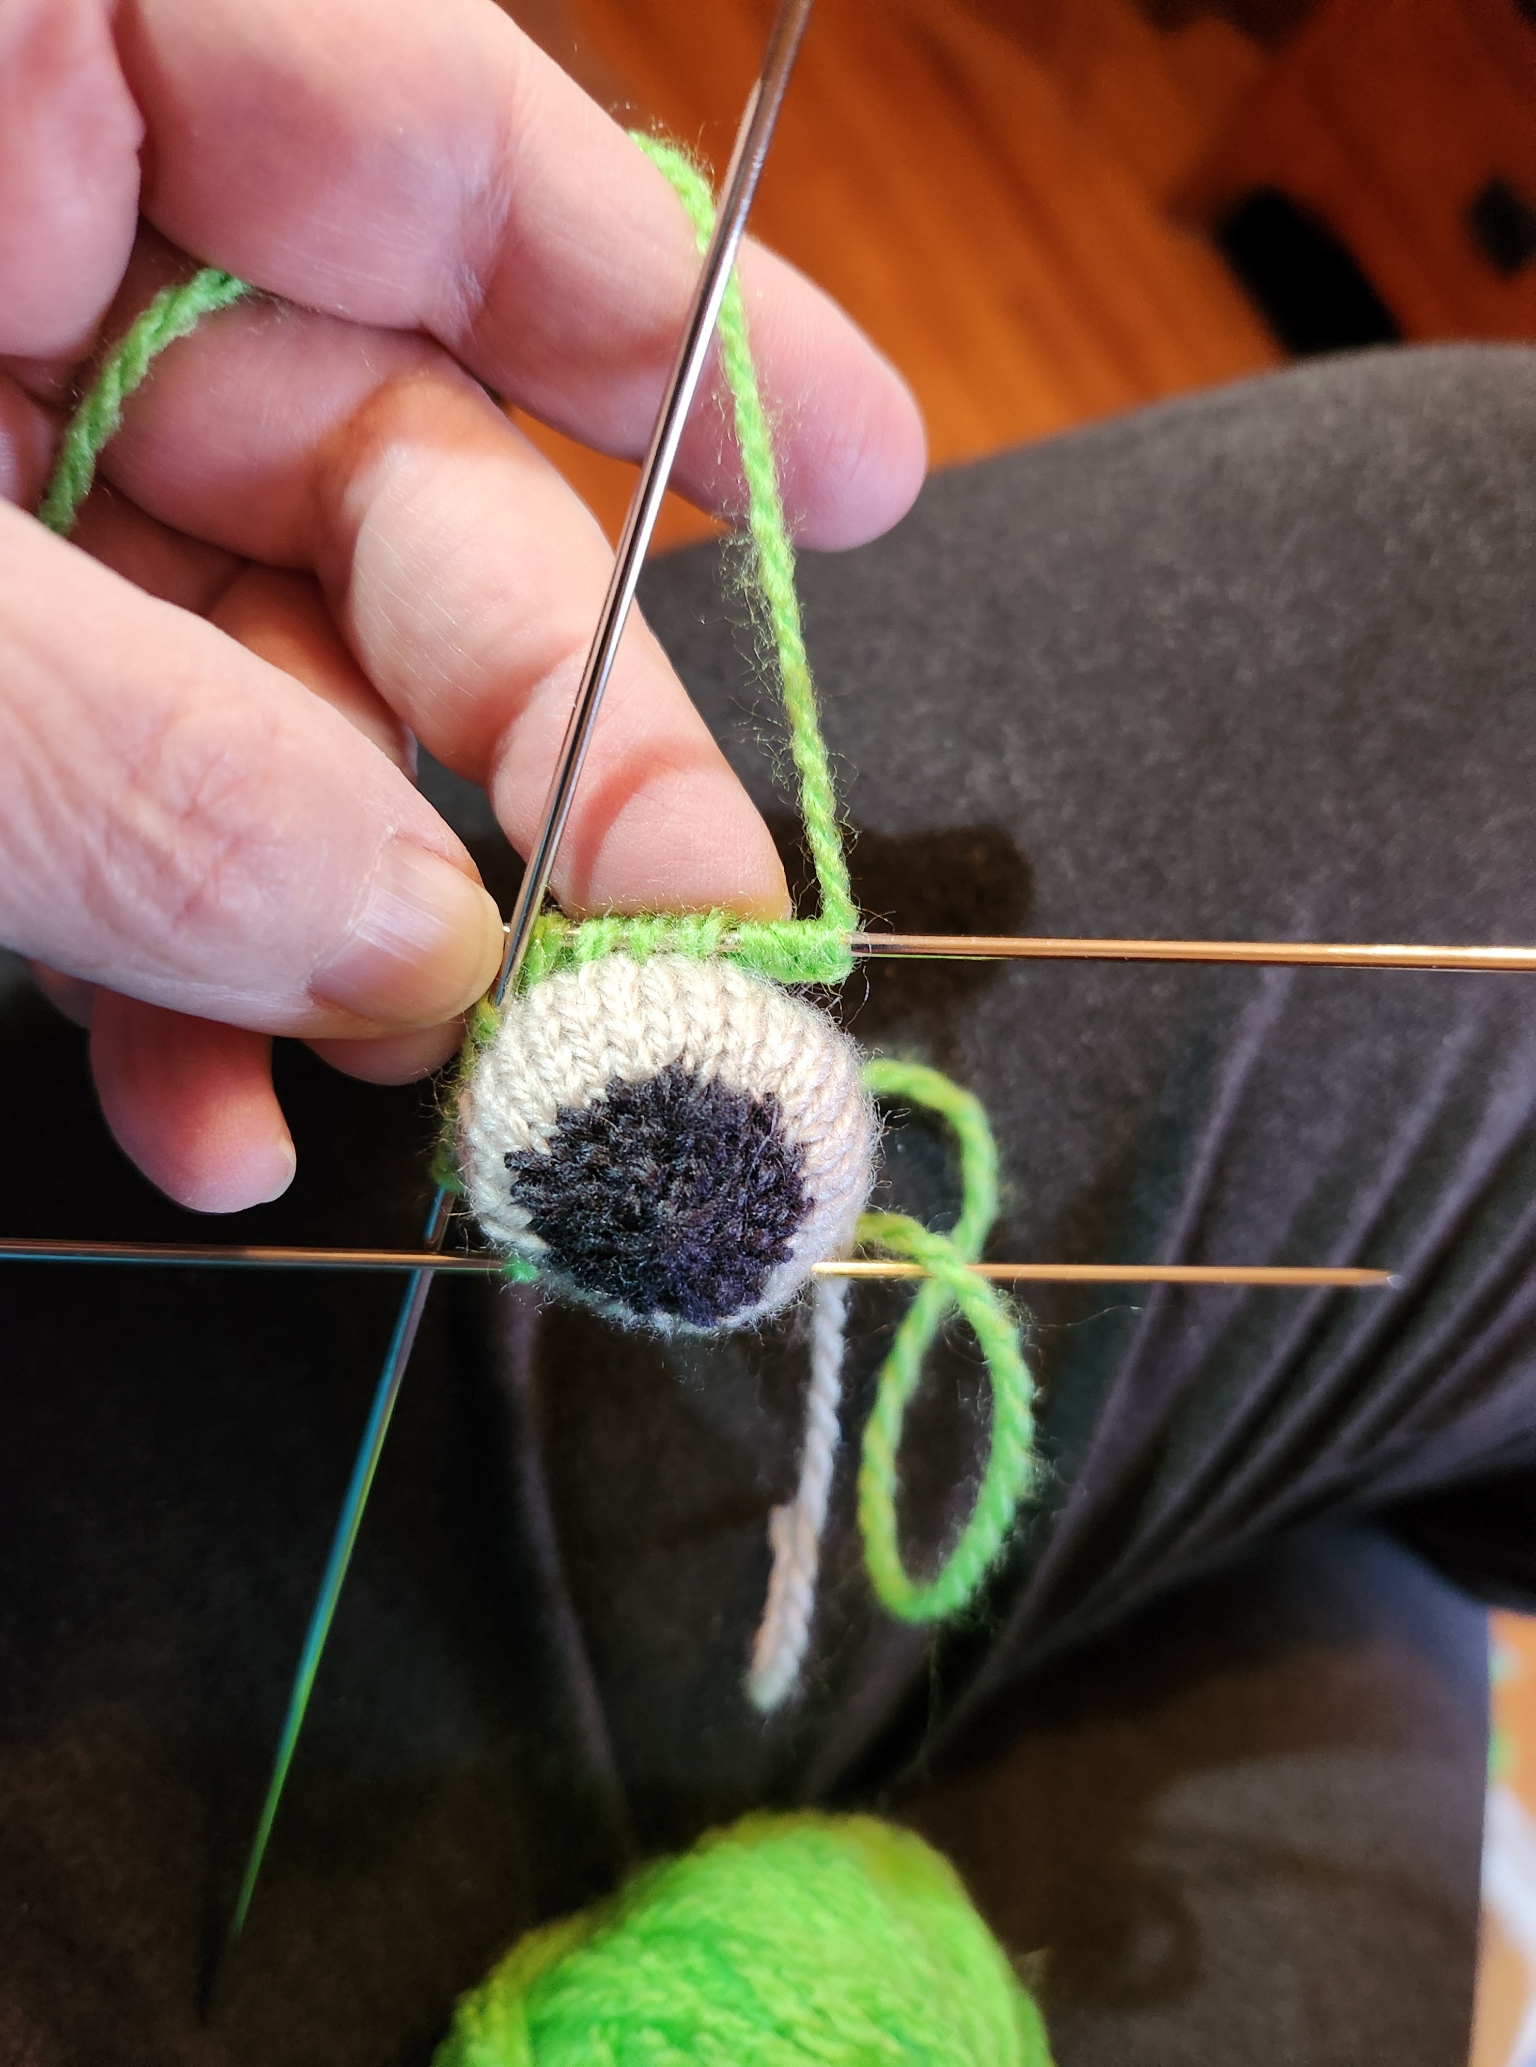
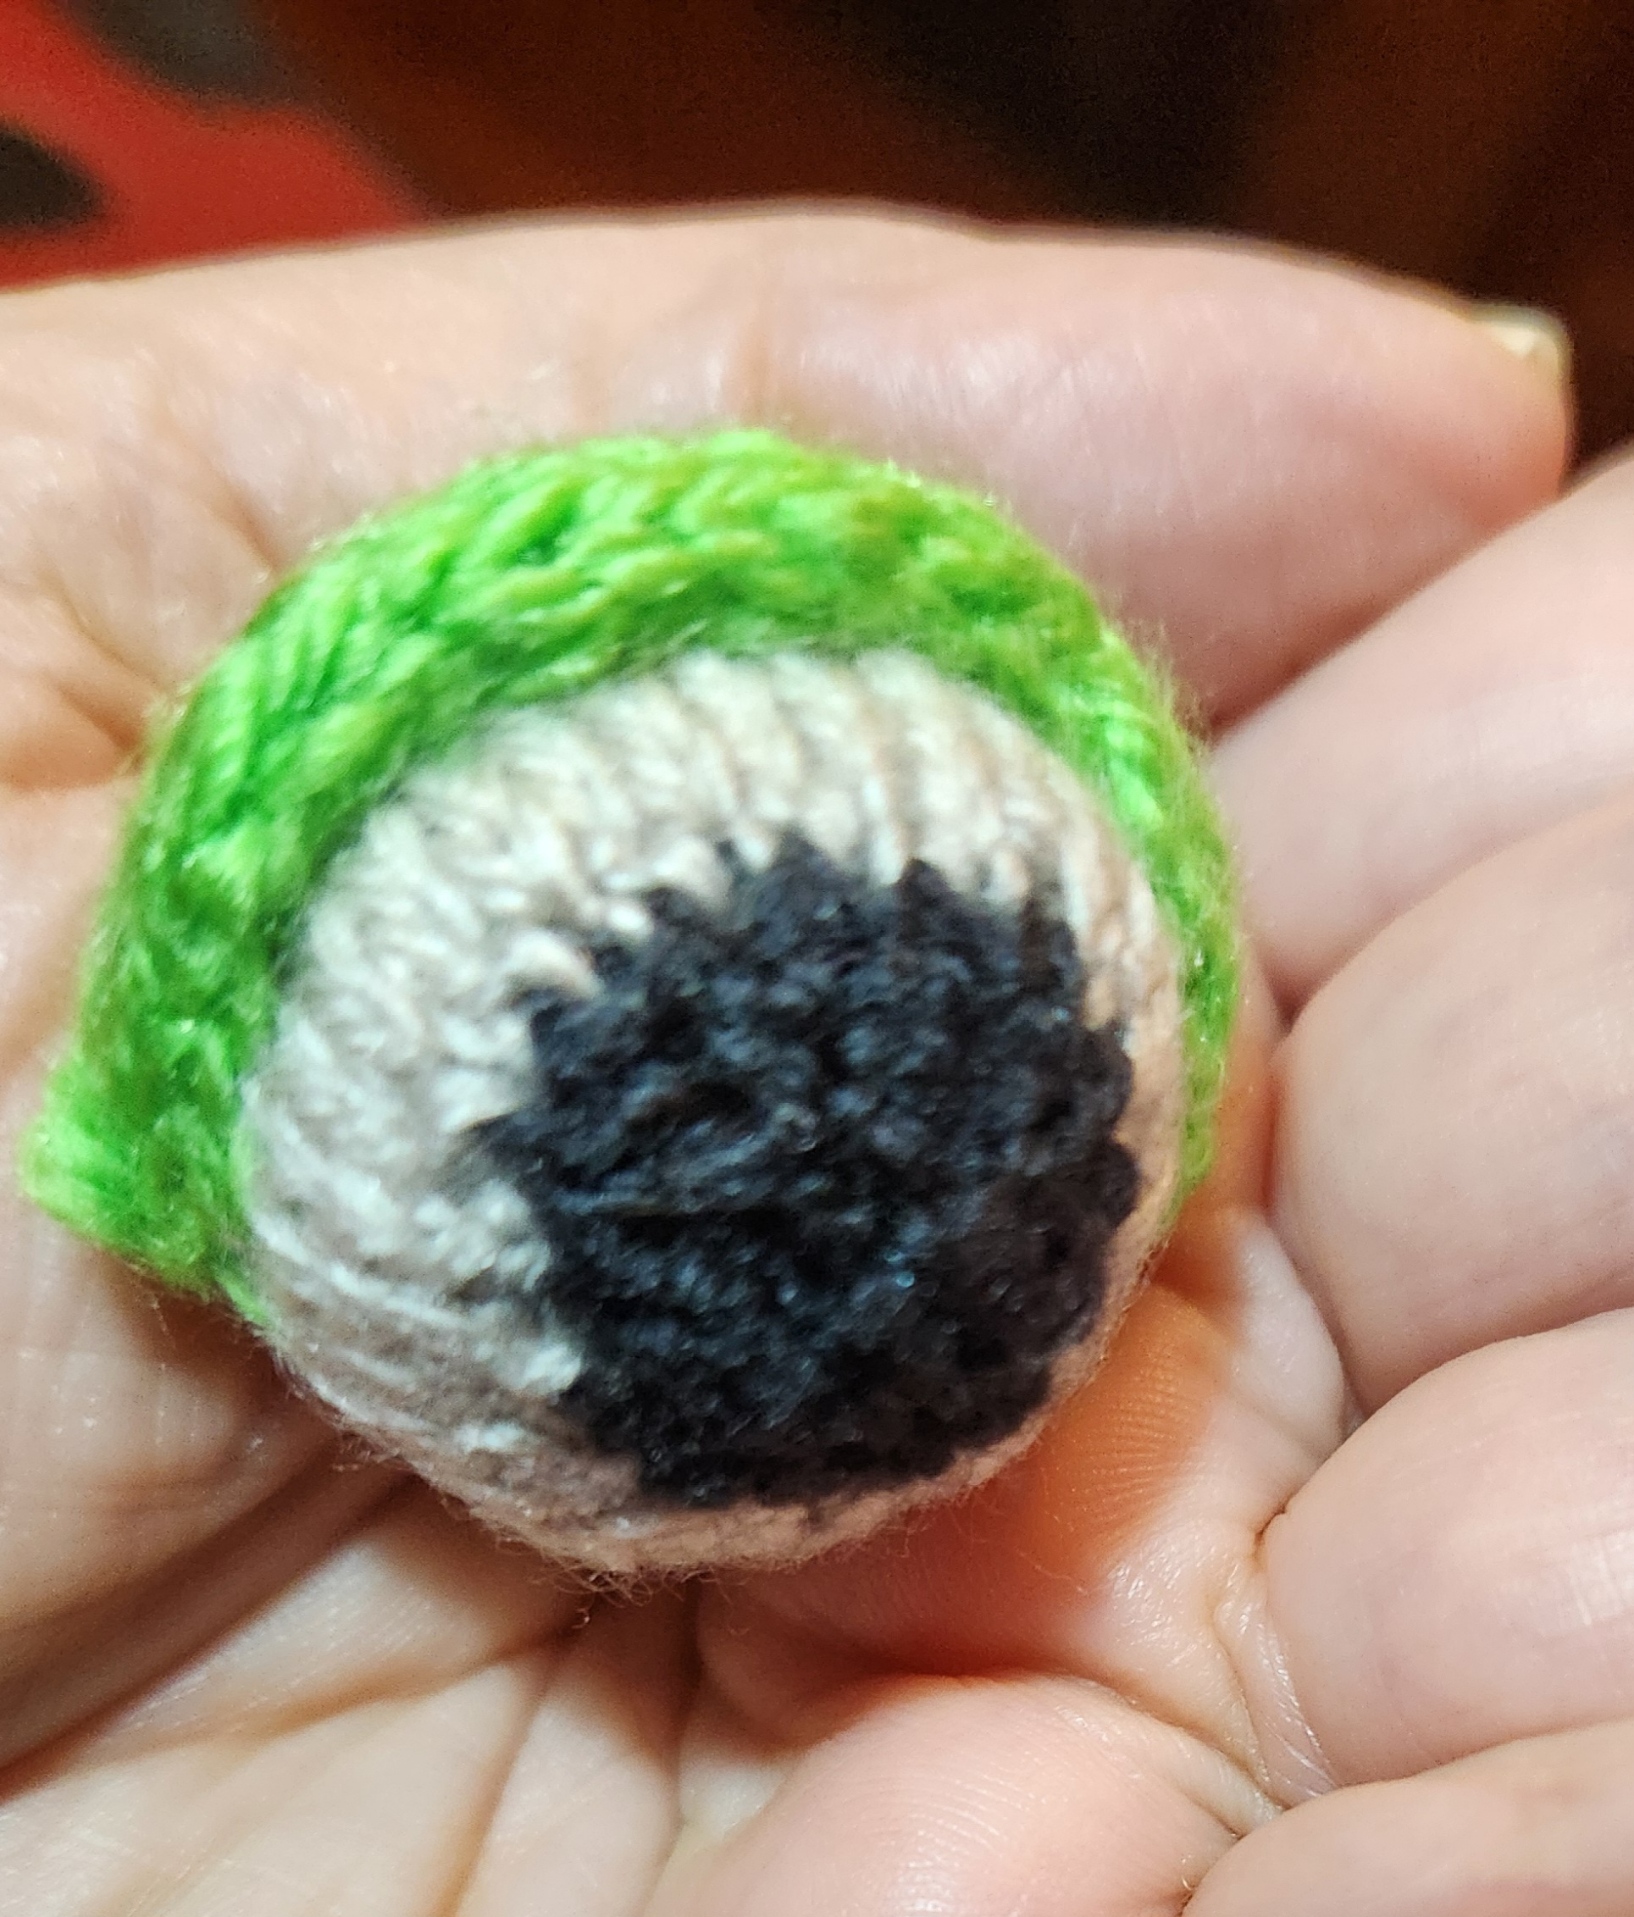
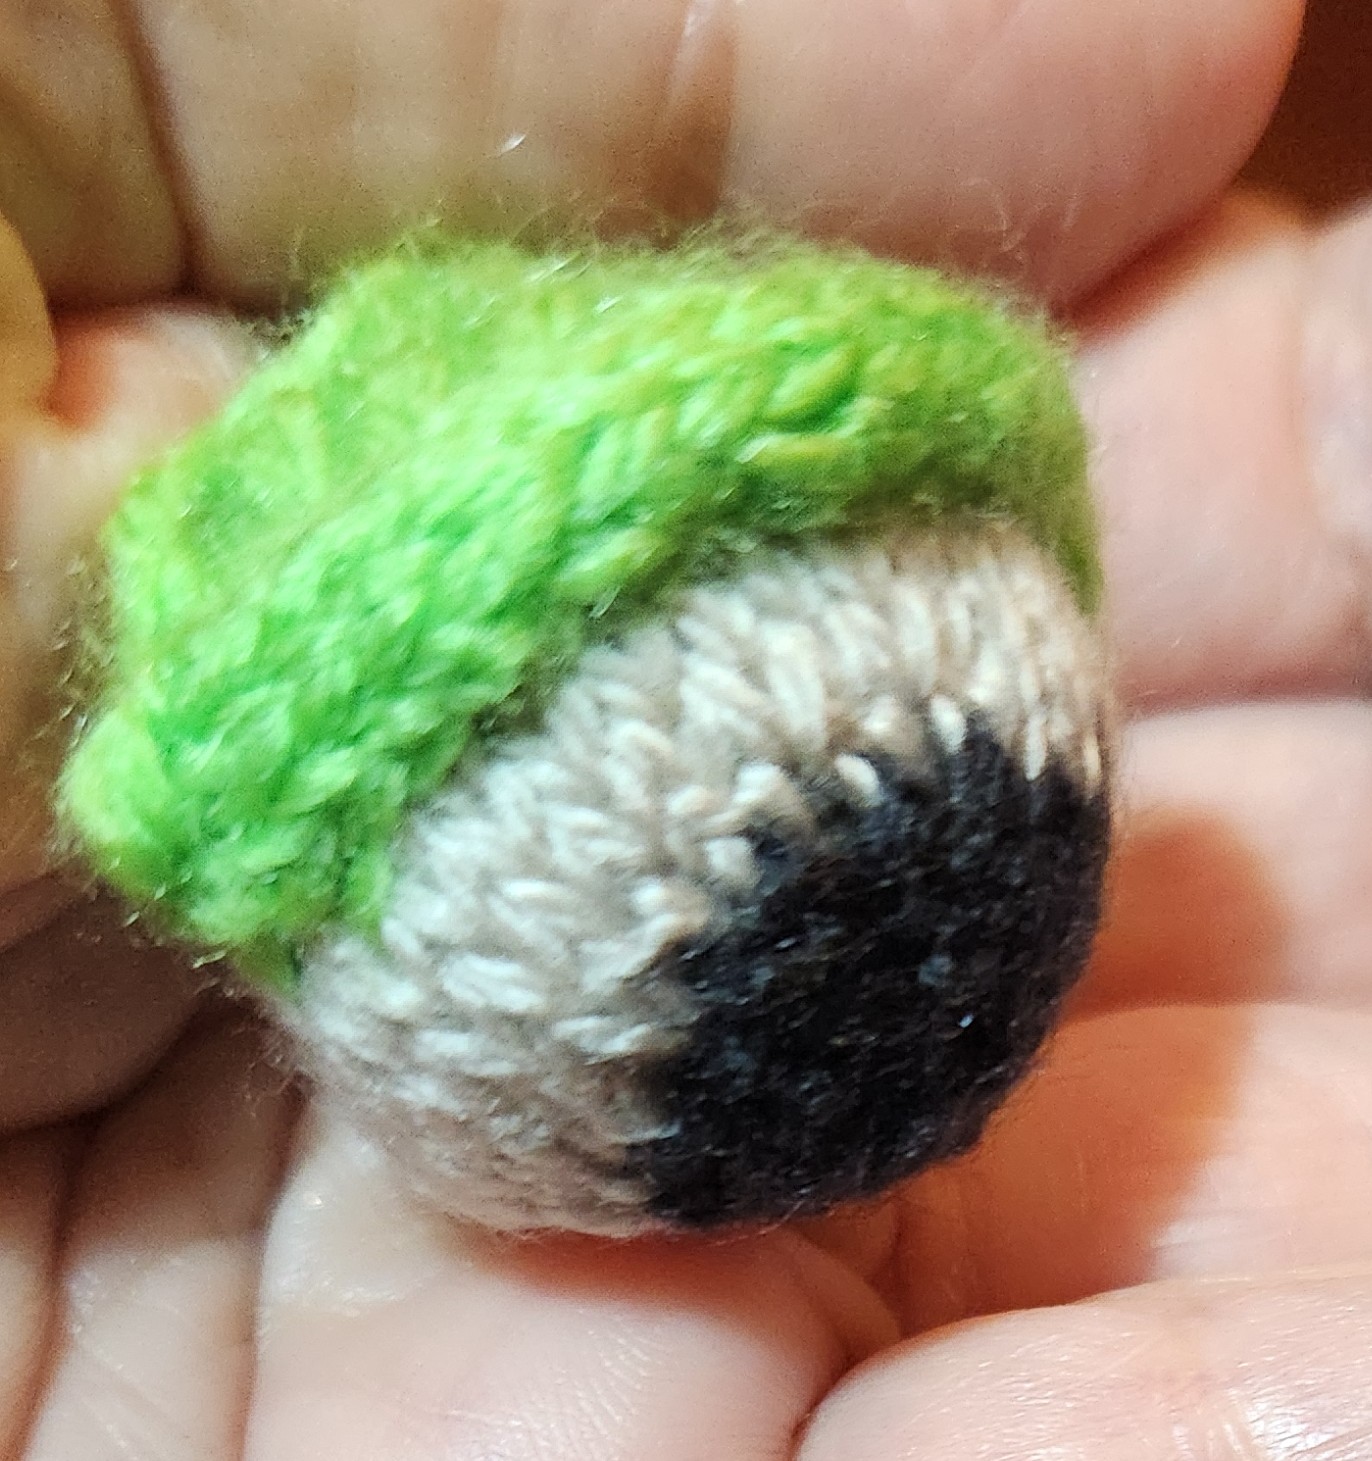
Once the eyelid was done, I went back and using a small crochet hook, picked up a line of knit stitches across the base of the I-Cord on the back, where it joined the eyeball. Those I knit into a triangle to make a dormer-window style cowling. I have to admit that I don’t think I did any two of them exactly the same way, because no two of the eyeballs themselves were exactly alike. That alone would make any specific write-up extremely difficult.
After the eyeball/eyelid, connectors were completed I sewed those units onto the hats, using mattress stitch.
I still have to finish the eyelids and final assembly on two more hats by the end of this week. I’ll stroll towards that completion. No hurry.
COOKIE COUNT-DOWN FOR 2025
And as promised, the family shot of our 2025 cookie plate, with prep notes. Half for the entertainment of those who follow our misadventures, and half so I remember what the heck I did next year, when cookie time rolls around again.
To start, we did two sets, more or less divided between keto/slimmed (lower carb) cookies, and “full octane” ones. You can’t call any of these truly-free, even if they are marked slimmed or keto. I’ve noted below what non-standard ingredients or deviations we took to make the slimmed set.

Starting on the left with the full sugar/regular all-purpose flour set:
Triple Ginger – This is one of the cookies we do every year. My own invention. In previous years I have tried to slim this one, but since there is no such thing as sugar free white chocolate chips, and I wasn’t fond of the texture of the drop cookie style dough when using keto flour, we went with the original recipe. However, this year I used a chopped bar of white chocolate instead of the bagged, pre-formed white chocolate chips. A clear improvement.
Earthquakes – Another of the must-have bunch. This is one of the many chocolate crinkle style cookies. Again, full-octane, no slimming. Just an intensely deep chocolate, almost brownie like cake-cookie, nicknamed because of the fault line cracks that form in the powdered sugar outer layer during baking. This King Arthur version is a good jumping off point.
Samoa-Alikes – Every year we experiment with at least one new kind, to audition it for future inclusion in the standard run. We used this recipe but will probably not do it again. While the cookies were faithful renditions of the coconut/chocolate/caramel/shortbread cookie of Girl Scout fame, we did find them a bit too sweet, and the melted caramel candies were difficult to handle. But the base shortbread cookie was excellent. Able to be rolled super thin, held the cookie cutter shape extremely well, and on its own was buttery, crisp, and an elegant alternative to heavier sugar cookie cut-outs. The extra base cookies on which we just drizzled the dark chocolate after the coconut/caramel topping was all used up were the first ones gobbled down. The intricate work in creating these was largely done by Younger Spawn, who is a cookie baker of enduring excellence.
Mexican Wedding Cakes – Our favorite pecan butter cookie. This is the standard version, full sugar. Enhanced this year due to the princely gift of top quality New Mexico crop pecans from a dear family friend. Ambrosia. Recipe in last year’s round-up.
Cinnamon Swirls – One of our newer faves, and a specialty of Younger Spawn. I stand in awe of the absolute precision of that spiral. And as good as they look, they taste even better. The base recipe is now only available via the Wayback Machine. Skip the optional icing, and use your strongest, most flavorful cinnamon. You won’t be disappointed.
And the slimmed set, last label on the left, and all of the right side:
Slimmed Cocoa-Raspberry Cordial Balls – You can’t call any cookie that’s loaded with booze, truly keto. We happened to have some well-aged raspberry cordial made by another family friend. These things take a while to mellow out, and we’ve been watching it and tasting it for a few years, waiting for it to peak. It did and was glorious. But I wanted to share the last of it with as many folk as possible, so I used it for a batch of cocoa/pecan no-bake cookies. Well, not exactly no bake. I made the keto flour/monkfruit sugar cocoa cookies to crumble to get the crumbs for this and for the bourbon balls, below. One big cookie, actually. Since the whole thing was ground for crumbs, I just rolled out one massive piece, baked it and then threw the pieces into the food processor. The recipe for final assembly is the same as the bourbon version, below.
Keto Iced Lemon Rounds – We usually do a lemon cut-out with painted color sugar icing. But that’s a lot of time on my feet right now, so I opted for a shortcut – plain flattened rounds with simple uncolored brush-on icing. These are a new recipe – keto flour, monkfruit sugar substitute, and I iced them with confectioner’s grind monkfruit sugar sub/lemon juice/lemon zest. I like the way they turned out. Will probably repeat this in the future.
And sad news on this one…. Our fridge is infested with quality cheese mold. I’ve tried vinegar wipe downs, but pretty much any cheese or butter put in there in time will mature into a rinded cheese. It must live on other surfaces, too. I grabbed an older lemon for juice and zest. I rinsed it off prior to zesting, but that wasn’t enough. I theorize that mold spores were on it. While they are killed in anything baked, the icing for these was just the monkfruit sugar, lemon juice, and a bit of zest. Spores from the zest colonized the cookies, and in three days time (two days after the photo) the cookies developed blue cheese mold mottled spots. Not harmful, and not enough to ruin the flavor, but enough to make them unsightly and somewhat suspect. So next year, I will keep the zest lemon out of the fridge, and just to be sure – scrub it down with vinegar and rinse well with water.
Keto(ish) Mexican Wedding Cakes – It would be cruel to Certain Family Members to make a holiday cookie plate with only the full octane wedding cakes. So I did a keto-ish batch. This really should be labeled slimmed, not full on keto. It’s a mix of mostly King Arthur Keto flour, with a bit of AP flour for improved texture. This year I also added a tablespoon of heavy cream to the recipe I posted last year. That also made them a bit more luscious.
Slimmed Peanut Butter Cookies – Another family fave, but lightened. Like last year I started with the Joy of Cooking classic. Teddy natural chunk peanut butter all the way for flavor. But I used the 3:1 ratio mix of Keto:All Purpose Flour; and the monkfruit brown sugar/white sugar, minus about 10% in volume of the white to compensate for savage sweetness. And they worked out well, again.
Slimmed Oysters – Like last year this is pretty much my original hazelnut sprintz/chocolate ganache filling sandwich cookie, but with a couple of differences. I used 2/3 cup of granulated monkfruit based white sugar substitute, and 2/3 cup of the same brand powdered sugar substitute. In all of these bakes, I have I found the monkfruit sugar sub to be sweeter than regular cane sugar, so when I sub I use a tad less. In addition, I find that the granulated if used solo in a baked product can produce a bit of a gritty texture, so I go thirds to halfsies with their powdered sugar equivalent. That’s cornstarch-free, so it’s really just the same product, ground much finer. For these I used a mix of 1.5 cups King Arthur Keto baking flour, and a half cup of regular all-purpose flour (APF). This year’s addition was two tablespoons of heavy cream to loosen the dough a bit, for better performance in the cookie press. The filling this year was a 50/50 mix of Trader Joe’s 70% cacao dark chocolate and the ChocZero sugar-free keto chocolate.
Slimmed Cocoa Bourbon Balls – The other half of the keto cocoa cookie crumbs, pecans, powdered monkfruit sugar, cocoa, and bourbon. This is more or less the recipe I started with, but I prefer to use chocolate wafer cookies to vanilla ones (I will use crushed Nilla Wafers in a pinch). Again, this used the powdered monkfruit sugar, and to hold it together instead of light corn syrup I used agave syrup. Still sinful, but slightly less so than the corn syrup.
Keto Chocolate Chip – Another offering towards full-octane/slimmed parity. This is the chocolate chip cookie that’s printed on the ChocZero chip bag. It satisfies the chocolate chip cookie itch with a slightly cakey, not overly sweet bite. It does miss a bit on the caramel tones that develop in the traditional full octane recipes, but that’s a varietal difference – not a fatal flaw.
So there it is. FOURTEEN types this year. Some hits. Some near misses. And one solid OOPS. But a good group, none the less.
UPDATING THE PENNY METHOD
A while back I posted about using a penny, a cell phone, and a bit of math to determine the thread count of linens, both evenweave and skew. And now the US penny is quickly charging to extinction, abandoned by the US Mint, and soon to disappear entirely from circulation. Which means that I need to issue an update.
Voila!
The Dime Method.
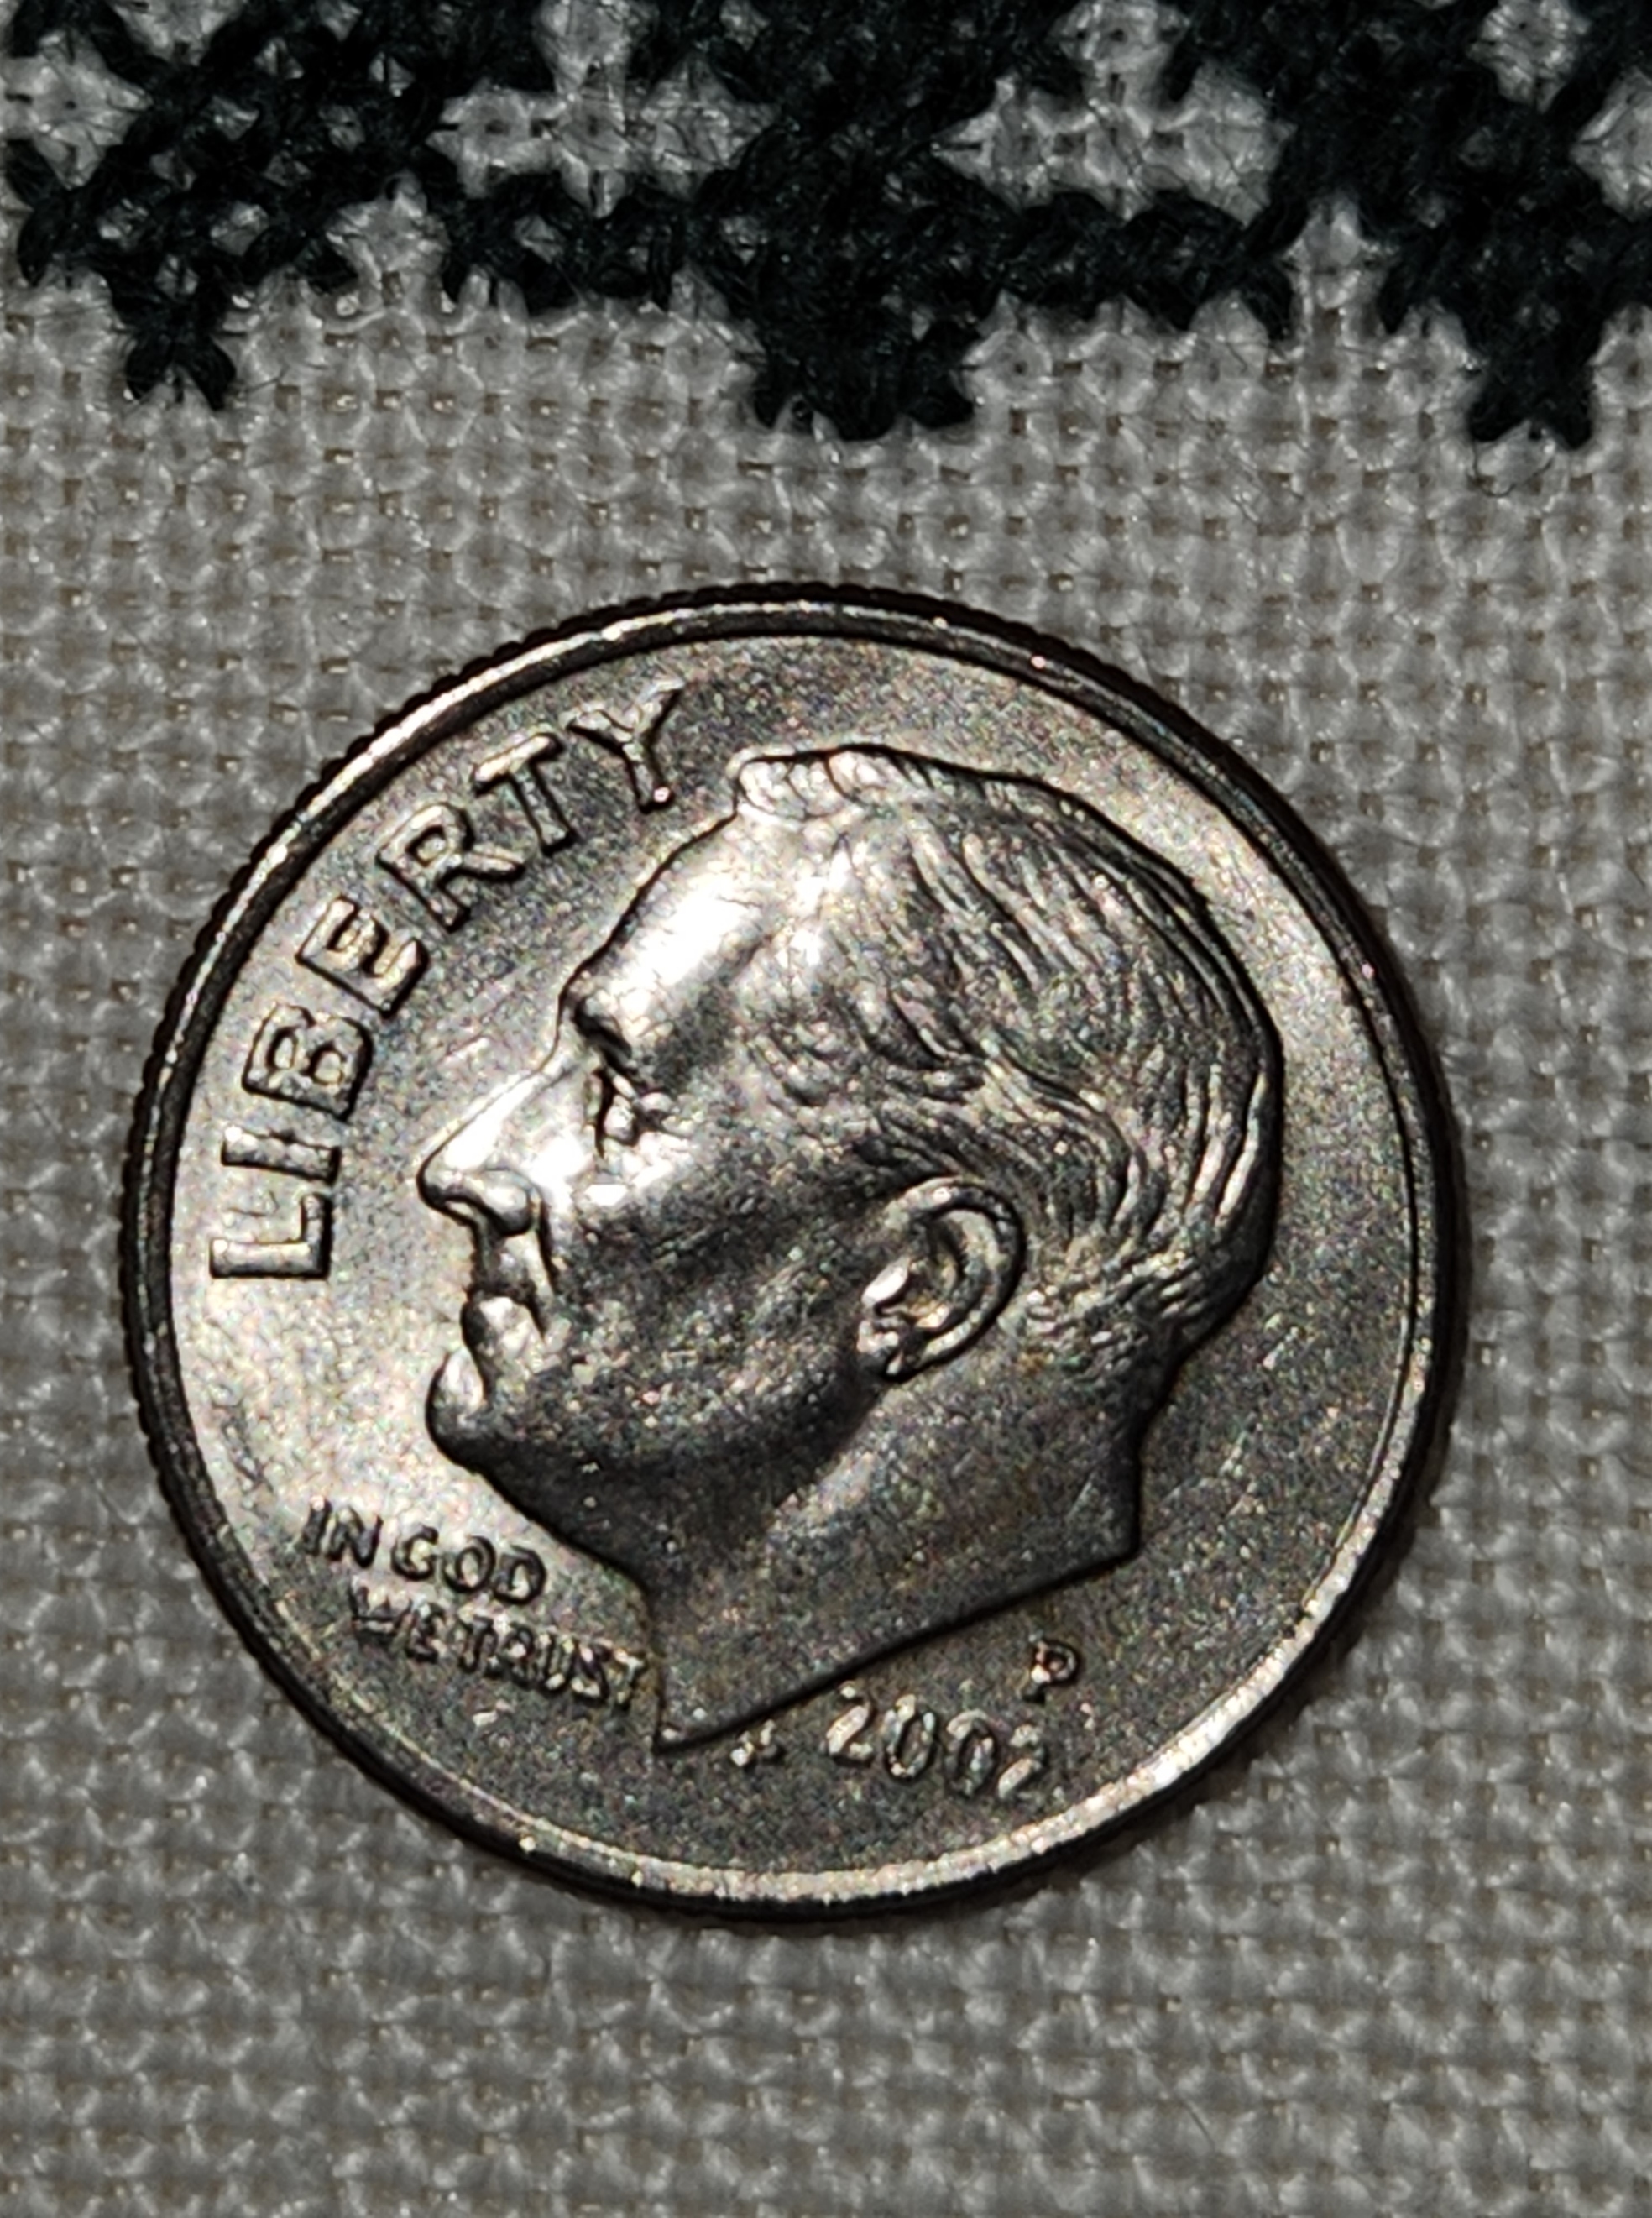
I picked the dime because it’s smaller than the nickel or quarter, and easier to count around the outside edge without losing your place. Counting the threads totally covered by the dime, heading north to south, we get a total of 26. And by counting the number of totally covered threads east to west, we also get 26. The first conclusion is a happy one. We have an evenweave.
Now for the math.
The official diameter of a US dime, as stated by the US mint, is 0.705 inch (17.91mm). I will continue the math here with threads per inch rather than metric to avoid confusing US folk, but the same method works perfectly well with metric measurements. And if you know the measurements of any other coin used anywhere else in the world, you can adapt this for local convenience, worldwide.
So what we have is 26 threads over 0.705 inches. We divide 26 by 0.705 and we get 36.88 (roughly). We can round that up to 37. My fabric in this sample is 37×37 threads per inch.
Let’s confirm that.

Yes, 37.
And you are right that’s a decimal inch ruler. I am proud to be an Engineer’s Daughter, and have many of my dad’s old drafting aides. I deliberately did NOT add any assisting lines to the ruler photo as proof of my assertion that it is FAR easier to count the threads obscured by the coin, going around the edge of the coin, than it is to do a straight line count across a ruler’s edge. It’s also FAR more likely that I would have a dime handy than a ruler in my pocket when I am out and about in the wild.
Try again. This time finer.

I get 31 in the north-south direction and 28 in the east west direction. This piece of linen is a skew count, with more threads in the vertical than the horizontal. Doing the math:
- Vertical (north-south) 31/0.705 = 43.97, rounded up to 44 per inch
- Horizontal (east-west) 28/0.705 = 39.71, rounded up to 40 threads per inch
Now, does a skew count mean that effective countwork can’t be done? Absolutely not. Here is the piece that I used for the second example:

The slightly skew count means that over the same length there are more stitches in the vertical direction than there are in the horizontal. My mermaids are then a bit squished in height compared to their width because the vertical stitches are a tiny bit shorter than the same number of stitches over the horizontal. But the only place that this is evident are the large, symmetrical flowers just above their tails. You can just make out the height elongation in them because (logically) they are supposed to fill a square volume, not a rectangular one. Here is an old post that discusses this challenge further, and shows what happens when you wrap a design around a corner on a skew count fabric, and confesses that flipping your measurements is an easy mistake that even I make..
For the record, I stitched this piece in 1994, from a chart I redacted myself. The photo source that I worked from was in Schuette and Mueller-Christensen’s Pictorial History of Embroidery. I presented this chart along with my own original accompanying border on Plate 75 in my own The New Carolingian Modelbook, published in 1995.
As for the piece I used for the first example? The full Don’t Panic chart is a free download on my embroidery patterns tab, right here on String-or-Nothing.
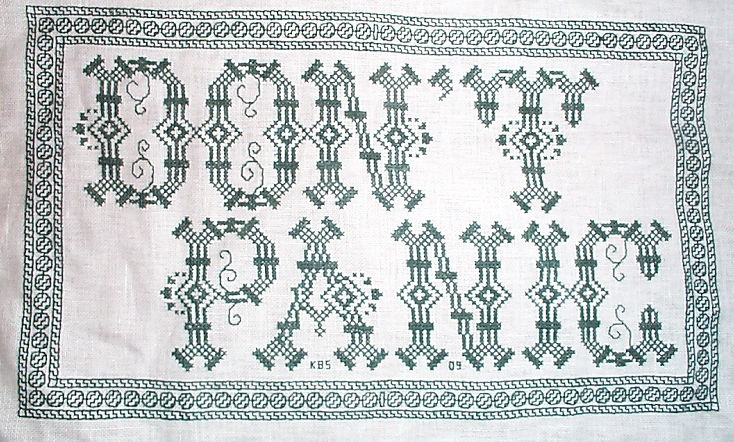
Don’t Panic is in fact the best advice I can give to the math anxious among us.
TEN DAYS OF PROGRESS – KNIT METHOD COMPARISON
Coming to the end of our recuperative sojourn out in North Truro. I had hoped to post pix of the aurora from here, but sadly last night was heavily clouded, and windy. So I maintain my record of weather-related disappointment in relation to notable sky events.
But that doesn’t mean that nothing has been accomplished in the past week and a half. I’ve been knitting, stitching, and working on various book-related projects.

That’s four of the hat bodies for the frog hats done, with another about 40% done. That leaves only a couple more to go, then I will begin the army of eyeballs for them all.
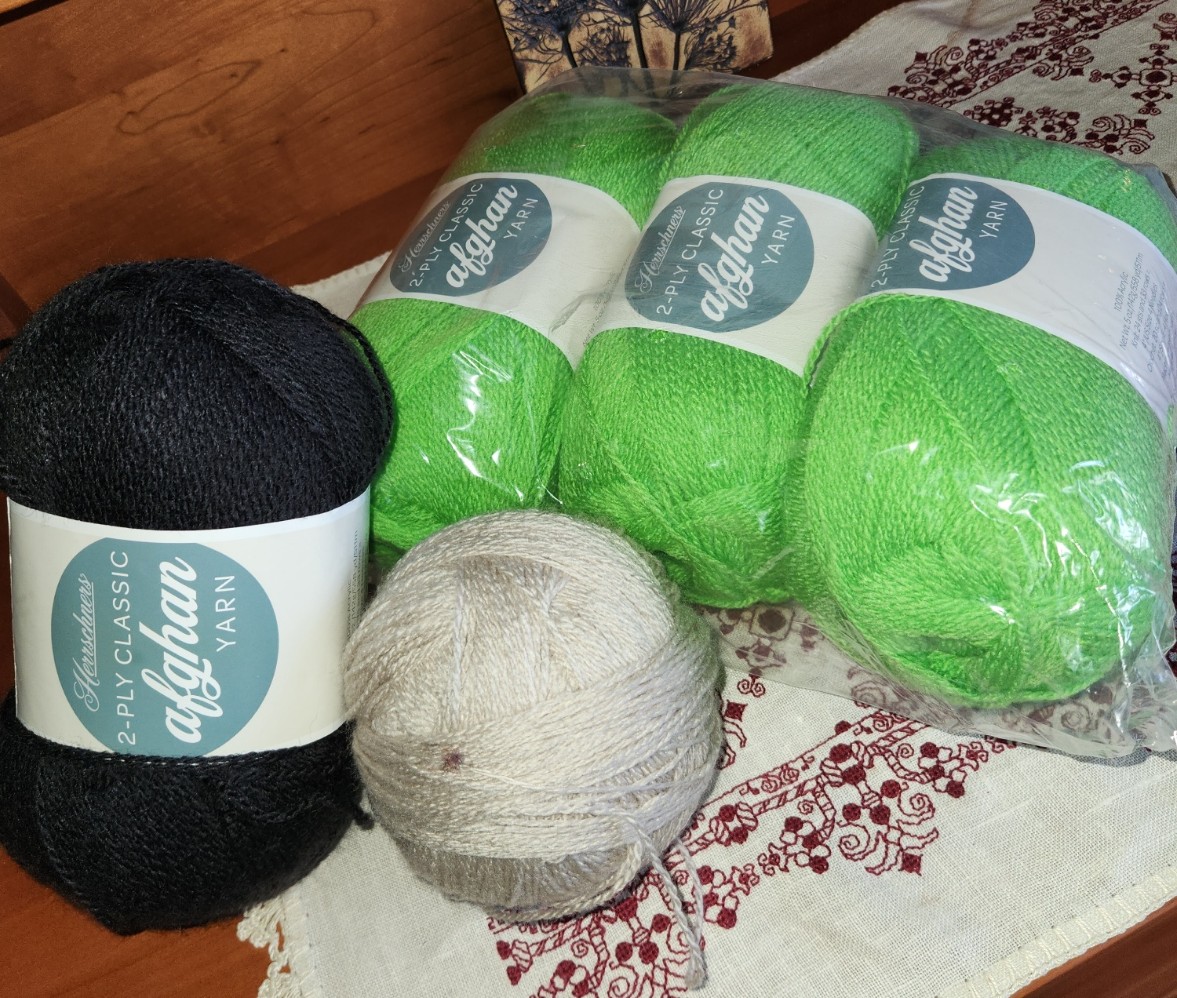
One large skein of THE Herschnerr’s afghan yarn makes about four hats. I am not any more pleased with it for knitting than I was with it for crocheting (it’s leftover from the Eyeball Bolster). It squeaks and splits. And being mid-range acrylic, is not “heirloom quality.” But for a topical hat whose topicality won’t last long, and being on hand rather than a new purchase, it is good enough.
One thing I’ve done is to check my speed and uniformity across a range of knit-in-the-round methods. Counting from the upper right, Hat #1 was done using the Magic Loop method. That employs one overly long circular needle. The excess cable length is drawn out into a loop between two stitches roughly on the opposite side of the piece from the point where one is knitting. One works to that loop, then pulls the excess out to make a new loop 180-degrees from the loop that has just been encountered. For the record, I find it quite awkward, an annoying break in the rhythm of production, and prone to distending stitches.
Hat #2 was done using just one circular needle of as close a size to the circumference of the hat as I had in my collection. Round and round, yanking the stitches across the joins as I went. I didn’t enjoy this one either. I find that circs of that small size have needle parts that are not long enough for my overly large paws. My fingers might not be pianist long, but my hands are quite wide. I wear men’s size golf gloves because women’s gloves are too narrow. Hand size plus the way I hold my needles for Continental style work means that my ring and pinky fingers support the weight of the needles and the piece. Using a circular this short makes me grasp cable, not the sturdy needle parts. Harder to hold, harder to maintain unform stitches, and harder to form them at speed.
Hat #3 was worked entirely on DPNs. Now I’m more in my comfort zone. But being out here on the Cape I only brought my set of mismatched but brightly colored Boye aluminum DPNs. They are seven inches long (about 17.78cm). I much prefer my vintage European DPNs from Inox, which were 8 inches long (20cm). I should have grabbed them, but didn’t. The short Boyes worked well enough for the K2P2 ribbing, and I flew through that section, but when I changed to stockinette, the extra width of the knit fabric without the draw-in of the ribbing made keeping all the stitches on the needles a bit difficult. I had to stop to retrieve dropped stitches more often than I anticipated. That slowed me down and affected uniformity of stitches, even though I’m a proven DPN warrior.
Hat #4 was worked with two circulars. This is a hybrid method. Each circular holds half of the stitches. Using both ends of the first needle, you work the stitches across the front of the piece, then you switch to the other circular, and use both ends of it to work the stitches of the back. Unlike with DPNs where the needles travel around the work, with each DPN advancing to the next position as it is freed then employed for the next segment, the two circulars in this method NEVER change places. Yes, there is a bit of awkwardness as one fishes for the correct end to use and then moves stitches up into working position, but it is not as fiddly as Magic Loop. And unlike Magic Loop, there is no distortion between stitches because there is no spot where the cable loop has to be drawn out. I also found that the in between needle bits did not ladder, but that may be because as an experienced DPN jockey, I tensioned across the gap in the same way that I do where two DPNs meet. All in all this worked quite nicely, especially for the stockinette part.
Hat #5 (in process) will be the “best of both worlds” piece. I started it on DPNs for the ribbing – proven faster for me than the other methods, and moved to two circulars for the stockinette tube section – the best for maintaining sanity and uniformity given the needle assortment I have with me here on the road. I will probably continue on two circs for a while and then when it’s convenient, switch back to the DPNs for at least half of the crown. That will minimize the needle ends flailing around part when the decreases begin to make a major dent in total stitch count. In all probability I’ll keep working this mixed method way for the remaining few hats.
For the record, the eyeballs will all be done on DPNs in a smaller size than the hat bodies. I want them to be nice, tight spheres, suitable for stuffing. So instead of these 3.5mm needles I’ll be moving down to 2mms, or possibly even smaller. Much experimentation is anticipated.
Also in the photo is the latest progress on my Italian multicolor stitched piece. I’m well into the third corner, having done the math correctly (thank goodness). No need to improvise a new corner. I know the museum original had four different corners, but in this case I’m glad to have to do only one.
The long stretch across is next. I have confidence that I am not off in count, so everything should align when I get to corner #4 and the the shorter march to rejoin my point of origin, but in case it doesn’t that last corner is where any fudging will occur. In the mean time I will work with my usual mix of confidence and suspenseful apprehension, plotting out just-in-case strategies so I have them if needed.
And they say that needlework as a hobby has no drama… If only folk knew.
CHARGING AHEAD ON MULTIPLE FRONTS
We are making headway here!
First, as I announced on FaceBook, I have completed radiation therapy. Minimal side effects to report even at conclusion of the course. We are now taking a bit of ease to recuperate both from the therapy itself, and having to drive out in the pre-dawn hours for 6:45 am appointments. 40 days of that doesn’t sound too bad when compared to the decades over which we left early as commuters, but once you are no longer used to being part of the Dawn Patrol, it becomes a lot harder.
Special thanks to the radiation crew Mass General Hospital, who greeted me every morning with good humor, efficiency, and a steady tolerance for my unorthodox music requests. I suspect that at least one of them has signed on to read here at String because of a mutual interest in knitting. If so, please pass the word back to the whole gang.
Second, my Italian multicolor piece is zipping along. I’m almost at the halfway point for the outer rim.

I’m 99% sure I will meet my horizontal centerline spot on in terms of thread count. I adjusted the total width to ensure that my corners are identical. There is one tiny mistake I need to go back and fix, but it is not something that has an effect on band width or repeat cycle. I could leave it, but I won’t.
And as you can see I am also making rapid progress on the frog hats – my third front of advance. Frog Hat #1 is now well underway. I admit that aside from the initial cast-on number I have not paid much attention to the general pattern I am using as my source. I’ve used a different cast-on, swapped in K2P2 ribbing for the original K1P1, and arranged the thing so that when the brim is folded, the more attractive side of my cast-on is on the outside of the hat. And yes, I’m working in the round on two circular needles.
Next comes hat depth and the decreases. I want the hat to fit rather sleekly rather than being full and floppy, so I will probably go short on the total depth compared to the written instructions. We’ll see if I follow the pattern’s decrease or if I end up opting for something more rounded.
My goal is to work the boring hat portion of at least four of the batch of hats I intend to make. Once those are complete I will make the eyeballs and eyelids, then finish off by sewing the eye units onto the hat bodies. Given quick progress on first hat (and that done while I still carved out time to embroider), I do hope to complete the minimum of the hard-promised four by the new year. The others are optional and will depend on available yarn, time, and my own rather spotty attention span.
I leave you with a repeat of the somewhat disheveled, early morning bell-ringing photo I posted on FB to celebrate my liberation from therapy. And yes – my last day’s music request was the 1812 Overture. You can’t celebrate an Independence Day in Boston without it. Especially because the MGH hospital complex is close by the river, and on upper floors commands a lovely view of the Esplanade where the annual 4 July celebration takes place.

HOPPING OFF ON A DETOUR!
Yes, I’m still working on the Italian multicolor strapwork cloth. But the holidays approach, and a topical whimsey presents itself. I am going to take a quick detour to kludge together a hat, then knit several for my various Offspring and Honorary Offspring.
In specific, I’m going to knit topical event relevant frog hats, in egregious green. Complete with bulging Muppet like ping-pong ball size eyeballs. Here’s my concept drawing:

I’m using leftovers from the bolster cover I did two years ago. The shocking green, the oatmeal white, and black, to be specific. It’s acrylic, and sport weight (24 stitches = 4 inches or 10 cm in stockinette) from Herschnerr’s. As you can see, I’ve got plenty.
I will be adapting a very basic free hat pattern I found on Ravelry, the Drover and Classer Plain Beanie. It’s plain stockinette with a turned back, ribbed brim, and a simple seven-spoke set of decreases at top. For the eyeballs I plan to play with the knit sphere design from Lisa Benden. Her free Knit Hacky Sack is written for a larger yarn than mine, but I don’t need a ball as big as hers, and I’m pretty sure I could fiddle with stitch count until I get the proportions I want. Plus, if I do one end in black, I won’t need to embroider the pupils onto the finished ball.
The only part of this that I will have to create from scratch are the green eye sockets into which the bulging eyes are affixed. For those I’m planning on doing a wrapped short row heel, but very small, with a rolled stockinette edge. The plan is to stitch each eye into its socket, then stitch those assemblies onto each hat. We’ll see how this sock heel-turned eye socket plan turns out.
These shouldn’t take too long. I’ll be working up the plain hats first. Worse comes to worse, even if the eyes don’t exactly to to plan, I will at least have screaming green beanies for my intended recipients.
Oh, and progress on the Italian cloth? Rounded the corner and headed for the center of the short side.

NEARING SECOND!
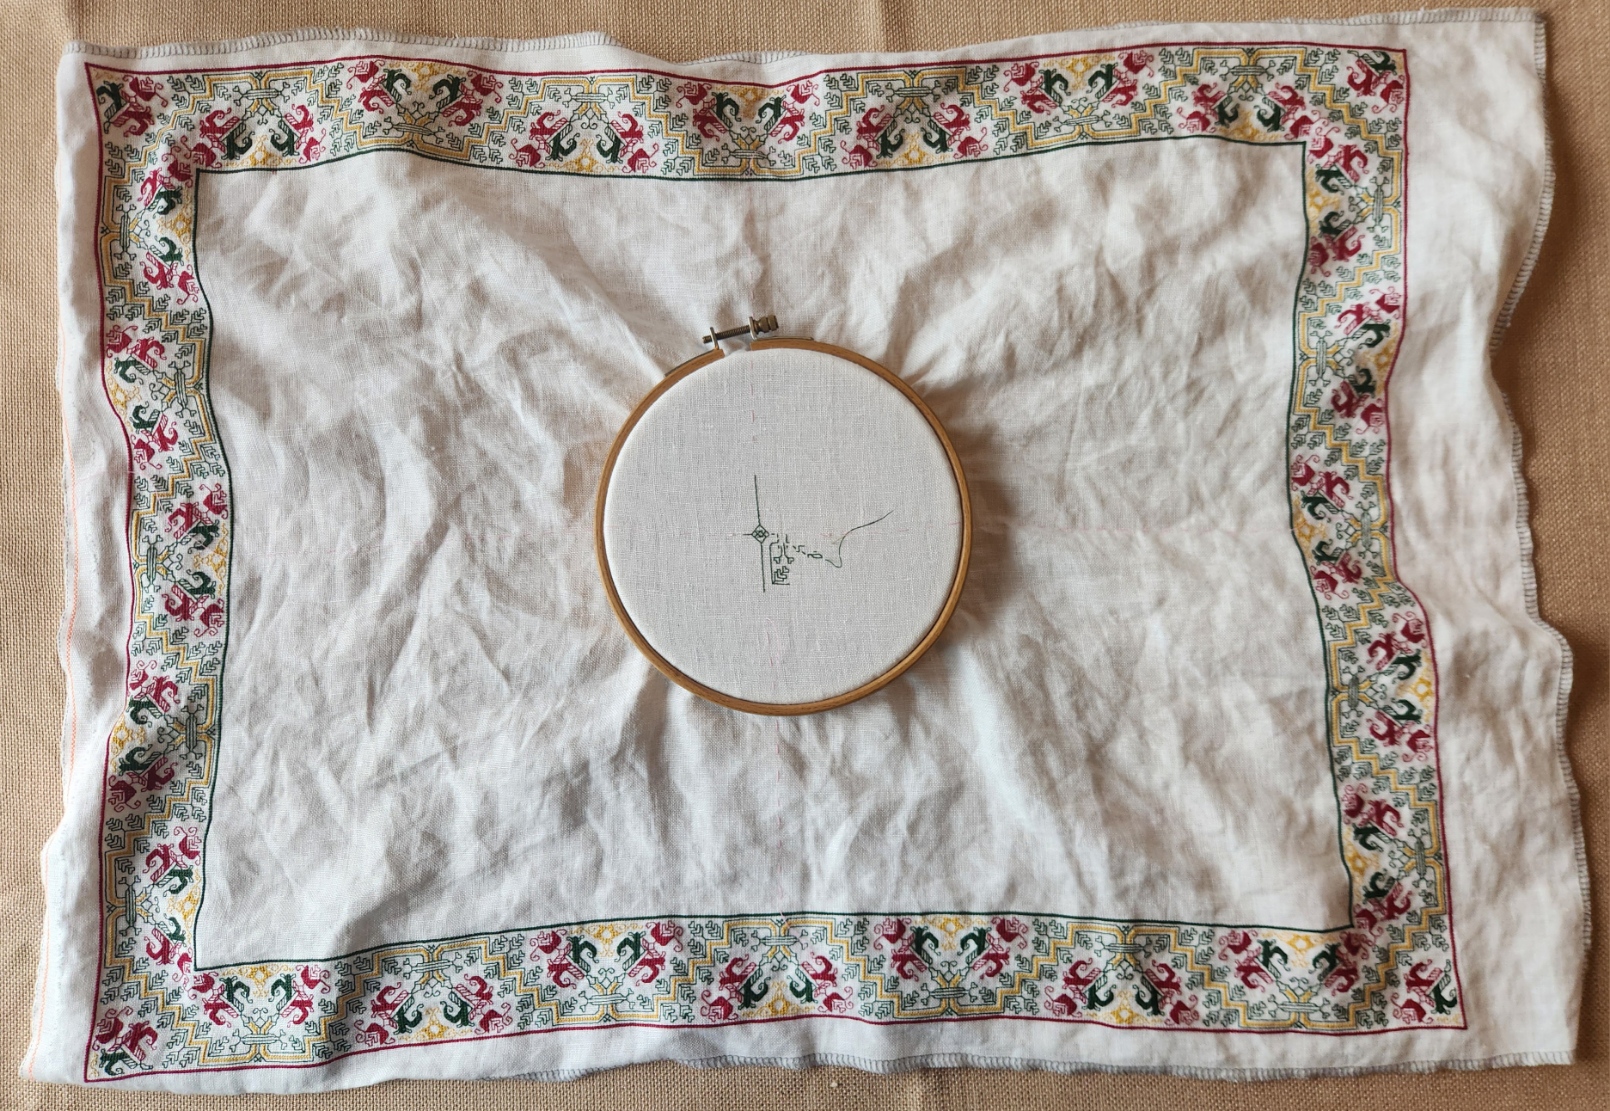
Sorry for not posting many interim images this week past. The repeat has been established. Memorized, even. So progress is pretty much more-of-the-same. Not particularly visually interesting, just being repeat after repeat. But I’m now on the run up to the second corner.

That diagonal just beginning to appear in the right side of the hoop will be the one that spans the corner, just like the one in the first corner.
Because I was very conservative in picking my starting point on the left hand edge, centering my beginning to the center line of the narrow end, but not having a drafted corner, just winging it – my right hand edge will be a bit further from the fabric edge than that on the left. No worries. I’ll end up trimming off about an extra inch of fabric when I do the final hemming. That’s not enough to be worth improvising a new, partial corner. I prefer to replicate the one I’ve already done, since that one worked out so well. Here’s a closer photo of the bit currently in the hoop.

You can see the bottom of the stitching is so close to bottom of the fabric that getting a nice, firm hold and an efficient span is difficult. I still may mount this on a scroller once I get up to working the spans across the middle, but for now, since I’m sticking with the small hoop for portability and the ability to get as close to the hemmed edges as possible.
In terms of thread consumption, even though (in theory) the stitching on this is based on two-sided principles, the work itself is quite economical. I am using DMC standard floss, single stranded, and I’m still on the first skein of all three colors. I figure that to do the whole rim around I am looking at two skeins of each. Since I’m not quite sure how densely I’ll be working the center I might be looking at as many as four more of each, but probably closer to another two. And I have them all in stash. No worries.
I do admit that going on and on in the same repeat is a bit of a challenge in perseverance and diligence. One reason I do so many narrow band samplers is that I get to go on to the next Interesting Thing before I run out of patience with the current strip. Still, this is a good study in applied discipline over time. A skill I have always had in short supply. It’s training. Yup. Training. 🙂
As far as my other exercises in discipline, I have been Very Good about my physical therapy homework, walking, and other activities to increase strength and endurance. It’s slow going (not unlike the current stitching), but I am seeing results week on week. Horseback riding and quick step galliards may be in my past, but there are lots of other things I hope to resume over time if I keep at it.
QUARTER FOR YOUR THOUGHTS
No, not inflation – at least not overtly. I’m just about 25% done with the frame around the outer edge of my Italian multicolor piece. Closeup posts of the bit currently under the needle are going to be repetitive from here on in, so I present the full canvas of this “painting.”

If it looks to you like I’ve sped up production – I have. I had wanted to mount this piece on my big Millennium frame, but I had no extra wide twill tape on hand. In person shopping being a bit unwieldy right now and not wanting to rely on goods sight-unseen I’ve stuck with the hand hoop, the sit-upon hoop being an inch wider across and even less suited to close-edge work than this smaller one. But I decided to stick the little hoop into my Lowery floor stand. That lets me work two-handed, one above and one below. And working that way for me is about half again as speedy as holding the hoop in one hand and stitching with the other. So one “up” repeat including initial outlines, meshy fills, and Montenegrin lines took about an evening and a half to stitch using the floor stand, but took three+ evenings with the hoop in hand.
The sharp-eyed will note that the center of the repeat currently in the frame does NOT align with my basted line that marks the center of the cloth as a whole, while the center of the repeat along the short edge, where I began does line up with the horizontal center line.
This was on purpose.
I took pains to do the math for the short edge, hoping to get close enough to the final diagonal needed to make a graceful improvisation for the corner. At that time I hadn’t realized that the original stitcher fudged the corner that most resembles what I wanted to do. I made it without that fudging, but at the expense of stitching further towards the serged edge of the cloth than I would otherwise prefer. You can see how low in my hoop my stitching is – a very inefficient and precarious placement that barely grasps the lower end of the fabric as I try to achieve and maintain optimal tension.
Since I hadn’t graphed out the corner and had only a rough estimate of depth, and knowing that my plans for a neat turn might not fit, instead of beginning the piece along my original posited outer edge (the basted line at left), I skimped on the edge area there, too. Not quite as much as along the second edge, but enough to make a difference. My logic was that when I continue around, if I need extra width or some odd bit of kludging to get to a neat corner on the second turn, I’d have more options. And if I didn’t, I wouldn’t be inconvenienced by the extra unworked cloth, and could cut it off in my finish.
Having narrow margins around the stitching (however inconvenient) and removing any excess play into my plans. My intention to finish this piece is to imitate the original, with “poetic interpretation” of what little remains of that treatment – a narrow turned hem, with neatly spaced blanket or buttonhole stitch and corner tassels. The hem-covering stitch of the original is probably plain old blanket stitch due to the way it has deteriorated. I would think that the edge reinforcement of tightly twisted knot like bits along the free edge in buttonhole stitch would have been preserved better, resisting large runs if snagged. But little remains. It’s very hard to see in the photos I took and the museum’s own shots, but there might even be a very narrow, barely there strip of needle lace along the edges – not wild stuff with dags and picots – just a simple solid band. I’ll be squinting at the photos to see if I can learn more. I’ve done that type of edging before, on The Resident Male’s SCA fighting shirt, in black, long ages ago, so it would not be a stretch to do it again. In any case, plain stitched hem or fancified hem, there will be little reveal of plain cloth between it and the established stitching. There will be plenty of linen left for the hem, regardless of how wide or narrow the stitched part ends up being.
Now where the true vertical center point of the piece as a whole is will matter when I get to the wide bar I am planning to add. That will span the middle, across the short dimension. It may be aligned with the center of the pattern iteration I’m currently stitching. That’s about an inch left of the basted line. BUT if I get near the other end of this side and I decide to devise ANOTHER corner treatment, and that treatment needs additional width, it might move either closer to the cloth’s original centerline, or to another point in that general direction. No clue right now what I will be doing, so stay tuned!
….Isn’t the suspense of Bungee Jump Stitching furiously exciting?
NOT QUITE EXACT, BUT GOOD ANYWAY
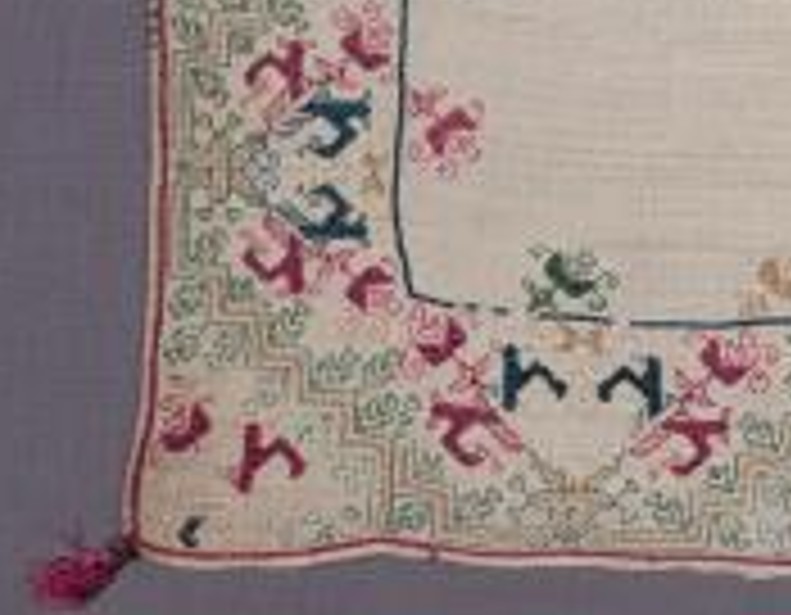
So. More examinations of the corners of the big towel from the MFA, and my first corner. Here are the four corners of the original
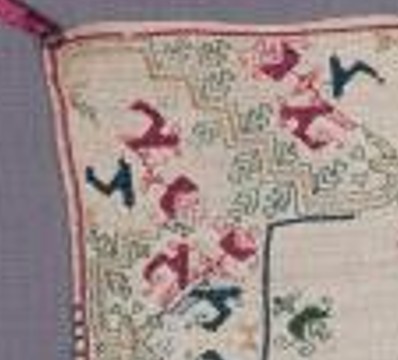


Not quite aligned but all there. Now my stitched corner as of this morning:

It’s closest to the one on the lower left, above. But not exactly. Look at this bit.
That’s a clear kludge. Not to brag, but my join is cleaner than this. I can’t deduce where the stitcher (or stitching team) began, but it’s clear that either the vertical bit on the left side of the photo, or the horizontal bit on the right was already laid down when that corner was rounded. The stitcher did their best, but the pattern doesn’t line up. For that matter, no two of the original corners ARE the same. But I bet you didn’t notice when you looked at the thing as a whole.
I will continue around on my mini-version. I haven’t decided yet if I will limit the width to multiples of the whole design, so I can replicate my corner exactly for the remaining three. Or if I will just make do, in a celebration of the heedless joy of the original.
And how far do I have to go to get to the next corner? Here’s my full cloth, so you can see the proportion of as-yet-not-done to the bit completed:
Quite a ways.
Aside from the corner challenge, upcoming decisions include a supplemental treatment spanning the center. Here’s the original again with two double width strips and two narrow single width ones across the center.
Examining those bars, I can conclude that they were done after the framing, and were aligned with the cloth’s horizontal centerpoint, because the band design is truncated (more or less) at the same point where it meets up with the frame, both north and south. But note that the centers of repeat along the long sides of the frame itself do NOT align with those bars, nor do they align with the measured center of the cloth. Again I bet you didn’t notice.
My smaller cloth may have enough room for one wide center bar; two narrow center bars; or one wide bar flanked with two narrow ones. Lots to think on there, but I won’t get to that part until after the frame around the edge is complete. And then there’s their alignment to consider. (I’m leaning towards filing them under Chaotic Neutral for the time being.)
On the healing front, I’ve completed Day 23 of radiation therapy. 17 more to go. No major perturbations, just the slog of rising before dawn to drive downtown and back before major traffic. Not that I’m counting or anything…
CORNER AND TASTY MILESTONE
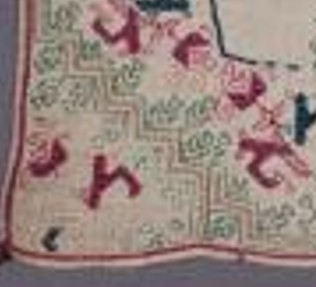
My improvised corner on the current piece appears to be working out. And it looks like the original stitcher(s) hit upon the same notion, and did something very similar. Here’s what I have:

Note the extension of the zig-zag frame to a full iteration of the pattern, but one headed off on a right angle to the initial bit. And the beginnings of another red flower section in the triangle made by the border. Looking back at the original, although all four of its corners are treated differently (and a couple of them quite awkwardly), one does appear to take a similar approach:
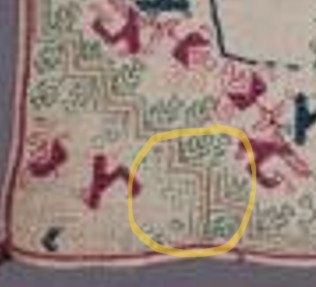
We will see if this gets me into any unforseen trouble, because looking at the original, I do see some kludges that address the variance in placement between that truncated corner flower and the framing zig-zag. Fingers crossed. Still it’s fun to see that I seem to be sharing the thought process of someone else, from way back then in time.
As to Meshy in cotton – I’m getting better at it as I learn more about the thread’s breaking point, and how much the ground cloth weave can be compacted by tight stitching.

The openwork texture doesn’t show well in such narrow spaces. It’s also hard to see in person without backlighting and practically putting one’s nose against the work, but the open mesh effect is there. I’m increasingly pleased with this, but I still don’t know to what purpose I will put the finished cloth.
Milestones
It’s no secret that since The Great Excavation and subsequent rehab/recovery, I’ve been living entirely on the labors of my Resident Male. While he has always handled the bulk of the cooking, I did contribute every now and again, with daily cleanup, baking special treats (especially during the holidays), and doing the occasional leftover reheat/repurposing, mid-week. But I have been a true freeloader since mid-March, and have only recently resumed unloading the dishwasher and doing other minor household tasks.
But yesterday and today I baked!
We are having some friends over tonight for dinner. I decided it was time to step up, and volunteered to make small ramekin chocolate cheesecakes
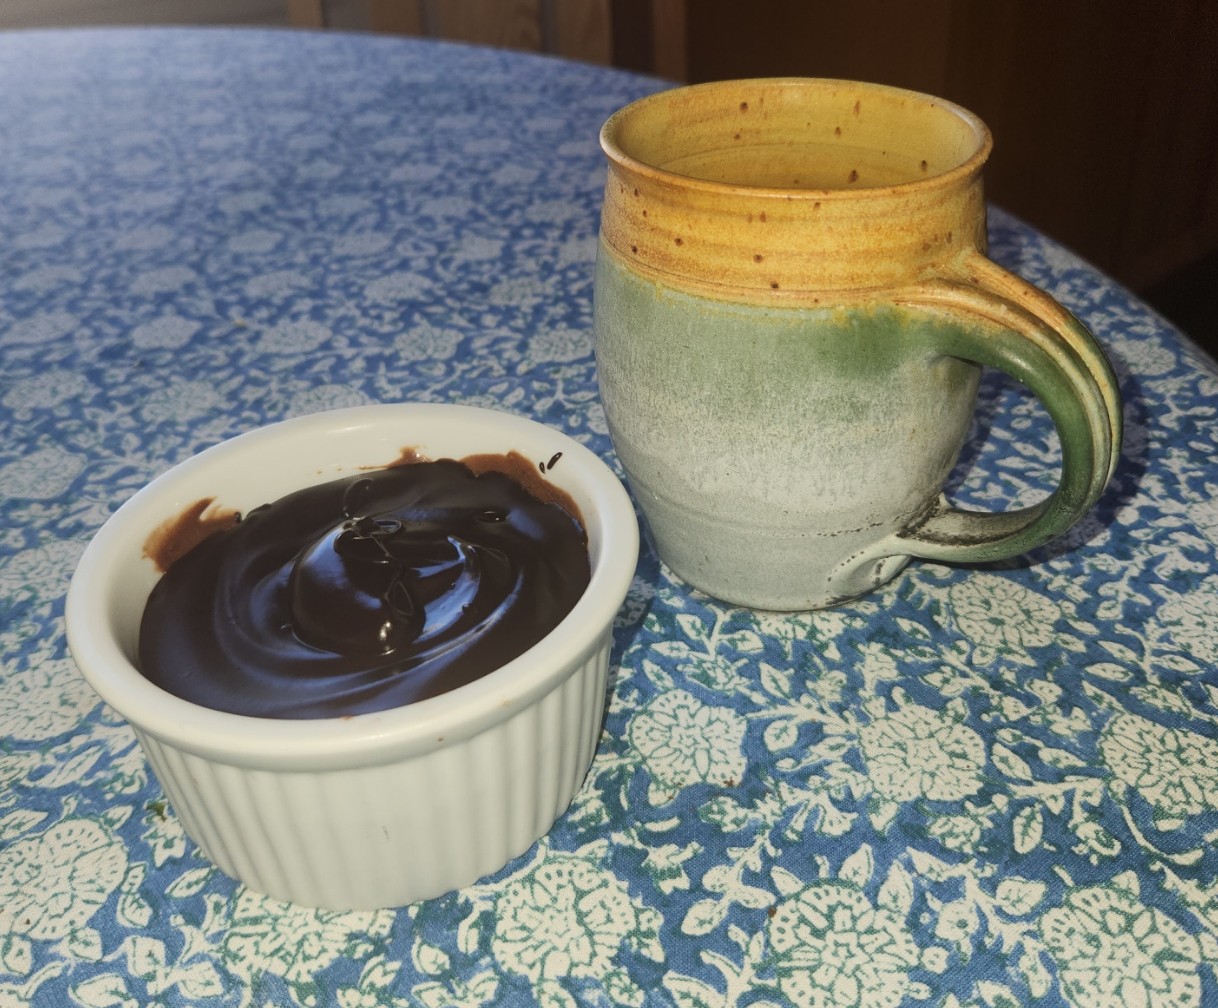
I made six of these little guys. They have three layers, and are a mash-up of several recipes. I used keto ingredients so they are low-carb, low-sugar, but not low-fat. And yes, I will clean up the edges a bit for presentation.
The bottom layer is a cocoa shortbread, made from King Arthur Keto wheat flour (no exotic nut flours, our guests are allergic), butter, cocoa, and faux sugar (Swerve brand, confectioners style). Next is the cheesecake part – standard full fat cream cheese (the bagel’s best friend), no-sugar dark chocolate baking chips (Choc Zero brand), heavy cream, eggs, vanilla, and a touch of salt. On top is a standard proportion ganache made from the same baking chips and heavy cream.
I did them in three stages with a small rest between the base and shortbread, then finished them with the ganache this morning. I was mildly tired after being on my feet so long yesterday, but not truly fatigued. While the shortbread and ganache I winged on my own, the cheesecake part is a combo of several keto cheesecake/chocolate cheesecake recipes.
I’m pretty confident that these will be acceptably tasty, with a dense but not rock solid texture. If not, I’ll report back, tweak my notes and in the future try again. Still, I’m proud of my dessert and happy to have cleared another recovery hurdle.
