A NEW CLUSTER OF HERESIES
I’m working happily away on what will become my replacement cushion cover. I decided that rather than cutting shapes and then stitching them, it would be easier to stitch on a larger piece of reclaimed denim, and then cut it into haphazard shapes bearing the stitching later. The denim is particularly thick and heavy, which has posed some problems.

The traditional Japanese method of working this style of running stitch embroidery is to use a relatively long needle, stitch in hand without a frame or hoop, and pleat the fabric onto it, such that the visible stitches on the front are roughly twice as long as the gaps between them.
This type of stitching isn’t easy because the denim resists the tiny folds and scoops needed for evenly placed and correctly sized stitches. I’ve tried, and would probably “get it” on a different ground. Eventually I will do another project in this technique with proper materials, but for now this is what I am committed to, and my goal is more important than the way I get there.
So in the long tradition here at String, Here’s a run down of what I am supposed to be doing, or what would make this a truly traditionally produced piece, along with my confessed heresies.
Needles
I am not using traditional Japanese-made needles, specific to hand sewing, and especially Sashiko.
I have a long steel needle, sharp and stout enough to pierce the denim, with a small eye. I found a paper of five of them in a box of miscellaneous threads and notions I picked up at a yard sale. No name, brand or date is associated with them, and they are not quite uniform. The eyes are very smooth, but there’s a bit of variation on eye placement and point taper. It’s remotely possible they are antique and hand-made. I use another of these as my plunging needle because the small eye retains the loop of strong carpet thread I need to capture goldwork ends and pull them to the back. In any case, these needles are almost two inches long, certainly long enough and easy enough to maneuver for the technique. It’s the stiff denim that’s the problem.
Thread
I looked at various thread options. The threads marketed specific for Sashiko are imported and not exactly inexpensive. From what I gathered, they are unmercerized cotton, nicely twisted, and not as “hard finished” as commercial threads sold for crochet. So I went hunting.
I cast about and eventually ordered a big spool of weaving cotton from Webs. It’s their Valley Yarns “Valley Cotton 10/2.” It was a risky purchase because it’s a large quantity, but I happened to hit a weaving yarn sale. And if the stuff didn’t work for my cushion project, I would be happy to knit lace with it.


I’ve got roughly 4,200 yards. Plenty. On the right above is a comparison shot of some threads next to a metric ruler. Apologies for the lousy photography. From top to bottom we have
- Valley Cotton 10/2 – a two ply matte finish cottom
- Coats & Clarks Knit Cro Sheen – a four ply shiny finish yarn. Much rounder and heavier that the Valley Cotton.
- Standard DMC 6 ply cotton embroidery floss. I didn’t have white to hand, so this is yellow. Six two-ply strands. The Valley is equivalent to about four plies of the DMC.
- Long discontinued DMC 6 ply linen embroidery floss. This I did have in white. It’s a mite heavier than the cotton floss, and the Valley Cotton is equivalent to about 3 plies of this.
I’m pleased with the Valley Cotton’s usability, its proportion in relation to the stitch length I’m using, and it’s appearance against the denim. It also coordinates well with the remaining Haitian cotton upholstery fabric used on the parts of the chair I do not intend on recovering.
Pattern Sources and Preparation
I tried to use straight drafting – laying out the geometry and drawing directly on the fabric. I also tried printed paper designs, employing tracing paper and pouncing to move them from paper to the cloth. Neither was satisfactory. Then I stumbled across some commercially sold plastic templates, and decided to take the short-cut.


Stencils opened up another experimentation hole. What writing instrument to use with them. I tried all of the standard pens and pencils intended for fabric marking. Some were too crumbly to achieve the fine point needed to use the stencils. A highly regarded pen drew clear, with the ink “blooming” into visibility over a 15 minute period. That was better, but it was difficult to see when ink was poorly laid down and needed retracing, or what had and had not been marked. It was even more difficult to realign the stencil to do a repeating pattern because of the wait and imperfections due to poor ink flow. (In fact I haven’t succeeded doing that yet, but I am still trying).
I settled on an unorthodox inking approach AND a non-traditional marking method. I am using these easily found Crayola wash-out fine point markers with the stencils.

I am also marking on the back, stitching the piece from the back, with starts and terminations on that side, but taking care that the reverse when I am working (which is the public side) shows the longer stitch length as opposed to gap length. Running stitch is running stitch. If you are careful in working, either side can be manipulated to be the public display side. Even in this style where the public side is characterized by longer stitches than there are gaps between them. And that’s why the photo at the top of the page shows the public side of the denim leg I’m stitching, but you see the twill tape wrapped inside unit of my hoop.
Heresies
So to sum up – my heresies are:
- Using a hoop and not stitching in hand
- Stabbing vertically rather than pleating the fabric onto my needle
- Using weaving cotton instead of Sashiko thread
- Using some unidentified vintage needle instead of the recommended long sharps
- Using stencils instead of drafting out the designs by hand
- Stenciling on the BACK rather than the front of the piece
- Stitching from the back, with the reverse side of my work actually being the side on public display
I pause now so the traditionalists can catch their breath, take a sip of tea or coffee and revive themselves.
With luck all hyperventilation and shock have passed.
More unorthodoxy
To add another dimension of complication, I am also hoping to use Western linear stitching on this piece. I plan to use standard double running stitch, and some of the fills or strapwork patterns that are oh so familiar to anyone who has followed this blog. But there is no grid on this denim, and it’s not countable.
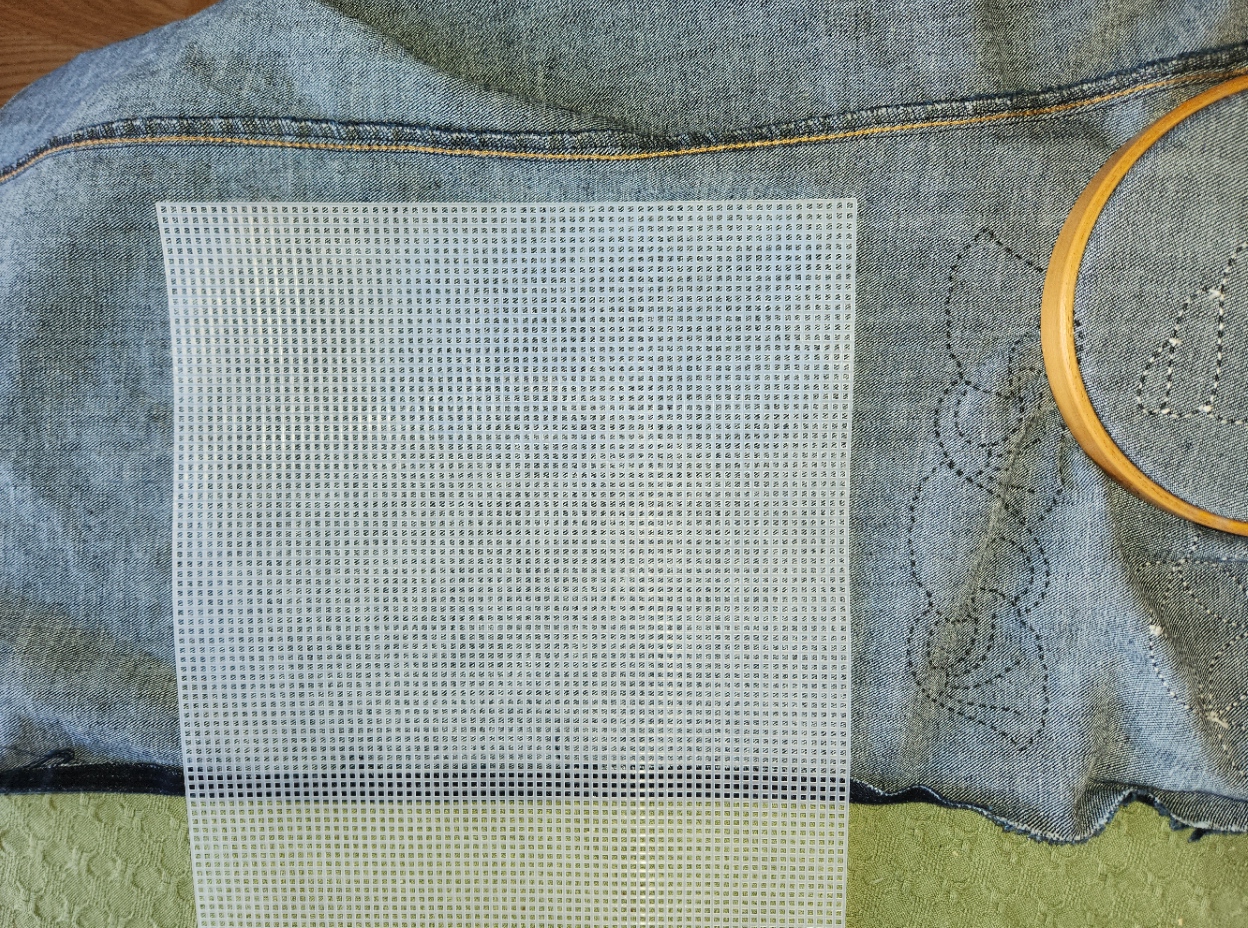
Again I am going to cheat, and stitch on the reverse. I am going to use my markers and this piece of plastic canvas to make a dot grid, and then use that dot grid to place my stitches. Double running is the same on front and back. If I stitch with care and make no skips, there should be no telltales in front to betray my working method.
Cheaters may never prosper, but on rare occasion a shortcut or labor-saving method is warranted.
BEGINNINGS – CHAIR RESCUE IN USED DENIM
Now that the spawn are off on their own, I have been able to claim one of their rooms as my office. I’m especially lucky, I know because I also have a room in the basement dedicated to sewing and crafts. But the upstairs room has the computer, my needlework library, and space to relax.
The office is the room with the hanging tambour carpet, and is largely furnished in mismatched Trash Panda style – a couple of purpose-purchases like my standing desk and an OttLight, plus items reclaimed from local everything-free groups, curbside abandonment, and opportunity shops/consignment/resale stores. These include two low end Arts & Crafts style cabinet bookcases, a barrel chair I’ve been hauling around with me since 1978, and the most recent addition, a reproduction Arts & Crafts reclining chair.

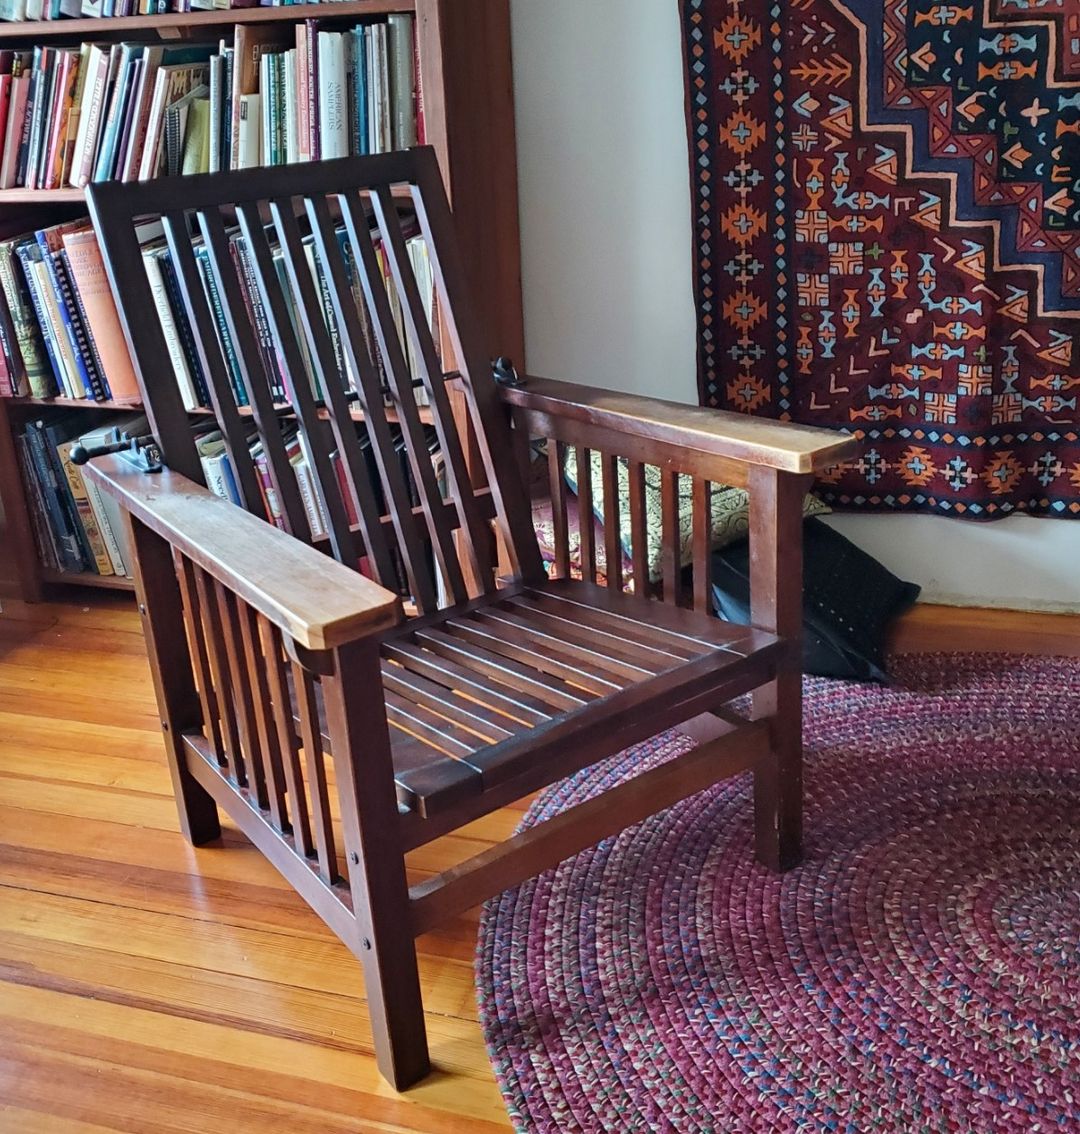
The barrel chair is in acceptable condition except for the horribly worn, stained and snagged cushion, and the little apron just below it. The recliner came as-is, without any cushions at all. Right now I have an old zabuton floor pillow and a couple of throws tossed on it to make it sit-able.
My next project is a massive multipart effort:
- Recover the barrel chair’s seat cushion recycled denim. The denim will be pieced crazy-quilt style with exposed seams. Some of the denim bits will sport sashiko stitching.
- Buy foam and create a thick, resilient seat cushion and backrest cushion for the recliner.
- Cover the recliner cushions with similar pieced and embroidered recycled denim.
- Figure out how to fig-leaf the wear on the barrel chair’s under-cushion apron, again from the used denim, but without embroidery.
To start, I’ve traced the existing cushion onto brown paper (a giant yard waste bag was sacrificed for this), and cut out patterns for the top and bottom. The sides are just a four inch strip wrapped around, so a pattern isn’t needed. I plan to sew random size/shape denim pieces onto the brown paper using my ancient Elna SU sewing machine, employing various wide stitches and exposed edge seams where denim patches overlap. Some of those pieces will be pre-embroidered by hand, taking advantage of some templates to lay out the traditional geometric patterns. And some might be stitched using waste canvas in double running designs. My whim will rule.
Once each of my brown paper mock-up patterns is completely covered with securely stitched denim, I will tear off the paper. The goal is to have the two sides, add a four inch strip running around the edge, winkle in a zipper on back edge, and then stuff the existing pillow, ratty cover and all inside. If necessary I will strip off the old cover and just use the inner foam (probably with a new inner cover I’d have to sew, too.)
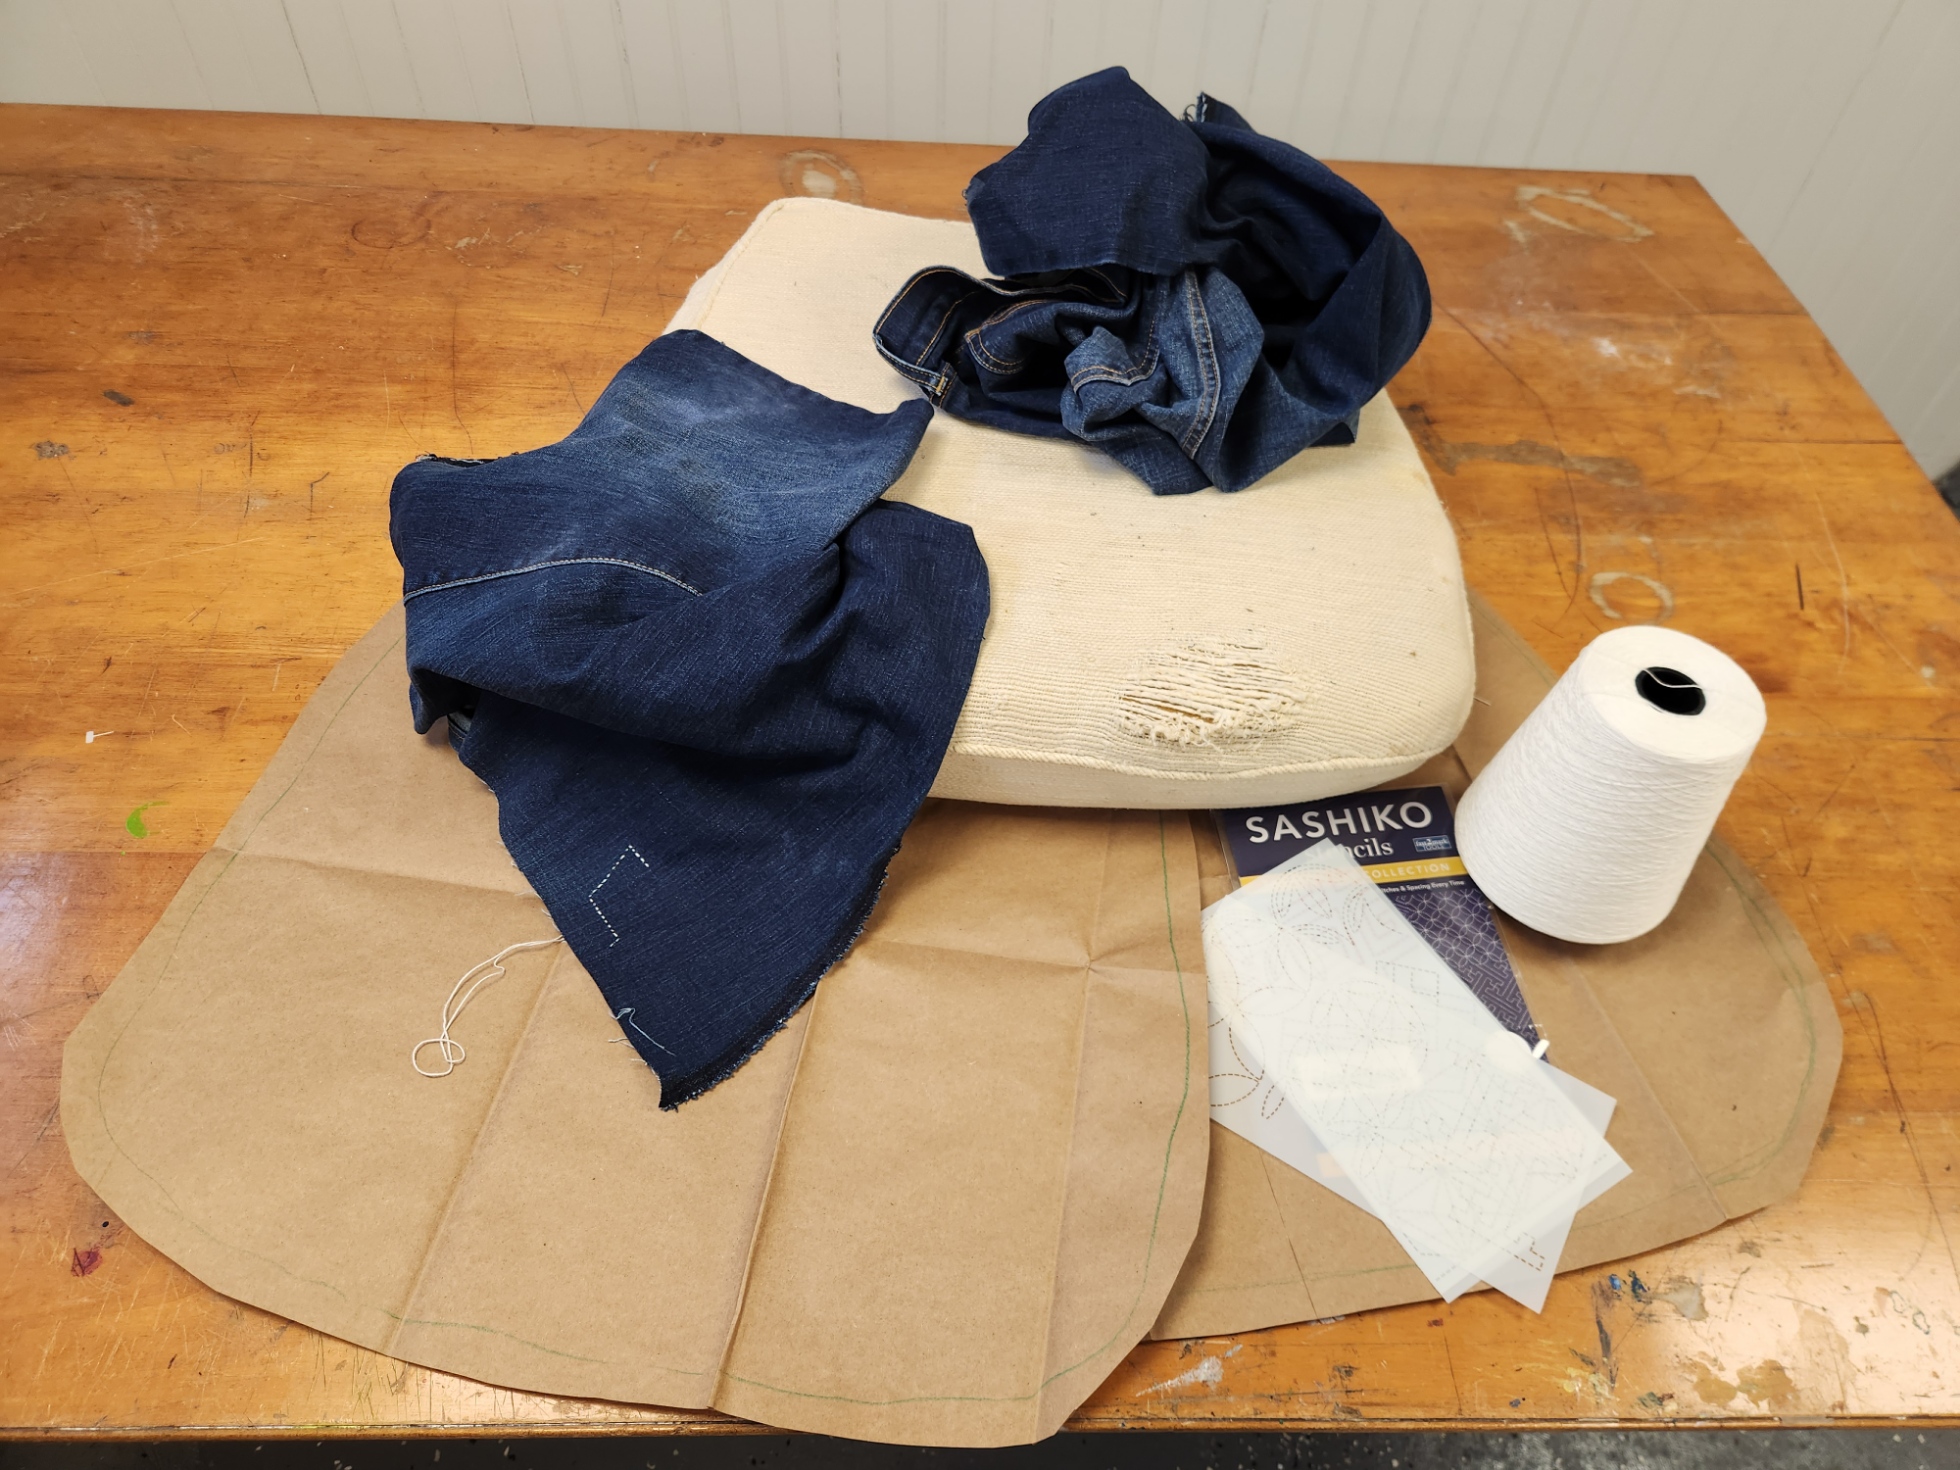
I have lots of denim discards in the house, and can always find more if needed. The big cone of thread I’m using is from Webs – their 10/2 Valley Cotton, intended for weaving. Its a matte finish two ply, and coordinates well with the well-worn Haitian cotton of the barrel chair’s back and sides. The back and sides aren’t being touched in this partial re-do. I’m not worried that I’ll have a ton of thread left over. It’s also useful for lace knitting.
I’m using the stencils to mark the BACK of the denim, and am stitching on it upside down. It’s much easier to see the markings on the back, and I don’t have to worry about the marked lines showing.
Right now I’m attempting to stitch without a hoop, in the scooping style that’s traditional for sashiko, but we’ll see how long that lasts. Denim is thick and scooping those tiny bites evenly in a heavy ground with a needle sharp and sturdy enough to penetrate the denim and with a hole large enough for the thick thread is proving to be a challenge. I may end up using my sit-upon or hand-hoop and stabbing vertically as is my habit.
While I have built cushions from scratch and recovered simple upholstered cushion covers before, there’s a lot here that’s new to me. If you are an old hand at this type of upholstery repair, sashiko, quilting (especially crazy quilting), or repurposing denim and you have advice, please chime in. Your hints would be most welcome.
I expect to be working on the barrel chair through the spring and into summer. Building the cushions for the other chair should take me into fall. And covering the cushions for the second chair will probably fill my time up until mid 2025.
Am I daunted by this timeline? No. I’ll get it all done.
Eventually.
THINKING, BUT KEEPING BUSY
A couple of people have asked if I’m taking a break from needlework in the aftermath of the great coif project.
Nope. To be truthful, I am filling my time with far less challenging pieces while I contemplate the next big project.
First, I’ve returned to the third forehead cloth. I’ve done two before and love wearing them instead of bandannas to contain my hair on windy days. I do a little bit on them in the afternoons, and in the evening catch up on my sock knitting.

The socks are my standard issue toe-ups on anything from 76 to 88 stitches around, depending on needle size; figure-8 toe (an technique unjustly despised by many), plain stockinette foot, German short row heel, then something interesting for the ankle. Mostly improvised. The only hard part is remembering what I did on that ankle so I can repeat it on the second sock.
The forehead cloth is fairly flying. It’s all one pattern, on cotton/linen yard goods that works out to about 32 threads per inch. That’s as big as logs compared to the coif’s linen. I’m trying out Sulky 30 thread (two strands). It’s ok, but I am not so fond of it I’d throw over softer, more fluid flosses. I am betting though that it will stand up to hard laundering better than standard cotton floss. The stitching on my other two forehead cloths, done in silk, has survived quite nicely. Unfortunately the ties – folded strips of the same ground – have totally shredded and been replaced twice on each. I may move to narrow store-bought twill tape for the ties, instead. Jury on that is still out. Oh, and yes, there are mistakes on this. Some I’ll fix, and some I won’t. Have fun hunting for them. 🙂
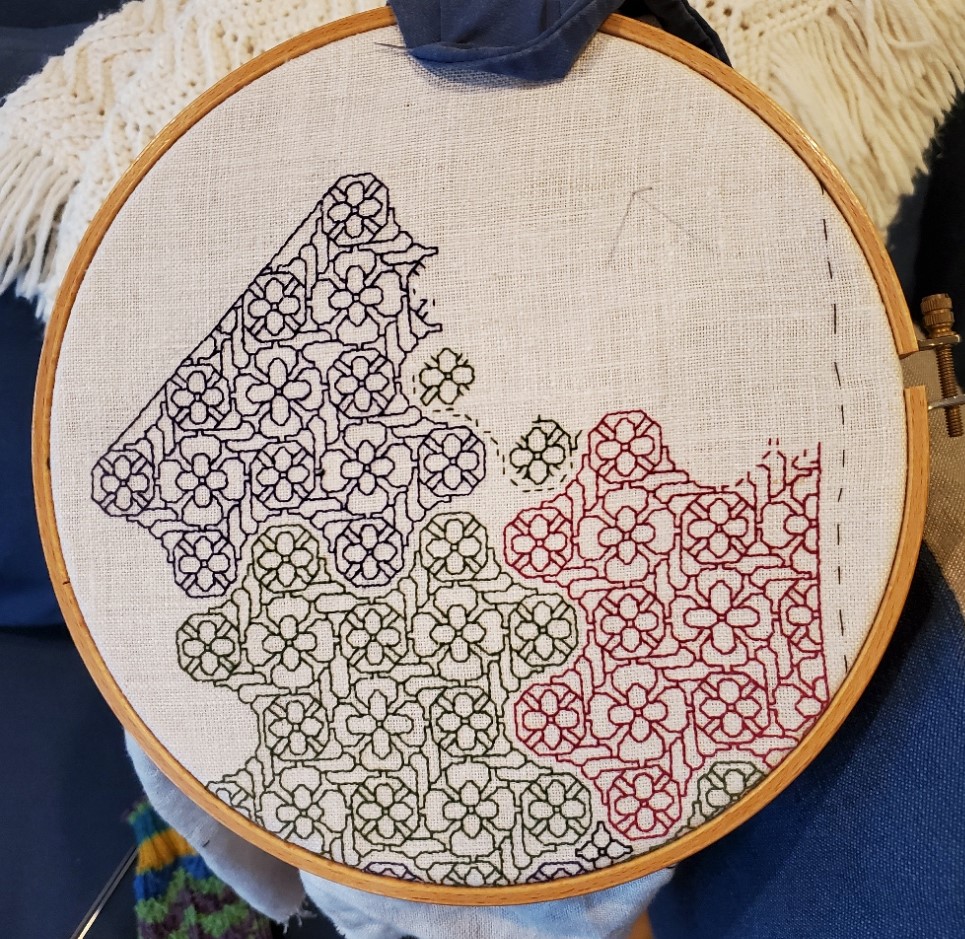
While I’m here, I’ll share a tiny blackwork hint.

I’m doing double running but this will be relevant to those who favor back stitch, too. See those “legs” sticking out in the photo above? As I passed those junction points I knew I would be coming back again, from a different direction. It is far more difficult to hit the exact right spot when joining a new stitch to an existing stitched line (both perpendicular as here, and diagonally) than it is to mate up to a stitch end. Those legs are there so when I come by again I have a clear and simple target for the point of attachment. This saves a lot of time, minimizes my errors and helps keep my junctions as neat as possible. Try it, I think you’ll find the trick useful.
What am I contemplating for my next project? Possibly a blackwork/sashiko hybrid. I have a barrel chair, a wreck salvaged from the trash, that I had recovered in Haitian Cotton back in the early 1980s. It has survived four house moves and two children, but although the back and sides are in good shape, the seat cover and the area just under the seat are both shot. I still adore the thing even though it doesn’t really fit in with the rest of the house’s style. So it’s going up into my office. I plan on recovering the shredded areas with patchwork denim overworked in white running stitch. The denim will be reclaimed from various outgrown and destroyed garments I’ve held onto against just such a future need. Since I do not plan on replacing the rest of the upholstery, I’m counting on those flashes of white to bring the seat and the rest of the piece together.
