ONE FOOT IN FRONT OF ANOTHER
Just because things are a bit in the air here at String Central right now, doesn’t mean that our dedication to Relentless Forward Progress has been put aside. There are things to do, things to make, and accomplishments waiting to be notched and acknowledged.
First, we did have a wonderful weekend of low key celebration here. The Resident Male (and Executive Chef) outdid himself. He did homemade gravlax (the Jacques Pepin overnight cure version); grilled boneless lamb with garlic and rosemary; and roasted cauliflower and red onions. I pulled my weight by baking four small chocolate pound cakes, one of which we split for dessert, stowing the other three in the freezer for future treats. But I have promised to detail my adventures in low carb baking, so I will elaborate here a bit.
Low Carb Chocolate Pound Cake
I started with this recipe – Keto Chocolate Pound Cake, from the All Day I Dream About Food blog site. The thing was pretty straightforward if you happen to have the ingredients in the house, which we did. Note that this recipe uses almond flour, monkfruit-based brown sugar substitute, butter, baking powder, eggs and sour cream in addition to the items mentioned below in my summary of deviations.
First change, instead of one standard size loaf pan, I used this one – a four mini-loaf thing I got years ago when I was a regular contributor to school-based fundraising bake sales. It takes a standard size loaf cake recipe and turns it into four more saleable and storage friendly smaller units.
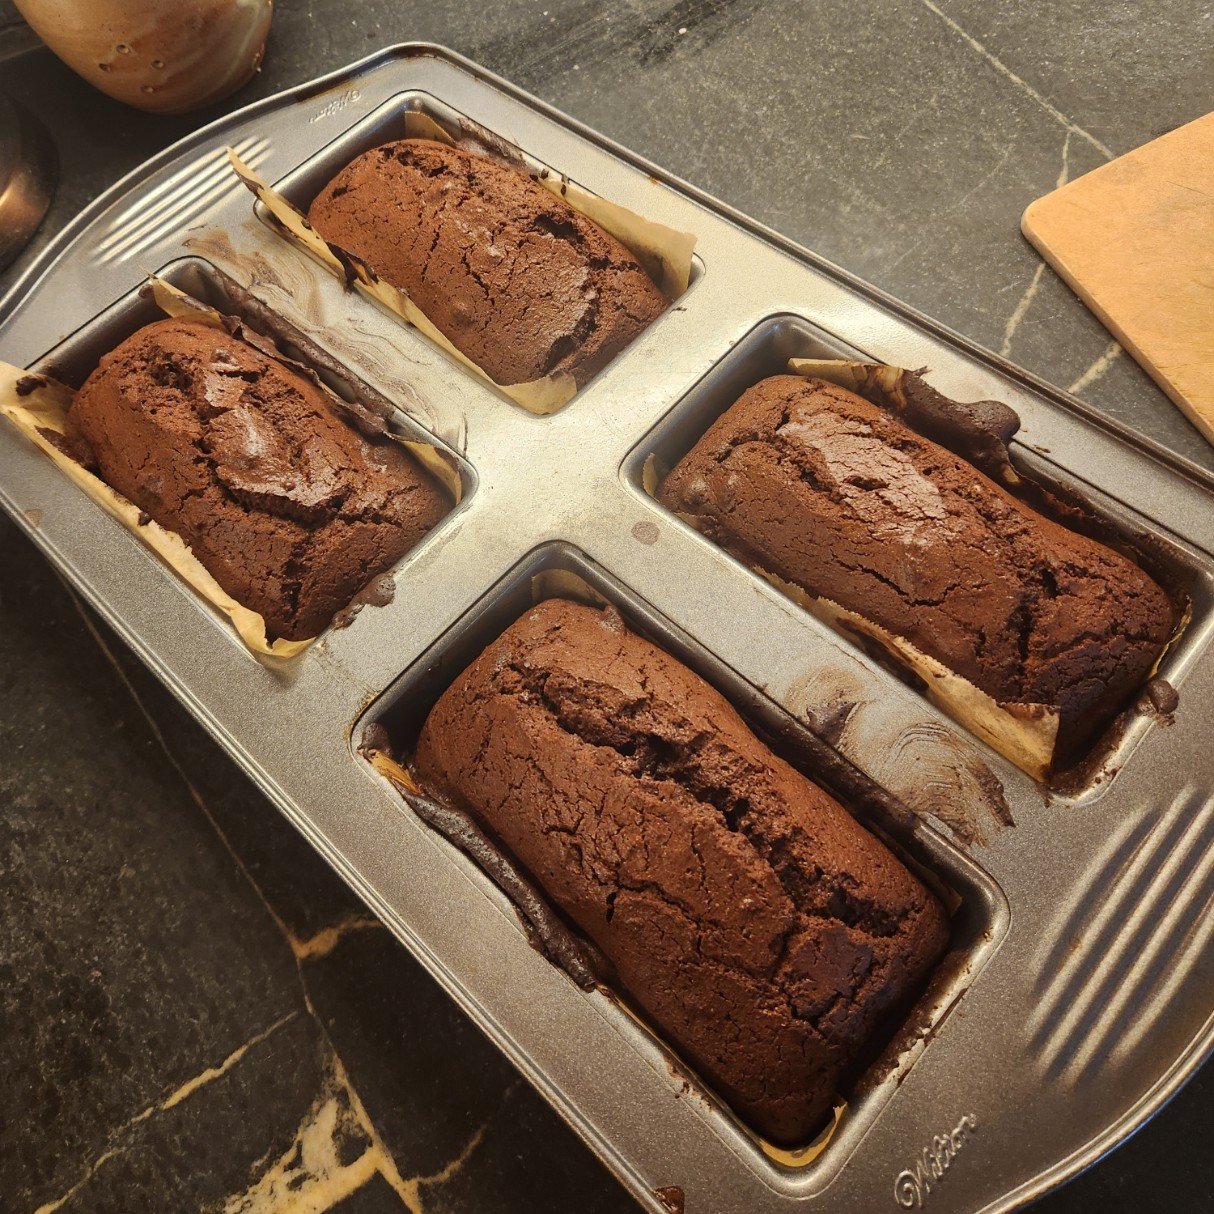
I am pretty sure I found this pan in a yard sale, but I do see them sold in cooking supply and on line sources. And yes, I buttered each little loaf hole and lined it with a piece of buttered baking parchment to make removal easier. From prior experience I know that this pan in my convection oven bakes faster than a full depth loaf pan. To compensate I did my bake at the recommended temperature, but only for 50 minutes – not the 60 to 75 cited in the recipe. I tested the cake with a skewer for doneness.
Second, and this is a personal preference – I detest coffee flavor in my chocolate. The recipe calls for two kinds of cocoa – regular and “black”, chocolate flavor whey protein powder, plus espresso powder and a quarter cup of room temperature, strong coffee. We had the whey powder on hand, no problem. I used just one kind of cocoa, combining the specified quantities for both together – a Dutch Process, known for its deeper/stronger chocolate flavor, and the only one on my pantry shelf right now. I skipped the espresso powder, and in place of the coffee (clearly needed to hydrate the rather thick batter) I used the same quantity of very strongly brewed unsweetened black Assam tea, also cooled to room temperature.
Third, I tossed two large handfuls of coarsely chopped toasted pecans into the batter before spooning it into the pan.
Fourth, I omitted the chocolate ganache glaze entirely. I knew I would be freezing the three extra cakes, and I know from experience that ganache can get chalky when that happens. Given that the four little loafs were moist and tender, and we would be eating one right away, I didn’t see the need. I can always whip up a little bit of glaze when we defrost a survivor if I think the extra moisture is needed.
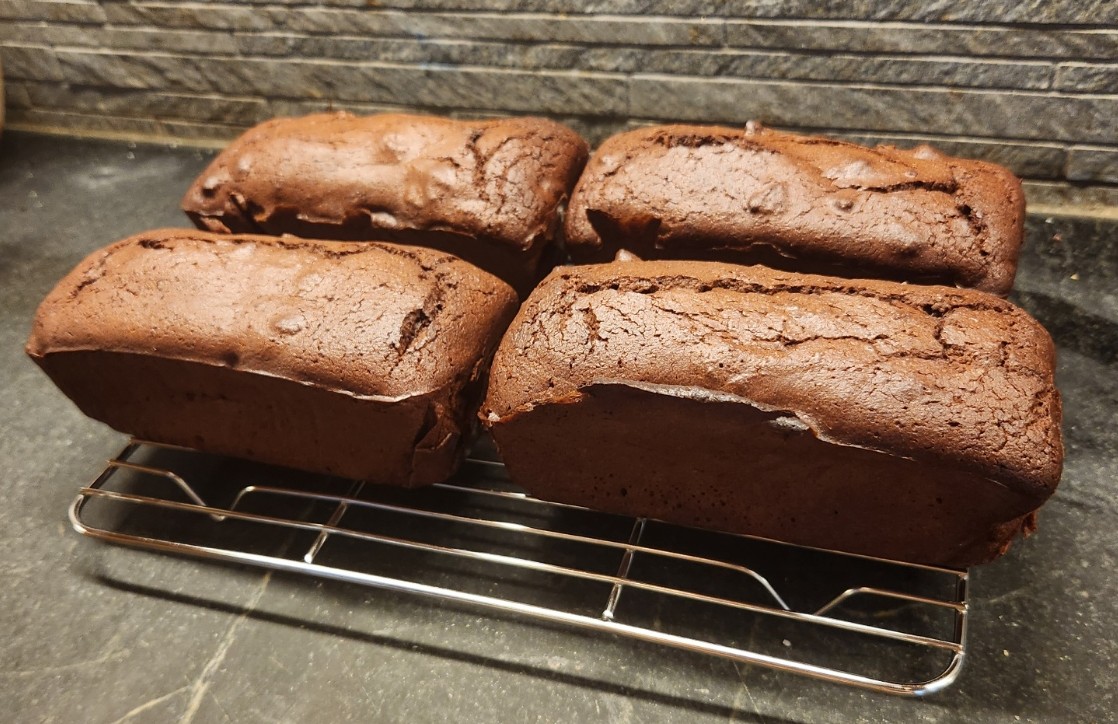
Here is the end result. A definite do-again. Moist, dense without being heavy, with a deep cocoa flavor. The toasted pecan bits were a welcome addition for both flavor and texture. Each little cake makes two very generous portions. Perhaps next time I will also add a handful of zero-sugar chocolate chips. But that would be truly decadent. Based on this result as opposed to many truly dismal Keto baking experiences I have had, I may explore the site of origin to see what else is up there.
Booties
I had a special request to knit some booties for a the sister of a friend of a family member – the first of that particular friend circle to have a baby. My favorite bootie pattern is a quick knit. I can do a pair in about four hours, so why not.
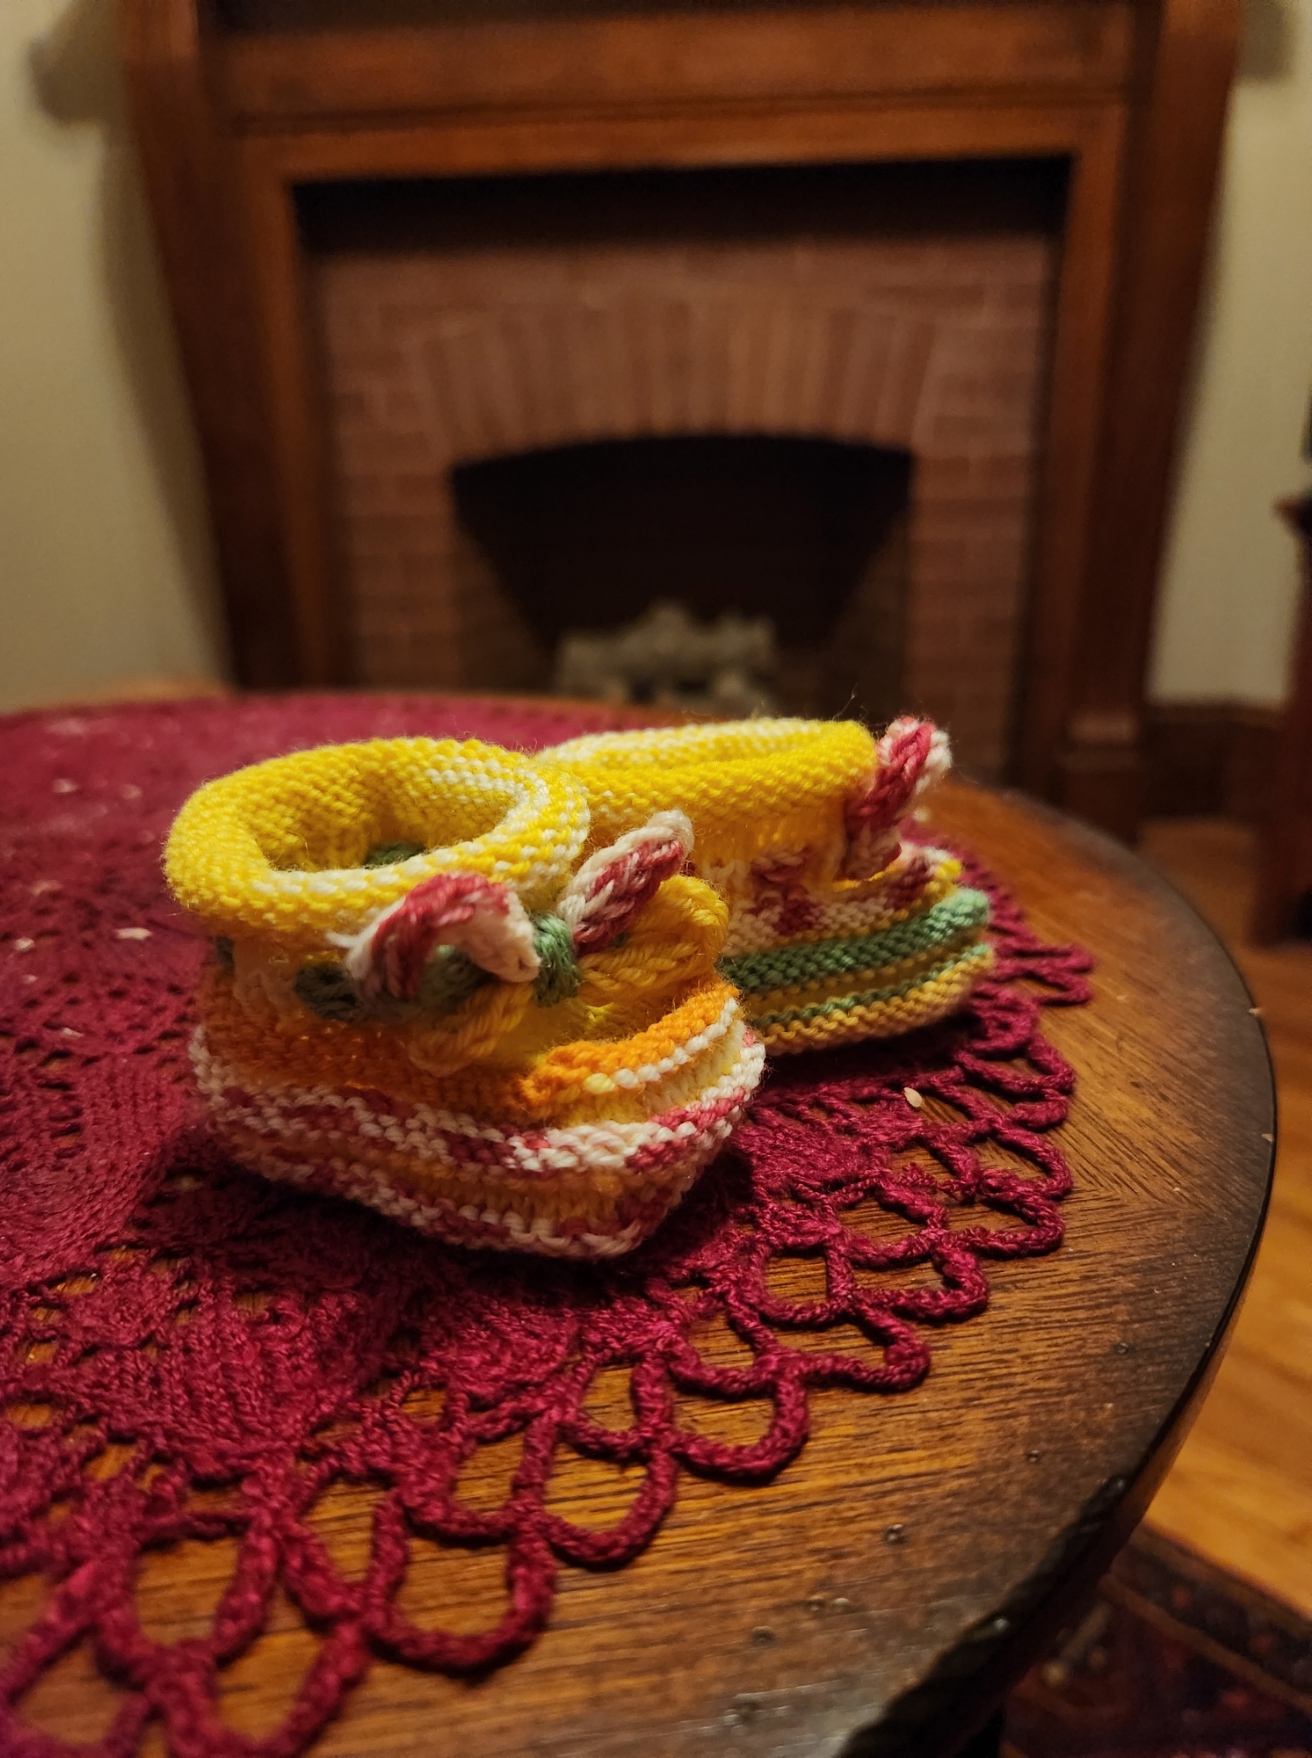
These are from the same pattern I used easily thirty times over a few decades to make items for my own spawn, plus baby gifts for friends, family, and co-workers. The original pattern was posted by Ann Kreckel in 1995, to the ancient email based KnitList mailing list back in the days when the Internet was still climbing out of primordial seas. It can still be found via the Internet Archive’s Wayback Machine utility – Click here to retrieve it.
In the past I’ve posted a mini-tutorial on making these, and invented and shared a hat to match.
Reading over the instructions it occurs to me that even with my mini-tutorial many knitters today might have a problem following the pattern as Ann originally shared it. Not that there are mistakes, but I do note that the level of comfort with written instructions in the general knitting community has declined sharply in the video era; and the terms and logic of the thing might challenge a newer knitter. I think I could make the pattern more accessible with a simple re-write and merge with my mini-tutorial. But it’s not my design, so I am not comfortable just doing so.
I have tried tracking down Ann to ask about updating and hosting her pattern as a free offering, but so far I haven’t gotten a response. If any of the old KnitList gang reads this and knows how to find her, please pass along my sincere wishes for happiness and health, and my request for pattern editing and republication permission.
Socks
Hating to just sit there, no matter where I am, over the past two weeks at home, waiting in doctors’ offices, and after my last procedure I kept busy knitting a pair of socks. They are going to be a present for someone who went above and beyond during a regional emergency – not to aid me, but to help someone near and dear. I won’t spill the beans because there is a remote chance that they might see this post. But I did do a whole pair, start to finish, and will be casting on for another before the coming hospital sojourn. Sanity before all other things, and keeping busy keeps me sane.
Stitching – Playing with Faux Buratto
Another bit of sanity-preservation. I wanted a stitching project to bring with me, too. Something small, easy to see, and easy both to follow and to stitch. Something I can slap in a small hoop and support with minimal kit. Yet something that holds interest, and would be enough of a challenge to tempt me to curious activity. I have teased this on Facebook, but here is the full story.
A while back I -lucked into a curious bit of textile. A sieving/bundling cloth used in traditional Korean kitchens as part of food preparation. HMart had it on a rack in the housewares section, and I noticed the weave immediately. I did a blog post on the discovery a while back,
I want to try out a few designs on this cloth. The first step of course was to establish a normed edge. Like most textiles the retail cut rarely aligns with the weave structure, so I basted the largest possible rectangle I could, and added guidelines for vertical and horizontal centers. Then I just started in on an outline. I’m keying off the use of deep red and yellow-gold in a couple of museum artifacts. I’m going to try out establishing my outline for this strip and then do one of several possible fill methods. This style is later 1500s into the 1600s. Then I will try one of the monochrome type designs. from the earlier half of the 1500s. After that probably another multicolor but using a different scale and fill style. It’s a small cloth and there isn’t room for a ton of strips on it, but I will use the available real estate to best advantage, picking on the fly as I usually do.
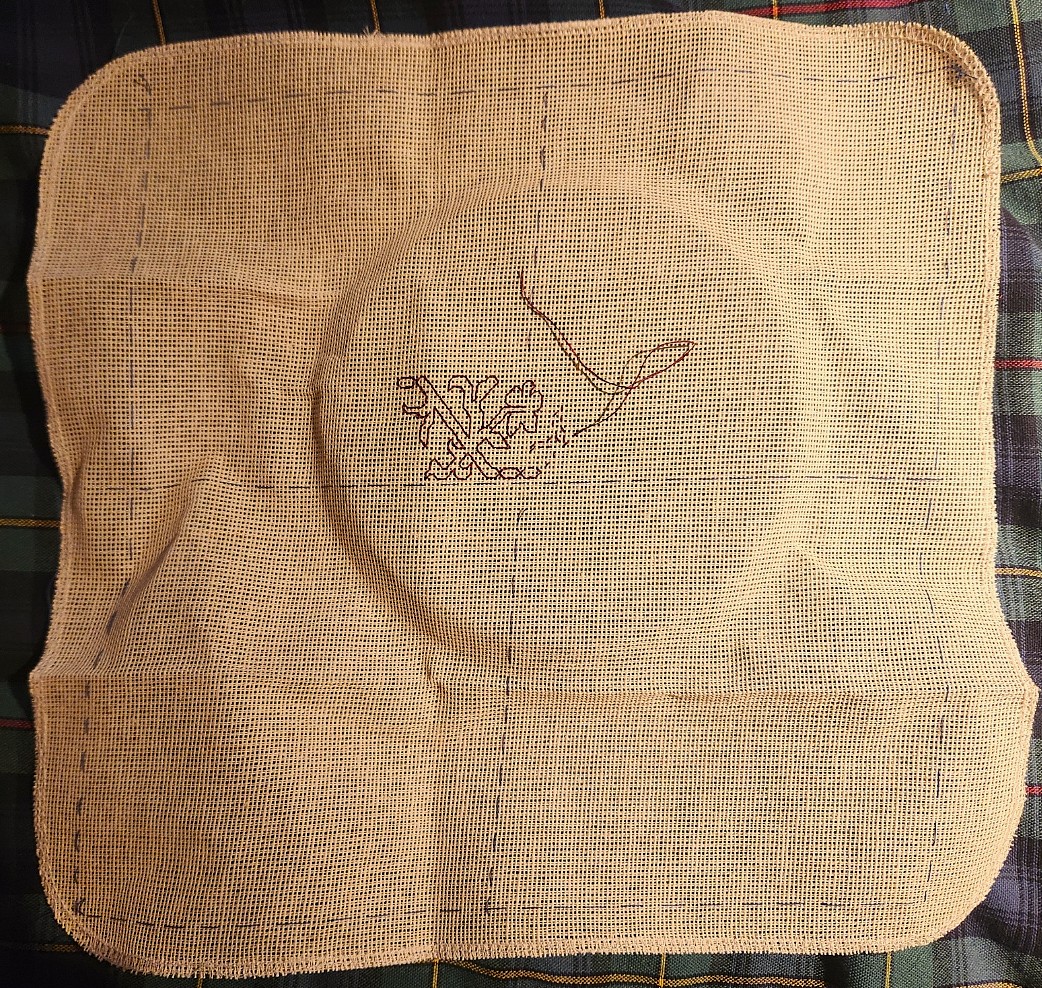
What you see here so far is simple uncounted basting in blue, marking out margins and centers. Those skew cut edges and the amount of area wasted does annoy me a bit, but this piece of cloth was never intended for the purpose to which I am putting it. Just above the center line you can see my start – double running in crimson faux silk (rayon). The design is already 100% established and from this point I can go left and right “off book” just by copying what I’ve already laid down. And I will have T2CM with me, electronically, just in case.
General Health Status Update
Yes, I know I alarmed a lot of you yesterday, for which I deeply apologize. But obfuscation has never been my strong suit. To clarify at this moment, aside from the facial numbness that triggered the hunt for the Danger Lentil, I feel pretty good. I have bounced back from the prior biopsy with no ill effects. I am back to my regular exercise routine. I am pretty much day-to-day advancing the new normal as I have been for many months now. Stamina is excellent, and I have no problems sleeping or eating. I have no headaches, nor blurred vision, auditory or balance problems. In general given my past year’s journey I am in excellent health.
I have every confidence that the team will figure out what’s going on, and that a treatment plan will be devised AND that I will weather that, too. So I do thank you for your words of support and comfort. I have both battle fury and the strength to put it to best employ. Know I keep all of you in my thoughts, and I do appreciate that you are thinking of me, too.
COOKIE COUNT-DOWN FOR 2025
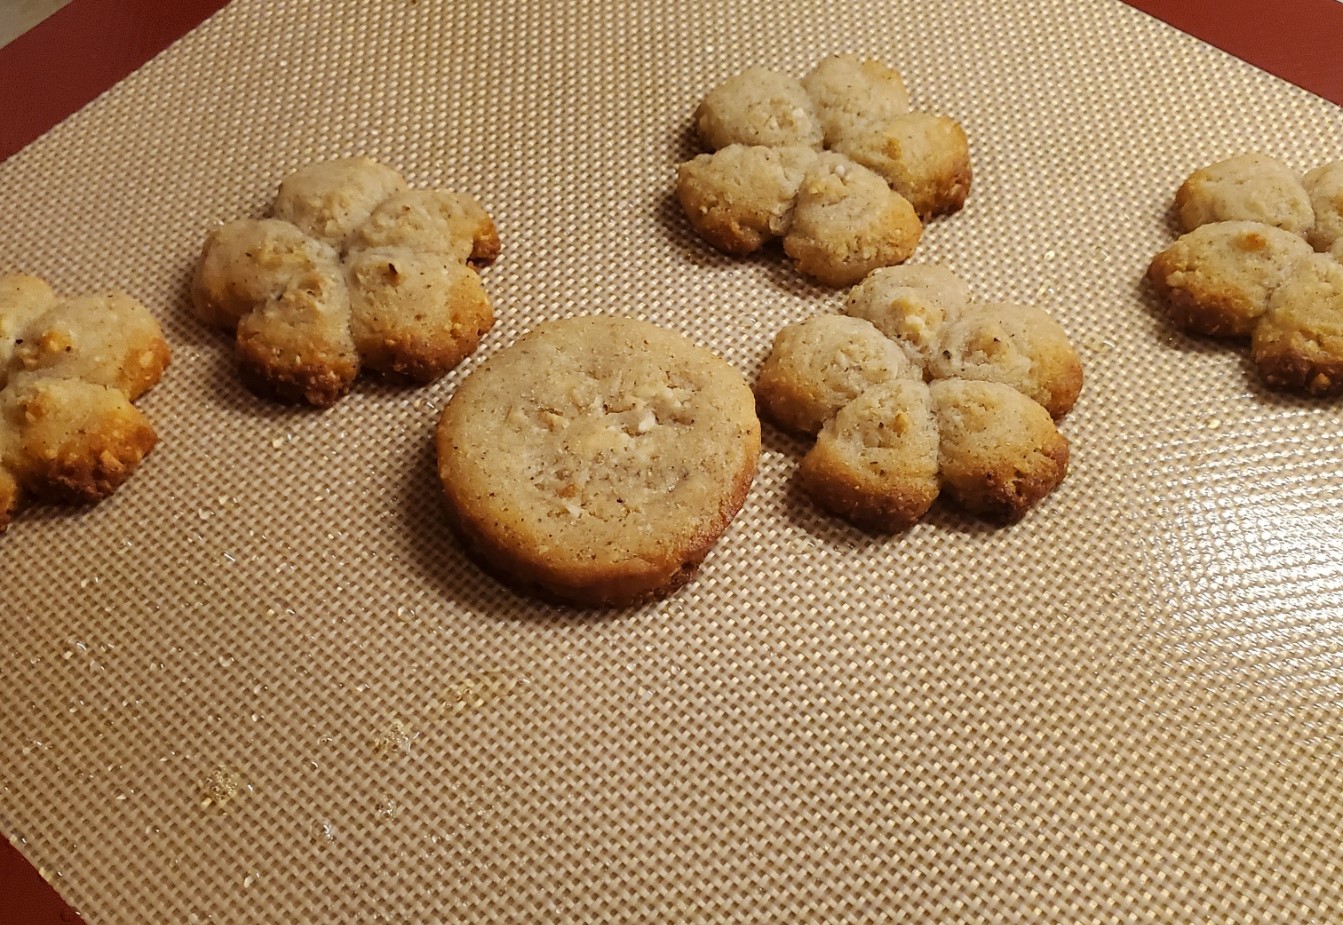
And as promised, the family shot of our 2025 cookie plate, with prep notes. Half for the entertainment of those who follow our misadventures, and half so I remember what the heck I did next year, when cookie time rolls around again.
To start, we did two sets, more or less divided between keto/slimmed (lower carb) cookies, and “full octane” ones. You can’t call any of these truly-free, even if they are marked slimmed or keto. I’ve noted below what non-standard ingredients or deviations we took to make the slimmed set.

Starting on the left with the full sugar/regular all-purpose flour set:
Triple Ginger – This is one of the cookies we do every year. My own invention. In previous years I have tried to slim this one, but since there is no such thing as sugar free white chocolate chips, and I wasn’t fond of the texture of the drop cookie style dough when using keto flour, we went with the original recipe. However, this year I used a chopped bar of white chocolate instead of the bagged, pre-formed white chocolate chips. A clear improvement.
Earthquakes – Another of the must-have bunch. This is one of the many chocolate crinkle style cookies. Again, full-octane, no slimming. Just an intensely deep chocolate, almost brownie like cake-cookie, nicknamed because of the fault line cracks that form in the powdered sugar outer layer during baking. This King Arthur version is a good jumping off point.
Samoa-Alikes – Every year we experiment with at least one new kind, to audition it for future inclusion in the standard run. We used this recipe but will probably not do it again. While the cookies were faithful renditions of the coconut/chocolate/caramel/shortbread cookie of Girl Scout fame, we did find them a bit too sweet, and the melted caramel candies were difficult to handle. But the base shortbread cookie was excellent. Able to be rolled super thin, held the cookie cutter shape extremely well, and on its own was buttery, crisp, and an elegant alternative to heavier sugar cookie cut-outs. The extra base cookies on which we just drizzled the dark chocolate after the coconut/caramel topping was all used up were the first ones gobbled down. The intricate work in creating these was largely done by Younger Spawn, who is a cookie baker of enduring excellence.
Mexican Wedding Cakes – Our favorite pecan butter cookie. This is the standard version, full sugar. Enhanced this year due to the princely gift of top quality New Mexico crop pecans from a dear family friend. Ambrosia. Recipe in last year’s round-up.
Cinnamon Swirls – One of our newer faves, and a specialty of Younger Spawn. I stand in awe of the absolute precision of that spiral. And as good as they look, they taste even better. The base recipe is now only available via the Wayback Machine. Skip the optional icing, and use your strongest, most flavorful cinnamon. You won’t be disappointed.
And the slimmed set, last label on the left, and all of the right side:
Slimmed Cocoa-Raspberry Cordial Balls – You can’t call any cookie that’s loaded with booze, truly keto. We happened to have some well-aged raspberry cordial made by another family friend. These things take a while to mellow out, and we’ve been watching it and tasting it for a few years, waiting for it to peak. It did and was glorious. But I wanted to share the last of it with as many folk as possible, so I used it for a batch of cocoa/pecan no-bake cookies. Well, not exactly no bake. I made the keto flour/monkfruit sugar cocoa cookies to crumble to get the crumbs for this and for the bourbon balls, below. One big cookie, actually. Since the whole thing was ground for crumbs, I just rolled out one massive piece, baked it and then threw the pieces into the food processor. The recipe for final assembly is the same as the bourbon version, below.
Keto Iced Lemon Rounds – We usually do a lemon cut-out with painted color sugar icing. But that’s a lot of time on my feet right now, so I opted for a shortcut – plain flattened rounds with simple uncolored brush-on icing. These are a new recipe – keto flour, monkfruit sugar substitute, and I iced them with confectioner’s grind monkfruit sugar sub/lemon juice/lemon zest. I like the way they turned out. Will probably repeat this in the future.
And sad news on this one…. Our fridge is infested with quality cheese mold. I’ve tried vinegar wipe downs, but pretty much any cheese or butter put in there in time will mature into a rinded cheese. It must live on other surfaces, too. I grabbed an older lemon for juice and zest. I rinsed it off prior to zesting, but that wasn’t enough. I theorize that mold spores were on it. While they are killed in anything baked, the icing for these was just the monkfruit sugar, lemon juice, and a bit of zest. Spores from the zest colonized the cookies, and in three days time (two days after the photo) the cookies developed blue cheese mold mottled spots. Not harmful, and not enough to ruin the flavor, but enough to make them unsightly and somewhat suspect. So next year, I will keep the zest lemon out of the fridge, and just to be sure – scrub it down with vinegar and rinse well with water.
Keto(ish) Mexican Wedding Cakes – It would be cruel to Certain Family Members to make a holiday cookie plate with only the full octane wedding cakes. So I did a keto-ish batch. This really should be labeled slimmed, not full on keto. It’s a mix of mostly King Arthur Keto flour, with a bit of AP flour for improved texture. This year I also added a tablespoon of heavy cream to the recipe I posted last year. That also made them a bit more luscious.
Slimmed Peanut Butter Cookies – Another family fave, but lightened. Like last year I started with the Joy of Cooking classic. Teddy natural chunk peanut butter all the way for flavor. But I used the 3:1 ratio mix of Keto:All Purpose Flour; and the monkfruit brown sugar/white sugar, minus about 10% in volume of the white to compensate for savage sweetness. And they worked out well, again.
Slimmed Oysters – Like last year this is pretty much my original hazelnut sprintz/chocolate ganache filling sandwich cookie, but with a couple of differences. I used 2/3 cup of granulated monkfruit based white sugar substitute, and 2/3 cup of the same brand powdered sugar substitute. In all of these bakes, I have I found the monkfruit sugar sub to be sweeter than regular cane sugar, so when I sub I use a tad less. In addition, I find that the granulated if used solo in a baked product can produce a bit of a gritty texture, so I go thirds to halfsies with their powdered sugar equivalent. That’s cornstarch-free, so it’s really just the same product, ground much finer. For these I used a mix of 1.5 cups King Arthur Keto baking flour, and a half cup of regular all-purpose flour (APF). This year’s addition was two tablespoons of heavy cream to loosen the dough a bit, for better performance in the cookie press. The filling this year was a 50/50 mix of Trader Joe’s 70% cacao dark chocolate and the ChocZero sugar-free keto chocolate.
Slimmed Cocoa Bourbon Balls – The other half of the keto cocoa cookie crumbs, pecans, powdered monkfruit sugar, cocoa, and bourbon. This is more or less the recipe I started with, but I prefer to use chocolate wafer cookies to vanilla ones (I will use crushed Nilla Wafers in a pinch). Again, this used the powdered monkfruit sugar, and to hold it together instead of light corn syrup I used agave syrup. Still sinful, but slightly less so than the corn syrup.
Keto Chocolate Chip – Another offering towards full-octane/slimmed parity. This is the chocolate chip cookie that’s printed on the ChocZero chip bag. It satisfies the chocolate chip cookie itch with a slightly cakey, not overly sweet bite. It does miss a bit on the caramel tones that develop in the traditional full octane recipes, but that’s a varietal difference – not a fatal flaw.
So there it is. FOURTEEN types this year. Some hits. Some near misses. And one solid OOPS. But a good group, none the less.
THE 2024 HOLIDAY COOKIE WRAP-UP (MORE OR LESS)
Time for the annual cookie roundup.
First, here is the cookie plate, photo courtesy of the Resident Male. Two plates, actually – one for the slimmed down cookies made at least in part with reduced carb ingredients, and a smaller one for “full octane” bakes, made with conventional sugar, all purpose flour, and chocolate.

We’re getting better at lowered-carb baking here, but in all honesty, the originals are better. For those on more restrictive diets than ours, note that this is LOWERED carb, not zero carb. I would not recommend my mods for someone who is under a strict regimen. We for example are not banned from carb consumption, we are just trying to cut down, not eliminate them completely. So with that, here’s the roll, with notes on changes to what happened before, and on the travails of lowered carb baking.
Lowered-Carb Plate
- Oysters. This is pretty much my original hazelnut sprintz/chocolate ganache filling sandwich cookie, but with a couple of differences. I used 2/3 cup of granulated Swerve white sugar substitute, and 2/3 cup of Swerve powdered sugar substitute. I find that the Swerve monkfruit sugar sub is sweeter than regular cane sugar, so when I sub I use a tad less. In addition, I find that the granulated if used solo in a baked product can produce a bit of a gritty texture, so I go halfsies with their powdered sugar equivalent. That’s cornstarch-free, so it’s really just the same product, ground much finer.
I also used a mix of 1.5 cups King Arthur Keto baking flour, and a half cup of regular all-purpose flour (APF). The Keto flour has a bit of a rye-like/bran-like flavor. It also absorbs liquids and fats differently. Some recipes require additional moisture. Some are overwhelmed by the fat content. The use of a little APF vastly improves cookie texture and flavor in both cases.
For the filling I made a standard 1:1 ganache with heavy cream and Choc Zero no-sugar chocolate baking chips. And a splash of vanilla. Worked quite well, but I recommend microwave melting for the Choc Zero – not stovetop melting. It scorches very easily. More on this later. - Buffalo Bourbon Balls (which we sometimes make with rum and not bourbon). Here is a similar recipe for a full-carb cookie. My modifications ended up being a two step process. Since using store bought vanilla or chocolate wafers was right out, I had to make my own to crumble for the base of this no-bake cookie. I used a recipe similar to this one, rolling the dough out into two giant rounds. Since I was going to crumble them up after, there was no reason to form individual cookies. I ended up having enough cocoa cookie crumbs both for this recipe, and for the base of a cheesecake I plan on making next week.
Other mods on this one included substituting toasted walnuts for pecans (no pecans were available the week I made these), using the Swerve confectioner’s sugar in place of the standard issue (and shorting that by three tablespoons), and using a scant quantity of agave syrup instead of corn syrup to glue the whole mess together. Please note though that even with these changes, a cookie with agave syrup and a significant quantity of booze cannot be considered truly slimmed. - Chocolate chips. Not the best success, but edible. Again, the standard Toll House cookie recipe, but using a 3:1 mix of Keto flour to APF; subbing in the Swerve equivalents of the brown and white sugars; and using the Choc Zero chips in place of standard bittersweet chips or chunks. On the sugars, I took the make-it-less-sweet bite out of the quantity of white sugar, leaving in the brown for flavor. I also divided the remaining quantity of white sugar in half between the Swerve granulated and powdered products.
Obviously these did not spread like standard drop cookie style choc chips. That has to do with the way the fake sugars play with the butter and moisture in the cookie. Next year I will add more liquid to the batter to see if that helps. Also the Choc Zero chips scorched a bit in the 375-degree-F oven. Next time I will not bake anything containing them at hotter than 325-degrees. Still, edible and not horrible. - Peanut Butter Cookies. I didn’t try to slim down the peanut butter component in these. I started with the Joy of Cooking classic. Teddy natural chunk peanut butter all the way for flavor. But I did use the 3:1 ratio mix of Keto:APF; and the Swerve brown sugar/white sugar, minus about 10% in volume of the white to compensate for savage sweetness. This is the first year I’ve done a slimmed down peanut butter cookie without having the baking sheet absolutely awash in oil, dripping down into the oven, making a mess, and threatening a fire. The texture on these was good – perhaps a bit less tender and more “digestive biscuit” like, and the flavor was spot on.
- Triple Gingers. Slimming down another of my originals here. With no zero-carb white chocolate chips to hand, I just used the regular. Ditto with the minced crystalized ginger. But for the rest I proceeded as per the chocolate chip drop cookie batter. Keto:APF; Swerve brown:white sugars (-10% of the white), and the rest. Like the chocolate chips, they retained their craggy ball shapes instead of spreading out nicely like my original recipe, but they have good flavor and texture.
- Russian Tea Cakes. The ethnic attribution on these overlaps so strongly that it’s hard to differentiate. But I will call this set Russian Teacakes because it used toasted walnuts in place of pecans (another victim of the Great Pecan Shortage this year). Again the Keto:APF flour ratio was changed, and the Swerve powdered sugar was deployed. The finished product was good, but the pecan-rich Mexican variant is so big a family fave that disappointment ensued. (See recipe below.)
- Earthquakes. Only minorly slimmed. I started with this one before departure, but I decided to use regular Trader Joes 60% cacao bittersweet and not the Choc Zero stuff for this one because the flavor and texture areso dependent on the cacao solids:cocoa butter ratio of the chocolate component. But I did do the keto:APF and sugar subs as with the others. Not quite as fudgy or crevasse ridden as the standard (like other keto flour containing cookies they don’t spread as well), but also in the acceptable range of results.
Full Octane Plate
- Brown Butter Chocolate Chunk Cookies. A specialty of Younger Offspring. No attempt to mod this recipe because it’s one of the all time best chocolate chip cookies out there, at the perfect intersection point of crisp and soft. Younger Offspring coarse chops the chocolate. It flakes and breaks, with the chocolate dust being just as valuable as the chunks to the finished product.
- Mexican Wedding Cakes. Miracle! Pecans presented themselves, and we HAD to do a do-over. This is the same base recipe as the Russian Tea Cakes above, but look at how well they spread. And they were just as tender, nut-rich, and luscious as they always are. (Recipe below)
- Orange Marmalade Cookies. No point in slimming these, either. Not when the recipe includes a full cup of orange marmalade. A nice light, citrusy compliment to the rest of the rich cookie plate.
- Cinnamon Bun Cookies. Yet another specialty of Younger Offspring. These are a wonderful rolled refrigerator slice and bake cookie. But the write-up has vanished off the original website and the recipe can only be found via the Wayback Machine. Skip the icing on this one. There’s absolutely no need for it. And how to get that magnificently even swirl? Surely it’s practice, Younger Offspring having made hundreds of these for charity fundraisers, but also this isn’t a two-dough cookie. It’s one dough, rolled out uniformly thin, and then smeared with a paste of cinnamon, sugar, and butter that’s about the consistency of peanut butter. Then rolled and fridged prior to careful cutting and baking.
Recipe – Mexican Wedding Cakes (also Russian Tea Cakes)
I posted this recipe about 20 years ago but the file appears to have been corrupted. Here is a refresh, with both the original and the slightly slimmed down version side by side. I can’t call the slimmed version a true keto or diabetic-diet-acceptable offering, and I can’t tell you caloric/carb count values. Just that it isn’t as impactful as the full octane version
I can’t even tell you the exact number of cookies that this will make. Lots. Enough to fill an 8-inch tin with a few left over. Especially if you make them the size I prefer for holiday cookies. Since we offer up so many kinds on one plate I make all of them rather small, so folk can taste several different types. I have a two-tablespoon cookie scoop (like an ice cream scoop but smaller). I take one scoop-full then divide it in half and roll both halves into small balls. I get about four sheets of 16-20 cookies. If I were to make these as part of an afternoon tea spread I would probably make them twice as large.
Ingredients for Regular Version
- 1 cup unsalted butter (not margarine)
- 3/4 cup confectioners sugar (plus more for rolling later)
- 1 tsp vanilla
- 2 1/4 cups all purpose flour (King Arthur recommended)
- 1/4 tsp salt
- 1 cup finely ground pecans (walnuts, or hazelnuts may be used but pecans are best)
Ingredients for Slimmed Version
- 1 cup unsalted butter (not margarine)
- 1/2 cup plus 3 tbs Swerve confectioners/powdered sugar equivalent or similar monkfruit based sugar substitute (plus more for rolling later)
- 1 tsp vanilla
- 1 3/4 cups King Arthur Keto baking flour
- 1/2 cup all purpose flour (King Arthur recommended)
- 1/4 tsp salt
- 1 cup finely ground pecans (walnuts, or hazelnuts may be used but pecans are best)
Cream butter. Add sugar (or sugar sub), and vanilla. Mix together thoroughly. Stir in flour and salt until mixture is uniform in texture. Stir in ground nuts. Chill until the dough is easy to handle.
Heat oven to 400-degrees F (around 204-degrees C). Roll dough into small balls of approximately 1 tablespoon each. Place dough balls on ungreased sheet of baking parchment on baking sheet. They can be placed about two inches apart because they will spread a bit into dome shapes, but shouldn’t flatten completely like chocolate chip cookies. Prepare a soup bowl or small mixing bowl with a quantity of your chosen powdered sugar for rolling the cookies.
Bake 10-12 minutes, until just set (watch these like a hawk after about 8 minutes). Cookies should look pale with just a tinge of browning around the bottom edge. They should NOT be brown all over. Let cool on baking sheet for a couple of minutes, then roll immediately in the prepared powdered sugar and set them on a baking rack to cool. When cool, roll them again then store in a plastic wrap lined cookie tin or similar storage solution. If kept covered they will be tender for about a week and a half, then slowly dry out. They will still be edible, just no longer soft.
REVISITING THE OYSTERS
This being cookie season it’s no wonder that this post is also about a family favorite, repeated year upon year since 2006 or so. This time, I attempted a slimmer version of our Oysters. That’s a hazelnut spritz sandwich cookie with a chocolate ganache filling – another sort-of invention of mine. The odd name came about the first year I did them. I didn’t grind the toasted hazelnuts fine enough, and bits of nut stuck in the dies of the cookie press. Lots of blobby, odd shapes resulted. We mated them as best we could. But the shapes and top/bottom format made the kids think of the shellfish, so the name stuck.
My original Oysters recipe is here.
Now there’s not much to be done to slim down the ganache – that’s just a strong bittersweet chocolate and cream, no sugar. Yes it has carbs, but a zero carb cookie is an asymptotic goal at best. Like the other cookies this week I subbed in the King Arthur Keto Wheat Flour for standard all purpose, and Swerve granulated (and powdered) sugar substitute for the white sugar. I generally use a bit less of the sugar sub than was called for in the unmodified recipe because I find the stuff to be sweeter than regular sugar. In addition, I ran out of granulated Swerve, and used a third of a cup of their confectioners’ substitute in place of that last half-cup of granulated.
And there was a small complication with the hazelnuts. They were locally unobtainable here this year, although had I known at the time I would have ordered on line from a specialty nut dealer. But fortuitously I did have enough leftover from last year and stowed in the freezer to do the recipe. I’ve used leftover nuts before and have not noticed any degradation in taste or performance, provided they are brought back to room temperature before toasting, chopping or otherwise using in the recipe being prepared.
Here are the hazelnuts after being rolled around and rubbed in a clean linen dishcloth. That flakes off lots of the brown inner membrane. While in an ideal world it would be totally removed, this amount is enough to avoid too many little brown flecks in the finished cookies, and to reduce the bitterness those membranes bring.

OK. So I made the batter. To get the right consistency I needed to add lots more cream than originally specified to achieve the peanut butter-like consistency. The dough needs to be just firm enough to pick up and pat into a log to insert into the cookie press, but still quite soft. Some years even with the “full octane” version I’ve had to add more than the recipe’s 6 tablespoons of milk or cream to get there. Perhaps the flour those years was drier than usual In any case, King Arthur does warn that recipes may require additional liquid to work properly with their Keto flour. I ended up using about 9.
I was very encouraged by the swift and easy cookie press action. One two-stop squeeze for each cookie, forming them fairly flew. Here they are unbaked.

Obviously I use one of the larger hole dies for the cookie press to avoid a repeat of “the oyster problem.”
On to actual baking. That’s where things began to be noticeably deviant from standard. Like the peanut butter cookies for this year and the two prior, these cookies sweated a lot of oil. I might have been able to reduce the shortening in them, but once a batter is mixed you can’t get it out again. They floated around on the surface of the silicon baking mat, in effect frying in that oil.
Here’s the last sheet with the stragglers. Admittedly I let that sheet go a minute or two longer than I should have – the cookies shouldn’t be that brown around the edges. And that odd man out is the last cookie – the traditional cook’s share – fashioned from the remaining bit in the cookie press that can’t make it through to true cookie form.
See those droplets on the mat? That’s fat exudate from the cookies. It’s hard to see but there’s a lake of it on the mat.
Still the cookies were cohesive and semi-attractive. Now, how did they taste?
Sadly, like the gingers, peanut butters, and chocolate chips, only a glimmer of their true selves. That ubiquitous cardboard-rye taste of the Keto flour overwhelmed the hazelnut flavor. They look ok, but to me at least they are yet another disappointment. Obviously the chocolate ganache will punch them up a bit, but that won’t happen until next week. I am delegating filling these to Younger Spawn, whose baking expertise is far in advance of mine. It’s best not to fill these too early because they do change texture as moisture from the ganache seeps into the spritz cookie.
I’m done with the slimmed portion of the cookie parade. That’s three years in a row I’ve attempted to make a less sinful cookie, and three years I’ve not been satisfied. I am afraid the answer may be not trying to re-engineer the cookie. It may be just to not make them anymore. This may well be the last year for ten types of cookies. Especially considering that the Keto flour and sugar substitute are four times as expensive as regular ingredients. Perhaps next year I will go full octane, making the originals but only as half- or quarter-batches of five types, and no longer share the largesse.
A SLIMMED DOWN GINGER
No, I’m not going to write about a red-haired friend embarking on a diet and exercise program. This is one of the holiday baking posts that intrudes on the otherwise fiber-filled menu here at String each December.
Back in 2018 I mashed together several thoughts and came up with another more or less original cookie – the Triple Ginger White Chocolate Chip. I posted the recipe for it in 2019 after two full and successful holiday cookie test runs.
The dough for it is of the same basic type as a chocolate chip cookie, perhaps a bit lighter on the brown sugar, with added cream for more richness, and three types of ginger – dry ground ginger, minced candied ginger, and ginger juice – to give it kick. As I had done them before they were delightfully sharp and gingery, lighter than gingerbread, with the white “chocolate” morsels acting sort of like internal frosting, bringing little bursts of sweetness. They quickly became a family favorite, and I’ve done them every year since.
This year, the third year I’ve been attempting to bake at least some of the cookies in lower-carb incarnations of their former selves, I tried to reduce the caloric load of this cookie. I had dismal results in previous years using various mixes of almond and coconut flour for other cookies. A few were absolute failures, but I was encouraged this year by the introduction of King Arthur Keto Flour. I haven’t used it for bread, roti, or tortillas yet, but that may eventually happen. I have tried the recipes they posted for it on their website, for pie crust and chocolate chip cookies. Neither was good enough to post links for them. I also used various Swerve brand monkfruit based non-sugar sweeteners.
The Keto flour and the Swerve granulated, brown and confectioners sugars all claim to be near analogs in baking – in theory they can be subbed one-to-one for conventional products. In practical use, not really. More like “kinda” and “maybe.” To start with I find the Swerve products are sweeter than regular sugars. And the King Arthur Keto flour isn’t as hydrophilic as normal wheat flour (it doesn’t suck up as much moisture or fat). It also browns faster, but doesn’t leap from raw to burnt the way almond and coconut flours do. In fact, it does ok for dusting and pan frying – something the other flours totally fail.
As a result I tend to tinker with conventional recipes when subbing in these products. I will scant the quantities of the fake sugars by a tablespoon or two, and tinker with the liquid and fat levels when I use the fake flour to avoid a sticky, greasy dough.
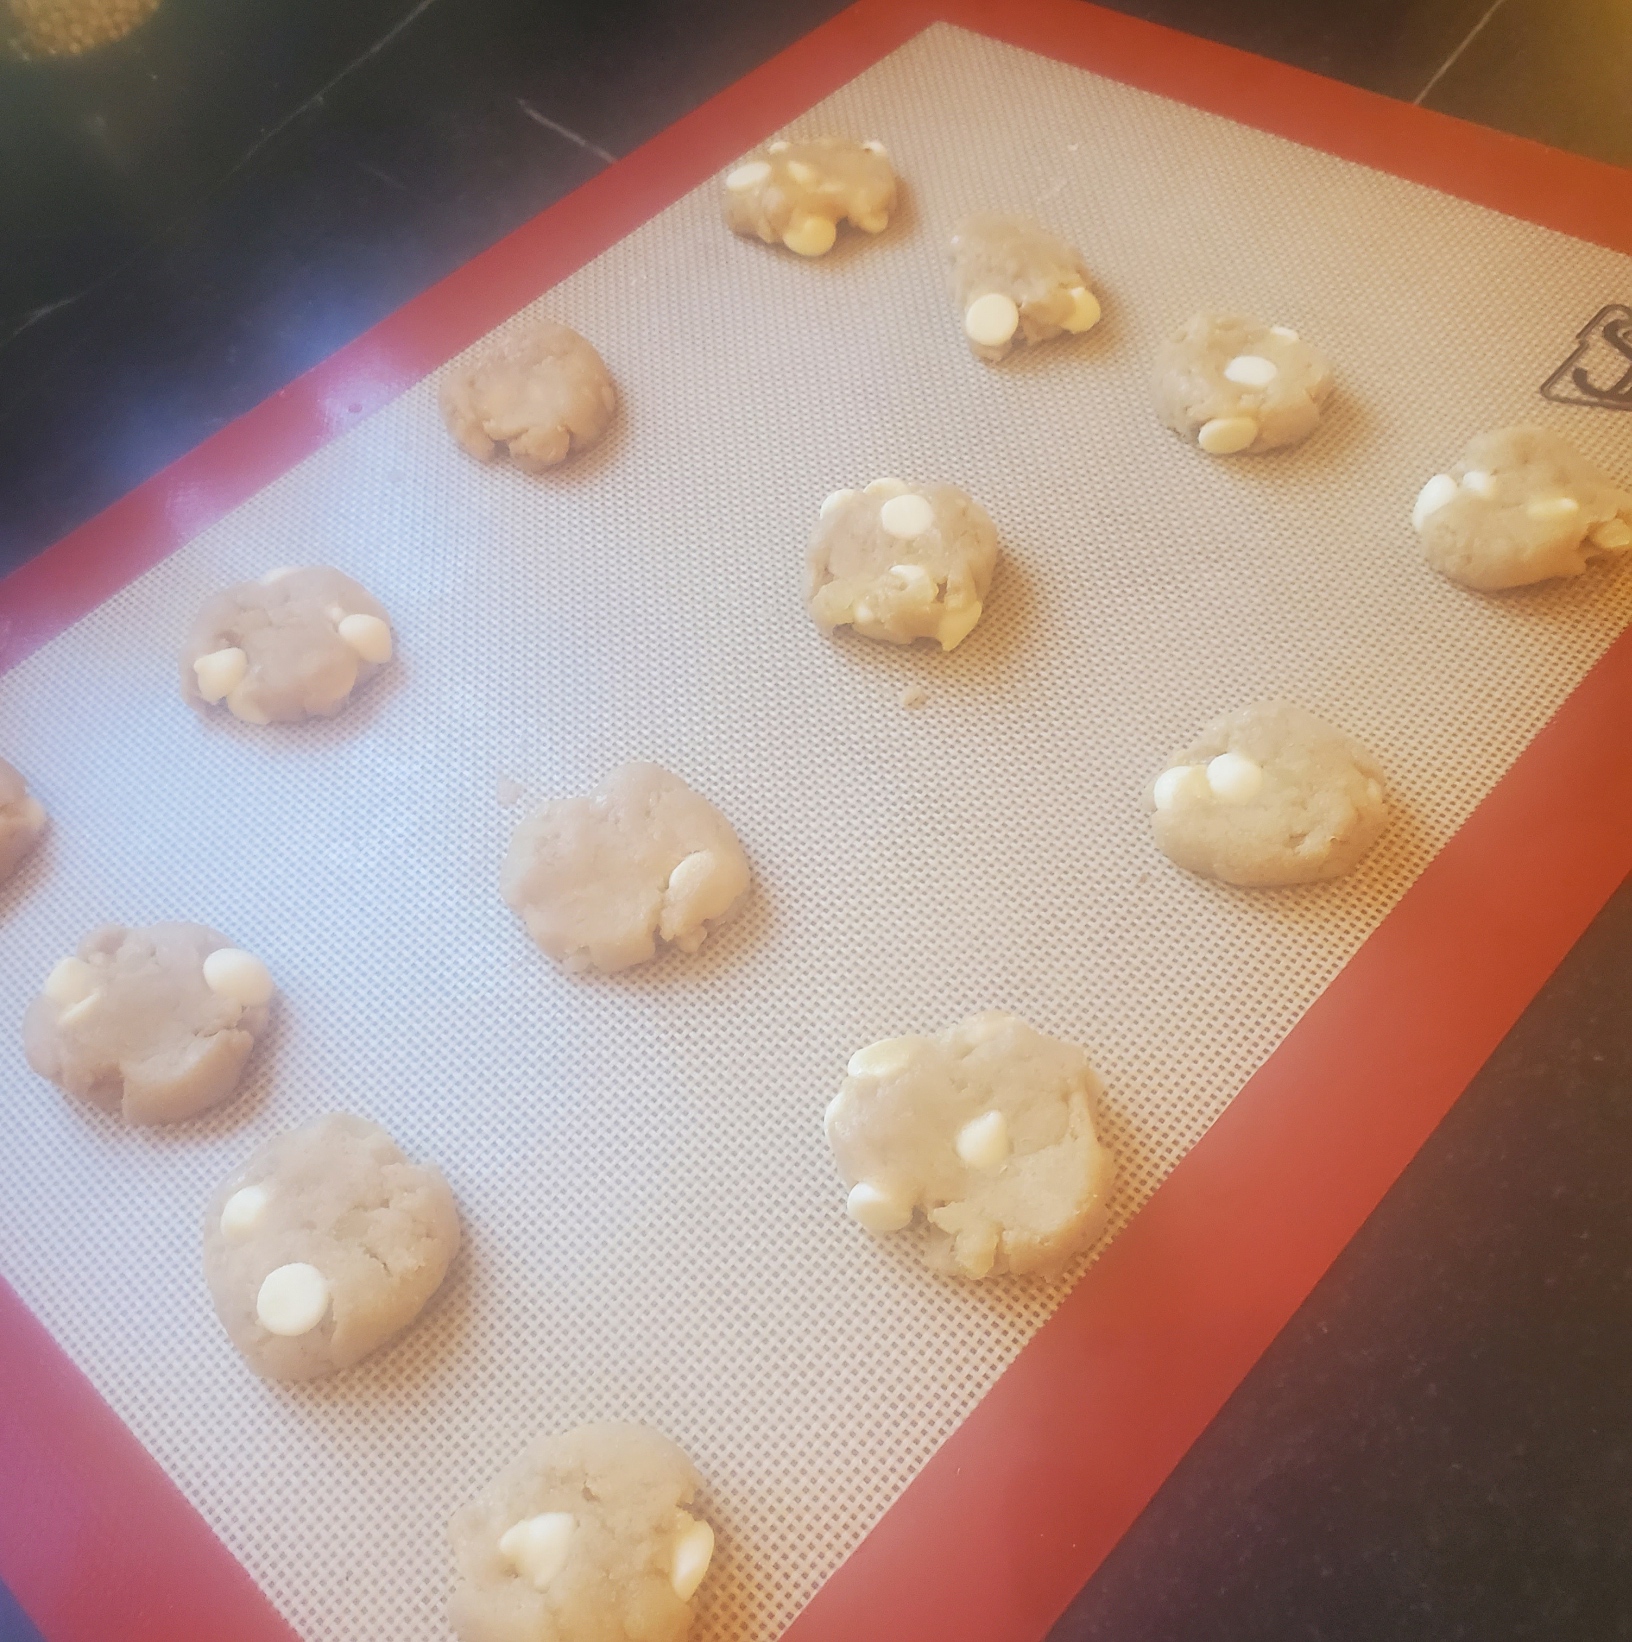
Here is the cookie dough for the Triple Gingers this year, with amendments. I used my original but I left out a tablespoon of brown fake sugar and two of the white fake sugar, and added an extra tablespoon of cream:

It looks pretty normal, although the dough isn’t “sticking” to the chips like it usually does. But I continued on. I always fridge this type of dough overnight before portioning it out and baking it.
I did the usual – scooping using my 2.5 TBS dough scoop (like a little ice-cream scoop), then dividing the lump in half and rolling it into two balls. We like small cookies at holiday time because there are 10 types on the plate. Little cookies let folks sample without being overwhelmed.
Usually what happens with these drop cookie doughs is that if I make a generally round-ish ball, it melts during baking to yield a flatter nicely circular cookie. Here’s a picture of the Triple Gingers from a previous year to illustrate:

And here are this year’s. But not even the first most lumpy batch. That set went into the oven and then emerged in exactly the same shape – misshapen balls. No melting, no spreading. So when I made the second batch I flattened them with the heel of my hand. Again, no melting, no spreading. They may be blobs, but at least they are somewhat cookie shaped. Second and third batches seen before (left) and after baking (right):

Not my most attractive product, for sure. To be fair, I did notice that the King Arthur Keto chocolate chip recipe didn’t make spreading cookies either, but I thought that was because I did something wrong. Those also just didn’t taste right. Kind of like I had used rye flour and cardboard by mistake, and with the texture of a store-bought packaged cookie, and not a comforting home-made one.
Back to the Gingers… How did they taste? I sampled (of course). While they are ok, they are not as they should be. They don’t have the cardboard/rye flavor I didn’t like in the chocolate chip cookies, which is good. But they don’t have the ginger punch of my original recipe, and I suspect they will get hard quickly. They are sweet, with a pleasant caramel note, but that note reduces the ginger to an afterthought. Ugly and disappointing as they are, they are still serve-able, and will take their place in this year’s cookie line up. But obviously more tinkering is warranted. Between the differential take-up of the butter by the flour, and the performance of the fake sugar, successful adaptation will take a lot more than just dumping more ginger into this recipe.
And as a last note – remember I said that the dough didn’t hold onto the chips? I had to jam them in, which is why so many are on the surface. When I was done forming the cookies I had a puddle of extras left behind. I’ve never seen that happen before with any type of morsel-bearing cookie.
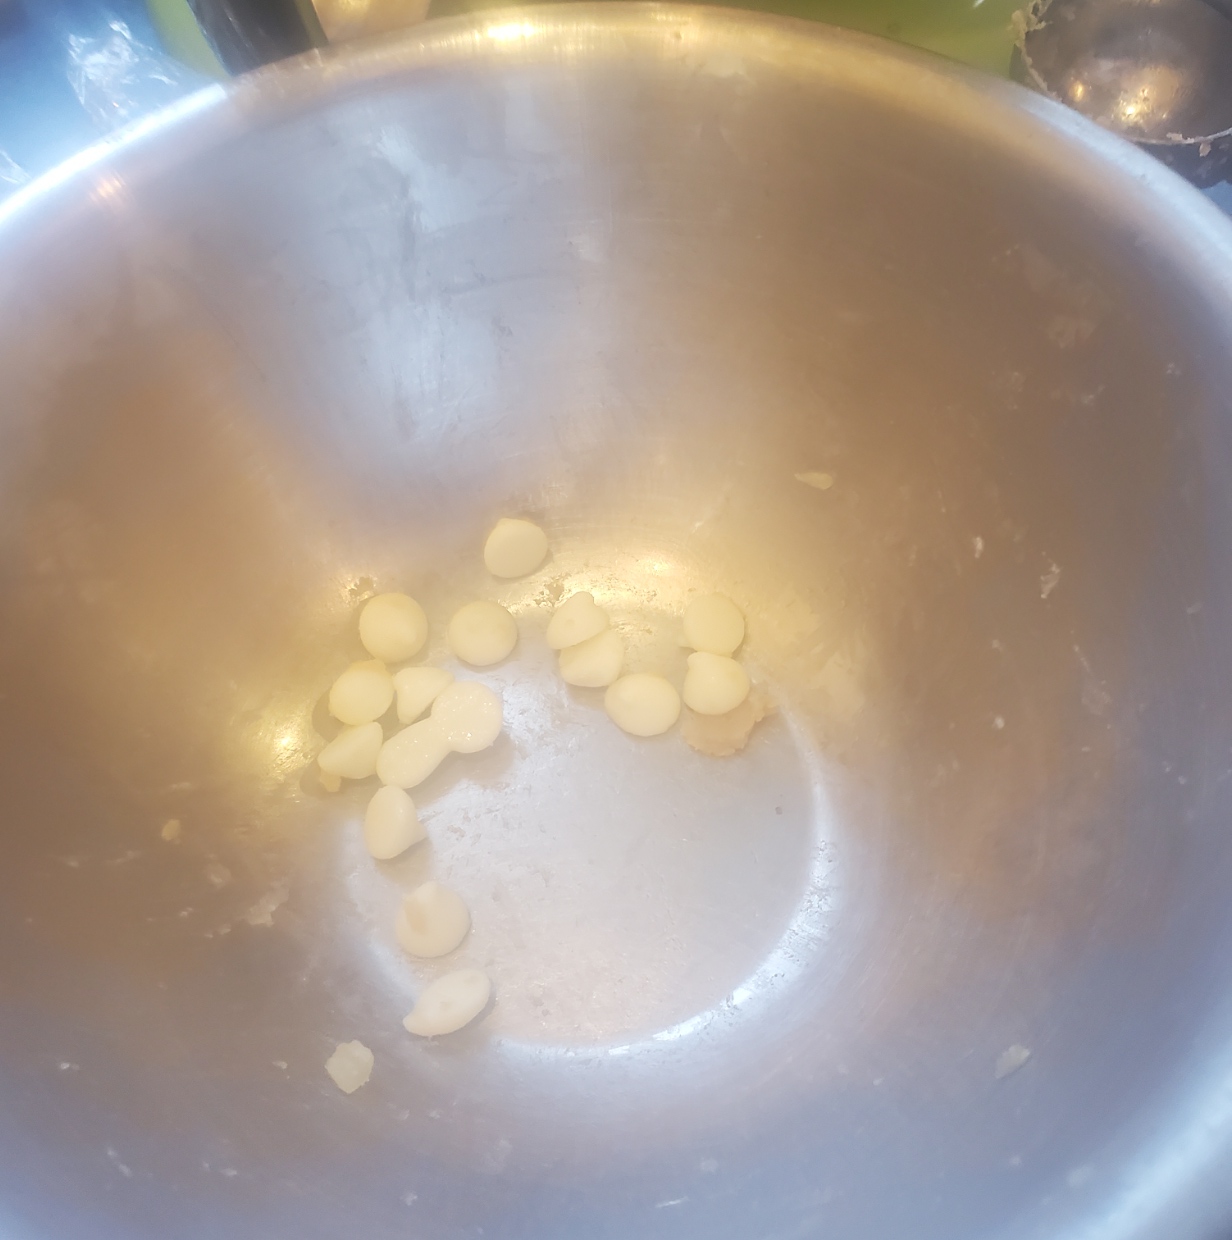
And I think I should get a medal for not snacking on them as I finished the bake.
A BUSY DECEMBER
One of my periodic “where did I go” posts, reporting on everything and sundry that kept me from regular blogging.
Baking
First because I know there are cookie fiends out there just waiting for this year’s round-up, I present Cookie Plate 2022, arranged on the fused glass bison presentation dish given to us by my sister and brother in law. I use it in tribute to the resilience of my Buffalo, NY family and friends, enduring their second (and twice as bitter) lash of winter weather since Thanksgiving. May the lights and heat stay on and may the driveway finally learn to shovel itself!

Starting from the yellow and blue stars just above the bison’s head we have:
- Keto cutouts. I used this recipe this year, no “real” flour or sugar. I did make two enhancements, though. I put finely grated lemon zest in the cookie batter, and mixed the icing using powdered monkfruit based sweetener with lemon juice (and a dash of food coloring). Light and lemony. This dough worked relatively well for the simple star shapes, but it’s a bit on the cakey and fragile side, and would not be at its best if used for a cookie cut with an elaborate design, or with one of the plunger-style cutters that also embosses an impressed design. The icing too was a bit harder to handle than the confectioners’ sugar standard.
- Mexican Wedding Cakes. I subbed the monkfruit sweetener inside and used about a third almond flour in place of the regular all-purpose flour in this recipe, but dusted with confectioners’ sugar because the substitute doesn’t do that well for dusting. So I’d call these slightly slimmed down, but not keto.
- Keto peanut butter cookies. Last year’s recipe turned out rather poorly, so I tried a new one this year. Better results. Still a bit cakey-crumbly, but the taste and texture are better.
- Earthquakes, the name by which what most folk call chocolate crinkles are known in this house. Again not much seismic cracking this year, but the brownie-bite taste and texture were spot on. The usual recipe. Full octane – no slimming.
- Cinnamon bun swirls. This one is a specialty of the Younger Offspring. Clever fingers and exacting methods make those mathematically perfect spirals. These instructions but we skip the recipe author’s icing, The cookies are sweet enough as-is. Hint for avoiding the flat-tire look – slide the long rolls of this refrigerator cookie dough into the cardboard tubes from paper towels. They firm up nicely round without flattening that way.
- Triple Ginger White Chocolate Chip. My own invention. I love these, even though they are not chocolate. 🙂 I did slim these down a bit by using monkfruit brown sugar replacement instead of the real stuff. But the white chocolate chips probably make up for that little bit of virtue.
- Bourbon Balls. A family standard that I’ve made every year since I began baking holiday cookies from recipes more or less like this one. Since they start with crushed Nilla wafers and have a cup of bourbon in them they will never be full keto, but I did slim them a bit with sugar substitute. Note that these are also good with many other nut/cookie/liquor combos, with or without the cocoa. Chocolate wafer cookies/pecans/Chambord. Almond biscotti/almonds/amaretto. Nillas/hazelnuts/rum. One hint – they improve with long curing. Make these up right after Thanksgiving and put them in a tightly sealed tin. Then hide them until the end of December. Your forbearance in not gobbling them down right away will be rewarded.
- Jam thumbprints. Another contribution of Younger Offspring. This time the clever fingers fashioned heart shape wells, which were then filled with raspberry jam. A very buttery and light shortbread compliments that fruity goodness. Full octane. When I extract the recipe from the cookie artist I will post it here, but by the time this last cookie was baked, I was distracted and didn’t make a note of the source.
- French cocoa macarons with almond buttercream filling. Oh so good, and oh so sinful. Again Younger Offspring steps up to bat with authentic technique off a memorized recipe. Even the almond paste-based buttercream was extemporary. Obviously the Padawan has far surpassed the teachers.
- Chocolate chunk. This one started with the traditional old school Nestle’s Toll House original recipe (the one that still called for 1/8 tsp of water). No slimming and no nuts in this one, but about a third of the weight of chocolate chips was replaced by Trader Joes’ Cocoa Nibs. The remaining chocolate was chopped cold, making lots of chocolate dust, and tiny fragments. That really helps the flavor distribute itself throughout the whole cookie. The big hint on this one (aside from chopping) is to fridge the batter overnight, and roll it into uniform size balls rather than employing the two spoon/drop method. Much more uniform results.
- Yes there are 11 this year. We couldn’t cut a family fave to make the goal of ten. My Oysters. A simple hazelnut spritz with whipped bittersweet chocolate ganache filling. Slimmed a bit by using monkfruit sugar instead of about half of the regular white sugar, and a third almond flour instead of 100% all purpose flour, but it’s hard to call these virtuous.
I also made a keto lemon-chocolate swirl cheesecake, with a hazelnut/almond flour crust. I forgot to take a picture of that, and now it’s gone.
Not Baking
Aside from cookies, I had some knitting and crochet projects going.
First, as a favor to my mom, an old school knitter from the days of Knitting Ladies who sat by your elbow throughout design selection, customization, swatching, and execution to gauge. I didn’t do those earlier stage support functions but I did do the last and most important one – finishing. Taking the individually full-fashion knit pieces, seaming them together and adding final details like collars. Mom had completed but had not assembled two sweaters, intended for my nieces. I helped those projects over the goal. Both are adult size. Now that they’ve been bestowed, I can break silence and post them here.

Also with almost all of the squares complete, I have begun assembly for the I’ll Be Watching You sofa cushion.

More on this as I get more strips put together. Note that some rethinking happened. Due to color assortment challenges, we added two more units to the mix to make 12 individual color layouts, and upped the cushion width from 11 to 12 units. Needless to say that required a few more squares than I originally planned.
Other Accomplishments
Let’s see. I visited my mom in Florida the second week of December. We had a good time together, and even managed to hijack the Palm Beach area family for a dim sum brunch over the weekend. Why I have no pix from the week, I don’t know. I guess I tend to live the moment and not document unless I’m a spectator. But I think the visit was appreciated, productive, and satisfying. Next time I promise to be a better chronicler.
As spectator, I cheered on The Resident Male as he prepared an epic feast for Christmas Eve. His menu is here. When Henri, our Guest of Honor emerged from the oven, he had celebrity status. Everyone documented him.


We also went to see a performance of The Boston Pops. It was a delight.


And as usual, we maxed out on holiday festivity, aside from food and drink. We lit candles (hard to see the fully illuminated menorah due to frost on the window). We did the tree. We had the fun of opening presents from each other. This year abetted by Fernando’s mom Carm, who is happy to be away from Lackawanna and the worst of the weather there.


ADVENTURES IN BAKING
As long time readers here know, I have a standing promise to provide ten types of home-baked cookies for the holidays. For the most part, we’ve been evolving a series of family favorites, and year on year are moving those closer to perfection. But this year we’ve opted for a disruption.
Keto baking. Kind of.
We’ve decided to slim down the annual carb-fest that is the holidays. We were not dogmatically inflexible about it, but we did try to make the cookie plate a bit leaner this year, without sacrificing the comforting festive level of indulgence, and leaving some unaltered so we could share them with nut-allergic friends. Some recipes were standards we modded with our own substitutions. Some were new – cognates of known faves, but composed and published specifically for no carb/low-carb baking. Not all were entirely successful, but we did have some very pleasant surprises.
Among our discoveries were the handling properties of the various flours, a disagreement with a claim of 1:1 equivalency for the sugar substitute we used, and what Xanthan Gum actually does. This post may be helpful to others who want to try this adventure. I know it will help me remember this year’s pitfalls if/when I try it again.
As usual, I was greatly aided in this endeavor by Younger Offspring, whose baking acumen now far surpasses mine. The padawan has truly become the master.
First, the group portrait:

1. Earthquakes – more commonly called Chocolate Crinkles. Full octane. We didn’t play with this recipe, this one used standard all purpose flour and real sugar. There are many variations of this recipe out there. Ours, from long time pal Kathryn, uses butter and not shortening. I now use Dutch process cocoa in it for an extra cocoa-kick. Very much like one-bite brownies and much loved.
2. Orange Marmalade cookies. Also not slimmed. After all if the recipe calls for half a jar of marmalade to begin with, there’s very little point in making emendations around that. This is a burst of fresh sunshine, sweet but not overpoweringly so, and a nice contrast to the others. I use this recipe, and with it polish off the jar of marmalade that also contributed to the apple-orange Anonymous Apple Pie back at Thanksgiving.
3. Oysters. My own invention. A hazelnut spritz so named because the first time I did them I didn’t grind the nuts fine enough, and they were weirdly blobby in shape. This year’s are slimmed down from my original recipe, with Swerve sugar substitute standing in for the granulated white sugar, and 3/4 cup of almond flour being substituted for one of the two cups of all purpose flour. I didn’t tinker with the ganache filling with a splash of Frangelico, but we did whip it to make it more airy, mousse like and less dense than usual. The result was very light, delicate, and cake like, much softer and tender than the normal spritz cookie texture. The dough however was a nightmare to put through the cookie press, with three tries and extensive profanity needed to achieve one useable cookie shape. If I do this again next year I might introduce a bit of Xanthan Gum to add more structure to the dough. Even with that painful birth, the result is quite pleasant. Worth further exploration.
4. Keto Linzers. This one is new this year. Although we substituted a reduced sugar, no fructose, whole fruit mixed berry/cherry preserve for the home-made filling, we followed this recipe. We reduced the amount of sugar substitute a bit because we are finding that it is in fact sweeter than cane sugar. The dough was very sticky and rolling between pieces of baking parchment or waxed paper is an absolute necessity, along with lots of extra coconut flour to keep the dough from adhering to the paper. The resulting cookies are delicate (this seems to be a standard characteristic of these alternative flour baked goods). These turned out nicely. A do-over if we bake keto again.
5. Mexican Wedding Cakes. A family standard, this year slimmed down. Except for the confectioner’s sugar on the outside. I used the family standard recipe, much like this one, but substituted 3/4 of a cup of almond flour for one of the two cups of all purpose flour, and Swerve buzzed down in the food processor for the powdered sugar in the dough. They flattened out a bit more than usual in baking, making buttons instead of more rounded/domed usual shapes, but are still as tasty, fitting the bill for this must-have.
6. Cocoa Macarons with White Chocolate Ganache Filling. I was just a observer on this creation. I am very impressed by Younger Offspring’s ability to leap into Fine Baking, and the associated display of piping skills. These by their nature are almond flour and egg white. The results of this recipe are spot-on in taste, with the occasional crackled top being a product of our very imprecise kitchen scale (note to self – this thing is due for replacement). The white chocolate ganache was enhanced by a dollop of raspberry liquor.
7. Cinnamon Swirls. Another specialty of Younger Offspring, these are thin and light, with a profound cinnamon kick that benefits from the addition of orange zest to the dough. Full octane – this one had no subs. The Offspring uses this recipe but leaves out the glaze – the cookies don’t need it.
8. Lemon cut-outs. In previous years we have made the Joy of Cooking sugar cut-outs, with lemon zest in the cookie, and icing made from confectioners sugar and lemon juice. This year we did a total keto cookie instead – this one, complete with icing made from the Swerve sugar substitute and lemon juice. This is the cookie that really demonstrated the difference that Xanthan Gum can make. Although the dough was slightly sticky, the gum gave it structure much closer to that of a dough with gluten-bearing flour in it. It was much easier to handle, roll, and cut than the similar no-gum dough for the Linzers. This dough also retained the cut-out shapes better during baking than the Linzer dough, which spread a bit more.
9. Not Your Average Toll House Cookie. This was our own minor modification. We start with the classic Toll House cookie dough, and we used real sugars and all purpose flour, but instead of loading them with semi-sweet chocolate chips, we used unsweetened cocoa nib chips from Trader Joe’s, plus a handful of the semi-sweet chips, well chopped. The result were these zebra-striped buttons. They are more cocoa bitter than sweet, and intense. An excellent “grown up” chocolate chip cookie that’s delicious with coffee, tea, or wine. I hope TJ’s offers the nibs again next year so we can engineer a do-again (they do have a habit of introducing something wonderful that then vanishes.)
10. Triple Gingers. Again, the ones I invented a couple of years back, but slimmed, with Swerve brown and white sugar substitutes, plus using 1 1/3 cup of regular flour plus 1/3 cup of coconut flour in place of the 2 1/3 cup of flour in the original. I also upped both the powdered ginger and ginger juice a bit. This was one of the first sub-in cookies I tried, and the one in which I discovered that the sugar substitutes are sweeter than real sugar. If I do these again, I would dial back the amount of both brown and white sugars because I prefer a lower sweetness level. (Side note – this was one cookie I had made surplus of last year and froze, so I was able to compare the full octane version and the modded version side by side. The difference was profound, so I do now firmly doubt the Swerve claim of “1:1 substitute for regular sugar in cooking and baking.”
11. Peanut Butter Cookies. Yes, we lost count along the way and ended up with eleven kinds this year. This was a new keto recipe, and by far the least successful of any we attempted. I used this one, with poor results. I used Teddy natural chunky peanut butter, an excellent local product I’ve used in baking for years (ingredients are just peanuts and salt). Note that the recipe did specify a natural style peanut butter. I followed the directions exactly, and used the amount of coconut flour indicated. The resulting dough was a bit softer/stickier than my usual, but not unreasonable to handle, and I was able to roll small balls and press them, although I ended up marking them with a fork as indicated instead of being able to use my usual cookie press (they stuck to that). BUT when I baked these, they exuded gushers of oil – so much that the cookies floated around and oven-fried rather than baked, and the oil overflowed the cookie sheet. I took them out just when they were cohesive and just a tiny bit brown on the edges, and rack cooled them – they were still dripping. After all of the oil lost in baking the result was dry and unappealing, with surprisingly little peanut flavor. I do not recommend this recipe, and don’t think it’s worth any further effort. If we go keto again next year I will look for a different peanut butter cookie.
Bonus Panforte: To round it all out, we did rescue from the freezer the second of the two panfortes I made last year. Obviously not keto – not by a long shot. Younger Offspring again demonstrated piping skills, using the leftover dark and white chocolate ganaches to adorn the top. We didn’t serve it on Christmas Eve, but we will certainly cut into it now, and save a goodly part for New Years Eve dinner as well.

So to sum up – some hits, some with room for improvement, and some misses. And yes – we do now have enough cookies to last forever. Again.
AT LONG LAST, LONG GREEN IS DONE
Not quite a record for the interval between commencement and completion, but close – but after years of languishing, my long green sampler is complete, signed and dated.
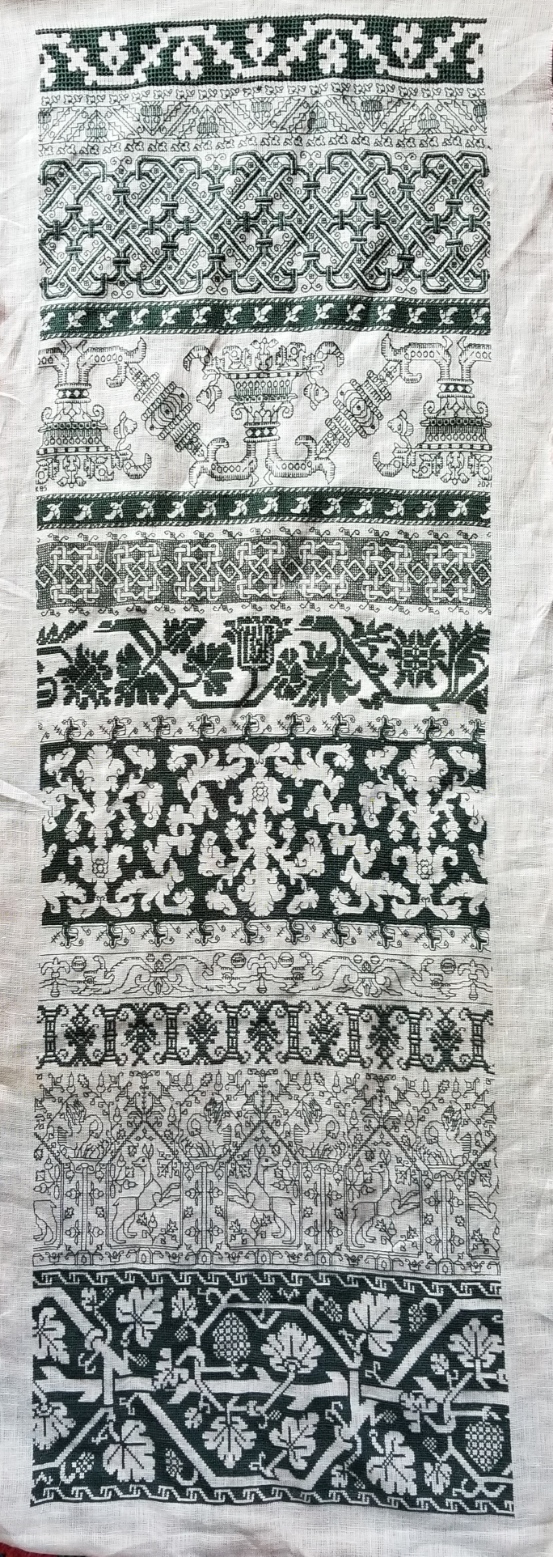
I used Au Ver a Soie’s Soie Alger silk thread, 40×42 count linen (you can see the slight distortion), and began it on 11 Feb 2012. I employed several stitching techniques including double running stitch, long armed cross stitch, plain old cross stitch, Montenegrin Stitch, and Italian four-sided cross stitch (pulled very tightly to achieve a meshy effect, and worked at two scales) . All of the designs here except the top one will be appearing in my ever forthcoming The Second Carolingian Modelbook. The top panel is from The New Carolingian Modelbook.
Long Green will languish again for a bit before I finish it off for display. Given that there is only about an inch of fabric at the bottom, due to the unfortunate destruction that happened over the years the thing sat waiting for me to resume stitching, I do not have enough fabric to frame it on a stretcher. And I really don’t want to frame it with a mat. With a stitched area of 10.5 x 34 inches (26.7 x 86.4 cm) that would be a very awkward and expensive piece. With the sewing machine out for the duration until our basement remodel is complete, I’m shelving this and moving on.
So. What to do next?
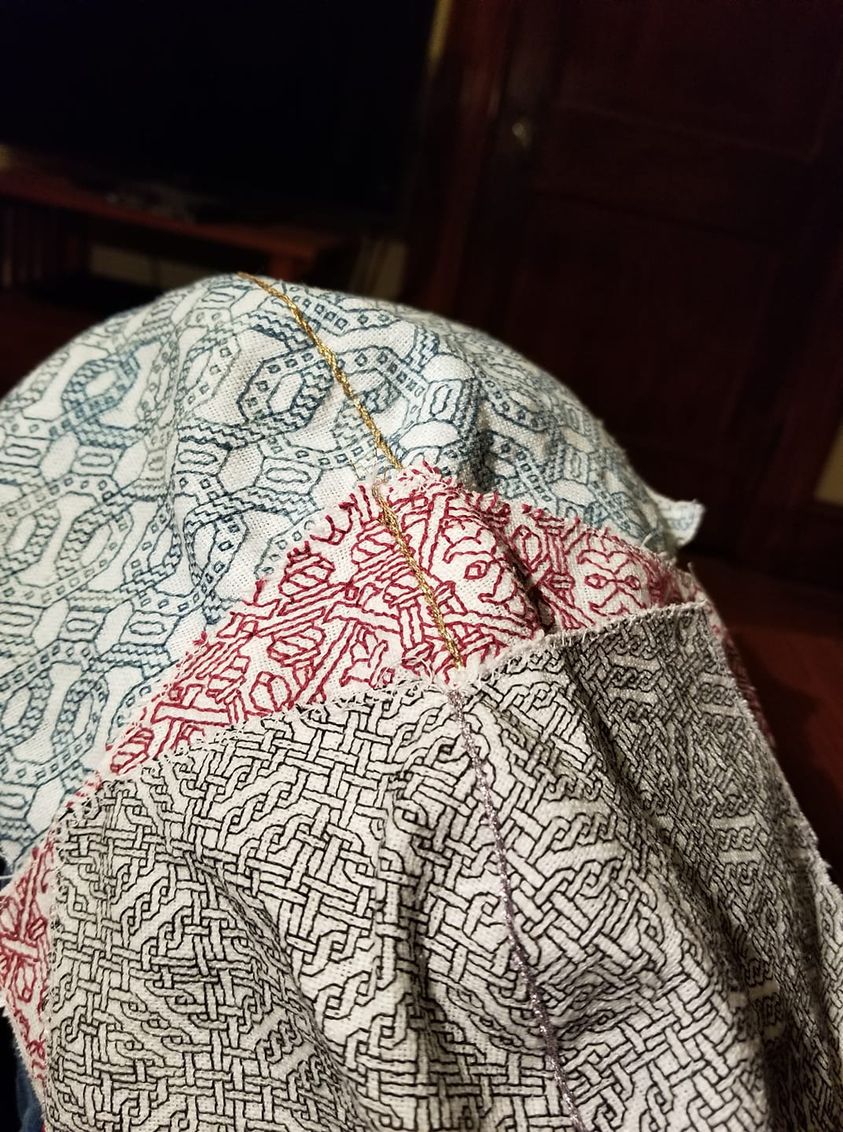
A couple of weeks ago I ran into a small DMC tote bag kit on our town’s freecycle/reuse/give-away exchange. I snatched it up. Although I didn’t want to stitch the rather boring roses intended, the kit with its big-as-logs 32 threads-per-inch evenweave was perfect for other counted work.

The bag itself was 90% assembled, and fully lined. There was an unfinished area at the bottom of the lining to allow access to the inside of the bag, to make working easier. But it was insufficient. I tried, but was unable to either hoop or work in hand as the kit stood. So I separated all of the side seams and laid the whole bag out flat:

I basted guide lines at the longitudinal center of the bag, and a half inch all the way around the edges. The total stitching area is two sides, each about 8.75 x 10 inches (21.6 x 25.4 cm). I am unsure if I will work just one design on this, front and back; or if I will do something different on each side. But the intent is to stitch, then use a decorative seam stitch on the visible parts, and a less fancy treatment on the heavier white twill lining, which won’t be very visible after the whole bag is put back to rights.
This being a rather small project, it doesn’t fit nicely in my sit-upon hoop, so I am working it in my hand held 6 inch (15.24 cm) hoop. Slow going compared to the two-handed approach I prefer, but even so this should be done quickly.

Here’s what I have so far. Two strands of standard DMC 310 black. I wanted the outlines heavy and prominent because I am considering working an open voided ground in a second color behind. At least for this all-over. And yes, it’s yet another T2CM pattern.
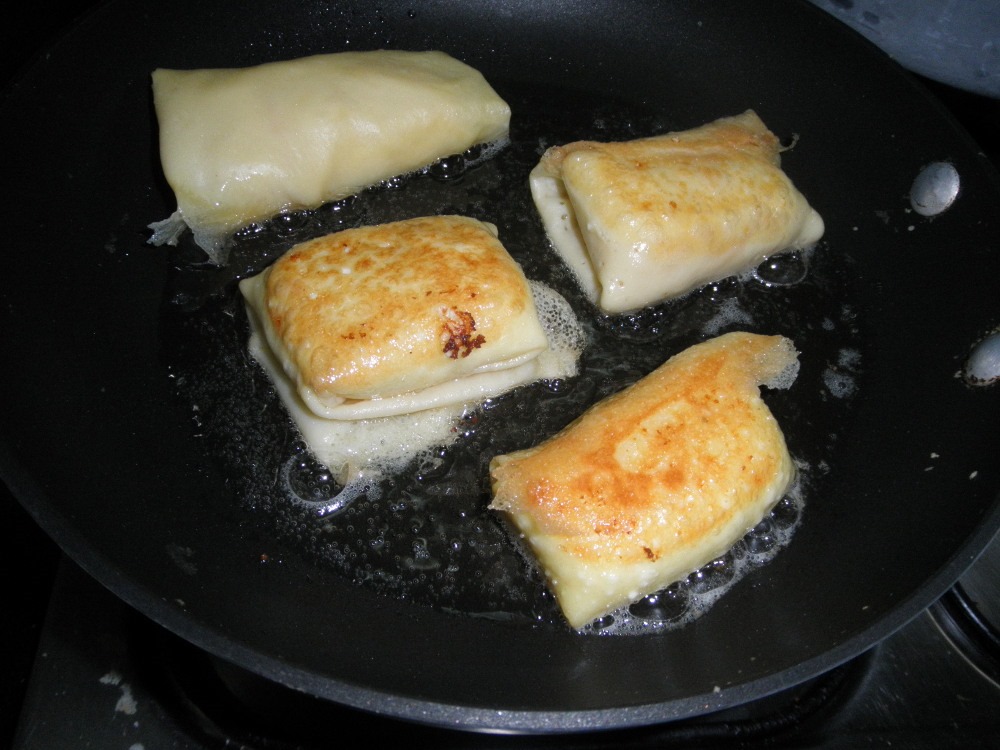
And finally it being eating season, both with first-run and leftover bounty, to celebrate the end of the Passover season, I transformed our leftover pot roast into a rather curious family specialty. Meat blintzes. It’s the standard blintz crepe outside, but with a mix of finely chopped leftover cooked pot roast, any remaining potatoes and carrots or onions that cooked with the roast, a handful of cooked rice, and just enough leftover gravy to keep the filling moist inside. I know of no one else who had this way of eking out an extra dinner in this manner. I suspect my grandmother or one of her sisters faced with hungry kids and a quarter pound of meat, made virtue of necessity, and passed their discovery down to me. There’s no real recipe here – it’s just doing the best with whatever leftover meat and sides are available.

So now I have about 3 dozen in the freezer, to be defrosted and pan-sauteed to finish prior to serving. Obviously these are not intended to be accompanied by sour cream. Instead, as a quick to fix/light dinner course they are usually preceded by a big bowl of chicken soup (also pre-made and stowed away against need), and are accompanied by a vegetable side dish.
If you are looking for the recipe for the blintz skins/crepes and a more traditional mixed cheese filling, it’s here. Just to be evil and make you extra hungry, I leave you with what they look like during the final sautee:
DECEMBER SLIDES INTO HOME
A hectic month and a miserable year come to a conclusion. But not without completions.
First, as promised in the last post – a family photo of this year’s cookies. I tried to have smaller batches of only ten kinds, but was foiled by a concerted group effort.
Working it clockwise (recipe links for most of these can be found in my last post.

- Noon – Lemon cut-outs, magically maniacal. Special thanks to friend Laura Packer, who sent me the twisted cutters. Oh, and bonus tiny leaf (see below).
- 1:00 – Chocolate pudding cookies. A surprise addition courtesy of Elder Spawn, who for a first fling into the communal cookie pile, did quite well with an intensely fudgy bit of delight.
- 2:00 – Orange marmalade cookies with fresh orange icing.
- 3:00 – Cinnamon swirls. A specialty of Younger Spawn, who dazzles with flavor and presentation.
- 4:00 – Mexican wedding cakes.
- 5:00 – Classic Tollhouse chocolate chip cookies
- 6:00 – Our Oysters – a hazelnut spritz sandwich, with dark chocolate ganache filling
- 7:00 – Meringues (also see below)
- 8:00 – Bourbon/cocoa balls
- 9:00 – Triple Ginger/white chocolate cookies
- 10:00 – Earthquakes – Most folk call these “chocolate crinkles” but we like the more dramatic nickname. For some reason the crevices closed up. Possibly due to overbaking this year. My cookie, my fault.
- 11:00 – Peanut butter cookies
- Center of dial – Jam thumbprints, with mixed berry jam. Another contribution of Younger Spawn.
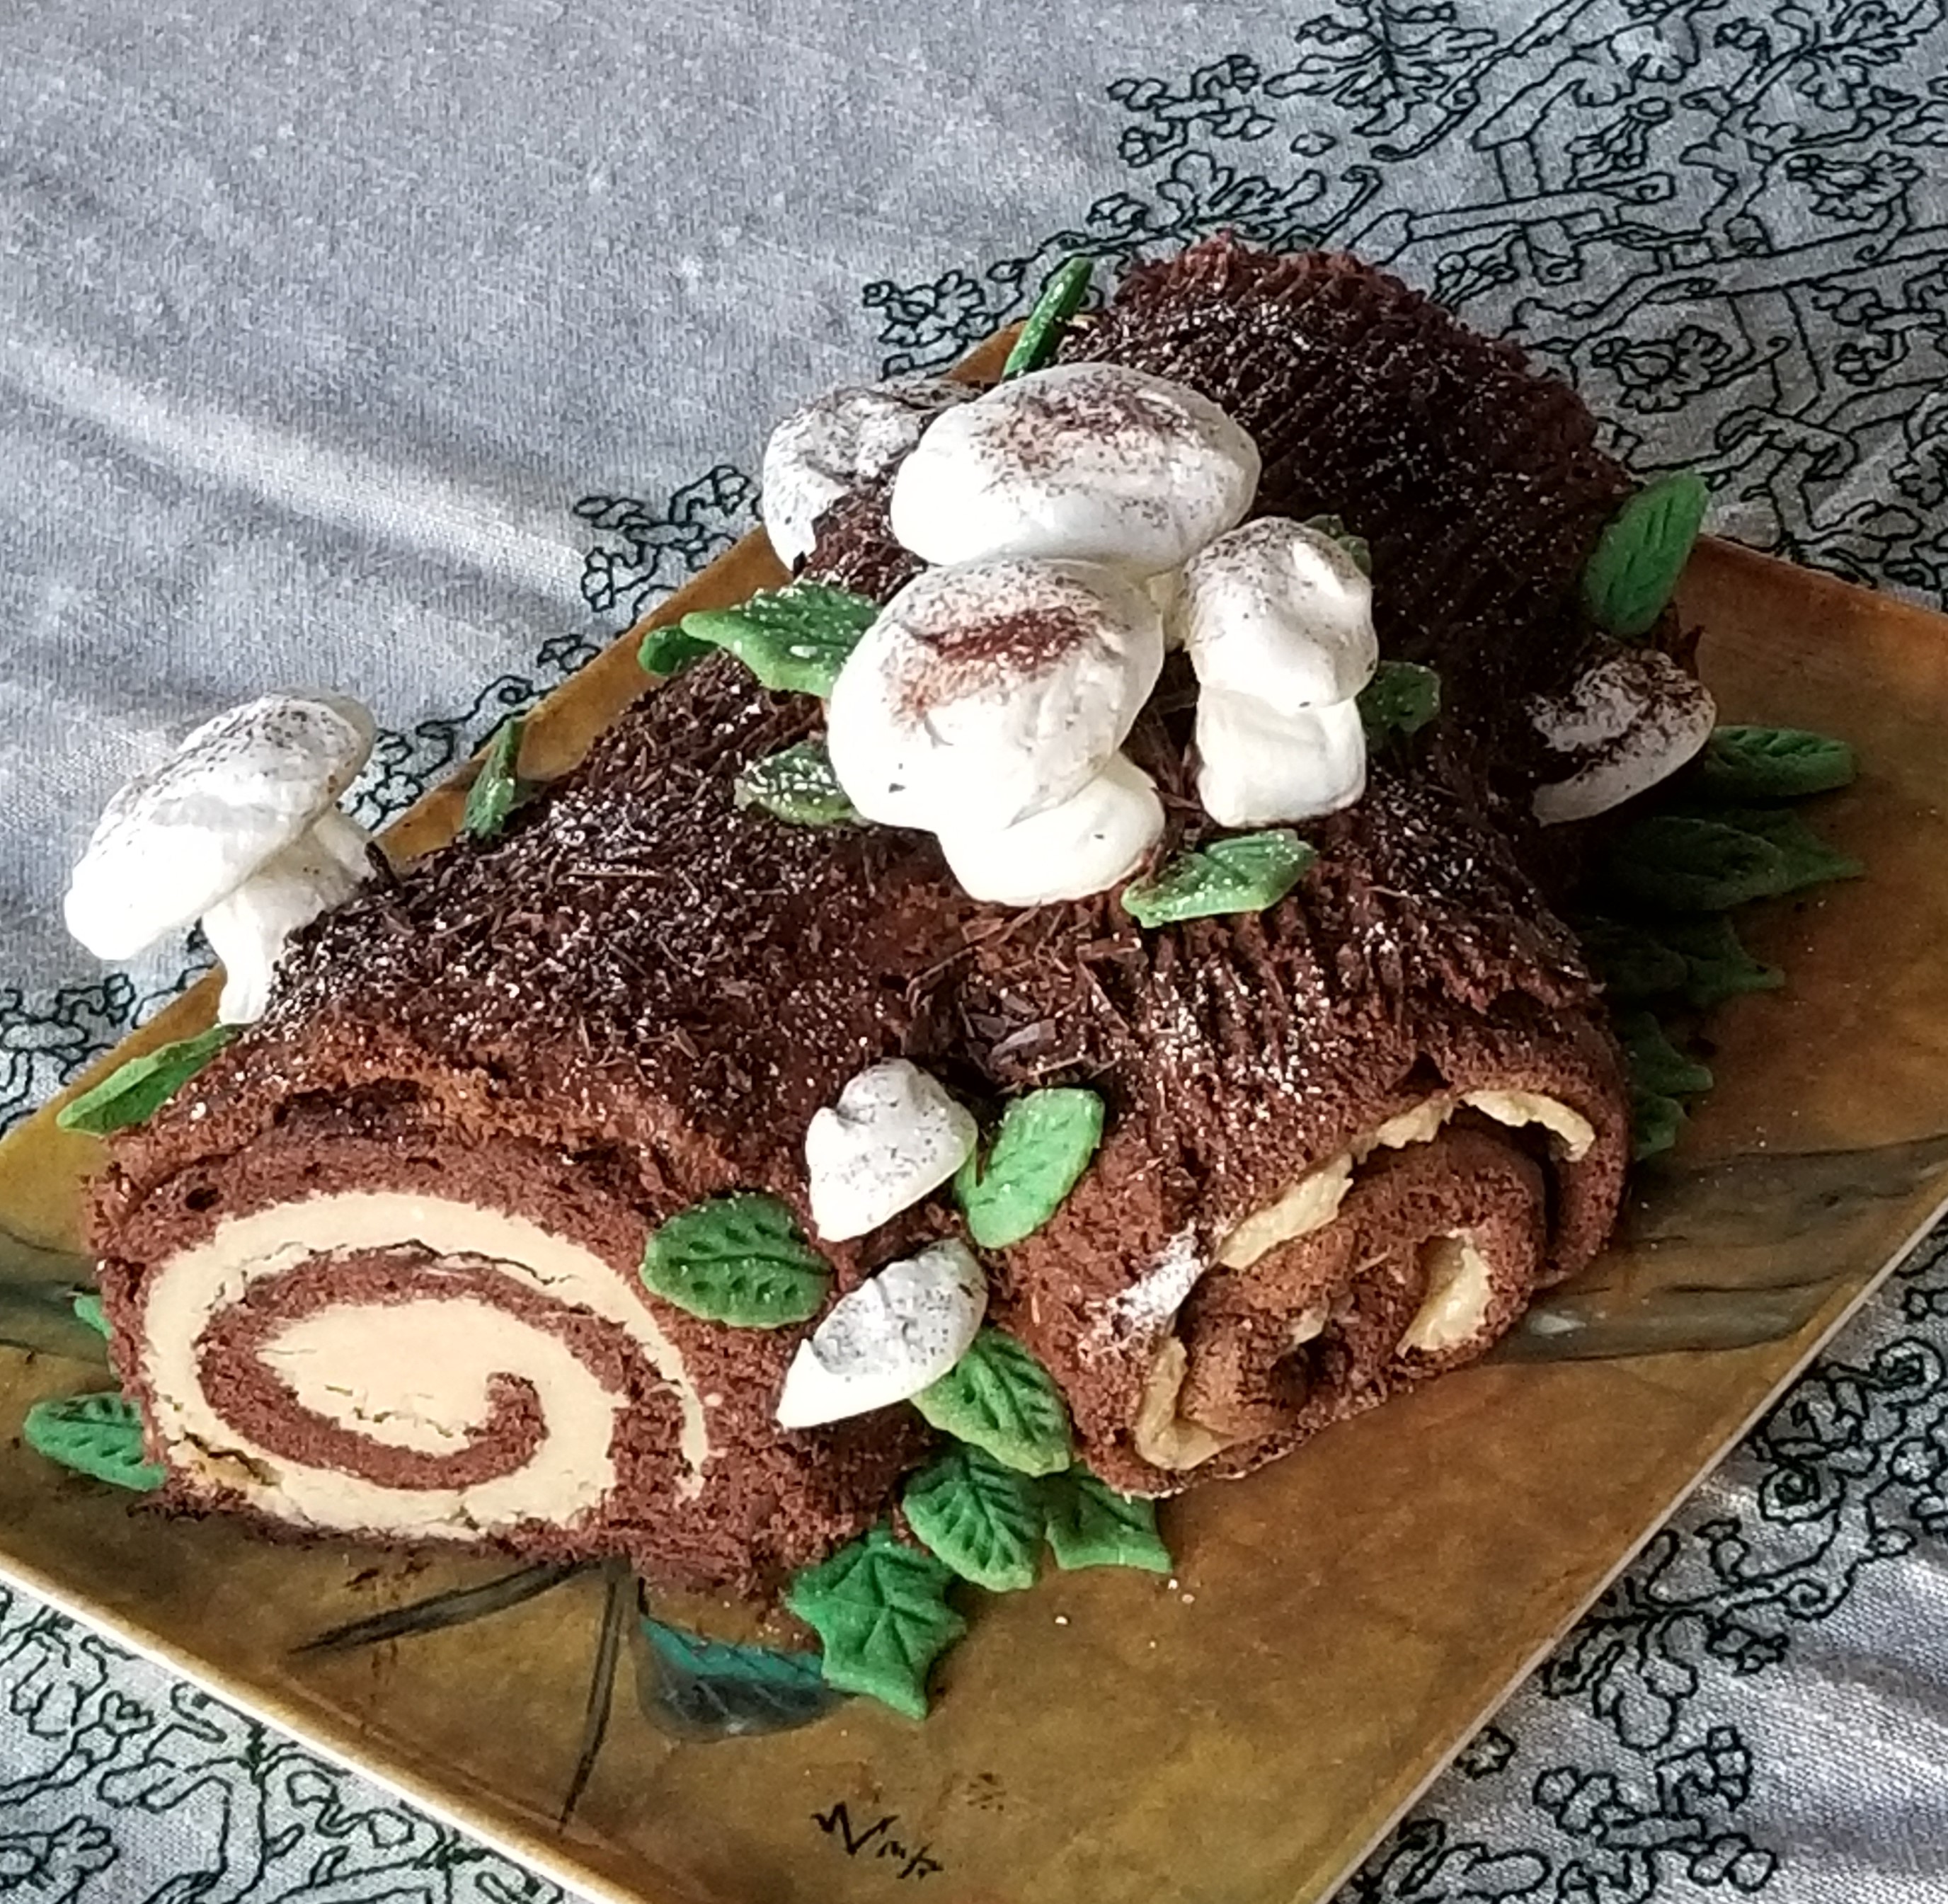
But that’s only the start. Younger Spawn also made a magnificent Buche de Noel (Yule Log Cake), with chocolate buttercream outside, and hazelnut buttercream rolled in a rich cocoa genoise. Including the traditional meringue mushrooms and little leaf-shaped sugar cookie leaves.
Not to be outdone, The Resident Male rose to the occasion and presented us with a Christmas Eve feast – seared fois gras with chanterelles; French onion soup au gratin; rack of wild boar with maple/chili glaze, plus potatoes Anna and spinach souffle.
And there are more year end finishes!
My Bony Boi piece, back from the framer and suitably hung in its place of honor in the Resident Male’s office:

The Great Masking
And I also finished my three blackwork plague masks.
I used one of Ancient Elna’s specialty cams to make a multi-stitch “hold fast” edging around the outer edge of each of the embroidered components. Then I cut out the shapes with confidence that the stay stitching would prevent any unraveling. (The stay stitching will be buried in the seam allowances, and never be seen.)
After that I sewed my stitching together down the center to make the outer layer. I toyed with a couple of treatments for the center seam to disguise the mismatch, but settled on a simple line of stem stitch, done in Krenick #16 metallic braid. The Elizabethan plaited braid I had originally envisioned was too heavy.

Then I cut the actual protective layers, traced from the same template I used to lay out the stitching, plus the lengths for the ties (I favor ties over elastic). Each mask has two layers of high thread count percale (harvested from retired sheets and pillowcases) in addition to the decorative outer layer.
When that was done, I sewed my linings together down the center, pressed them, and pinned on the ties. Those get sandwiched between the right sides of the lining and decorative back double-layer, with care taken to make sure they are not accidentally sewn over when front and back are seamed together. The two fronts, with the ties pinned to the lining are shown below.

Once that was done it was a simple matter to sew front to back (right sides inside), leaving a bit of a turning space between the two ties on the left. The thing is flipped right-side-out by teasing the ties out and yanking. A press followed by a line of topstitching all the way around to set the edges and seal the turning aperture, and I was done:


Now on to the next thing. But first I have to decide what that is….
AND THE ANNUAL BAKING MARATHON COMMENCES!
Long time readers know that for decades now I’ve been making at least 10 kinds of cookies for the holiday season. Along the way other goodies have joined them. This year is no different. But how to manage it all?
Systems design and phased planning.
I’m only half kidding. I don’t sit down and do a critical path chart for cookie preparation, but I do put some thought into it. Last week I sat down and composed this year’s list. Over the years the list of must-do kinds has grown, leaving fewer slots for experimentation. This year we hit max do-over – ten kinds now proven and loved. But that doesn’t mean there isn’t room for improvement.
- Chocolate chip cookies – The original Tollhouse recipe (minus the nuts because so many other kinds I make have them).
- Peanut butter cookies – A family favorite. More or less the one from Joy of Cooking, but using Teddy Superchunk natural peanut butter instead of the more sugary big commercial brands.
- Mexican Wedding Cakes – Another gotta-have. Buttery pecan shortbread, rolled in confectioners’ sugar. I don’t stint on the toasted pecans.
- Bourbon Balls – Another standard done every year since I began this. A no-bake cookie. But I’ve been disappointed in the old recipe of late, so this year is a change-up. I’m trying out a recent NY Times recipe. https://cooking.nytimes.com/recipes/1021660-fudgy-bourbon-balls
- Sugar cookie cut-outs – Another Joy of Cooking standard, but I add lemon zest and extract to the cookie, and made the plain confectioners’ sugar/water icing with lemon juice instead of water. Tons of fun to decorate with the kids when they were small, but a lot of work for one person, now. Some changes to this one, too this year.
- Oysters – One of my own invention. Or as they say in knitting – “unvention” (personal discovery replicating something previously done by others, but not known to the unventor at the time). This is a rich hazelnut spritz cookie, served up sandwich style, with chocolate ganache filling between.
- Iced Orange Marmalade Cookies – This will be the third year in a row for these. Obviously they’ve made the cut from exotic newcomer to gotta-have.
- Triple Ginger White Chocolate – Another successful original. I started with a variation on a light brown sugar drop cookie, made with ginger juice, dry ground ginger, plus minced crystalized ginger, along with white chocolate chips, that act as “internal icing” and counter the ginger’s heat. Love these.
- Earthquakes – Most other people call them Chocolate Crinkles. They are the fudgy, brownie like chocolate cookie that is rolled in confectioner’s sugar prior before hitting the oven. During baking they crack and split, making distinctive dark canyons across the white surface. Much loved (and nicknamed) by the kids, long long ago.
- Cinnamon Swirls – A specialty of Younger Spawn, who was Padawan, has now eclipsed the master. Spawn’s swirled icebox cookies are food-stylist-perfect, feather light, and intensely tasty.
- Jam Thumbprints – Eleven? Yes. Eleven. This was a late addition, by special request. I hope it will be a learning experience. Former Padawan Spawn says that a never-fail recipe for them is in their pocket. To date though, mine have been dismal – with no useful divots to retain the jam. No recipe for this yet – I eagerly await the personal import.
Oh. And Panforte. I make this liquor-soused chocolate/nut fruitcake every other year (one recipe makes two). It sits on the sideboard supping up its nightly drink until the day before it is served, when it gets a chocolate ganache top-icing. My mods to it include using less expensive dried fruit – 40% pitted prunes, 40% apricots, and 20% berries or cherries, and NOT using whole nuts. The thing is dense, and having whole hazelnuts and almonds in there make it quite difficult to cut. Instead I use halved or smashed hazelnuts and slivered almonds.
The secret of this juggling? Spreadsheets.

I have a master workbook. Each year I add a new sheet. I copy the previous year’s cookie row or enter new data. The sheet sums up my major ingredients at the top. It feeds into a shopping list form that I can tick off as have-on-hand or to-buy. There’s also a sheet where links or hard copy references to all the recipes live.
Geeky, yes. But effective.
Most years I’ve had to do these solo, although I was spoiled for a few when Younger Spawn was still living at home and evinced interest and growing skill. And I’ve always held down a full time professional job with an intense end of year activity burst (work has an annoying way of interfering with life.). Therefore I tend to do these as two-night exercises. Make dough on night 1, bake on night two. When I can I double up on baking and making the next night’s dough, but that isn’t always possible, leading to some intense weekend sprints to catch up.
And on preparation order – I group cookies by how far in advance I can make them (without freezing). Some types stay fresh longer than others. Some require time to cure or set properly. And some are truly ephemeral, best consumed on the week that they are made. Sequence runs something like this:
First – Panforte. Lasts forever, is better if it is made early and soused with extra liqueur daily until consumed. Ice with ganache the day before finally serving it. I usually do this the weekend after Thanksgiving weekend.
Second – Bourbon Balls. They are better if they have sat to cure a couple of weeks. Always the first cookie made. Usually the same day as the Panforte.
Third – Peanut butter. The natural oil content of peanut butter keeps these soft for a very long time, they are great keepers, and lead off the baked cookie production line.
Fourth – the sturdy drop cookies. Chocolate chip, triple ginger. Not quite a long lived as peanut butter, but if tightly sealed, better keepers than the more fragile guys.
Fifth – Sugar cut-outs, Iced Orange cookies, and the spritz cookies for the oysters. Both of these can be baked ahead and stored without their respective finishing frosting or filling. Kept tightly covered, they will dry out a bit, but will gain regain moisture from their wetter components when they are finished.
Sixth – This batch are more fragile and shouldn’t be made more than a week ahead of need. Earthquakes, Mexican Wedding Cakes in that order.
The ones that depend on Younger Spawn will of course have to await arrival, but if I were to slot them in regardless of Spawn-presence, the Cinnamon Swirls would go in the Fifth group, and the Jam Thumbprints in Sixth.
The instant icebox fudge comes last. Our old neighbor and adopted family member Ms. Jean taught me how to make it the very first holiday season we celebrated together. It’s a special treat that everyone loves, takes very little time, and that’s handy for using up small amounts of leftover nuts along with the chocolate. Like there would ever be leftover chocolate in this house.
Pix of these as they are finished. Or maybe I’ll wait until the end and post the traditional “family photo.”
