SAVAGE BLOCKING
The merino/possum wool shoulder shawl turned out to be one of the quickest completing projects I’ve done in a while. It took only four evenings to knit.
For the record again, I used a wonderful luxury yarn – a gift from a pal. It’s Happy-Go-Knitty’s Ahuru 8, labeled as DK, but I like it as a worsted weight. It’s airier and less compressed at a stockinette gauge of 20 stitches for 4 inches/10 cm than at the DK gauge of 22. I started with a Knitty pattern from almost 10 years ago – Wavedeck, by Kate Atherley.
I made a couple of minor departures from Kate’s original. In the feather detail motif that constitutes the bottom round of the design, I worked the feathering for 15 odd number rows, not 12. Being a bit taller I thought a bit of extra length would be nice. I might have done at least three more because I had enough yarn to do so, but I was worried that blocking might not work out if I added too much depth.
Also, on the final round of bind-off, at each natural point formed by the feather border, I added a small cast-on/cast-off picot, both to accentuate those points, and to make a nice, sturdy spot for extra tugging during blocking. (To do this as I bound off according to directions, when I got to the centermost stich of each feather’s middle rib I cast on three extra stitches using the cable cast on, then immediately cast them off as per the method specified in the pattern. This made a little triangular nub at the base of each feather.
All in all, I used 1.75 skeins worth of yarn (estimate). I think I have enough left over for a pair of small wristlets, which will be a nice, comfy use for this super soft and super warm yarn.
Now for the blocking, savage or otherwise – you be the judge.
First we start with the completed, unstretched knit. Measuring with more precision but without stretch, it’s about 23 inches deep from center neck to center bottom, and about 46 inches across the wingspan (58.42cm x 116.84cm). You can see the little nubbins I added to each feather spine.

The first step is to get it nice and wet. I didn’t bother washing it with Eucalan or Kookaburra. It wasn’t dragged around enough in four days to get it grimy. Wetting was enough. Once wet, I gently squeezed out some of the water weight (no wringing, or rubbing, just a couple of compressions. Then I laid the piece folded in half on a bath towel, and rolled it up into a big jellyroll.

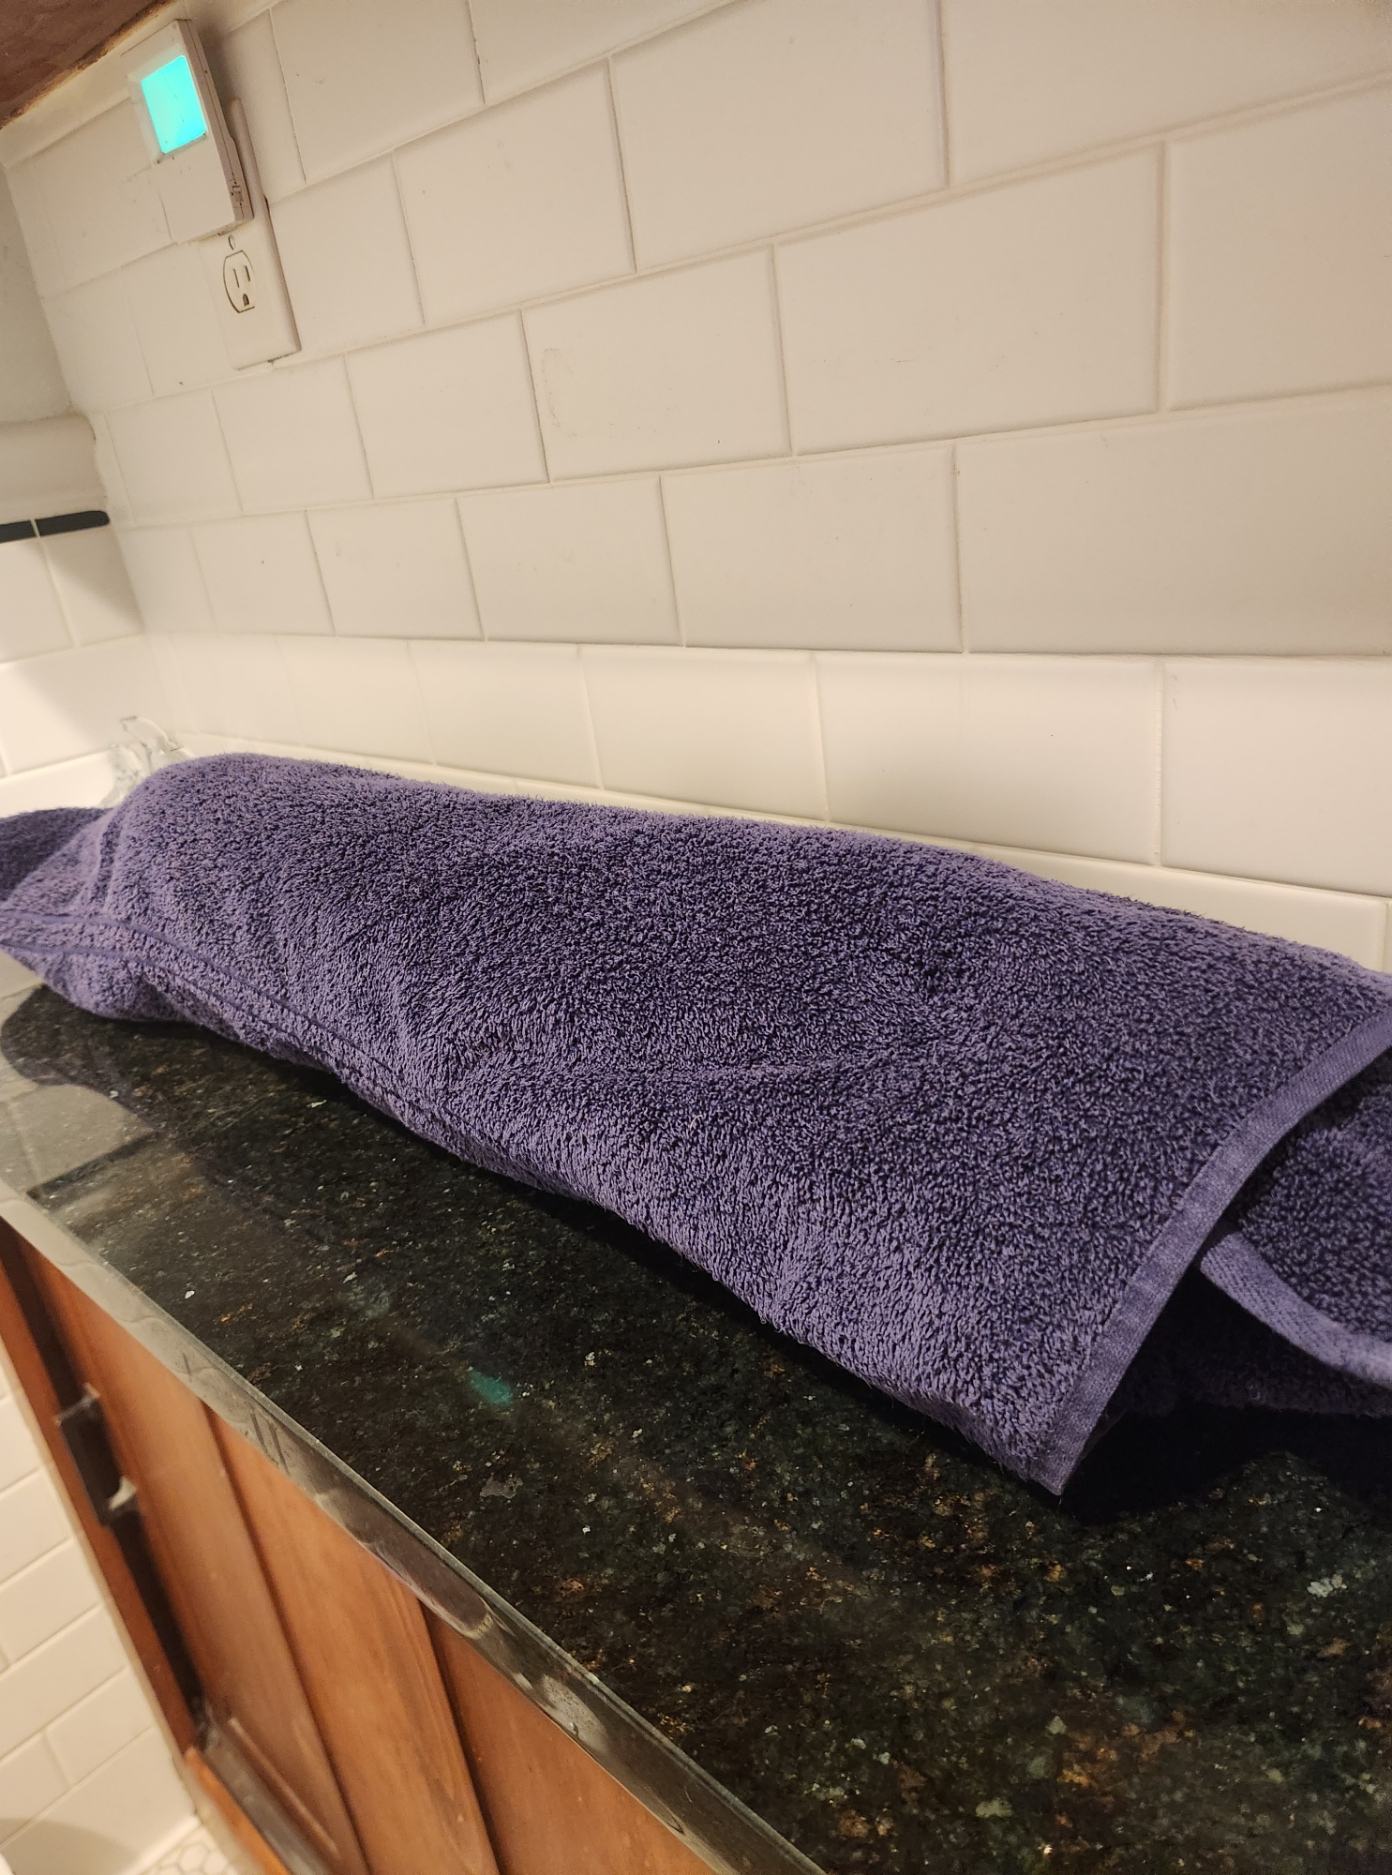
I leaned on the jellyroll to squeeze water into the towel, rotating it several times to get as much out as I could, but without subjecting the shawl to any undue stress.
Then I prepared my blocking area. First I laid out my usual blocking sheet – a rally checked flat twin sheet I found years ago at a yard sale, spread over a sturdy braided wool throw rug. Then I assembled my other blocking tools – blocking wires (some hand-me-downs from long time stitching and knitting pal Kathryn), and my long pins.
I began on the long side, threading every garter stitch edge bump along the straight edge onto blocking wires. Note that I used three of them. I deliberately left about a third of each wire bare, doubling up for about six stitches when I changed from one wire to the next. The reason I did this to leave room for stretching during blocking. If I filled up each wire completely, then stretched the thing during pin-out, stitches would fall of the end of the wires. Better to have lots of extra room and overlap. Bump threading below.

After wires were placed along the straight edge, I pinned them out following one of the horizontals of my checked sheet. I started at the center and tried to place pins and stretch evenly both to the left and right. The blocks of the sheet’s print helped me keep that stretch even.
Once the straight edge was laid out, again starting in the center I began pulling the points. There is no feather point at the center of this piece, so using the two points to the left and right of the center line, I used the sheet’s checks to make sure that the visual center line of the piece was perpendicular to the straight edge, and began pinning the points out from there. Now I’m not the best blocker. Were I so I would have calculated the angular difference at my chosen circumference, and marked it, pinning each to the exact spot on the indicated, scribed half circle. But that’s not me. I just winged it by eyeball. Good enough for home consumption.

Pinned out like this it’s about 30 inches deep, and 60 inches across (76.2cm x 152.4cm) roughly a gain of 7.6% in the stretching. It will probably relax a little bit once it’s released from savagery.
The next steps include letting it dry completely, unpinning and unthreading it from the blocking wires, and darning in a few ends. But at this point, it’s done. Four days of knitting, and 45 minutes of blocking, and fewer individual stitches than a single sock at my usual gauge. And one super cozy shoulder shawl, soft as whispers, to wear come autumn.
PLAYING (WITH) POSSUM
Fueled by Friend Kim who surprised me with a yarn gift, I dawdle a bit more in the Land of Knitting. I’ve done a ton of socks since finishing my Unstitched Coif submission – 14 pairs to be precise. But charmed by this super soft yarn I decided to do up a larger project – a shawl.
First the yarn. It’s an exotic fiber – a blend of possum and merino – the yarn on the right in the photo below. It’s Happy-Go-Knitty’s Ahuru 8, labeled as DK, but knitting up more like a true worsted. It’s soft as butter; very warm; extremely light, airy and compressible; and adaptable to being knit down possibly as far as sport (24 stitches for 10 cm/4 inches) and up to worsted (20 stitches for 10cm/4 inches). The color name of my skeins is Caramel, possibly the undyed color of the possums themselves. The mixed color sock weight (red supplement with a brown to ecru main skein) from Prosper Yarns will decide what it wants to be later. That one is a luscious merino/nylon blend. I think the red accent skein is intended for toes and heels.
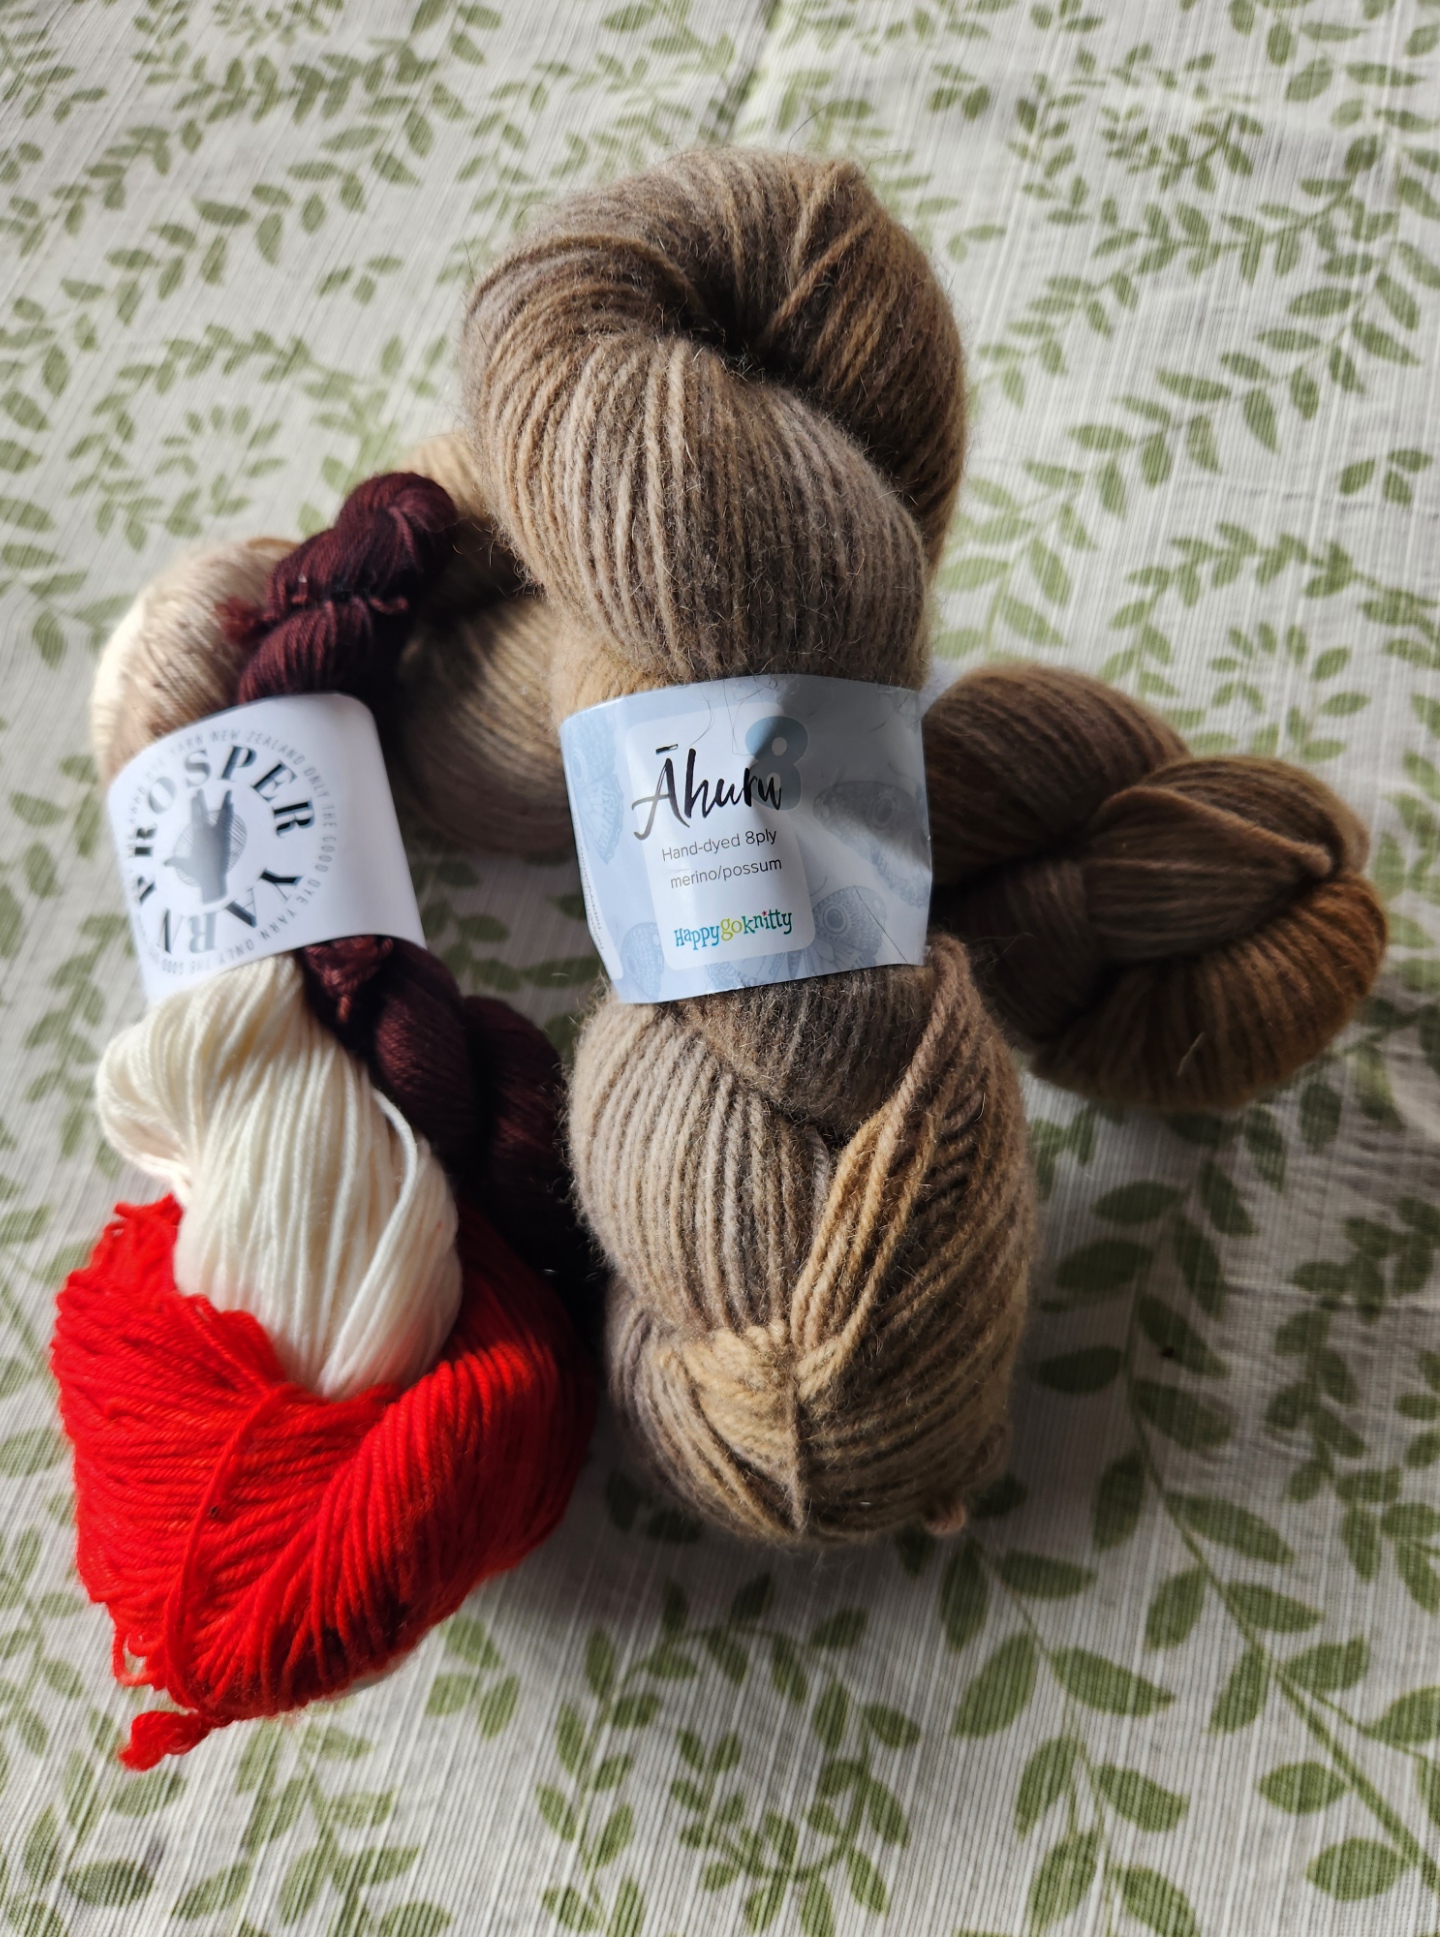
Back to the Ahuru. Now possum isn’t North American Opossum, it’s a New Zealand beast. It was introduced there from Australia and became an uncontrolled and invasive nuisance. But folk in New Zealand appear to be quite practical – there is now an entire yarn industry based on the controlled harvest of these creatures, limiting the ecological disruption they cause and furnishing some lovely fiber and (so I’ve heard) pet food.
Now the project. I have about 476 meters, roughly 520 yards. I initially thought of using it in combo with another yarn to make a yoke style pullover, but I decided that this stuff needed to shine on its own merits. So I went looking for something else. I hit upon Wavedeck, a Knitty project from 2014. It’s a half circle shawl based on the Pi Shawl principle, heavily textured with YO/decrease pairs, directionally arranged to create flower petals, with feather edging that can keep going until the yarn runs out. If it ends up a few rounds longer or shorter than the official count, it won’t matter.
Although this one looks complicated, with massive charts, it’s nowhere near as difficult as first glance would make out. The patterns are extremely logical, requiring mostly that one keep track of the current row number (odd rows only – all the even rows are the same). My only deviation so far is to use a US size 8 needle (5mm) instead of the pattern’s recommended size 7 (4.5mm). I liked the slightly looser drape of the produced fabric better with the larger size.
Here’s two evenings’ progress. I had forgotten how quickly knitting at this gauge goes. I’m up to Row 25 of the largest chart, and halfway through it.
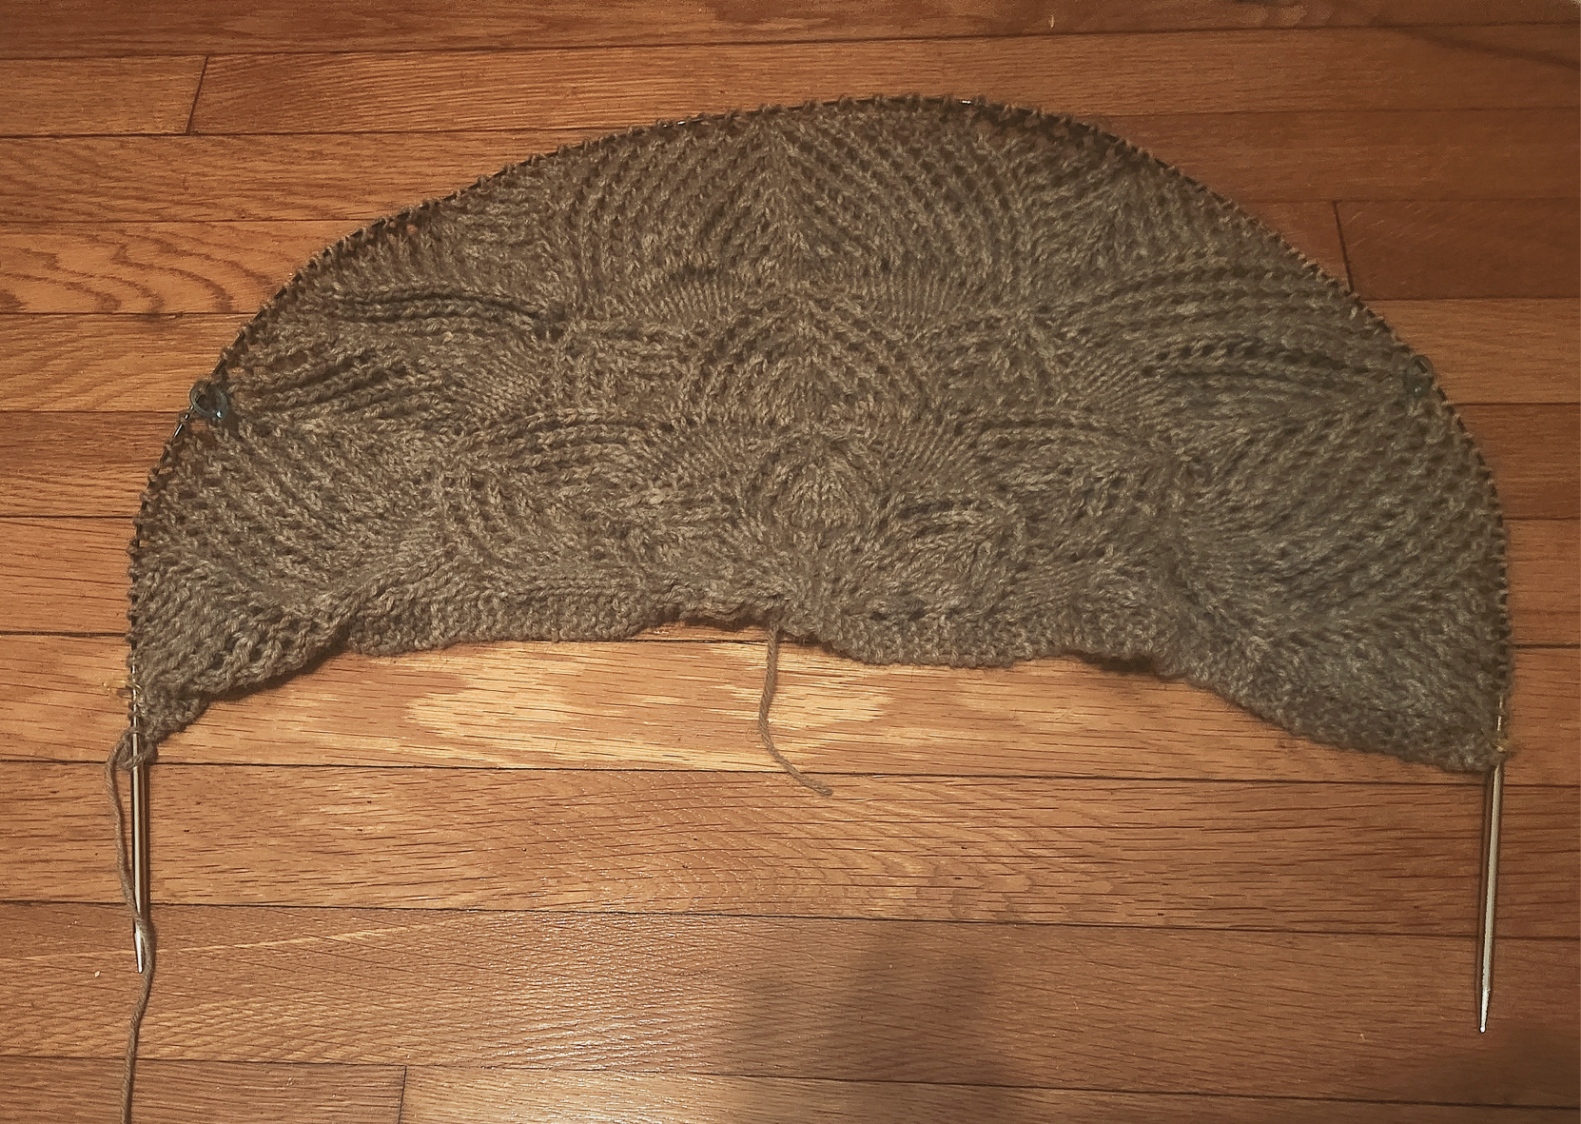
I really like the stitch definition I am getting with the Ahuru. The mottled colors come across a bit more orange than they are in the late night indoor illumination, but in person the color spread is grey to a tannish smoke brown, with spots of ecru and occasional bits of a darker chocolate, all with a tiny hint of mustard. Sounds like a mishmash, but in person it looks very Vintage Camouflage.
Knitty tags this one as “tangy” – their euphemism for “slightly challenging.” It’s one step up their four-step scale from beginner to complex. So far I’ve found it very easy to follow. If you are comfortable with yarn overs, left and right leaning decreases (K2tog and SSK), and can manage a center double decrease (three stitches merged into one, with the centermost presenting on top), and can pick up along an edge, you can do this one. Use sticky notes or a magnet board to focus on the current row, and go for it.
I’ll post back when I’ve run out of yarn and declare the project complete. After this, I’m not sure what will be next. Always a pair of socks as a guard against waiting room boredom. But I itch to stitch. Something…
LOOKING BACK AT AN OLD PROJECT
I’ve been tidying up my closets and drawers. I stumbled across a couple of items that I haven’t worn in a long time. Luckily they still fit well enough, so they’ve been rescued and added to the regular rotation. One was this T-shirt style pullover.

It’s one of the most intricate projects I did, mostly because I designed it myself. I did it back before Russian language sites became notorious for malware dissemination and wholesale piracy/copyright infringement. There were a few knitting sites back then that were clearly hobbyist-generated, with hand drawn charts for texture patterns. Needless to say there are many reasons why I do not recommend visiting any of them now and strongly caution against it, but I do confess that in the early days of the international Internet, I did browse worldwide.
In any case I stumbled across a hand drawn texture pattern thumbnail that led to this diagonal design. It wasn’t as tall a repeat as I present, and the drawing didn’t show a center mirroring, but both that detail and elongation were so obvious to me at the time. So to maximize the fun, I doodled up a pattern. The resulting repeat with its offset verticals was SO large that to this day it remains one of the largest knitting charts I’ve ever drafted.
The yarn I used was a bit unusual. I knit this from Silk City’s Spaghetti – a narrow cotton tape ribbon, with a native gauge that was roughly sport weight (24 stitches to 4 inches/10cm). The result was both crisp and springy, making a negative-ease garment that was quite come-hither and curve-hugging. Any hard twist sport weight cotton, linen or ramie can be used. As dense and tightly twisted as possible for maximum display of the textures.
I knit this project before I began blogging with intent – probably around 1991 or so. I shared an initial write-up in the ancient KnitList email based chat group, and eventually revised it and posted it on an earlier incarnation of String-or-Nothing in 2004. It’s been up and available ever since, but I don’t know of anyone else who has tried to knit it. The short length and close fit however seem spot on with current street fashion so I present it again. If I had a full length mirror I’d post an as-worn, but I am quite a bit older, and a bit bigger these days. The pattern is offered in just one size, and given the stretch would probably fit a US size 14-20 of ample endowment. I knit and wore it as a 16-18, and can still present it credibly if a bit brazenly as size 20. You could probably tinker it down a couple sizes using a slightly thinner yarn and smaller needles.
The name? I named it after the middle name my mom always thought was hers, until a birth certificate was obtained and she found out she’d been saddled with another. Since it was a Russian derived name and my mom has always been my knitting inspiration, it seemed fitting.
You can download the pattern for Raiisa here,
or from the sweaters section of the free Knitting Patterns Page tab available elsewhere on this blog.
