KNITITNG NEEDLE SIZES – REPOST
I went looking for this info on the site but apparently when we moved to this location from the old Blog City address, it all squirted out into the ether. Hope that this is still helpful.
KNITTING NEEDLES – PART V, TRUE SIZES BY MAKER, originally posted 25 June 2005
Still working on the needle characteristics summaries. In the mean time, here’s something else somewhat useful – a cross-maker chart of needle sizes.
This chart lists modern needles only, and should hold true for both straights and circs of the same line made by the same manufacturer. I will keep adding manufacturers, plus I will also go through my collection of older needles and post sizes. But not today…
<
| Absolute Metric Size |
Addi Turbo |
Inox Express |
All Bates |
Brittany | Boye | Crystal Palace |
Clover Bamboo |
| 0.5mm | |||||||
| 0.75mm | |||||||
| 1.0mm | |||||||
| 1.25mm | 0000 | 0000 | |||||
| 1.5mm | 000 | 000 | |||||
| 1.75mm | 00 | 00 | |||||
| 2.0mm | 0 | 0 | 0 | 0 | 0 | ||
| 2.25mm | 1 | 1 | 1 | 1 | 1 | ||
| 2.5mm | 1 | 1.5 | 1.5 | ||||
| 2.75mm | 2 | 2 | 2 | 2 | 2 | ||
| 3.0mm | 2 | X | 2.5 | 2.5 | |||
| 3.15mm | 3 | ||||||
| 3.25mm | 3 | 3 | 3 | 3 | 3 | 3 | |
| 3.5mm | 4 | 4 | 4 | 4 | 4 | 4 | 4 |
| 3.75mm | 5 | 5 | 5 | 5 | 5 | 5 | 5 |
| 4.0mm | 6 | 6 | 6 | ||||
| 4.25mm | 6 | 6 | 6 | 6 | |||
| 4.5mm | 7 | 7 | 7 | 7 | 7 | 7 | 7 |
| 4.75mm | |||||||
| 5.0mm | 8 | 8 | 8 | 8 | 8 | 8 | 8 |
| 5.25mm | 9 | ||||||
| 5.5mm | 9 | 9 | 9 | 9 | 9 | 9 | |
| 5.75mm | 10 | ||||||
| 6.0mm | 10 | 10 | 10 | 10 | 10 | 10 | |
| 6.5mm | 10.5 | 10.5 | 10.5 | 10.5 | 10.5 | ||
| 7.0mm | 10.5 | 10.75 | 10 7/8 | 10.75 | |||
| 7.5mm | 10.5* | ||||||
| 8.0mm | 11 | 11 | 11 | 11 | 11 | 11 | 11 |
| 8.5mm | |||||||
| 9.0mm | 13 | 13 | 13 | 13 | 13 | 13 | 13 |
| 10mm | 15 | 15 | 15 | 15 | 15 | 15 | 15 |
| 12mm | 17 | 17 | 17 | 17 | |||
| 12.5mm | 17 | ||||||
| 14mm | |||||||
| 15mm | 19 | 19 | 19 | ||||
| 15.5mm | |||||||
| 15.63mm | 19 | ||||||
| 19mm | 35 | ||||||
| 25mm | 20 | 50 | |||||
| 34mm | 20 | ||||||
| 36mm | 20 |
An “X” indicates that this size is made, but has no US marked equivalent.
*7.5mm Addi Turbos are available in Canada, and are sometimes marked (or marketed) as US #10.5.
KNITTING NEEDLES – PART VI: CIRCULAR LENGTHS – originally posted 23 June 2005
As promised, here’s a chart showing the circular needle lengths available from commonly listed (and some not so commonly listed) manufacturers. I’ve compiled this from on-line catalog sources. In the case a manufacturer had a web page, that info trumped what I could find in catalogs. Centimeter equivalents are rounded off to the nearest whole unit, except for the 16″ size. Various catalogs list 16″ needles as being either 40 or 41cm.
| 11″ 28cm |
12″ 30cm |
16″ 40-41cm |
20″ 50cm |
24″ 60cm |
26″ 66cm |
29″ 74cm |
32″ 80cm |
35″ 89cm |
36″ 91cm |
39″ 99cm |
40″ 100cm |
47″ 120cm |
48″ 122cm |
60″ 152cm |
|
| Addi Natura Bamboo | x | x | x | x | |||||||||||
| Addi Plastic | x | ||||||||||||||
| Addi Turbo | x | x | x | x | x | x | x | x | |||||||
| Balene | x | x | |||||||||||||
| Bates Quicksilver | x | x | x | x | x | ||||||||||
| Bates Silvalume | x | x | x | x | |||||||||||
| Bates Silverado | x | x | x | x | |||||||||||
| Boye | x | x | x | ||||||||||||
| Clover Bamboo | x | x | x | x | |||||||||||
| Crystal Palace Bamboo | x | x | x | ||||||||||||
| Hiyahiya Nickel-free Steel | x | x | x | x | x | ||||||||||
| Inox (Grey) | x | x | x | x | x | ||||||||||
| Inox Express | x | x | x | x | |||||||||||
| Noble Nickels | x | x | x | x | |||||||||||
| Plymouth Bamboo | x | x | |||||||||||||
| Pony Pearl | x | x | x | ||||||||||||
| Suzanne Ebony | x | x | x | ||||||||||||
| Suzanne Rosewood | x | x | x | ||||||||||||
| The Collection Wood | x | x |
CHARTING SOFTWARE FOR DOUBLE RUNNING STITCH (AND KNITTING) – PART 3
Continuing my exploration of dedicated and general purpose software for use with my two great needlework passions – charted patterns suitable for counted thread embroidery (in specific – double running stitch) and knitting. Again I’m not testing one main feature of these programs – the ability to turn images including photos into needle-painted ready-to-stitch images. I don’t care about that feature, although it’s clearly the hook on which most of these programs hang their hat.
PC Stitch Pro v 9.01 by M&R Technologies
PROS: Standard features that one would expect – cross stitch, floss palette tied to major manufacturers offerings (in this case, in a companion program that allows color editing, but does not appear to allow one to mix across makers lines without direct finagling, or to blend colors – two features that Pattern Maker had). Includes back stitch, but not a separate straight stitch). Includes standard flipping/rotating/mirroring manipulations. Allows back stitch to be displayed in color. Allows printing pages with a selectable number of overlap columns so that navigation among multiple pages is easer. Allows auto-outlining of blocks of contiguous cross stitch with back stitch.
CONS: Selection is limited to rectangular areas (no free-form lasso), oddly called “select all” on the edit menu. The selection area can be resized as needed, and does select back stitches along with block units. Back stitch cannot be displayed with voids between individual stitches or by symbols that otherwise indicate beginning and ending of individual units. Back stitches can’t be right-click erased like cross stitches or erased using the eraser tool, they need to be individually clicked on and removed using a pop-up window.

KNITTING AND CROCHET SPECIFIC USE: Can be used for standard colorwork mappings, and true type fonts (including the same knitting font mentioned yesterday) can be substituted for the symbol set. Symbols can be displayed on a color background and more than one symbol can be assigned to the same color. You can also override the program to assign more than one color to the same symbol. Like all graphing solutions not specific to knitting, there is no artificial intelligenge programmed in that would prevent building impossible to knit stitch configurations (this is rare even in the knitting world). Could handle block unit diagrams for linear filet or multi-color tapestry crochet, but even if one had a pre-made font for crochet symbols, this isn’t well suited for stitch graphing.
VERDICT: Handy for cross stitch but unremarkable for my intended uses. I don’t like the interface with the separate floss management program, or the way selection is handled.
PROGRESS AND USING STITCHING CHART PROGRAMS FOR GRAPHING KNITTING
In the middle of this charting program exploration I have had time to do a bit on my Clarke’s Law sampler. But first to answer a question. Aileen read my last couple of posts and wondered what I would consider a complex double running stitch pattern. I answer with pix of my current piece, plus a snippet of this pattern done up using Pattern Maker Pro, from yesterday’s review.


The nickel shows scale (click for better size shots of each). This strip is stitched using one strand of DMC floss, color #498 on 32 count linen (16 spi). Not particularly fine, but fine enough to show the patterns. The entire stitched area is about 15.75 inches across. From the top of the dark red twining strip to the bottom of the the D of ADVANCED is about 8.6 inches.

The top strip and the cross stitch words were all done using two floss strands. The outlining of the motif in the wide grape strip was done using two strands, and the squared background was done using one. (I’ve since found historical precedent for the squared background treatment).
All of the strips between the words will be relatively light in value, done in some combo of plain or voided double running stitch, but they won’t be as wide as the grapes (well, maybe the last one will be just to balance). I won’t do another dark band in long armed cross stitch (either foreground or voided) until after the entire quotation is done. I think it will take another three bands of text before the whole quotation is complete. Then I’ll fill out the cloth with a mix of styles, perhaps doing some in two-tone. It’s all fly by night here. I’ll also figure out something to eke out the line ends where the lettering comes up short. I think that NOT centering each line of text works better for my purposes, especially because I’m breaking text between lines in an unorthodox manner.
Now back to writing up the results of my stitch charting program explorations. Which for my knitting and crocheting readers, will have value. Either of the programs I described yesterday can be used to graph out colorwork repeats, or linear crochet (filet and tapestry styles). Pattern Maker Professional also allows you to assign a True Type knitting font (like the one from Aire River) to the symbol palette, and then using the program in symbols-on-graph mode, to compose knitting charts. Here’s a sample from PM showing a simple double 1×1 twist cable:

Where this falls apart though for knitting is if you try to display both colors and textures at the same time. The purl symbol will always be associated with one chosen color, the knit symbol with another. Although you can override the program and display more than one symbol per color, this program links symbol and color in a way that you can’t have multiple colors per symbol. Numbering rows is also problematic.
As I write up the rest of the sampled programs I’ll include their potential for use by knitters.
VISIO STENCILS AGAIN
I noticed quite a few hits in the past couple of days from people looking for my Visio knitting symbol stencils (templates). They’re the tools I use to do all of the charts here on String. However those files appear to have gone astray. I’m having problems going back and editing the original posts to edit the links there, so I am offering up this set of links instead.
I’ve got two sets, both for older versions of Visio. For Visio 5 here’s a Zip file containing the basic shape set, increases and decreases, and cables. And here’s the same thing for Visio 2000. I know for a fact that my stencils work with Visio 5, Visio 2000 and the last version of Visio in MS Office 2003. I haven’t had an opportunity to test the latest Visa version of Visio with my templates yet.
Here’s a link to the original post describing my method, but in short – I’ve built a series of “alphabet blocks” each bearing a standard knit symbol. I build my patterns up block by block. I can group or rotate blocks as needed. Once my blocks are in order, I add chart notations, including my grids and row numbering, and a key. I can also use the same system for colorwork charting by assigning my desired colors either to the whole block, or to a small square unit in a block’s center, as needed.

I offer up these stencils to anyone who wants to use them. For the record, I’ve heard that these blocks can be imported and used in other less expensive graphics programs including Edraw. I know that Edraw can open Visio files, but I don’t know if it uses a stencil or template library that can import Visio stencils. I suspect that to adapt my symbols you’d take one of the files in the zip dowloads above, then use Edraw to open it and copy the symbols out.
If you do use my files to create your own charts, I’d greatly appreciate a link back or a line of acknowledgment in your final work. I hope that someone else finds these useful as I do.
LOG CABIN MODULAR BLANKET WORKING METHOD AND CROCHETING ON
First, in answer to a question about how to draw up a loop, I do a normal pick-up one into one chain selvage (or bind off, or cast on) stitch, then I grab it and pull more yarn through, distending the newly made stitch until I’ve pulled a foot or more of yarn through. Once I’ve got the giant loop, I use it to knit the next two rows. When I’ve finished the two rows I grab the strand leading back to the ball and give it a firm tug to pull any left-over yarn back out of the loop, and to snick the newly knit piece up closely to the existing work. Here you see the loop being pulled through prior to knitting with it:

After much trial and error, I’ve hit on the best way to cast on for the strips in my modular knit Log Cabin Baby Blanket. (Wish I’d looked at yesterday’s comments before all that fiddling and seen Karen’s suggestion). Crocheting onto a knitting needle, like I do when I start off the waste chain for a provisional cast on, works nicely. It produces an even chain type edge, analogous to the strip’s bind off and chain selvage edges. I’ve described crocheting on before, but here’s another swag at it.
In the snap below I’ve stuck my crochet hook into the final stitch remaining after I’ve cast off the stitches on the last strip. I’m holding the working yarn BEHIND the target knitting needle, and I’m reaching OVER the needle with the crochet hook

I’m grabbing the working strand with the crochet hook and am about to pull the just-grabbed strand through the existing stitch (in effect, I’m making a crochet slip stitch).

Ignoring the errant strand of Smaller Daughter’s hair in the shot above, what we wind up with is a stitch on the knitting needle. I’ve moved the working strand to the back of the knitting needle again, and am poised to make another.

Crocheting on works especially nicely for provisional cast-ons. Instead of crocheting a long chain THEN fiddling with the bumps on the back of the chain, trying to pick them up, this method produces the chain edge and mounts the stitches in one step. It’s one of the core techniques I teach in my occasional “Crocheting for Knitters” workshop.
As you can see, my blanket is growing. According to the logic diagram, I’m in the middle of unit #7:


Finally, here’s the working method. It’s not a pattern because I am not giving yardage estimates, gauge or dimension. These log cabin blocks can be made to any size and assembled like a standard patchwork quilt, or the working logic can be used to make a larger object as a single square. For the record, I’m using Austermann Batika Color, a bulky weight yarn with a native gauge of 4 stitches per inch in stockinette, on 6mm needles. I’m getting roughly 4 stitches per inch and four garter ridges per inch in garter stitch on US #9s (5.25mm). My initial square was about 3×3 inches (roughly 7.6cm), and all my subsequent strips are about 3 inches wide.
The best way to join ends of Batkia when starting a new ball is to thread the new strand into a standard tapestry needle and stitch it through the center of the chainette for about 2 inches, like feeding an one eel to another. Once the doubled length has been knit, any flapping ends can be trimmed back without fear of raveling.
Working Method for Modular Log Cabin Square
First square:
Cast on 12 using crocheting on.
Row 1: Slip the first stitch purlwise, knit 10, k1b.
Repeat Row 1 until you form a square of garter stitch. In all probability there will be 12 chain selvage edge loops running up both sides of the square. Cast off 11. One stitch should remain. Do not break yarn.
Strips:
Using the last remaining loop, crochet on 12 stitches.
Row 1: Slip the first stitch purlwise, knit 10, k1b. Draw a loop through the first available chain selvage stitch on the previous square or strip (it will be the edge to the left of the new strip’s attachment point). Enlarge this loop until it’s big enough to knit with. Turn the work over.
Row 2: Pulling the loop tight and making sure you’re knitting with the anchored side rather than the side that runs free back to your ball of yarn, knit 11, k1b. Turn the work over.
Row 3: Slip the first stitch purlwise, knit 10, k1b.
Repeat Rows 2 and 3 until your new strip runs the whole width of your piece. The first time you do this, it will be a square of 12 stitches x 12 garter ridges. The second strip will be a rectangle of 12 stitches x 24 garter ridges and will run across the top of the first two squares.
Next row: Cast off 11. One stitch should remain. Do not break yarn.
Repeat the strip directions, always adding strips counterclockwise around the perimeter of the piece, with each strip running the full length of the available side.
ADVENTURES IN THE UNSEEN
I was wrong and I freely admit it. Remember the post in which I described a method for estimating the depth of stripes that would be produced by a skein of space dyed or multicolor patch yarn? I applied that method to my skein of Noro Kureyon Sock, and it flat out missed the mark.
Based on skein size and color strand counting, I estimated that each solid color stripe would last 4-6 rows or so before shading into the next. I still stand by that for the yarn on the outside of the skein, but I didn’t factor into my estimation how seemingly random Noro yarns can be. Here’s the skein:

I see lots of turquoise and magenta, with side trips to royal blue and deep green. The color segments of the yarn on the outside of the skein appear to last for the lengths I indicated.
But here’s the resulting slouch sock (a sock with a deliberately wide ankle part), knit from the center of the ball out. It’s brother is just a tiny turquoise cast-on speck right now:

Huh? where did that huge lump of royal blue above the heel come from? And the green/orange mix directly above that? And why is the pink/purple section so unexpectedly wide? Counting the strands on the inner layer visible on the un-dissected skein, pink/purple should be equal in width to green. What gives?
I might have been less surprised had there been more than one skein of this color number available on the day I bought the yarn. Looking at several, each starting at a different spot in the color progression might have revealed larger (or different) color segments than I anticipated. In any case, the color repeat has gone through about one and a half cycles in this sock, hitting the toe’s hue blend about halfway between orange stripe and densest part of the magenta, although factoring in the wider circumference of the ankle part than the foot, the second appearance of the pink/purple is longer than that combo’s debut.
So there’s my caveat. I still say my estimation method works. Mostly. Except for Noro, where all bets are off.
Pattern footnote:
How to do a slouch sock? Easy. US #00s. Standard figure-8 cast on toe, worked on a set of five DPNs. Increase to 17 stitches per needle until just before the heel (68 st total). Increase one stitch per needle to 18 (72 st total), work a standard short row heel across two needles (36 stitches), instead of decreasing away the two sneaky stitches used to minimize any top-of-heel-decrease gaps, keep them, and increase one stitch each on the two non-heel needles for a total of 19 stitches per needle (76 st total). Work leg part equal in length to foot (folded along the heel’s natural equator), then work about 20 rows of K2, P2 ribbing and end off.
Why do a slouch sock? Between the wild colors, thick/thin spin, and overtwist, any lacy or texture pattern would be lost in this stuff. Also this yarn isn’t a good candidate for stranding or striping with another (although two different but closely related skeins in a simple stranding pattern might be interesting). I’ve had some breakage, and I’m not inclined to use this stuff for a nice, snug sock that takes a lot of stretching to put on. The roomy top will diminish that strain.
ON BUYING AND USING MULTICOLOR YARN
I got a private note yesterday from a knitter who seeing the fuzzy entrelac blanket posted yesterday, wanted to know how I knew the spotty yarn would work well for it. I reply.
Frankly, I wasn’t sure what I was going to do with my spotted yarn. But multicolors come in several flavors. While there are no hard and fast rules in knitting, there are some general principles I use to help figure out what to do with multicolors, especially because I’m one of the yarn-first folk. I rarely have a specific project in mind when I purchase yarn, and usually have to find or invent something to do with my new treasures. Also, as long time readers here have seen – I don’t always hit on the best use right away. Sometimes it takes me a couple of starts before things work out. I don’t mind ripping back. To me it’s part of the process of exploration and discovery. Now these thoughts are things that work for me. Your taste is probably different from mine, and there’s nothing wrong with that, so please don’t think these are put forward as rules for everyone.
For me, first comes yarn choice. Multicolors come in all sorts of types and color combos. I have to like the color set and mix proportions as a whole. I like to look at my target yarn from a distance – 10 feet at least, to see if the skeins “read” well as an aggregate. Lots of times one or more of the colors pops out strangely from a more harmonious background. I tend to avoid those mixes. I do however like multicolors that are composed of different colors but similar intensities.
Once a color combo has caught my eye, I look at the length of the repeat. On skeined yarn, this is relatively easy, especially if the yarn shop allows customers to untwist a skein. Never do this unless you have asked permission and you know you can return the yarn to the original twist, neat enough to be indistinguishable from the on-shelf stock. Then do so once you’ve made your evaluation. Or ask the yarn shop staff if they can untwist/retwist for you.
On DK and worsted gauge, I figure about 1.5 stitches per linear inch of yarn. On sport and fingering, figure 2.5-3.5 stitches per inch of yarn. A run of a single color as wide as my palm on a DK is probably a bit over 5 stitches when knit up – just under an inch worth of knitting in DK gauge. Shorter areas of color end up looking like little spots. Longer ones produce broken stripes. Really long segments produce larger stripes (depending on the circumference of the piece being knit and the gauge).
What to do if the yarn comes in a ball rather than a skein? You’ve got to guess and estimate. Look at the put-up. Estimate about how long one circumference wrap of the ball is. For example, if you look at the Noro Kureyon Sock below you can see that the wrap goes diagonally around the ball, and that there are about four or five wraps before the color changes.

The ball is approximately 7 inches long (the spread from my index tip to small finger tip with my hand splayed – it’s good to know some standard biometrics of your own hand for guesstimation), so a rough estimate is that one wrap around the ball would be about 15-16 inches. The individual color patches on this yarn are probably on the order of 65-75 inches long, probably something like 24-30 linear inches of knitting at an approximate sock gauge. (My socks are about 11.5 inches in circumference on the ankle, so for socks one color segment would probably make a stripe a bit over two or three rows deep).
A yarn with lots of rapid color changes will read very differently from a yarn that’s mostly background color with scattered spots. The rapid color change yarn will, from a distance, almost seem to do an impressionist’s blend, and appear as a hue median to all the colors being represented. That means that a yarn with a zillion little spots of color, each individually quite clear will end up looking like a muted blend of all of them from a distance. Tweeds and multi-strand ragg style yarns (two or more plies of different, sometimes variegated color twisted together) are good examples of this effect. My Impossible Socks uses a ragg-twist multicolor tweed in combo with solid blue. The overall effect of the tweedy yarn is much darker and muddier than its constituent bits, even without the navy stripes.

Colors that blend one to the next can also present problems. Sometimes the nondescript areas between vivid colors predominate if evaluated as a general proportion of total skein length. A lovely multicolor on the shelf may actually knit up rather muddy, with only small flashes of the marquee hues. Conversely, colors that shift abruptly from one to the next can produce a rather motley and jarring effect, with each jostling against its neighbors. In longer repeats, I tend to favor yarns that have few or no blended transitions. I also prefer that any transition areas make up less than 10% of the total color cycle.
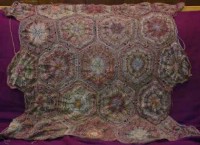
Because of the “tweens” challenge with shading multicolors and the perceived meld problem in general, I tend to stay away from yarns with wildly disparate color combos, and stick mostly to multicolors with either a well established and pleasing uniting background color; to yarns that present either multiple variants of the same color (like a continuum from light blue to navy); or to yarns that offer up two or at the most three closely allied colors (like red to yellow, with side trips to orange). The Paisley shawl illustrates this visual mind meld. It’s a raspberry to blueberry blend. The detail shows the color spots clearly, but the big picture blends both into a medium purply garnet.


In terms of color repeat length, I try to match projects to the repeat length. I’ve found in general that unless I can engineer repeats to deliberately and predictably flash, I am not wildly fond of large areas of multicolor yarns knit flat. They’re just not very interesting to me worked that way. I much prefer trying to introduce movement or to break up the large-field effect. Entrelac works nicely. The color repeats in the strip below (from my Chest of Knitting Horrors graveyard of unfinished projects) uses Entrelac to make the most of a short color repeat. Each square is only about an inch across.

If the repeat is long, you can engineer something fun like my Snake scarf, displaying the long repeat’s gradations to maximum advantage, or working center-out medallions that radiate from one color to another (the brown throw is all knit from the same color number Blauband sock yarn).

If the color bits are extremely short, the diagonal movement introduced by the Entrelac patches combined with the narrow “bounce area” of the patch width evens out the distribution of the spots, and makes them look like ice cream sprinkles (jimmies to my fellow Bostonians).

Sometimes I’ve broken the rules and used directional-distortion texture patterns with self stripers to break up the march of concentric rings of color by zigging the texture this way and that. My SeeSaw socks, published in KnitNet ages ago are a good example. These are in fact my original SeeSaws, still in service after all these years:

If I can engineer it, I really like making yarns flash – knitting them in the round so that patches of the same color align on top of each other to create an almost painterly effect. The wildly jarring colors of my Rainbow Mills Matisse sweater would not have worked well together if the piece hadn’t been designed to flash. Look at the cuffs and waist ribbing to see how muddy and non-descript the blend is without color stacking. You can also see the difference in the flash pattern produced by the difference in body and sleeve circumference.

An alternative approach is to limit the width of the strip so that colors bounce back and forth across a narrower strip of ground. That can make the individual stripes deeper, and add interest by adding the “collision lines” where the repeats abut. The piece below was interesting because it was made from four skeins of hand-dyed from the same batch. They were close, but different enough to each present its own periodicity of repeat when knit into strips of equal width.

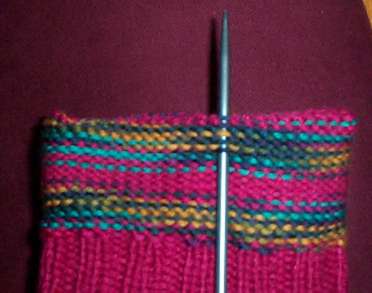
Sometimes I’m faced with multicolors that just can’t be tamed by stitch direction, calculating garment widths to make them flash, or working them in narrow strips. My favorite solution for those yarns is to find another yarn that coordinates – either by picking up a color from the repeat itself, or by adding another color in contrast. Then I work my solid along with the variegated in stripes or other patterning, in a proportion that tames the wild mix, in effect forcing an new uniting background color into the repeat. In the sock top below, the solid is the magenta. The variegated was turquoise, yellow and hunter green. An unlikely and loud combo, but one that worked.
So to sum up, there’s a use for almost every multicolor yarn. Things that make using multicolors easier include harmonious, balanced color sets (even if they’re bright), and a minimum of muddy areas. Introducing movement by stitch direction or by narrowing the strip being knit can be more interesting than the same yarn knit totally flat in stockinette. It IS possible to use texture patterns with multicolors, and even the most savage multicolor can usually be tamed by introducing a background or contrasting solid.
Hope someone finds this useful, so that a skein that’s been languishing in stash somewhere finally meets inspiration.
CHARTING 108 – LACE STRUCTURE
Apparently my last post caused some confusion. A couple of people wrote to say that they didn’t understand why the original graph wasn’t knit-able. I’ll try to explain again.
One principle of lacy and other texture knitting is the equivalence of decreases and increases. In patterns with parallel edges, for every new stitch introduced into a row via a YO, Make 1 or cast on, there is an equivalent stitch removed by a complementing decrease. That decrease can come in many forms – a K2tog, a SSK, a cast-off, or as part of a multiple stitch decrease (Sl-K2tog-PSSO, K3tog, SSSSK, etc.) Yes, there are some exceptions – patterns that deviate by having a decreased stitch count on one or more rows, but if they have parallel edges, they must restore the stitch count on subsequent rows. I’ve graphed both types here before.
Walker’s Porcupine Stitch uses increases and decreases balanced throughout to maintain parallel edges

By contrast, her Starlight Lace Stitch is a parallel edge insertion that has a modified stitch count on rows 16 and 14, that is restored in both places on the next right-side pattern row. The presence of those evil gray “no stitch” boxes is a dead give-away that stitch count monkeying has happened.

To create a panel with one or more decorative edges – edges that zig in and out to make nifty curves, scallops, or sawtooth or triangle points – the stitch count has to be deliberately altered so that the width of the piece grows and then shrinks in a predictable manner. Most of these decorative panels are edgings – strips with one nice firm straight edge that is usually knit or sewn onto the thing being trimmed, and one fantastical dagged edge – the decorative points or ruffles that hang free. There are two-edged edgings that in the past were used as trim or decorative strips all by themselves – lingerie straps, camouflage for shelf edges, free strips appliqued onto towels and house linen, but they’re far less common and are rarely seen in modern pattern collections.
The stitches introduced (or decreased) to form the points can occur anywhere in a row. Placement as well as the number helps determine the overall shape and depth of the point. If the new stitches accumulate or disappear from the left of the location of increase/decrease, the points tend to be a bit sharper. If they accumulate between the stable edge and the location of the increase/decrease the points formed are more like waves or scallops. We saw that in the pattern I charted in the last post, where the point-forming increases/decreases were relatively close to the stable right edge of the piece, stitches were accumulated between the stable right edge and the location of increase decrease, and that spot was followed by a relatively large section that had a stable stitch count. Here are simple graphs of a few basic edging shapes, stripped of all lace detail. Note that in each and every one, if a row has more (or fewer) stitches than the one that preceded it, there is a clearly discernible cause on that preceding row – an increase or a decrease that’s clearly to blame.

It’s the absence of any stitch-to-blame in the historical chart that made it un-knitable:

Yes, the graph looks good. The points march in and out in clearly defined order – but the causes for that patterning are absent. Every YO on this graph is countered by a decrease. There are none left over to form the basic triangle point shape.
Now as to why the chart was published this way – the pattern book I was working from is a direct facsimile of a work produced in Germany in 1921, in a language I can’t read. I did double check the instructions, both against the English key thoughtfully provided by the book’s modern editors; and against the original diagrams presented at the front of the book. Those show standard symbols and a little engraving of what the resulting work should look like. I also successfully reproduced another pattern on the page that uses the same symbols, so I’m pretty sure that in spite of not being able to read the accompanying text I didn’t miss anything substantive.
My guess is that because charting was new, and the symbols used in the original book are not standard (charting symbols aren’t standard even today), among the pattern designers, the artist that laid out the pattern, the typesetter, and the proofer, errors slipped in. Proofing knitting patterns isn’t an easy thing, as any modern professional pattern writer/editor can tell you. In my experience, the most accurate patterns appear to have been produced between 1950 and arbitrarily – 1985. Stuff before in general isn’t as stitch for stitch perfect or isn’t in modern notation; and stuff after seems to have suffered from a lack of skilled manpower and/or editorial time. Not to say everything published after 1985 is junk, but we’ve all seen books rushed to market that required dozens of pages of errata. Books published during the designated “sweet spot of knitting” era tended to require far fewer corrections than do many contemporary works. Kudos to those professional authors/editors/publishers who have taken on the extra time and expense in pursuit of perfection. Eyebrows are raised at those who cut corners. Slack is cut for pre-modern works, especially those that pioneered new forms of instruction.
So the moral of the story in knitting as in far more weighty world matters, is “trust, but verify.”
Afterword: People new to charting might find the Charting 101-107 series here on String useful. You can find those posts under my Reference Shelf tag.
MORE ON EDGINGS AND CORNERS
More on corners. Using the same principles as the knit-from-center-out framing area on my cashmere shawl, I’ve done a mitered corner on my baby blanket. I do envision a problem now that I’ve finished a credible Corner #1, but I’ll deal with it when I get there.
The first step was to make sure that I had a multiple of my halved row count available as live stitches along each edge of the project (small alerts should be going off in your head right now, but back to this later). That’s because using my chosen attachment method, two rows of edging are attached to each live stitch.
Edging right side row: S1, work pattern to end
Edging wrong side row: Work pattern to penultimate stitch, SSK last stitch together with a live stitch of the body.
I can modify this scheme by doing an occasional SSSK on that wrong side row, in which one edging stitch is knit together with two live stitches from the body. This can be periodic and eat a specific number of stitches over a given number of repeats (eating one on every Edging Row 1, or every third row of the edging, for example); or it can be ad-hoc – performed when the thing looks like it’s getting too ruffly. Being a precise person, I prefer the former, but I’m not above sneaking one in using the latter should it be necessary. You’ve probably already figured out that working an edging onto a top or bottom of live knit stitches (or stitches rescued after unzipping a provisional cast on) will require a different rate of attachment than would knitting them onto stitches picked up off a side edge formed when the body was knit, via a standard slip stitch edge.
The second step was to identify a clear diagonal on the existing pattern, and use that as an alignment point on which to build my mitered corner. In this case, the edge of the eyelet diamonds makes a good divider.
So having stated the obvious, I violate it all. To create the live stitches all the way around my perimeter, I picked up, putting all the new stitches on a large circ. I started at the end of a knit-side row of stockinette, placed a marker and picked up a stitch in every slip stitch selvage on my left side edge. Then – not having done a provisional cast-on because I was on vacation and was lazy – I placed a marker and picked up the same number of stitches as I had stockinette stitches across the bottom of my half-hitch cast-on row. Then it was a march back to the origin point, placing a marker then picking up stitches along the remaining selvage.
It so happened that my picked up stitch count on each side is pretty close to a multiple of my edging row count-halved. So I started knitting my edging a couple of stitches in from my corner, commencing with good old Edging Row #1. (Hearing that ding-ding alert again? You should be.)
All is well and good (sort of). I’ve now marched around three of my four corners, and am in the home stretch, working my last straight side. Then it’s on to the final corner and graft.
Now. Why all those alerts?
Because my corner as graphed works best when I commence it on the tallest row of my point – not on Row #1, which is the shortest row. I didn’t figure that out until I was well along. Not wanting to rip it all back a THIRD time, I’m going to see if I can somehow cheat on Corner #4.
Here’s a graph for my modified edging and corner, with attachment instructions (done to the best of my ability).

VINTAGE LACE SCARF; ATTACHING LACY EDGINGS
Where have I been? Well, first there was another spate of chaos deadlines at work. Then it was the beginning of Birthday Week here in the String household (they’re 7 years and four days apart, with mine shortly thereafter). And to no one’s surprise, I came down with a nasty flu. I’m not yet over that, but it was severe enough for me to stay home from work – something I’ve done only once or twice in the last decade.
For her birthday Smaller Daughter specified a volcano cake with a dragon on it. She’d seen something like this in a kiddie cookbook – a bundt with a lava-like frosting poured on, surmounted by some clever marzipan decorations. So we made it a group project. I provided the almond bundt with chocolate fudge filling and frosting; Older Daughter molded the marzipan dragon with dried apricot wings; and Smaller Daughter made the strange red prey creatures fleeing from the dragon:

We were hard pressed to find enough room for the obligatory birthday candles. The cake and decorations however were delicious.
I did manage to make some progress on the lace scarf over the last week. I’ve finished the center section, and am working on the edging. It looks like I’ll have to nip into my third skein of Prescott, so I’m thinking of pausing on the edging to go back and add some length to the center section before lapping all the way around that last end. I’m not doing anything fancy here – no mitered corners. I’m just working an extra repeat of the pattern into the cornermost stitch, and hoping that all blocks out evenly later.

UPDATE: THE LACY EDGING BELOW IS NOW AVAILABLE AS A SINGLE PATTERN DOWNLOAD UNDER THE KNITTING PATTERNS LINK, ABOVE.
I played with quite a few edging patterns for this piece, finally settling on the “Doris Edging” from Miller’s Heirloom Lace. It has framed diamonds that exactly complement the center strip. Along the way I noodled up another simple triangle-based edging. This is an out-take, and didn’t end up on the scarf. I won’t violate copyright by sharing Miller’s edging (which I used more or less verbatim), but I will share this one:


Knitting an edging onto a piece isn’t difficult. It helps if your base item was worked with a slip stitch selvage edge, but that’s not mandatory. I’ve knit edgings onto all sorts of things, including finished fulled/felted items, fabric, and leather (some caveats on this, below). The slip stitch selvage just makes it easier. Your chosen trim will have one edge intended to hang free. Most often that will be dagged, serrated, scalloped or otherwise fancified. It will also have one (more or less) straight edge. This straight edge is intended to be sewn or knit onto something else. I like to work in the orientation shown in the knit sample and pattern, above – with my straight edge on the right, and the fancy edge on the left. My right-side rows commence from my main piece outward, and my wrong-side rows return from the fancy edge back to the main piece.
Sometimes I use a provisional cast-on and start my lace rows immediately after it. Other times I use a half hitch cast on, then work one row back in knits before starting my lace patterns. There’s no real rhyme or reason here. It’s just what I felt like doing at the time. In this case, I cast on using half-hitch, and worked a row of knits back, working my first join on that “back from cast-on” non-repeated row. The join itself is quite simple. When I get to the last stitch of my wrong side row, I pick up one stitch in the edge of my established body piece. Then, for the first stitch of my right-side lace row, I either knit or purl that newly created stitch along with the next stitch after it on my needle.
If I knit those two together I end up with a neat column of stitches that makes a visual line between the lace edge and the main body. While this can be desirable in some cases, it does present a different appearance on the front and reverse of the work. Because the lace center of this piece is garter, and the edging is also presented in garter, I used a P2tog to make the join. The front and back of the work look less different from each other if I purl the join instead of knit it. Once the join is made, I work out the remainder of my right-side lacy row, and the return row. So long as I remember to pick up one stitch at the end of every wrong-side/return row, then work that stitch together with the next one as I begin the right side row, my edging will be firmly united with my main body.
Sometimes you don’t want to do a row-for-row join. Occasionally the stretch of the lace edging or the ratio of the edging rows to body rows isn’t 1:1. This might happen if you are working the edging on smaller needles; or if you are working the edging across a row of live stitches (or across the top or bottom cast-on or bound-off edge) rather than along the “long side” of the work, parallel to the main body’s knitting. In that case you may need to either work additional non-attached lace rows every so often, or pick up at the end of the wrong-side/return rows by knitting two body stitches together, again every so often. The former adds more length to the lace, the latter subtracts width from the body. Which method is used depends on the stretch of the body.
The biggest caveat in attaching knitting by knitting on rather than by seaming is that if you do so, the lace is no longer “portable.” Let’s say in a fit of Suzy Homemaker frenzy, you edged out a set of exquisite hand towels. It’s now some years later, and your children have stained those towels beyond recognition, but the edging still looked good. If you had knit the edging separately and seamed it on it would be very easy to remove and re-apply to new towels. But even if you had run a band of slip stitch crochet down the edge of the towel to provide an easy edge for attachment first, if you had knit that edging onto the towel, removing the fancy lace from the towel will be …problematic.
As far as knitting onto fabric, fulled material or leather – it CAN be done. If the edge can be pierced by a needle tip (or was conveniently punched beforehand), you can knit right onto the edge of anything. BUT the warning about not being able to take the lace off again or adjust it later is strongly in effect. If you want to attach a lace edging to any of these substrates, it’s worth it to work one row of slip stitch or single crochet along the item first, then knit (or seam) your knitted edging onto that crocheted foundation row. The foundation row of crochet gives you a stable, evenly placed line of stitches for the joins, and stabilizes the base item’s edge somewhat. It also (in the case of leather) makes working into previously punched holes easier (a crochet hook is much easier to thread through and grab a strand than is a knitting needle’s tip). Plus, if you think the item being trimmed might shrink, consider seaming rather than knitting on so you can make adjustments later.
So. If you plan on using a lace edging again on another item, or you think your base item might shrink – take the time to seam (collars, cuffs, bed or bath linens). If the edging will remain on that piece, living and dying with the item that bears it – consider knitting on instead (knit counterpanes, scarves). To illustrate this post I wish I still had the denim jacket I trimmed out in knitted lace, or the baseball jacket that used strips of recycled fur interposed with white Aran style heavy cables…
In any case, back to sniffling and a nice lie-down.
