PONCHO FINISHED!
The blue poncho is done!? I had wanted to do something more elaborate with the crocheted border, but the Target Daughter reminded me that it being for her, I might like to hold off on the wild part. I had forgotten that as an early teen one wants to be different from everyone else in exactly the same way as all of one’s friends. Target Daughter thought that too much crochet would make the piece too frou-frou. and requested something simpler.

I ended up using the chain selvedge edges as my foundation, and working with only one ply of my de-plied yarn (in contrast, the knitted part is worked with two plies). Into each of the existing?elongated selvedge edge stitches I did?this unit:
2 double crochet, (chain 3 slip stitch in base of chain to make picot), 2 double crochet

I fudged as best I could along the cast-on and bind-off edges of the rectangles. This made a very simple slightly scalloped edge, with little picots marching along it. Using the thinner yarn kept it delicate and in proportion to the lacy bits made by the knitted drop stitch technique.
While this wasn’t my favorite project ever knitted, my dislike for this project was mostly due to the interminable un-plying. The piece itself knit up and trimmed out extremely quickly. I really like the post-wash softness of the wool I used, and the airy drape of the finished poncho. If you wanted to achieve a similar effect, use a yarn that’s thinner than the one called for in the original Classic Elite pattern. Although the yarn as a whole before I unwound the plies knits up like a heavy sport weight (not quite DK), my unspinning it made it alot more lofty My extracted single plies?are about a fluffy as opposed to hard-twisted?fingering weight in thickness, two of these fluffy beasts knit on conventional as opposed to the wildly large needles I used would knit up at standard DK gauge (22 st=10cm or 4 inches, probably on a US #5 or so).
Birds Eye Shawl
On to the next project. My Birds Eye shawl, done in Lorna’s Laces Helen’s Lace in purples, and adapated from the free pattern posted by Sharon Miller on her Heirloom Knitting website. I’m about?6 inches into the thing, measured from the starting point at the triangle’s tip. I’m having fun with it, but I think the variegated yarn is overpowering the eyelet design. Since it’s turning into massive effort for less of a return than I had originally hoped, as described before I’ll work a wide band of eyelets left and right, and a single eyelet column as a spine up the center back. The rest I’ll do in garter or stockinette. I’ve started on this modification, but have had to rip back a few times because I hadn’t quite gotten the math right on the pattern transformation. I was ending up with too many stitches because I was including some YOs that had no accompanying decreases. More charting is my next step. I’ll report back on this in my next post.
More on Blocking
A couple of people have asked where I do my blocking, or if I use a blocking board. I have to admit that I’m not that organized. Until recently I didn’t have a place to stow a piece of wallboard or a commercial blocking board. We have a mostly bare floors house, with?8×10-foot rugs in only a couple of the rooms. Two kids, but no free-range pets. Depending on traffic, whether or not the piece might bleed dye, I throw some beach towels over either the white Berber style rug (my bedroom) or blue fake oriental?rug (family room)?and pin out on the towels.
General Kvelling
See this??
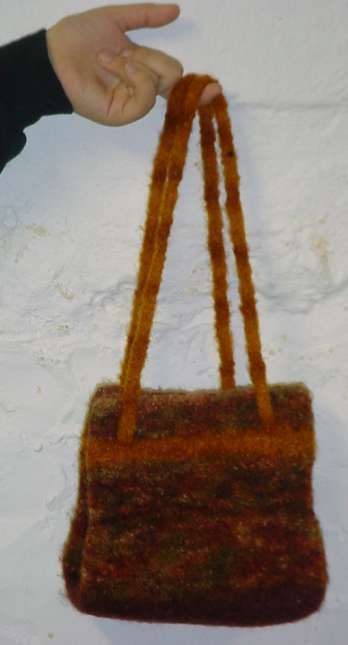
Aside from a couple of fuzzy narrow scarves in garter stitch, it’s Target Daughter’s first knitting project!? She used some bits of leftover Manos del Uruguay?from my stash, and we started with the Booga Bag pattern. I admit we didn’t actually follow it, but we did borrow its general idea – a rectangle of garter stitch, pick up around the edges and work a tube in the round, in stockinette. Make I-cord for handles.
In total I think there’s about skein and a third of the brown/paprika Canyon color, a third of a ball of dark brown (the bottom of the bag, plus the first three or so rows of the tube); and a third of a skein of gold (the stripe and the handles). It’s hard to give exact totals though as all was in little balls and I didn’t bother to weigh it first. We fulled?the bag?in the washing machine by tossing into two hot wash/cold rinse loads of dark colored towels.
Her next project is the one-skein Gusto 10 hat, and mastering double points and decreases. After that it’s on to purling, and wherever else knitting takes her. She’s muttering things about replicating sprites from her GameBoy games, so perhaps it will be Intarsia or stranding…
RELAX. YOU’RE BLOCKING
From my inbox, based on yesterday’s post:? Does knitting really need to be blocked?? It seems so inconvenient to take all these finishing steps when we all want to get the current piece (finally)?done, try it on, and cast on for the next.
It’s?up to you. I find that while blocking is far from an absolute remedy for all knitting ills, it does even out stitch imperfections, improve drape, and even does a little bit to help tame curl. I do a wash/wet block, in which I wash the garment as I intend to for the rest of its life, then pin it out to dry. I never use any of the steam blocking/finishing methods. You can set yarn for life using steam, a mistake is yours forever. But wash/wet blocking can be undone by another trip through the laundry.
I don’t block everything I knit, but I almost always block wool or wool-blend things larger than socks. I also almost always block things I intend on sewing together. If I’ve knit in the round, I’ll block the body and sleeves before attaching them. If the sleeves go on early (like on a Wallaby, where they are joined before the yoke is knit I’ll block the sleeves first, attach them, then block the entire garment when again when all the knitting is done.
I always block lace and cotton knitting – especially counterpane motifs before assembly. Yesterday’s poncho looked MUCH better after it was stretched to even out and maximize the spread of the laddering.
I rarely block hats unless they require post-knitting shaping (like stretching a tam over a plate to give it a beret fold). Some synthetics I block, others not. I didn’t block my Suede T because it was heavy enough to lay flat without encouragement, plus I’d heard that immersion in water changes the yarn’s drape. (I’ll probably dry clean that piece). I did block the Waterspun poncho. Classic Elite Waterspun?is a yarn that looks worlds better after washing and blocking. I’ve made several things from it and always block it before assembly.
So. Do I always block?? No. Do I think blocking is worth the effort?? For most, but not all pieces.
WORKING REPORT – BLUE PONCHO
Is now blocked out, stitched together and is being edged. Here’s a photo mid-block:
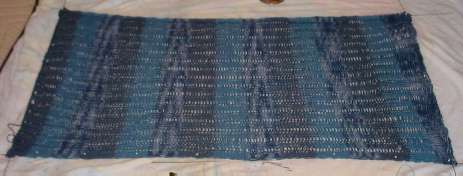
I’ve pinned out both rectangles one on top of the other, using the same set of blocking wires in an attempt to ensure that they end up being the same size. You can see the lacy ribbed look resulting from the dropped stitch pattern, plus the variegated ended up doing a little zig-zag flash thing on some of the stripes.
The two pieces are now dry and sewn together. I’ve started crocheting around the neck edge for firmness. Since I did a chain selvedge, I’ll use that to my advantage around the neck. By doing one or two more double crochets than would fit flat over each chain selvedge loop, I’ll end up with a firm, scalloped neck trim, possibly with some picots thrown in. Pix tomorrow.
Birds Eye Shawl
In other knitting related news, I’ve started the Birds Eye Shawl available as a free pattern on the Heirloom Knitting website. I’m using Lorna’s Laces Helen’s Lace in mixed berry colors – mostly purples with some blue and fuschia thrown in. I’m not entirely pleased at the effect because the colors are overwhelming the texture pattern. I might make some mods to the pattern. I’ve gotten about eight inches into the thing. I may keep the birds eye pattern up around the edge of the piece, but switch to a plain garter stitch or stockinette center, possibly with a line of the birds eye ring motifs running up the center like a spine. More thinking is in order…
YARN MANUFACTURER WEBSITES III
Today we go up and downscale. First Rowan, then Spinrite/Bernat. Both do?a membership thing, but each does it differently.
Rowan
Rowan, like Karabella sells fashion. However Rowan unlike Karabella?retails its products via the website, and as a retailer provides more end-user consumer information. Full yarn?data is available, including stitch and row gauge, recommended needle size, color cards,?and complete wash instructions. There is also search capability, and visitors can look up yarns by name or specify gauges, weight names, or fiber types (searching combos of attributes isn’t possible though).
The site also sells the various Rowan publications, including books, magazines, and in some cases – individual patterns abstracted from them. You can page through the contents of the larger publications, and links are provided to the yarns from which the individual designs are knit (in some cases just the yarn name is given without making it an active link). One?annoying info lack is that thumbnails of the patterns don’t display yarn quantities. If one was to buy off the website, choosing patterns and yarn one wouldn’t know how much yarn to order to make something in the desired size. Another annoying info gap – like most sites that are selling image, there is nothing on the Rowan site that describes garment?sizes or mentions the range of sizes in which the patterns are offered.
Other products/services at the site include a line of designer fabrics, notifications of and registration for upcoming workshops in the UK, and a limited number of kits.The site does offer up pattern and book errata (called addendums and placed under the "Info Centre" tab).Issue #33, Spring/Summer ’03 is the?most recent magazine for which corrections are on the website (#36 is the current issue). There’s also an international index of stockists (shops that carry the Rowan line). There’s also a list of suggested substitutions, listing discontinued Rowan products and recommended current products that may be suitable. It’s not immediately evident because it’s not listed separately, instead it’s in the FAQ.If you want to get in touch with Rowan, there’s?contact form, ground address and telephone numbers provided, along with a note that enquires can take 7-10 business days before response.
All site services are available to both registered and unregistered site users, with the exception of the direct sales section, and the members discussion forums. On site registration shouldn’t be confused with membership in Rowan International, which is a for-fee subscription that includes two magazines and other benefits. Only RI members can access the discussion boards and monthly free pattern. I can’t comment on either as I don’t feel like spending $44.00 US per year to find out more.
As a whole on the site, organization is good and navigation is pretty straightforward. Responsiveness varies, and there appear to be some programming errors in the books section (conflicting tab menus replace each other and loading is slow). Cross links are provided from the patterns back to the yarns, but no links go from the yarns back to the designs. If you’re in love with a particular yarn and visit its page first, you’ll have to poke through to find patterns that use it. Also only six color samples present themselves per page. The link to get to the next set is at the lower right, and is placed (confusingly) after the "make new search" button. You can tell that there was concern about this on behalf of the web designers because they place a prominent "we’ve got X shades of this yarn" statement at the top of every yarn’s basic data page to remind visitors that they are seeing only a few of the available colors. Similar unclear paging haunts the pattern library, and the total number of available selections is listed at the top of pattern search results pages, too.
I do however wonder about the relationships between Rowan, R2 and Jaeger. Rowan has taken pains to establish and/or maintain those lines as separate image entities, yet they include books and designs (but not yarns) from them in the retail section and pattern search sections. It seems a strangely??schizophrenic treatment – either make them totally separate, or bring all three together under one umbrella.
On the basis of easy navigation, clear site organization, complete yarn info, good pattern browsing ability, the availability of errata and substitutions, minus points for yarn quantities and available sizes?missing from the pattern blurbs (with the paid members only thing being a business model thing that’s not to my taste, but has no impact on my scoring)?Rowan gets an?A-.
Spinrite Bernat
From the heights of Rowan we come back down the mountain to the more mass-market Bernat, now a quivering vassal of the Spinrite family of yarns. Bernat sells craft, not fashion. Yes, they have patterns to make fashion garments, but the entire tenor of the site is "what?things you?can make" not "what looks you can create."? There is a difference…
Bernat’s website also has a registration feature, but Bernat doesn’t have the second tier paid membership, nor does it sell things directly off the site. People who sign up at the Bernat site get access to quite a few free patterns both for knit and crochet. There are also periodic newsletters sent to those who have signed up.
Bernat provides complete info on its yarns, too. Knitting stitch and row gauges and recommended needle size is there, as is suggested crochet hook size.Complete wash info is also provided, as is yardage and the useless yarn weight tag promulgated by the Craft Yarn Council (I’ve ranted about this before). Color samples are provided, as are links to patterns that use the yarn. There’s also a link to a retailer search page that implies you can search in your local area for a particular product, however no matter what products I selected, I never got an in-state result, and only found three results for a non-product-specific list of stockists at the national level.
In addition to the free pattern library (in *.pdf Acrobat format), Bernat offers up thumbnails from current booklets offered for sale at local retailers. There are no links back to yarns from the current book profiles, although that info is provided as a link on the free pattern pages and most of the current books do state what yarn was used and what sizes are available?(no quantities though). One useful feature is?a yarn?suitability calculator that assists searches for Bernat products by by yarn descriptor, gauge, or yarn weight/yardage ratios. There is no list of older/discontinued Bernat products and their equivalents in the current line, nor is pattern errata available. There is no contact info on the site aside from a single ground mailing address.
Overall presentation is rather cluttered,?more utilitarian than groomed, but?it’s not hard to make one’s way around the site. I give high marks for complete yarn info and links to patterns from yarns and yarns from patterns; also for the yarn suitability tool and listing available sizes on the patterns. I take some away for the poorly working?retailers listing, the lack of info on older yarns, lack of pattern errata, lack of a convenient contact/feedback mechanism, and overall clutter.Like before, the presence or absence of a free pattern library is nice, but has no effect on these ratings. Bernat just barely squeaks into?an A-, mostly on the effort to link yarns and patterns.The addition of?historical info would?boost it to an A in spite of the clutter.
?
HARDWARE AND SOFTWARE
I am too miffed at the xenophobic, fundamentalist?Red States to be very coherent this morning, so I beg your indulgence. I’ll do more yarn maker site reviews when I’ve cooled down and can be more objective. ?Also, posting a shot of a large piece of stockinette in blue is guaranteed not to awaken those who also stayed up to watch election returns, so I’ll skip a boring progress report on the blue poncho until I can show it raveled and sewn together.
Hardware
Yesterday however I did pop by the hardware store. I find it almost as much fun as a knitshop, and almost as full of Useful Knitting Gadgets. I thank The Knitting Curmudgeon for?writing about the wealth of gizmos in hardware stores back in her pre-blog days.
Yesterday’s acquisition was an inexpensive caliper:
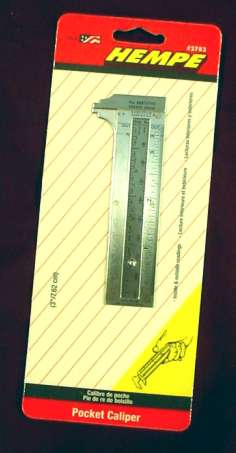
What for?? I’ve got lots of tiny needles, smaller than US #0 (2mm). I had hoped that it would be precise enough to parse out the difference between a 1.5mm and a 1.25mm. Unfortunately, it’s not. It does help me see which sets belong together (something that can be hard to do with fingers alone), but for the tiny needles it’s just not accurate enough. What it IS accurate enough for is discovering the real metric size of various needles. As we all know, just because something is marked as 3mm, it doesn’t mean that the marked size is true. I know I’ve got "big sevens" and "small sevens". Now I know what the difference is between them.
I’ll still need to shell out for a sub-zero needle gauge or micrometer, but this tool at $6.00 is still useful.
Other useful thingies in hardware stores include washers and o-rings of various sizes (stitch markers, especially for giant size needles); tool boxes and roll-up pouches for needle storage; measures of all types; the yardage?estimators used by fishermen; slabs of drywall or other soft, flat materials for blocking or pin-out boards; PVC pipe for building blocking frames for shawls and other huge flat things; lengths of thin non-rusting wire or tubes to use as blocking wires (ask for brass music wire or stainless steel welding wires); wooden dowels for create-your-own needles; and hard finish cotton twine or thin wire for knitting.
Software
This has nothing to do with knitting, but I’ve finally wrestled the camera into submission and can show you the Pumpkins that Ate My Sunday:

Let this be a cautionary tale. If you tell children, "We’ll carve anything you want on the Jack o’Lanterns this year," be prepared for major surgery.
The wolf was a canned pattern that came with the little carving tool set, and was a special request of the smaller daughter. The dragon was an original drawing by the larger daughter.Both kids helped, but I did the bulk of the finer work. ?I can wholeheartedly recommend those carving sets. The small plastic doodads and saws really make the impossible possible, and saved me from lopping of fingers, hands, and the heads of the pumpkin requesters.
PROJECT – RIDGED RAGLAN
A break from the monolith of text that this blog has become.
I’ve been having an on-line chat with a knitter looking for something to do with a pile of small balls/many colors of worsted weight yarn salvaged from a ravelled back Intarsia sweater. I recommended the Ridged Raglan from Knitters Magazine #54,?Spring 1999 issue.
This is my 6-year old’s all-time favorite sweater:

Also please excuse the blurry photo. Some days the camera and I get along, others we war. Believe it or not, this is the best of ten shots.
This pattern is by Gerdine Crawford Strong, and in my opinion is the last thing?Knitters published that was a "gotta knit it" project, and the last thing I’ve made from their pages. But my disappointment in their current direction is food for another day’s post.
Ms. Strong’s pattern is pretzel-clever. It’s knit vertically, with the arm and front (or back) panel knit at the same time – decreases form the raglan lines. The "ribbing" bands at waist and cuff are actually garter stitch worked at the same time as the sweater arms/body. The idea is presented in sizes from little kid through adult XXL, and as both a pullover and as a cardigan. It calls for a worsted weight acrylic, but anything knitted to the same gauge can be used.
I hate to make more than one of anything, but I’ve done three of these sweaters. One was a two-blues cardigan in Encore (a mostly acrylic/wool blend); the one above is a pullover in three citrus colors of?Record 210, an Aran weight unmercerized cotton; and one was?a pullover in Tahki Cotton Classic, all in tiny balls salvaged from a five-pastel intarsia project abandoned by my mother. For the latter two I had to play a bit with the pattern to accommodate differences in gauge.
As you can see, there are tons of scope for fun with this project. It’s a great vehicle for using up bits and drabs. You need one color for the purl welts that?unite the piece as a whole (in my case, navy blue, orange and white respectively), but the individual stockinette stripes can be anything, from scraps leftover from several different projects to one of those hand-dyed yarns that can be so challenging to use effectively.
My only caution is that if you do choose to use cotton take care with the cuffs. Knit an extra garter stitch ridge, and try to work them loosely otherwise they can be too tight for quick dressing. Wool and wool blends however are naturally more elastic than cotton, and don’t present this problem.
If you go searching for the Knitters #54, Spring 1999, it looks like this:

A final note to US citizens – go vote or lose your right to complain for the next four years.
BLUE PONCHO – MORE TWISTS AND TURNS
For such a butt-simple project, this poncho has taken me on more twists and turns than I care to think about. Perhaps it’s knitting it for a new teen. Perhaps it’s that I find ponchos to be such boring things to make.
Latest iteration- my choice of the texture pattern is "too heavy" in the opinion of the targetwearer. Something lighter is called for. So I’ve thrown in the towel on coming up with something original, and am retreating to a freebie pattern on the ‘net: the Classic Elite Charmed Poncho.
Of course I won’t be making it in the cashmere blend Charmed or all cashmere Lavish. Prices for Charmed hover around $32. US per skein; Lavish is something like $64. US per skein. I’d need four. Maybe your teen deserves such spoiling, but it’s not going to happen in this house. Besides which, were I to miraculously come up with the funds, she’d expire at the thought of blowing it on yarn instead of a PlayStation game console.
Current plans include sticking with the un-plyed blue Paternayanyarn for the thing. She adores the colors, and being in stash – is already paid for long ago. One other good feature of this pattern is that it’s in ladder stitch (knit stockinette, deliberately unravel every 3rd stitch top to bottom). That means that for the width it’s VERY yarn-efficient. While that’s a good thing if you’re knitting with $64. per skein yarn, it works out well for me, too. The poncho as written requires only 520 yards of yarn. It’s small though – more like a ponchette. I’ll be making this one a bit wider and longer, but will still have plenty in my bag of mixed blues.
Although my gauge is roughly 3spi, as my unplied isn’t as heavy as the original yarns. Not a problem though. Airy works. I’ll do amultiple of3 stitches, plus 8 edge stitches.According to the printed gauge, the original works out to be 16 inches wide before the laddering (18 inches after unravelling). That’s an expansion factor of roughly .125 (18/16). If I work my piece on 53 stitches (15×3 + 8), my before-ladderwidth should be about 17.7 inches wide (17 3/4, rounded up). After laddering, it should be about 19.9 inches wide (20 inches, rounded up). To keep the proportions of the original 18 wide:26 long, I need to make my rectangles about 29 inches long (26/18 = 1.44; 1.44 * 20 = 28.8) . I’ll also add two selvedge stitches which I’ll slip to make sewing up and crocheting an edge easier.
In another serendipitous occurrence, having de-plyed the yarn, I’ve got all this one-ply stuff that matches it exactly.
Why is this a good thing? I note that the original poncho sports a minimal crocheted finish along the edges to stabilize the ends after laddering back. I’ll work the crochet, but I’ll probaby use a simple edging pattern instead of just plain old single crochet. Since crochet’s product is thicker and bulkier than knitting given the same yarn, working the crochet out of one instead of two plies should make the edging more in proportion to the knitting than it would be if I used the whole, unsplit yarn. This plain old stockinette piece will be ultimo boring to knit, but will be an interesting experiment to prove or disprovesome of the points in my pastcrochet diatribes.
So there you have it. Cast on 55 stitches. Working the first and last stitches as a slipped selvedge edge, work in stockinette until the pieceis 29 inches long. Work last purl row and finishing as described in the Classic Elite original. Sew up, finish all edges with some simple crocheted edging to be chosen later. I’ve got to save something to write about later next week, as pix of two large striped blue stockinette rectangles will put everyone to sleep. (Even those who have made it through the math of this entry.)
NOT OOP BOOK REVIEW – BEAD CROCHET
Pork in the Trees?
Well, as asomewhat pessimisticfollower of Boston baseball, I had to go out and inspect the tops of the neighborhood oaks. Surely pigs flew last night, andsome might still be up there. But on to needlework.
Not OOP Book Review – Bead Crochet
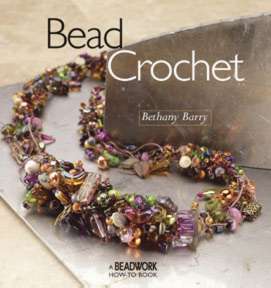
I’ll break with my pattern of only reviewing long out of print books, and pick on something contemporary. I found Bead Crochet by Bethany Barry in the library (Interweave Press, 2004).
I have to say, I was highly disappointed. Maybe my taste is entirely in my mouth. I do like demonstrative jewelry and embellishment, but aside from a couple pix of historical and contemporary pieces in this book, the contents – especially the projects – left me stone cold.
I was also extremely surprised that any book presenting a capsule history of crochet put out by Interweave can fail to cite Lis Paludan’s wonderfully complete Crochet History and Technique – another Interweave Press publication. The background of crochet given in the Beading book is vague at best, and flat out contradictory at worst. It repeats the old nun’s work saw on crochet’s beginnings, and offers up adisciples-of-Christ origin for shepherd’s knitting. She mentions advanced bead crochet being taught in a Philadelphia academy inthe 1820s (which seems a bit early to me based on other readings), but gives no exact citation for it. There are several exquisite examples of late 19th century beaded crochet in the book. Most of these can be seen in the Amazon peek-inside preview. Unfortunately the rest of the text has nothing to do with them.
O.K., picky historycriticisms aside, as this is clearly not a needlework history book. On to the techniques and projects. You see that large chaotic rope of beads on the cover? All the projects inside look like that. Large ones, small ones, square ones, pouch-style ones, flower shaped ones, ones done with eyelash yarns, and ones done with smooth yarns. If you like the necklace on the cover and want to learn to make lots more encrusted things exactly like that, this is the book for you.
To be fair, there is one project featuringinstruction on how to crochet a basic beaded rope. That’s useful. There are four pages of basic description for simple off-loom needle beading techniques(peyote stitch, brick stitch, square stitch, African herringbone weave) – but these things are described in passing, as adjuncts to the book’s main premise – beaded crochet.
What was I expecting? More substance, perhaps less art. More detailed techniques, dipping into historcial sources for something besides clumps of randomly-encrusted crochet. Maybe I wanted to see a range of things that can be done in bead crochet, and learn some techniques to make them. While the gallery section at the backdoes showa wide range of pieces (some of which I do like), there is no relation between them and the techniques presented earlier.
So to sum up – I’m glad I borrowed this one from the library before buying it. As much as I like crochet and adore embellishment, I won’t be adding this one to my permanent collection.
TEENY RED SOCK – PATTERN
UPDATE: A REVISED, EASY TO PRINT VERSION OF THIS PATTERN IS AVAILABLE AT THE KNITTING PATTERNS LINK, ABOVE.

Several people have written to ask for the pattern for the teeny Red Sox sock.
It’s pretty much the same as the sock patterns on wiseNeedle. If you’ve done a toe-up sock with a Figure-8 no-sew toe and a short rowed heel, you’ve got it. I don’t want to re-write the entire thing with detailed instructions here. For that you can go to any of the sock patterns on wiseNeedle:
http://www.wiseneedle.com/knitpatterns.asp#socks
But here’s an abbreviated version. For any how-tos or further details, refer to the comparable section of any of these other sock patterns.
Teeny Red Sox Sock
(c) 2004, Kim Brody Salazar
Permission granted to link to this pattern and make socks for personal
consumption, but not to reproducethepattern or make socks for sale
without the author’s consent
1 card Special Blauband darning yarn, bright red
1 card Special Blauband darning yarn, white
1 set of five double pointed needles in any teeny size you have, preferably #000 or smaller
Gauge: Pretty much unimportant, although the darning yarn looks best at 12 stitches per inch or smaller.
Using the white yarn, work a figure-8 cast on starting with two needles and four loops on each needle. Knit the first row as usual, taking care to untwist the stitches that will be mounted wrong on one of your needles.
Toe and Foot:
Row 1: k1, M1, k1. Using another dpn, k1, M1, k1. Using a third dpn, k1, M1, K1. Using the fourth dpn – K1, M1, K1. You should now have 4 live needles in your work, each with3 stitches on it.
Row 2: Knit all stitches.
Row 3: *k1, M1, k2. K2, M1, K1* repeat. Each needle should now have four stitches on it. Your toe is done.
Row 4: Switch to red and continue knitting until sock measures approximately 3/4 of an inch measured from the tip of the toe.
Heel:
Determine where the bottom of your foot will be. With white yarn, work the following on the two needles that hold the stitches for the bottom of the foot. Think of the two needles that hold those stitches as being one unit:
Row 1 of decrease: K7, yf, slip next stitch purlwise onto right needle. Turn work.
Row 2: Yf (wrapping the yarn around the slipped stitch that was just slipped and return it to the right hand needle – it should look like it has been lassoed by a noose), p6, slip the next stitch purlwise (keeping the yarn in front of the work). Turn work.
Row 3: Yf (wrapping the yarn around the stitch you just slipped and returning it to the right hand needle), K5, yf, slip the next stitch knitwise onto the right needle. Turn work.
Row 4: Yf (wrapping the yarn around the stitch you just slipped and returning it to the right hand needle), p4, slip the next stitch purlwise (keeping the yarn in front of the work). Turn work.
Row5 (first increase row:) K4, knit the next stitch through the back along with the wrapped loop around its base. (I do this by picking up the loop on the point of my right hand needle, then knitting the loop and the stitch together), yf, slip next stitch knitwise onto the right needle. Turn work.
Row 6: Yf, (wrapping the yarn around the slipped stitch so that there are now TWO wraps at its base and returning it to the other needle), p5, purl the next stitch along with the loop wrapped around its base, slip next stitch purlwise (keeping the yarn in the front of the work). Turn work.
Row 7: Yf (wrapping the yarn around the base of the slipped stitch and returning it to the other needle), k6, knit the next stitch through the back of the loop along with the two loops wrapped around its base, yf, slip next stitch knitwise onto right needle, DO NOT TURN WORK.
Ankle and Ribbing:
Switch back to red, and continue knitting entirely around the ankle of the sock. On the first row of the ankle when you get around to the white stitch at the right hand edge of the heel, knit it along with the wraps around its base. Continue to work in stockinette until it is approximately 3/4 of an inch measured from the top of the heel
Ribbing Row 1: *K1 red, K1 white* repeat
Ribbing Row 2 and 3: *K1 red, P1 white* repeat
Bind off all stitches using red. Darn in ends.
YES, I LIVE NEAR BOSTON
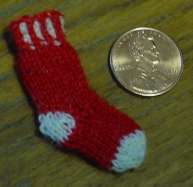
Fully fashioned toe-up, short row heel sock with corrugated ribbing, 16 stitches around. Knit from Froelich Special-Dekatur reinforcement yarn using US #00000 (1.0mm)needles. Approximately 1 inch (2.5cm) from top of cuff to bottom of heel, and approximately 13spi/20rpi. I may not be wearing my heart on my sleeve, but I will be wearing a tiny sock on my lapel.
