TRUE CONFESSIONS
I am very glad that I didn’t focus on making this piece two-sided.
At the outset, I thought about it. Hiding the ends on both Montenegrin Stitch and Meshy (Two-Sided Italian Cross Stitch, pulled tightly) are easy. Lots of real estate overstitched in which both beginnings and endings can be camouflaged. Double running is a bit more difficult, especially when one strand is used. Yes, I know various termination methods to do so – one-strand loop start and waste knots to begin; back-trace stitching, and threading through the existing line to end – but they are annoying to do, especially on a large piece. I made a half-hearted stab at it, but abandoned double sided double running early on, But I never thought it would be the two solid techniques that would be giving me trouble.
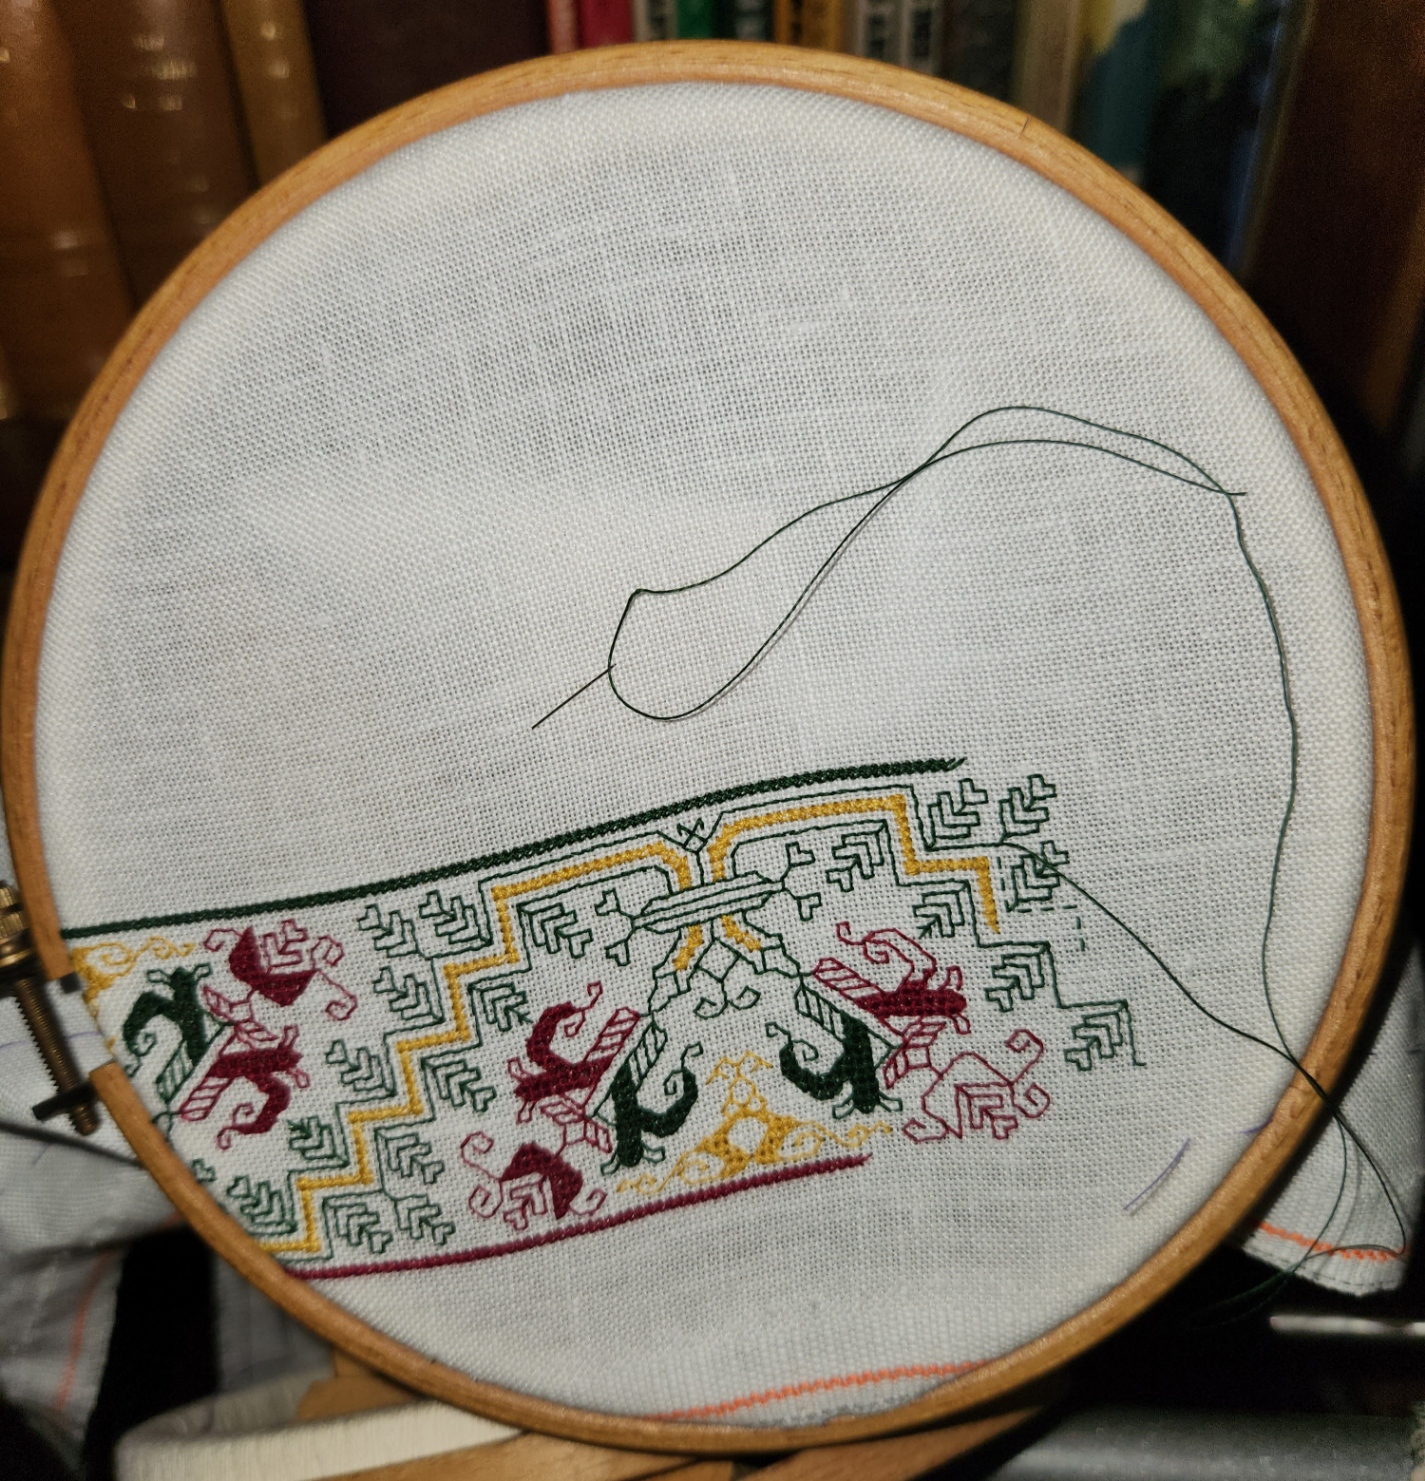
Here’s the front:
Here’s the back:

Montenegrin is working well. There are just a couple of bald spots where I lost track, mostly in angle changes. I blame resuming the habit of watching TV while I’m stitching. Occasionally I get caught up in the action, and miss a turn. Then don’t realize it until I am long past. Had I still been reverse-side-display focused, I would have done more diligent checking, and would have ripped back and redone the less than perfect bits.
Meshy on the other hand… Ouch.
The two-sided Italian cross stitch works best over large areas, like backgrounds in voided style pieces. It isn’t as cooperative when its playgrounds are small, as they are in these flower parts. It’s like working nothing but the bits where voided stitching bumps up against a foreground line, with no respite. Working these small parts I never quite get the rhythm – it’s all compensation stitches, with very little chance to display the openwork texture. That also means that coverage on the back gets slighted as working direction changes to adapt to the shape of the field being filled. Add to that the tension limitations of the cotton floss (more fragile than silk, believe it or not), and in spite of cotton’s fluffier nature, we have lots of bald spots on the back. Far from optimal for double sided display.
Finally then there’s my own general laziness. I’ve made a couple of mistakes that I’ve had to pick out. But instead of picking out large areas, I’ve mostly opted to pick out just the “broken” bits, tying off loose ends, or fastening them with overstitching on the back. Most of the fat or knotty looking spots above are from fixing mistakes. Sometimes the errors encroached on Meshy sections, and those are notoriously difficult to frog. Sometimes I ripped out small segments and replaced them because I didn’t feel like re-creating the large, accurate sections they were in, just to get at a couple of errant stitches.
So my back is a relative shambles. I will of course continue on, focusing on the front. But especially for those of you who tell me that my pieces are inhumanly perfect, please know that you usually only see the after photo, and lots of corrections and creative editing went into making the project look like that.
STONE BY STONE FINISHED, ANOTHER BEGUN
The blackwork mini-sampler I did to celebrate The Resident Male’s latest work (now in Beta reading) is complete, a mere 30 days from the first stitch done on 27 June, to stitching the signature on 27 July.
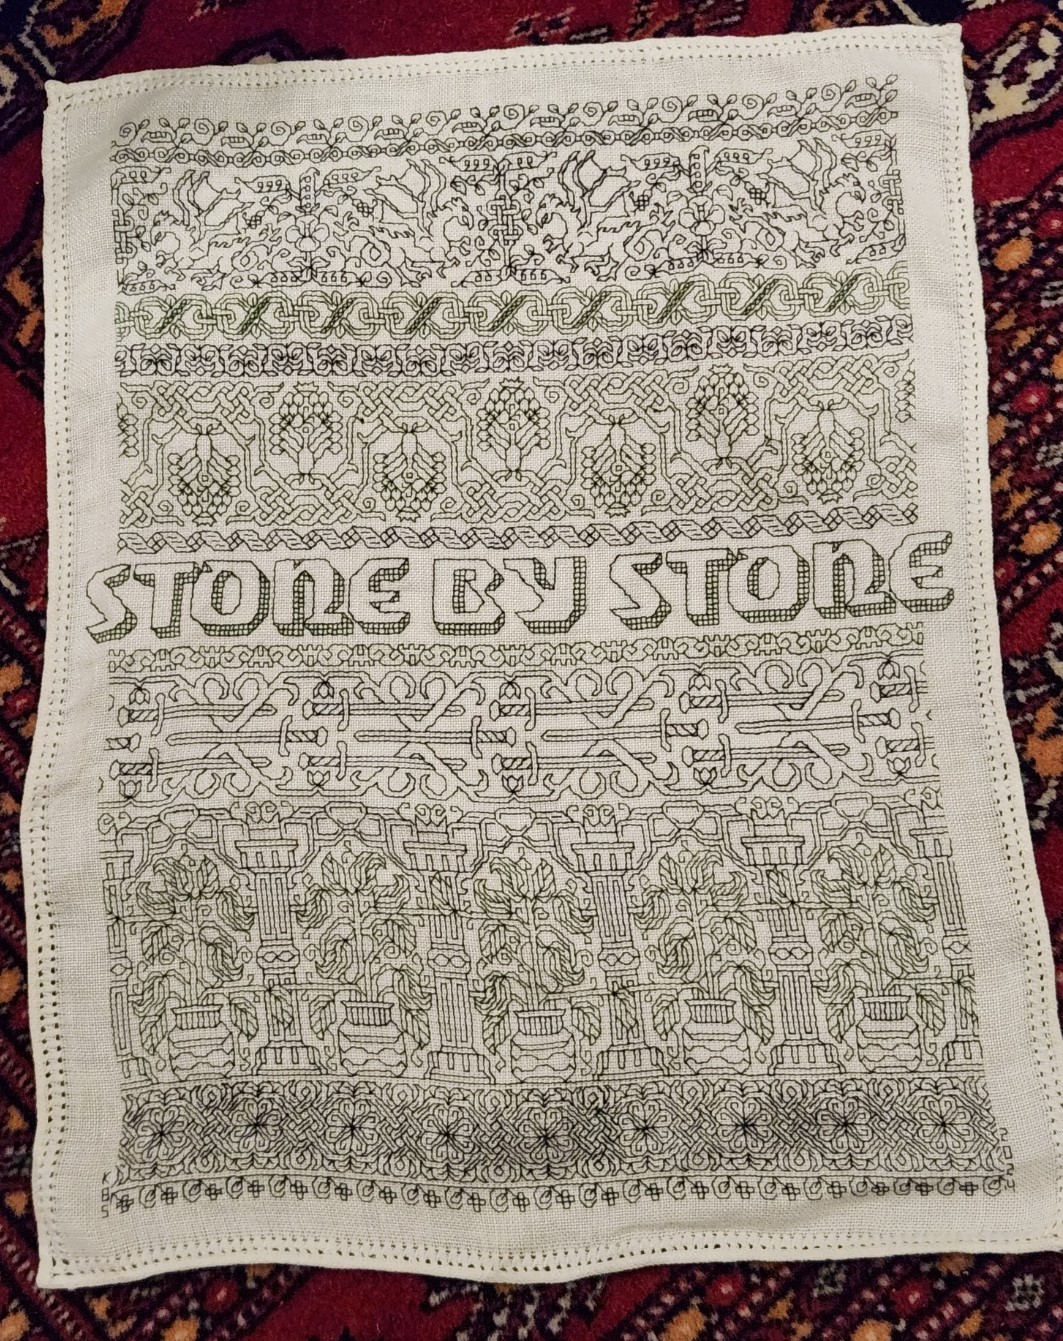
Dated and signed. If I had been thinking, I would have left spots at the left and right of that bottom flower edging for the initials and date, so they would have been in line. But not wanting to pick anything out (stitching in hand on the edge is a real pain), I went outside the lines and signed/dated the piece in the margins.
For the record, this was done in one strand of Sulky 30, a mix of black and deep green. I am not particularly fond of the Sulky look here using only one strand stitched over 2×2 ground cloth threads. It’s a hard finish thread, and was a poor choice for the rather open holes on this 33.25 threads per inch count ground. The threads rattle around in the ground cloth weaving holes, making sharp corners and straight runs rather wobbly. I probably should have used a double strand.
While I could have been happier about that stitch regularity and alignment problem, I’m not un-pleased with the end result. All of these bands will be in Ensamplario Atlantio Volume III. With the exception of the ribbon immediately above the letters, they are all of my own devising. That ribbon band is something I redacted myself from an extant artifact. No timeline yet on Ens Atl III‘s release, but I am close, with 20 pages of new fills (a few with source annotations). It will also have an as-yet undetermined number of pages with narrower bands, plus several full page plates with larger, all-over designs, wider fills, strips with mitered corners, and shirt yokes. Neatly symmetrical mitered corners on these strips are very rarely seen in period pieces – usually designs are butted up against each other, or the corners are fudged and display no planned diagonal mirroring. But modern stitchers prefer them, so I’ll furnish a few.
For now Stone by Stone has joined the other pieces on my Wall of Shame – the pin-rail display of as-yet-unframed, or unfinished stitching in my sewing room. And you can see why I called this a mini-sampler, compared to its brothers.

While I will be finishing this off as either a framed or fabric scroll piece, I’m not quite sure how to do it yet because the margins around the stitching are so small, and the antique pulled thread hem too charming to hide. I might baste it to a piece of deep green or black cloth, and either frame or scroll-finish that. But such things are to contemplate in the future.
Now on to the next piece.
Since I’ve established a pattern of these needlework tributes to The Resident Male’s writing output, I have decided to do another small piece to honor Fractured Symmetry, which so far has been unrecognized in stitchery. This time however I’m starting with a piece of cut yardage rather than a rescued vintage linen item, complete with finished edges. To that end, I need to prepare my ground cloth for stitching.
First I need to true it to weave, because the cut edges of remnants (and even purchased pieces of ground cloth) rarely follow the threads. Here you see my chosen piece of stash linen. I’ve found the first unbroken thread along each edge, and carefully pulled it out, leaving the partials above it intact. This gives me a nice, straight line along which to cut. Note that there is a bit of skew that will be snipped off before the next step:

In total, that’s about an inch (2.5 cm)of wastage north/south, and about 3/4 of an inch (2 cm) wasted east/west. But it can’t be helped. I carefully cut along the lines created by the withdrawn threads, and hand-hemmed the cloth all the way around. I know others use sergers or sewing machines to do this. It’s a pain to haul that puppy out. If Klaatu (my ancient Elna) was out and being used for something else, I probably would have done an off-the-edge zig zag or other specialty stitch using it. But I don’t begrudge the time to hem. It’s the sort of thing I can do while watching TV.
After hemming my ground works out to about 9 7/8 inches wide (25 cm) across by 18.5 inches tall (47 cm). This time I’ll leave about 1.25 inches (a little over 3 cm) of unworked margin all the way around, to avoid the stitch-in-hand challenge of Stone. That gives me a stitching area of roughly 7.5 inches x 17.3 inches (19 cm x 43 cm).
And the thread count? Easy with the penny method.

In this close zoom cell phone photo, the penny obscures 28 threads going east/west, and 24 threads north/south. Multiply each of those by 1.33 and you get roughly 37.25 threads per inch in the horizontal direction, and 31.9 threads per inch in the vertical. Obviously not evenweave, but I can work with that. It does mean that the designs as stitched will be a bit compressed in the horizontal, and a bit elongated in height. For example, squares on the count will present a bit like rectangles, but since I’m planning a simple band sampler, that will just end up being part of the piece’s overall look.
The next step is to iron the cloth to get out the storage creases (yes, I should have done that first), then baste in my guidelines to mark the vertical and horizontal centers, and to establish the top, bottom, and right hand margins. (I could do the left, too, but since I generally start in the center then finish symmetrical bands to the right first, I usually just work them to that same point in the repeat to the left.)
And while I’m doing that bit of tedium, I’ll be thinking about what strips or motifs to include on this piece. I’ve got a couple of bands I want to try out, but no full piece designed. And I also still have to find a word or short phrase to enshrine on it, so I’ll be thumbing through Fractured Symmetry to pinpoint that.
This is the fun of being a bungee-jump stitcher. You get to surprise yourself as you go along.
