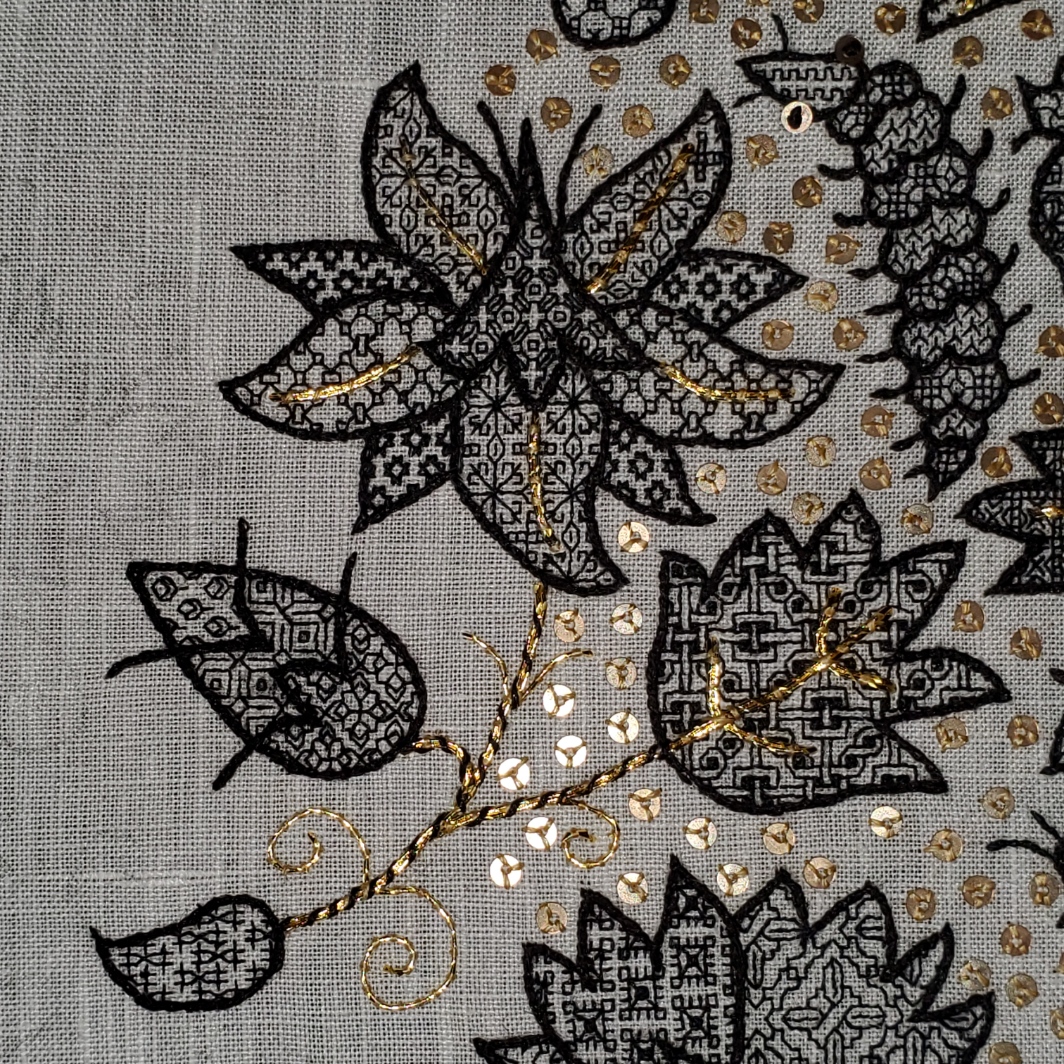
More progress on the latest small band sampler. Just a little to go on the latest band.
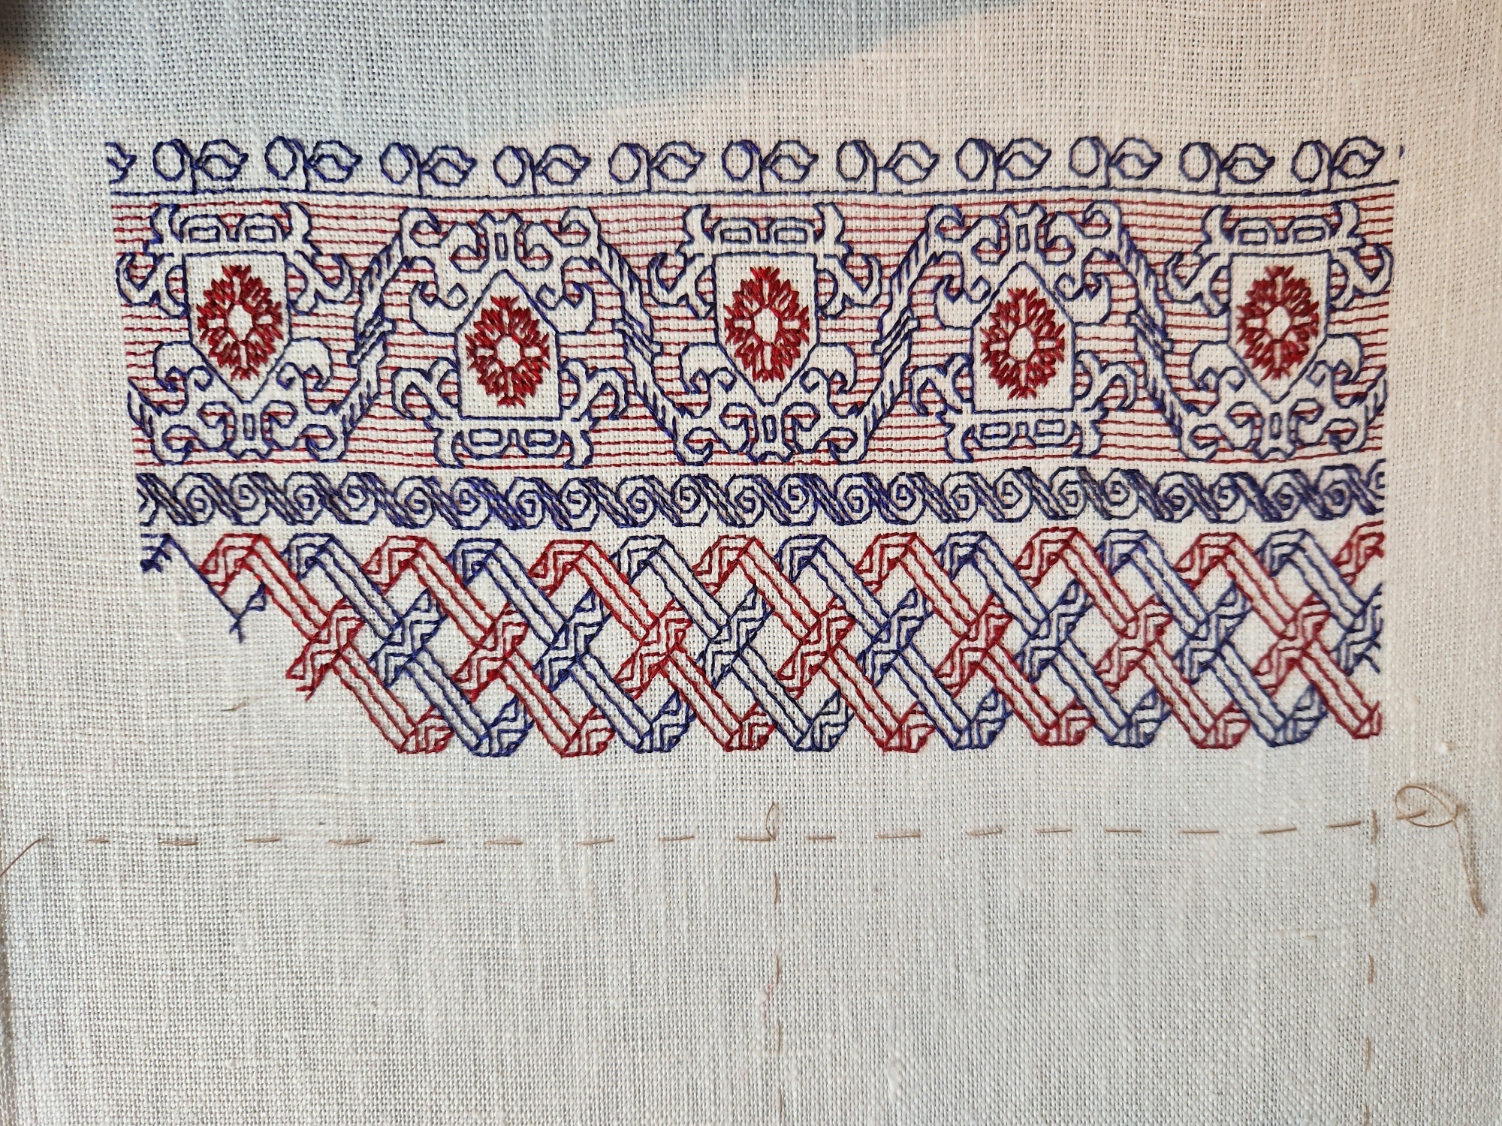
That basted line below the ribbon strip marks the top quarter of the piece, measured from the top edge of the stitching. Next I will probably do a narrow red band, and then on to the lettering. Advance warning that it will bear another incomprehensible motto in yet another non-Terran language, in keeping with my themed tribute.
On to answering questions from my inbox.
First one up is “Why do you leave twigs as you go?” I think the person is referring to single stitches like the ones hanging down in the upper left of this snippet.
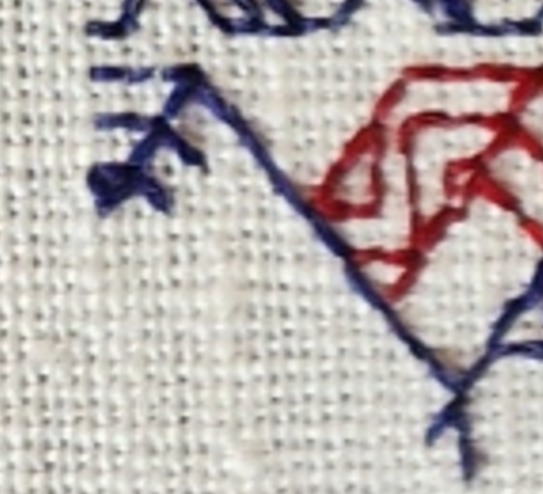
These are a temporary artifact of the way I work double running stitch. In this case I had just enough thread left to do the blue bit shown, but not enough to continue down the other two parallel lines that make up the ribbon. But I know I’ll be coming back from the other direction. So to make life a tiny bit easier, instead of coming back and then having to noodle around to hit the **exact** spot along a continuous line where the previously laid stitches pierce the ground, while I was at that spot I added just one stitch along each of those future branches. That way when I return from the other direction I have a nice, easy to see spot point to join up with instead of having to squint. It’s a tiny thing, but makes life a lot easier.
The second item was phrased as a minor accusation – “You say you almost never use stitches over 2×1, but the angles on your piece clearly show them.” To this person I can say that I haven’t violated one of my stitching conventions. My weave is skew and makes the angles that are 45° on my chart look closer to 60° or 30° when stitched. Here is how that works:
Using the penny method I counted 28 threads going east/west, and 24 threads north/south. Multiply each of those by 1.33 and you get roughly 37.25 threads per inch in the horizontal direction, and 31.9 threads per inch in the vertical (I rounded up to 32 on that one).

That means that a square stitched over 2×2 threads will appear as a rectangle – taller than it is wide, with a ratio of about 1:0.83. Here’s a rough illustration of what’s happening.
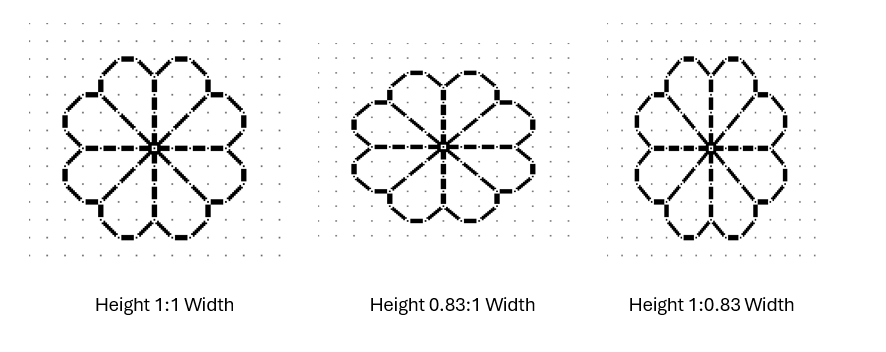
All three of the simple quaternary flowers above are exactly the same in terms of stitch count. All of them model what happens if you stitch over 1×1, 2×2, 3×3 or any exact ratio count. The one at the left is what most people expect to see when working on Aida or evenweave, and for the most part it is. But if you find a piece of woven, countable ground that isn’t exactly even – that has more threads in one direction than in the other, the stitched expression of the fully symmetrical pattern will appear a bit distorted in one direction or the other. If you have more vertical threads per inch, the design will appear squished – wider and more squat. If you have more horizontal threads, the design will appear stretched out and taller. In my case my fabric has more horizontal threads per inch than vertical ones. You can clearly see this here when you compare the length of three stitches in each direction.
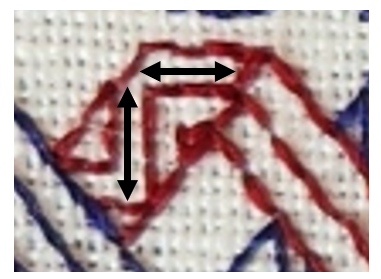
That vertical arrow bar is visibly longer than the horizontal one.
I stitch on skew count quite often, mostly because I am frugal and use countable grounds NOT specifically sold for embroidery. These include vintage linens, newly purchased finished goods (like napkins), and yardage sold of the bolt intended for regular garment or home goods sewing. But when I do use these non-standard materials I try to plan the direction of my stitching or the design of my work to either take advantage of the distortion, or avoid calling attention to it.
If the counts are close, most likely no one will notice, and if they do it will be because I’ve chosen to do a pattern that goes around a corner. Here’s an example. These are closeups of the same pattern from my first Fangirl sampler (the bony bois). The left photo is of the strip pattern running up the side of the piece, and the other from the same strip stitched along the bottom.

Side by side it’s very clear that there is distortion. But I doubt you noticed it in the last post’s photo of the entire piece.
The easiest way to avoid this challenge is NOT to work the same design both horizontally and vertically on the same piece of ground. That’s where band samplers show their strength. The bigger the percentage deviation between horizontal and vertical count, the more I lean towards doing a piece featuring strips or parallel bands.
As a closing thought on this, note that I planned the direction of the count on my Unfinished Coif rendition in response to the ever so slightly skew 72×74 thread per inch count. I had purchased the meter piece of wide linen but in spite of the cost I discarded the frugal method of cutting it to maximize the number of coif-size pieces I could get from the yardage. I was only making one coif, and saved the remnant for future work. So my ground for that project was cut on the other direction of the grain than the ones worked from the pieces supplied to the in-country stitchers. I did this so the stitched filling designs on it would be stretched and thinner rather than wider and more squat.
In the example above you can best see this in the big leaf with the fancy interlace filling. That filling when charted presents with the larger “circles” formed around the center interlace by the twists as being of equal height and width. But as stitched they look taller than they are wide. It’s a very tiny and subtle difference, but one I think added to the elegance of the overall presentation.
Oh, and as an aside…. The ONLY place aside from use as part of eyelet formation I have ever seen a 2×1 stitch unit in ANY filling or band artifact or historical work prior to 1650 was found by Toni Buckby, our fearless leader on Unstitched Coif. She redacted the “stirrup” fill I used in the paisley shape in the lower left. The 2×1 units form the elongated crosses in the center of the scattered motifs.

That is stunning! Love the use of two colours.
Oh, I *do* like that woven band, the 2 colors, the differing “sides” of the ribbons…
And fantastic idea to leave a landmark to aim at when working from the other direction.
I forgot to ask – your basement redo…did it get finished and are the changes working out as hoped?
Yes, we did, although final assembly took a bit longer than expected, and there are still a couple of details (like a misplaced and as-yet-unfinished chair) that need more attention. But I should post a long-belated summary of how it all turned out. Thanks for the reminder.
[…] Why do the patterns look tall and squished? I’m not working on purpose woven evenweave linen sold specifically for embroidery. I am not sure where this well aged yardage from my stash came from, but it was “fabric store” linen sold off the bolt for home sewing. The count is about 37.25 threads per inch in the east-west direction, and about 31.9 threads per inch north-south. There’s a more complete explanation of what that does to a charted design in this linked post. […]
[…] Working on skew counts (non-evenweave linens). An aside in the discussion of a past project, but lots of tech info here. […]