ONE FOOT IN FRONT OF ANOTHER
Just because things are a bit in the air here at String Central right now, doesn’t mean that our dedication to Relentless Forward Progress has been put aside. There are things to do, things to make, and accomplishments waiting to be notched and acknowledged.
First, we did have a wonderful weekend of low key celebration here. The Resident Male (and Executive Chef) outdid himself. He did homemade gravlax (the Jacques Pepin overnight cure version); grilled boneless lamb with garlic and rosemary; and roasted cauliflower and red onions. I pulled my weight by baking four small chocolate pound cakes, one of which we split for dessert, stowing the other three in the freezer for future treats. But I have promised to detail my adventures in low carb baking, so I will elaborate here a bit.
Low Carb Chocolate Pound Cake
I started with this recipe – Keto Chocolate Pound Cake, from the All Day I Dream About Food blog site. The thing was pretty straightforward if you happen to have the ingredients in the house, which we did. Note that this recipe uses almond flour, monkfruit-based brown sugar substitute, butter, baking powder, eggs and sour cream in addition to the items mentioned below in my summary of deviations.
First change, instead of one standard size loaf pan, I used this one – a four mini-loaf thing I got years ago when I was a regular contributor to school-based fundraising bake sales. It takes a standard size loaf cake recipe and turns it into four more saleable and storage friendly smaller units.
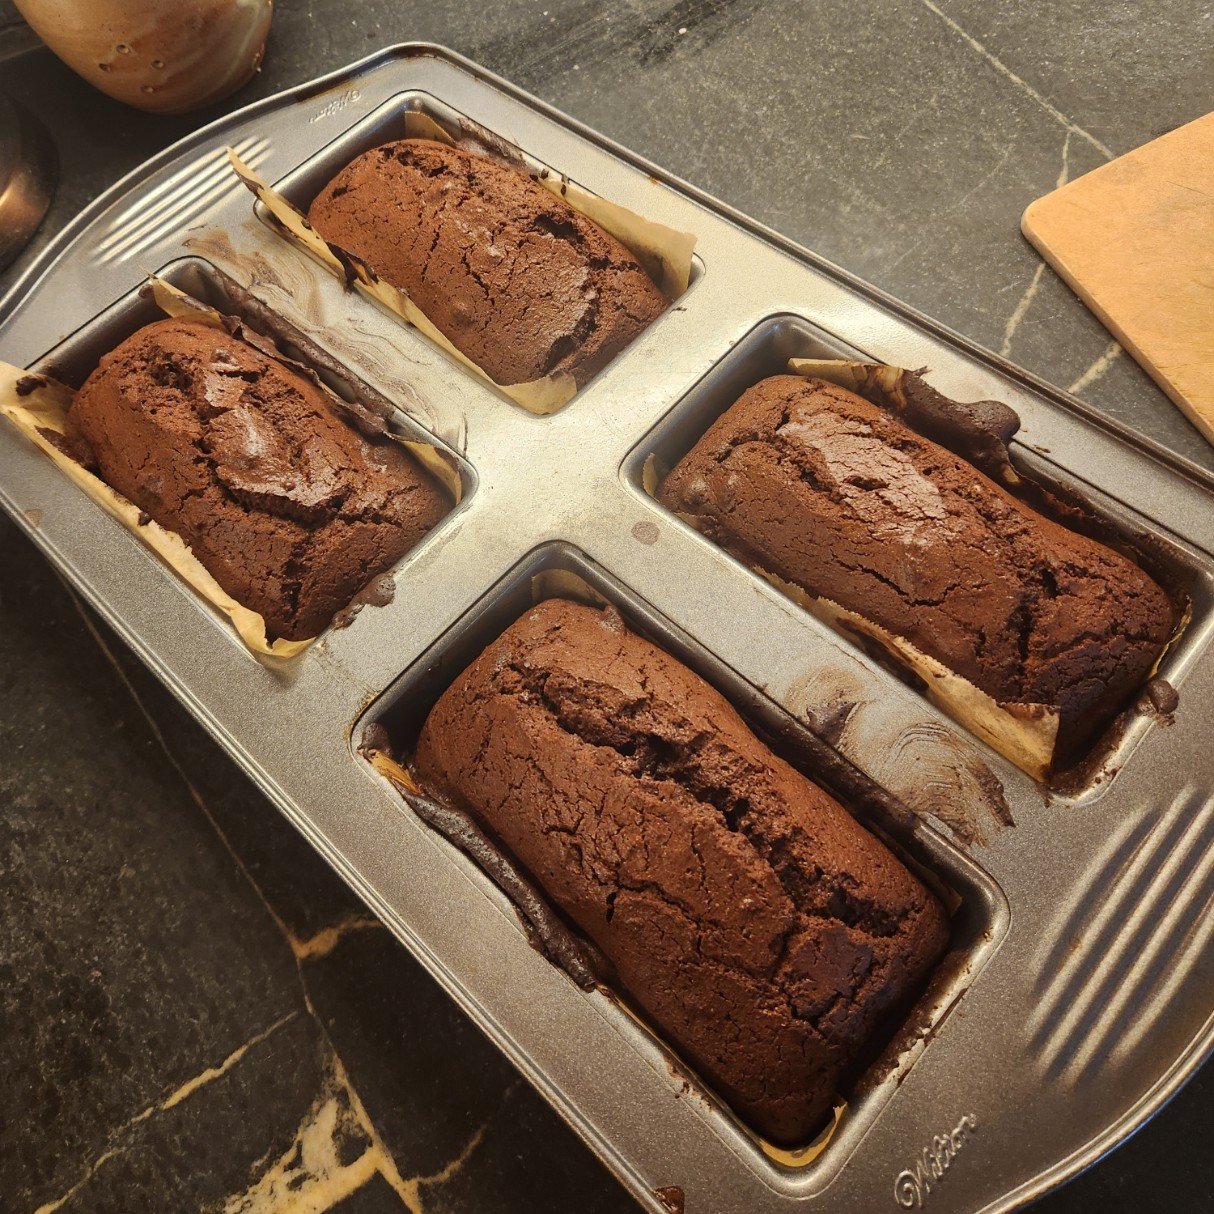
I am pretty sure I found this pan in a yard sale, but I do see them sold in cooking supply and on line sources. And yes, I buttered each little loaf hole and lined it with a piece of buttered baking parchment to make removal easier. From prior experience I know that this pan in my convection oven bakes faster than a full depth loaf pan. To compensate I did my bake at the recommended temperature, but only for 50 minutes – not the 60 to 75 cited in the recipe. I tested the cake with a skewer for doneness.
Second, and this is a personal preference – I detest coffee flavor in my chocolate. The recipe calls for two kinds of cocoa – regular and “black”, chocolate flavor whey protein powder, plus espresso powder and a quarter cup of room temperature, strong coffee. We had the whey powder on hand, no problem. I used just one kind of cocoa, combining the specified quantities for both together – a Dutch Process, known for its deeper/stronger chocolate flavor, and the only one on my pantry shelf right now. I skipped the espresso powder, and in place of the coffee (clearly needed to hydrate the rather thick batter) I used the same quantity of very strongly brewed unsweetened black Assam tea, also cooled to room temperature.
Third, I tossed two large handfuls of coarsely chopped toasted pecans into the batter before spooning it into the pan.
Fourth, I omitted the chocolate ganache glaze entirely. I knew I would be freezing the three extra cakes, and I know from experience that ganache can get chalky when that happens. Given that the four little loafs were moist and tender, and we would be eating one right away, I didn’t see the need. I can always whip up a little bit of glaze when we defrost a survivor if I think the extra moisture is needed.
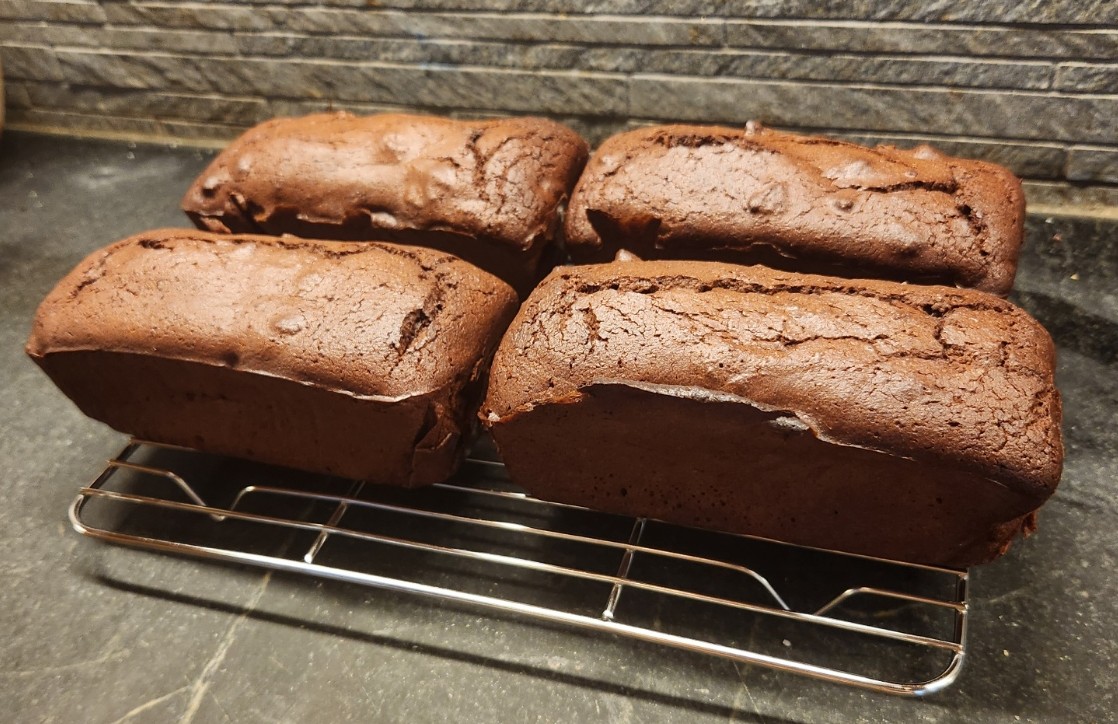
Here is the end result. A definite do-again. Moist, dense without being heavy, with a deep cocoa flavor. The toasted pecan bits were a welcome addition for both flavor and texture. Each little cake makes two very generous portions. Perhaps next time I will also add a handful of zero-sugar chocolate chips. But that would be truly decadent. Based on this result as opposed to many truly dismal Keto baking experiences I have had, I may explore the site of origin to see what else is up there.
Booties
I had a special request to knit some booties for a the sister of a friend of a family member – the first of that particular friend circle to have a baby. My favorite bootie pattern is a quick knit. I can do a pair in about four hours, so why not.
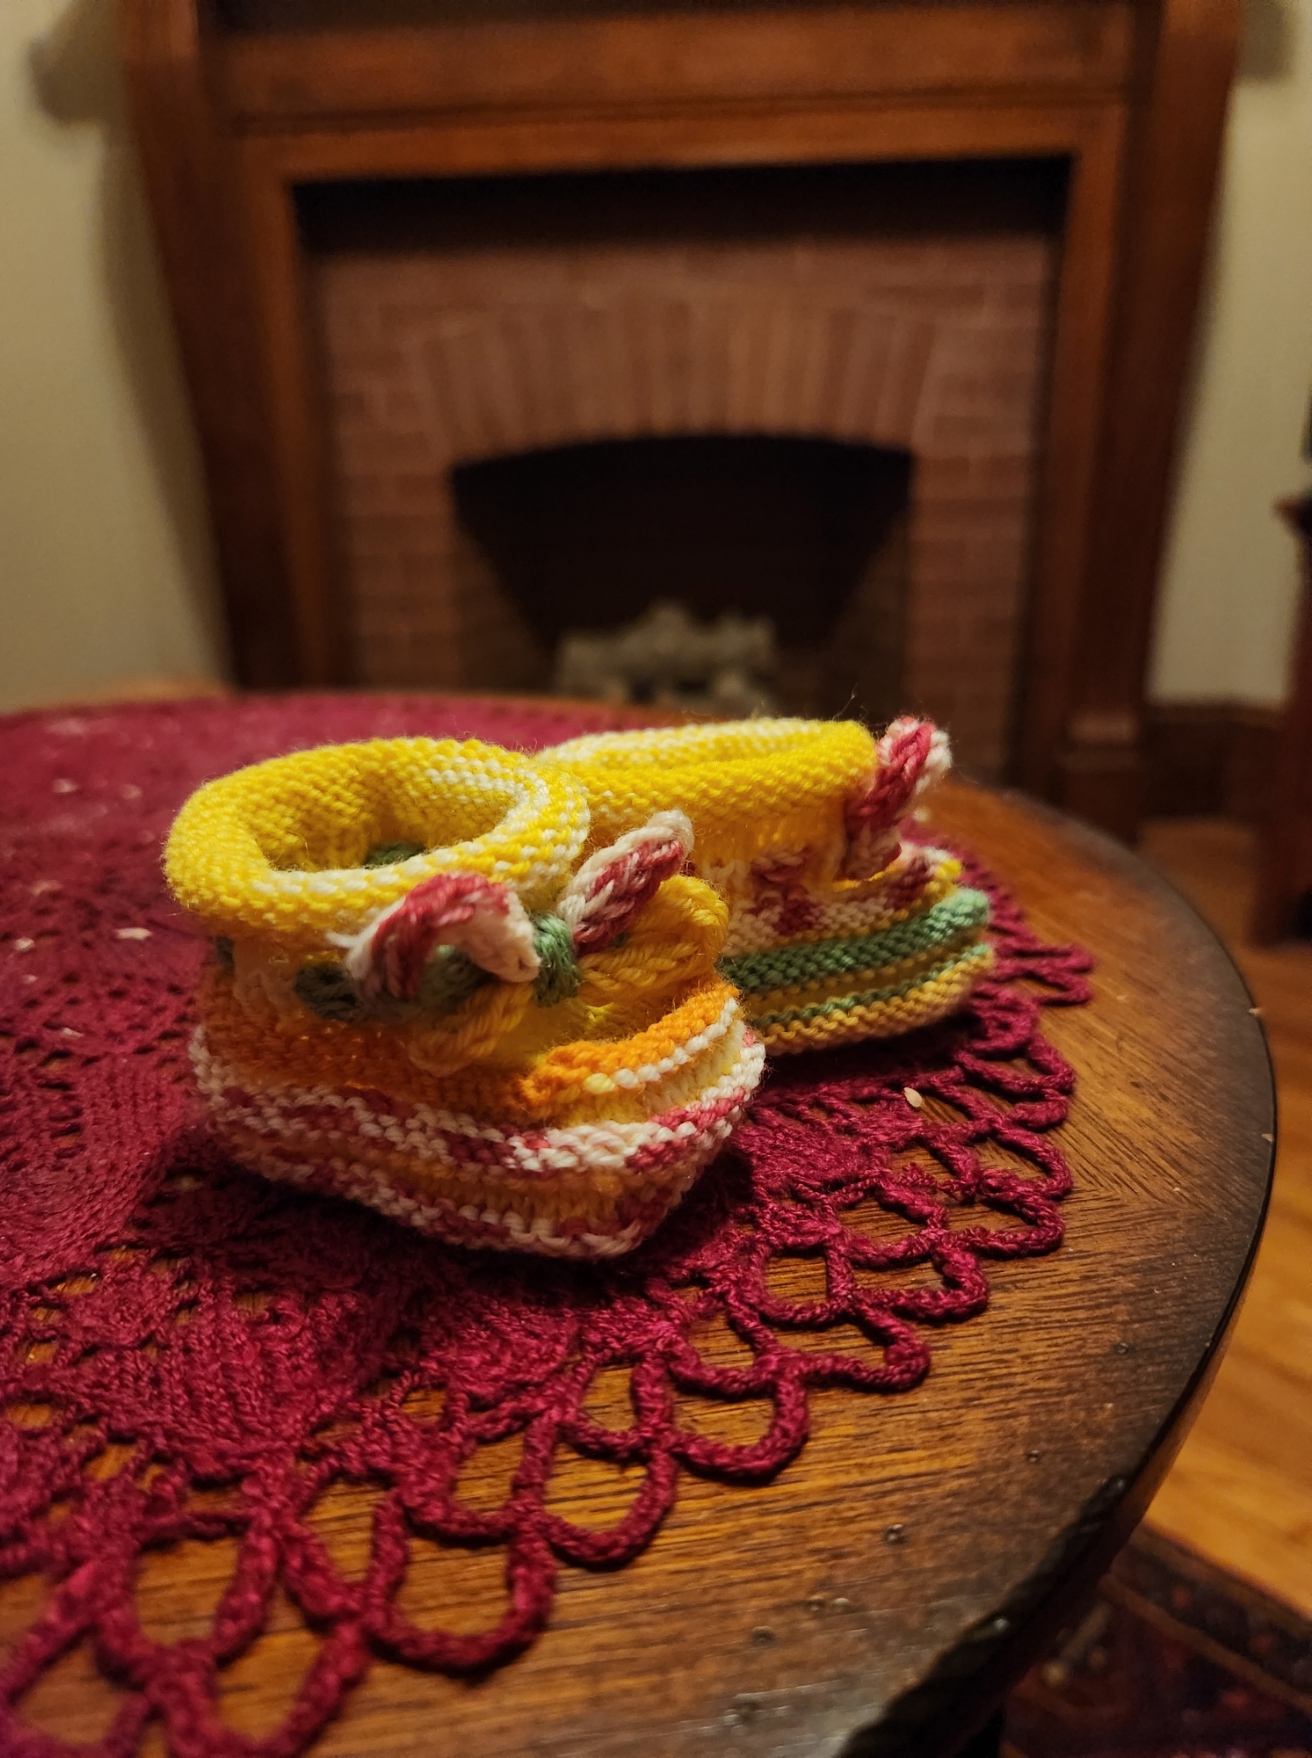
These are from the same pattern I used easily thirty times over a few decades to make items for my own spawn, plus baby gifts for friends, family, and co-workers. The original pattern was posted by Ann Kreckel in 1995, to the ancient email based KnitList mailing list back in the days when the Internet was still climbing out of primordial seas. It can still be found via the Internet Archive’s Wayback Machine utility – Click here to retrieve it.
In the past I’ve posted a mini-tutorial on making these, and invented and shared a hat to match.
Reading over the instructions it occurs to me that even with my mini-tutorial many knitters today might have a problem following the pattern as Ann originally shared it. Not that there are mistakes, but I do note that the level of comfort with written instructions in the general knitting community has declined sharply in the video era; and the terms and logic of the thing might challenge a newer knitter. I think I could make the pattern more accessible with a simple re-write and merge with my mini-tutorial. But it’s not my design, so I am not comfortable just doing so.
I have tried tracking down Ann to ask about updating and hosting her pattern as a free offering, but so far I haven’t gotten a response. If any of the old KnitList gang reads this and knows how to find her, please pass along my sincere wishes for happiness and health, and my request for pattern editing and republication permission.
Socks
Hating to just sit there, no matter where I am, over the past two weeks at home, waiting in doctors’ offices, and after my last procedure I kept busy knitting a pair of socks. They are going to be a present for someone who went above and beyond during a regional emergency – not to aid me, but to help someone near and dear. I won’t spill the beans because there is a remote chance that they might see this post. But I did do a whole pair, start to finish, and will be casting on for another before the coming hospital sojourn. Sanity before all other things, and keeping busy keeps me sane.
Stitching – Playing with Faux Buratto
Another bit of sanity-preservation. I wanted a stitching project to bring with me, too. Something small, easy to see, and easy both to follow and to stitch. Something I can slap in a small hoop and support with minimal kit. Yet something that holds interest, and would be enough of a challenge to tempt me to curious activity. I have teased this on Facebook, but here is the full story.
A while back I -lucked into a curious bit of textile. A sieving/bundling cloth used in traditional Korean kitchens as part of food preparation. HMart had it on a rack in the housewares section, and I noticed the weave immediately. I did a blog post on the discovery a while back,
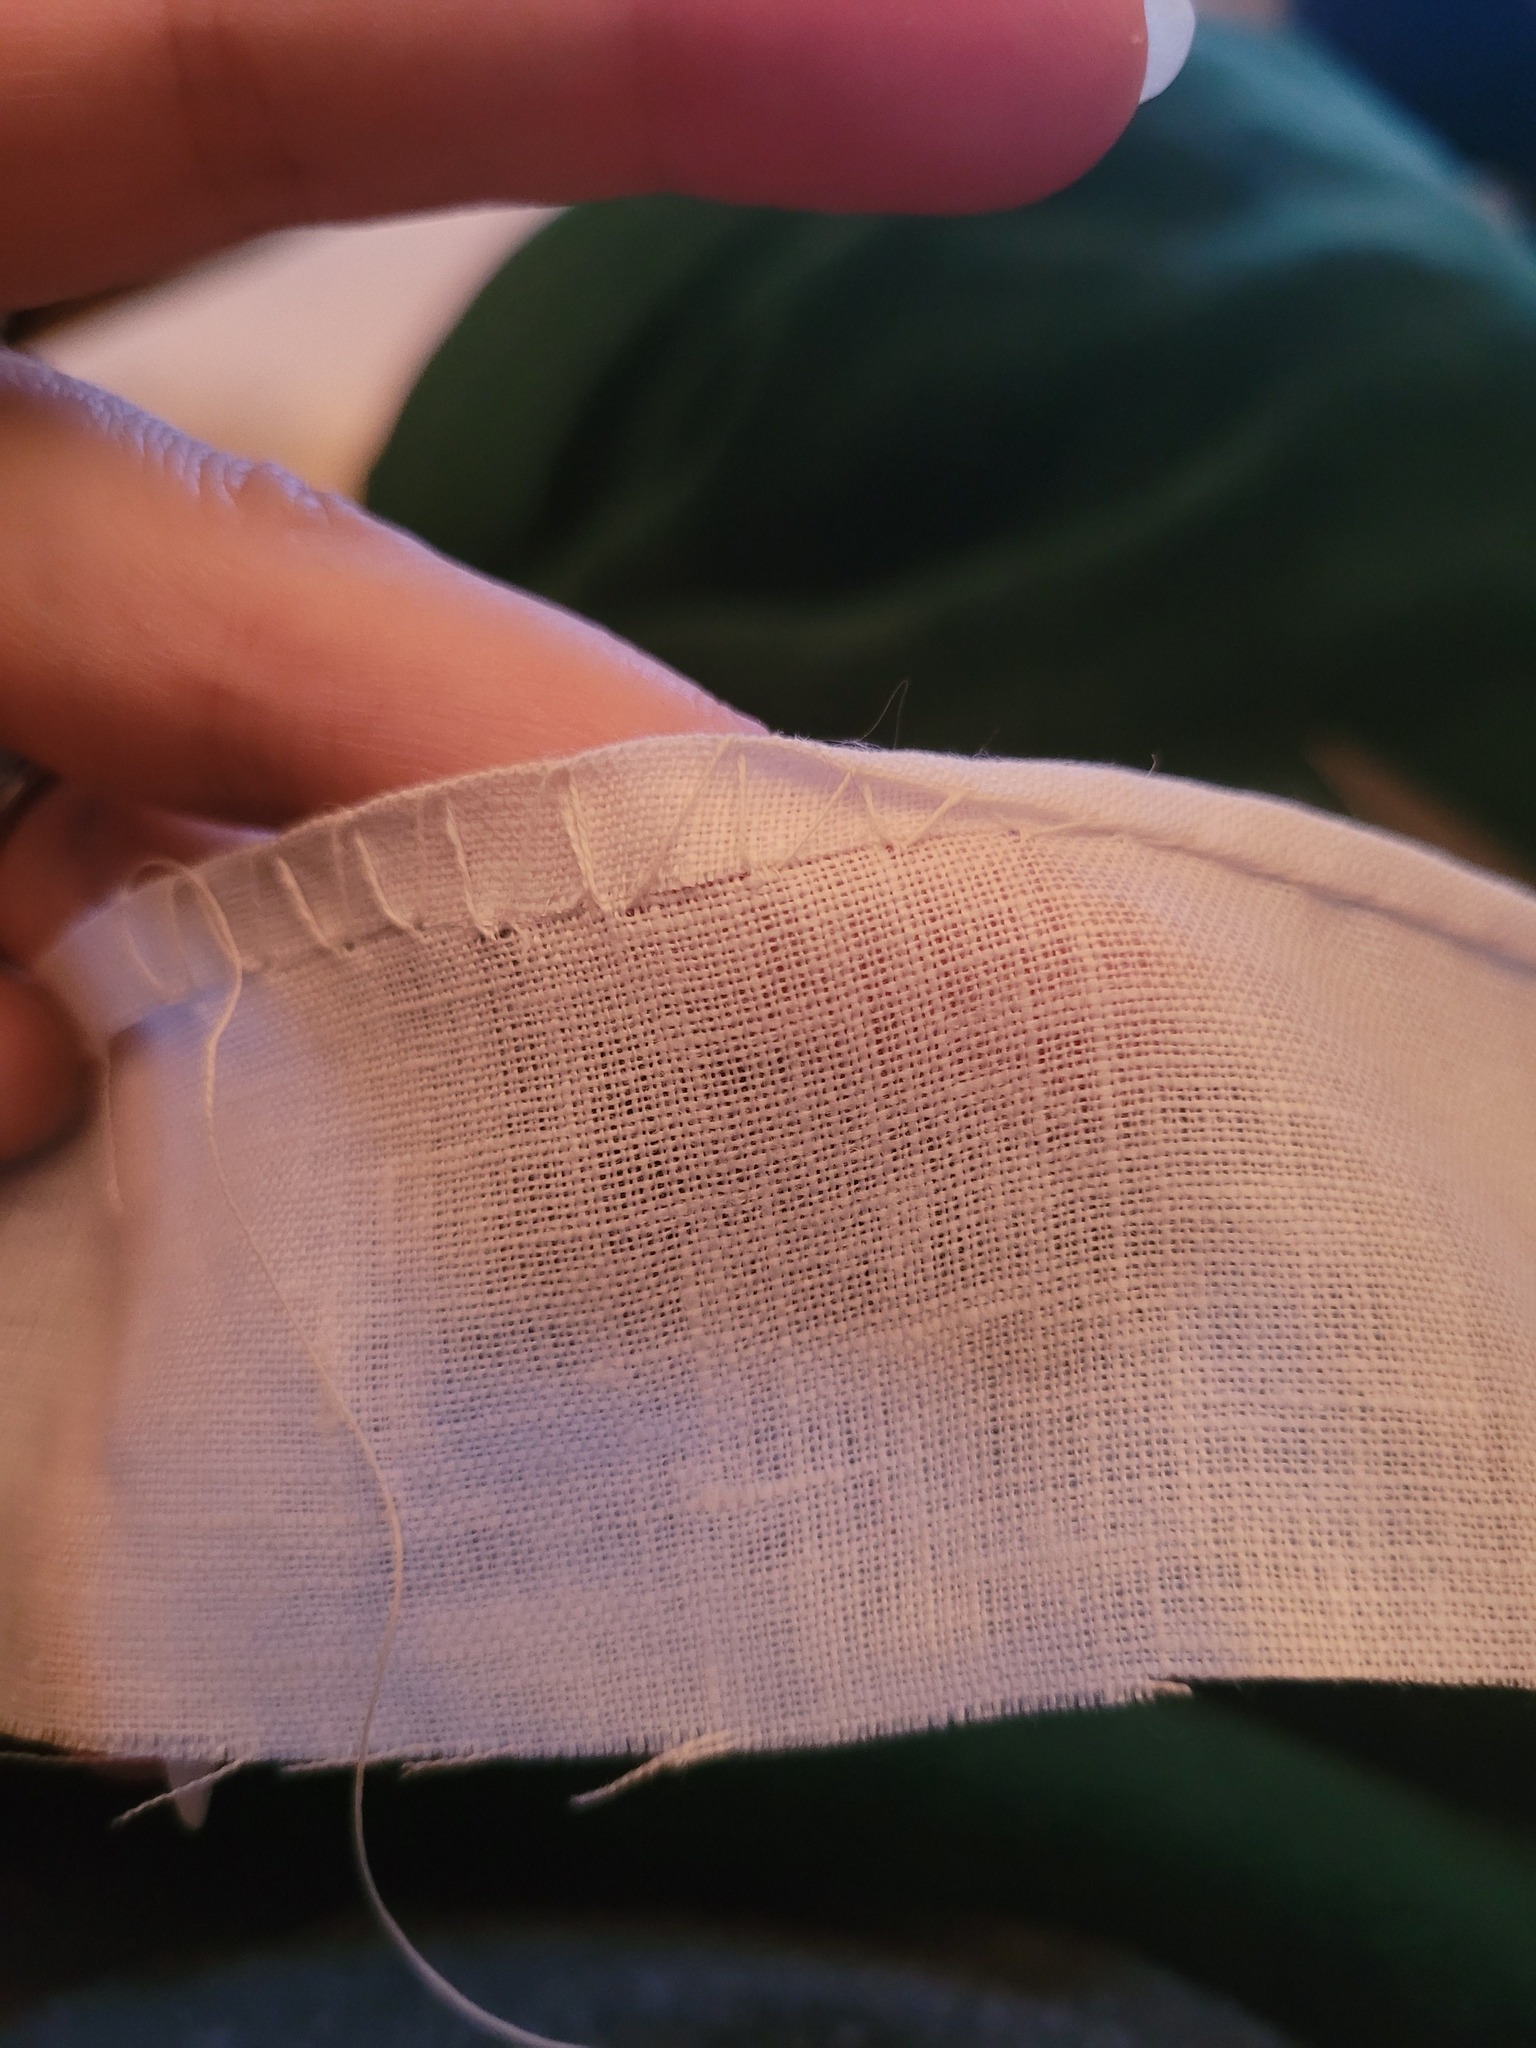
I want to try out a few designs on this cloth. The first step of course was to establish a normed edge. Like most textiles the retail cut rarely aligns with the weave structure, so I basted the largest possible rectangle I could, and added guidelines for vertical and horizontal centers. Then I just started in on an outline. I’m keying off the use of deep red and yellow-gold in a couple of museum artifacts. I’m going to try out establishing my outline for this strip and then do one of several possible fill methods. This style is later 1500s into the 1600s. Then I will try one of the monochrome type designs. from the earlier half of the 1500s. After that probably another multicolor but using a different scale and fill style. It’s a small cloth and there isn’t room for a ton of strips on it, but I will use the available real estate to best advantage, picking on the fly as I usually do.
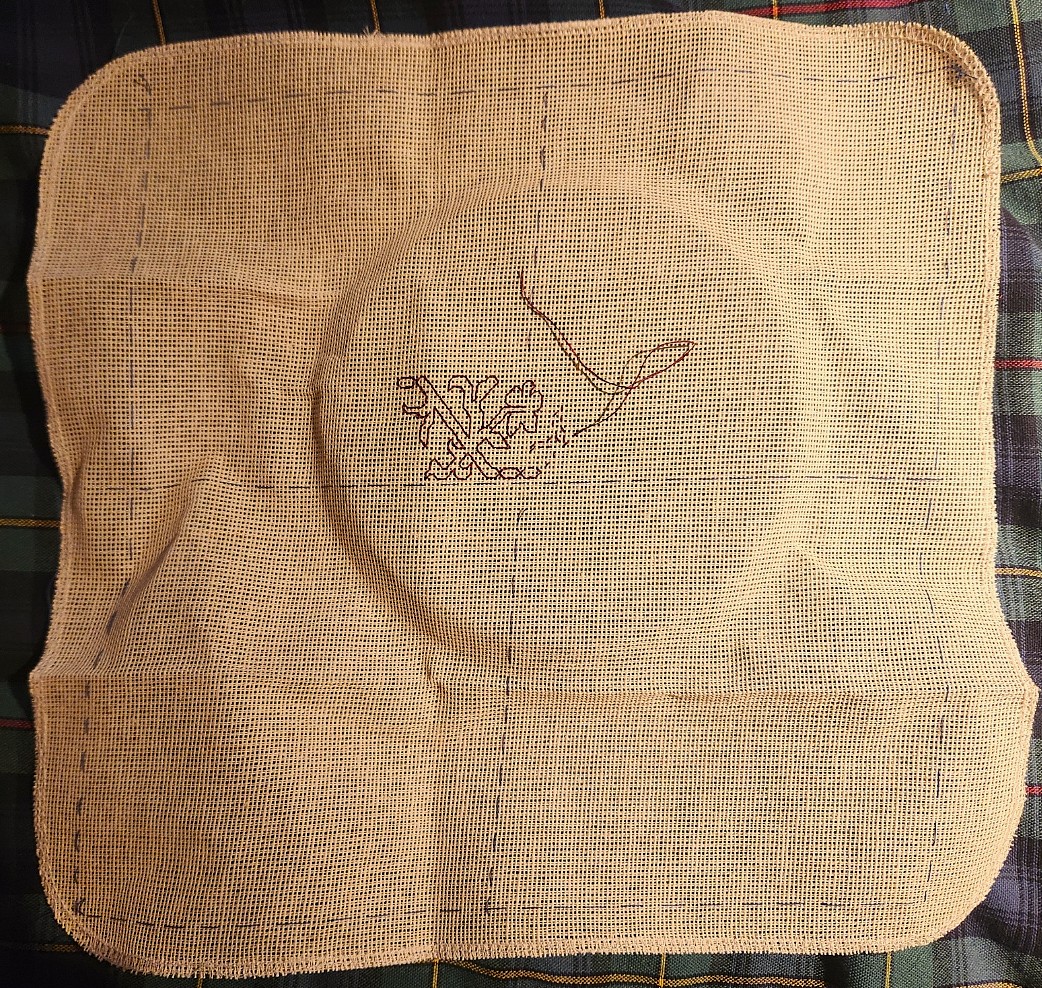
What you see here so far is simple uncounted basting in blue, marking out margins and centers. Those skew cut edges and the amount of area wasted does annoy me a bit, but this piece of cloth was never intended for the purpose to which I am putting it. Just above the center line you can see my start – double running in crimson faux silk (rayon). The design is already 100% established and from this point I can go left and right “off book” just by copying what I’ve already laid down. And I will have T2CM with me, electronically, just in case.
General Health Status Update
Yes, I know I alarmed a lot of you yesterday, for which I deeply apologize. But obfuscation has never been my strong suit. To clarify at this moment, aside from the facial numbness that triggered the hunt for the Danger Lentil, I feel pretty good. I have bounced back from the prior biopsy with no ill effects. I am back to my regular exercise routine. I am pretty much day-to-day advancing the new normal as I have been for many months now. Stamina is excellent, and I have no problems sleeping or eating. I have no headaches, nor blurred vision, auditory or balance problems. In general given my past year’s journey I am in excellent health.
I have every confidence that the team will figure out what’s going on, and that a treatment plan will be devised AND that I will weather that, too. So I do thank you for your words of support and comfort. I have both battle fury and the strength to put it to best employ. Know I keep all of you in my thoughts, and I do appreciate that you are thinking of me, too.
ANNIVERSARIES, CHALLENGES, AND PERSISTENCE
For those who have followed me for a while, you may remember that a year ago this week past I was hospitalized for major cancer surgery: the removal of a chordoma – a rare type of spinal tumor and the bone it compromised in my sacral area, and the implantation of a system of internal braces to carry my weight and enable movement. Over the past year I’ve clawed my way back to a new normalcy, relearning how to stand, walk and sit, and edging back into full independence. My radiation was completed back around Halloween, and I rang the traditional bell at the last session.
These things are always asymptotic, but I am proud of how far I’ve come considering where I was on 20 March 2025. I only rely on a cane as safety insurance for long distance walking over rough terrain or inclines. I need no aid indoors, and can go up and down stairs at whim. I can drive a car, sit long enough for air, automotive, or train travel; and at need have even climbed a ladder. And I was under evaluation for the reversal of plumbing modifications that needed to be made to access the affected area.
We are celebrating my Liberation Day and eviction of my invader this weekend, with a bit of extra spoiling, special dinners, and general good cheer.
But I am afraid that I have to reclassify myself again. I have to move back from Cancer Survivor status to that of Cancer Patient.
Between investigation of a bit of unusual jaw/cheek numbness and the full scans required as part of the great plumbing restoration project we have discovered that I have a small anomalous mass sitting on a major facial nerve just behind my right eye. I’ve nicknamed this one The Danger Lentil, and we are proceeding at full speed to classify it and formulate a treatment plan.
A week ago Friday I had a needle biopsy – an extremely small hole drilled above my ear and a probe inserted to retrieve suspect material for analysis. Unfortunately the test was inconclusive, so later this coming week I go in for what’s called an open biopsy – a larger hole that allows eyes-on observation and larger tools for sample extraction. Needless to say, the plumbing project is now on indefinite hold, so as not to insult both ends of the organism at the same time.
As to my mindset – I am just as determined as I was before, if not more so. I refuse to be defined by what I can no longer do. My bombastic statement of record is “I am a shieldmaiden of the East. I do not bow to infirmity or pain.”
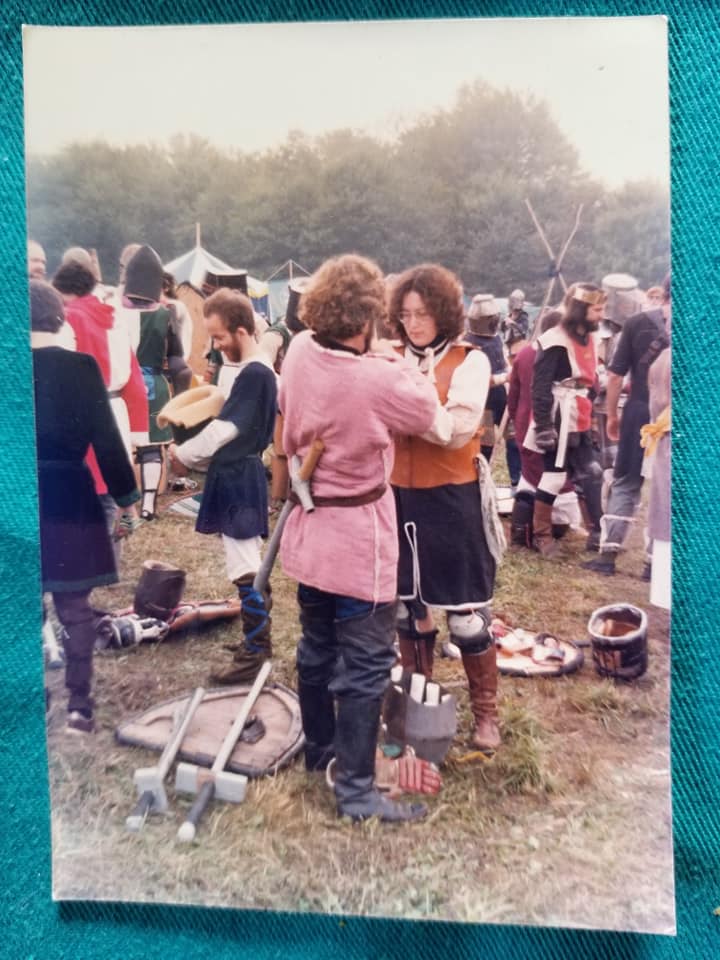
(Photo from a Pennsic War long past. My helm, shield, sword and other gear are on the ground behind me.)
So if you don’t see me on line, offering up unnecessary advice, or marveling at someone else’s work, please don’t be alarmed. I’m just taking a few days out for a bout of literal physical introspection. I will be back. Plan on it. I’ve even started a new project so I have stitching of my own I need to return to the moment I am able.
In the mean time, be well, and don’t let the spiraling state of the world get you down. We will need every hand to heal and rebuild, and I for one intend to be here for that, too.
ANOTHER FINISH! THE MULTICOLOR ITALIAN WHATEVER-IT-IS, IS DONE.
Yup! It’s done.
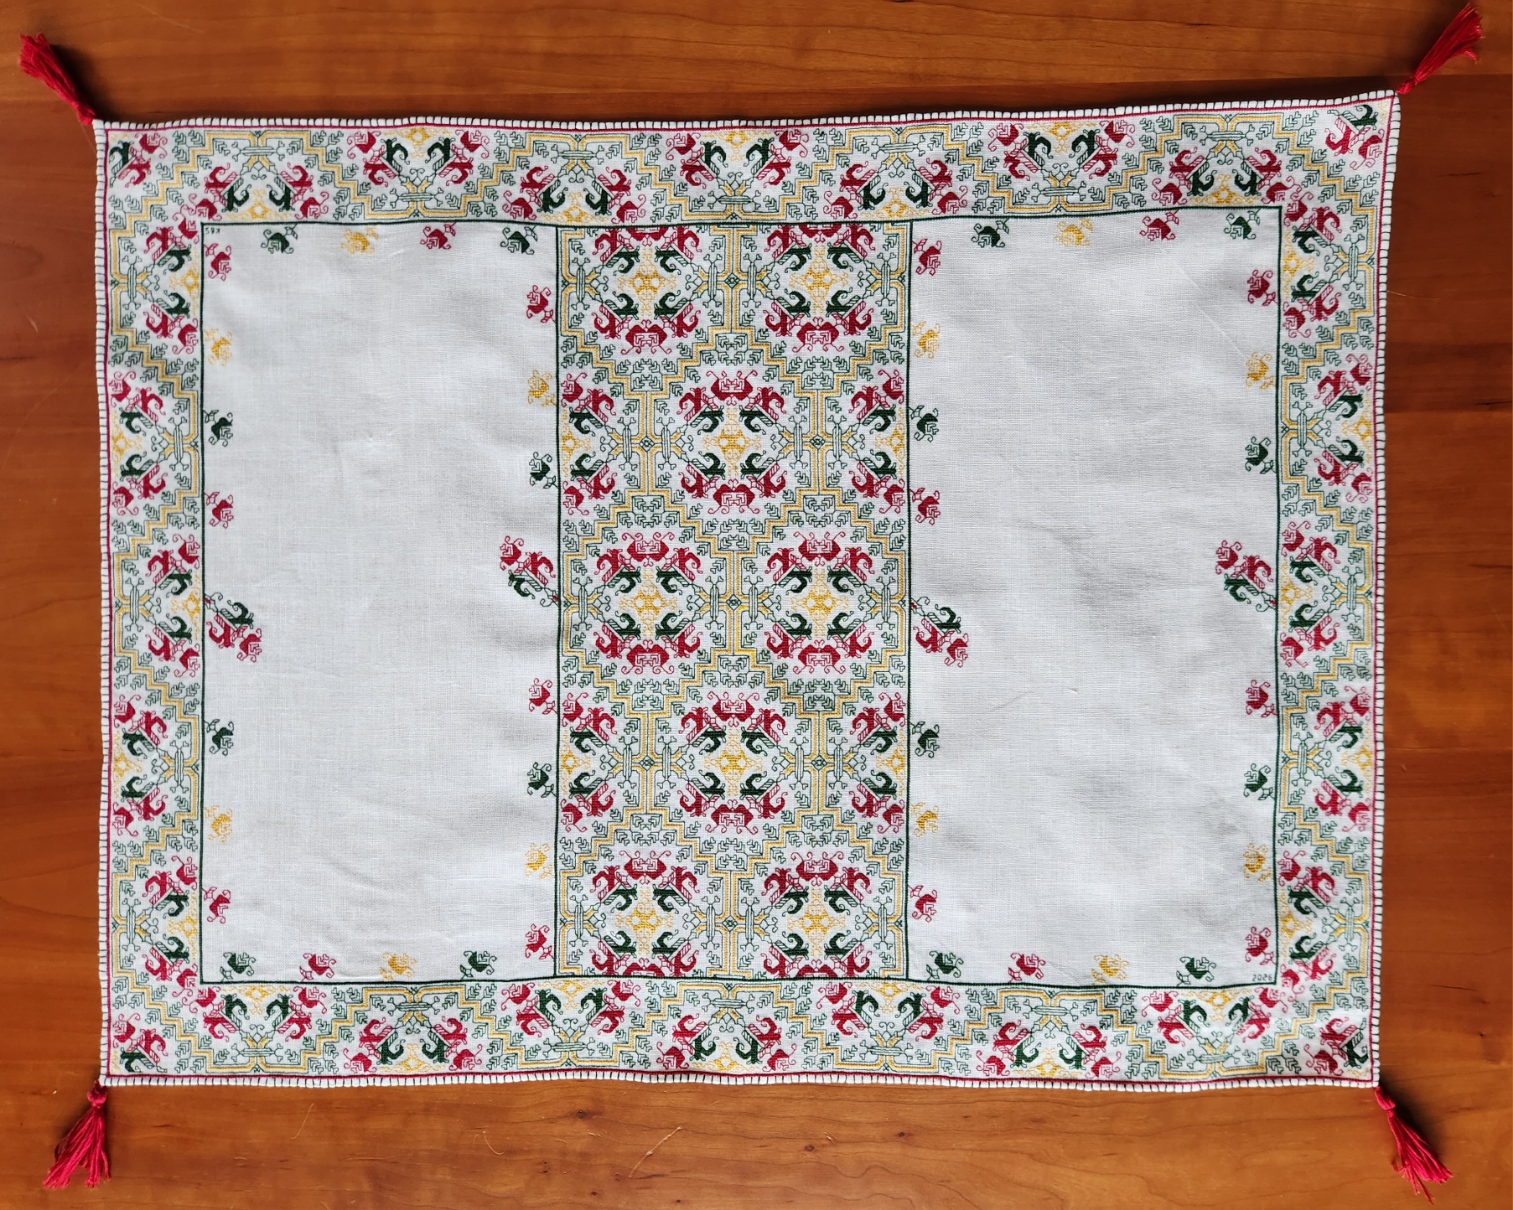
Final finished dimensions (not counting the tassels), are 60 cm wide x 45 cm tall (about 23.6 inches wide by 17.7 inches tall). It’s stitched using one thread of standard DMC cotton floss on 40 count linen. The stitches used are double running, Montenegrin, and two-sided Italian cross stitch. Although the thing is mostly double-sided, I did not take any special measures to hide ends.
I started on or about 13 September 2025, drafting out the design from photos taken at a 2023 Boston of Museum of Fine Arts visit, and from the museum’s own photo of the inspiring original. Prepping the ground – determining and basting centerlines and edge guides happened immediately after.
Actual stitching commenced on 19 September. At that point I had the edging drafted, but not the corner joins. I began at the bottom center and worked around the perimeter, and worked the corner out on the fly. (It doesn’t match any of the corners of the original.) Then I continued around, replicating that corner three more times. After I finished the frame, I did the wide center stripe, formed by doubling the framing meander, with a couple of small adaptations as in the original. Then I added the sprigs that circle the unembellished panels, left and right – more quotations from the main meander motif, with small adaptations congruent with the original.
The final step was a narrow rolled hem, ornamented with a rather odd buttonhole stitch variant. Instead of working it with the joining horizontal bar along the edge of the piece, I did it – backward – piercing the ground from the front, and catching the loop at the base of the stitch in the back. That made a single vertical loop around the rolled hem, with no whip-stitch style slant, and with the bar connecting the buttonhole stitches riding unseen across the back, tucked into the edge of the rolled hem itself. I have no historical source for this, just trial and error, trying to replicate the visual remains of the bar-ornamented hem of the original. And I did feel compelled to make the little red tassels in homage to the ones on the original.
It’s hard to estimate total hours for this. I tend to work 2-3 hours per evening, with an additional 3 hours in the afternoon on Saturday and Sunday. That adds up to about 23.5 hours per week, and 25 weeks from start to finish. Rounding down for holidays or travel days when nothing got done, I would estimate this piece took about 575 hours total. I’d call it moderate – far less intense and shorter than many I have completed. But a time commitment, none the less.
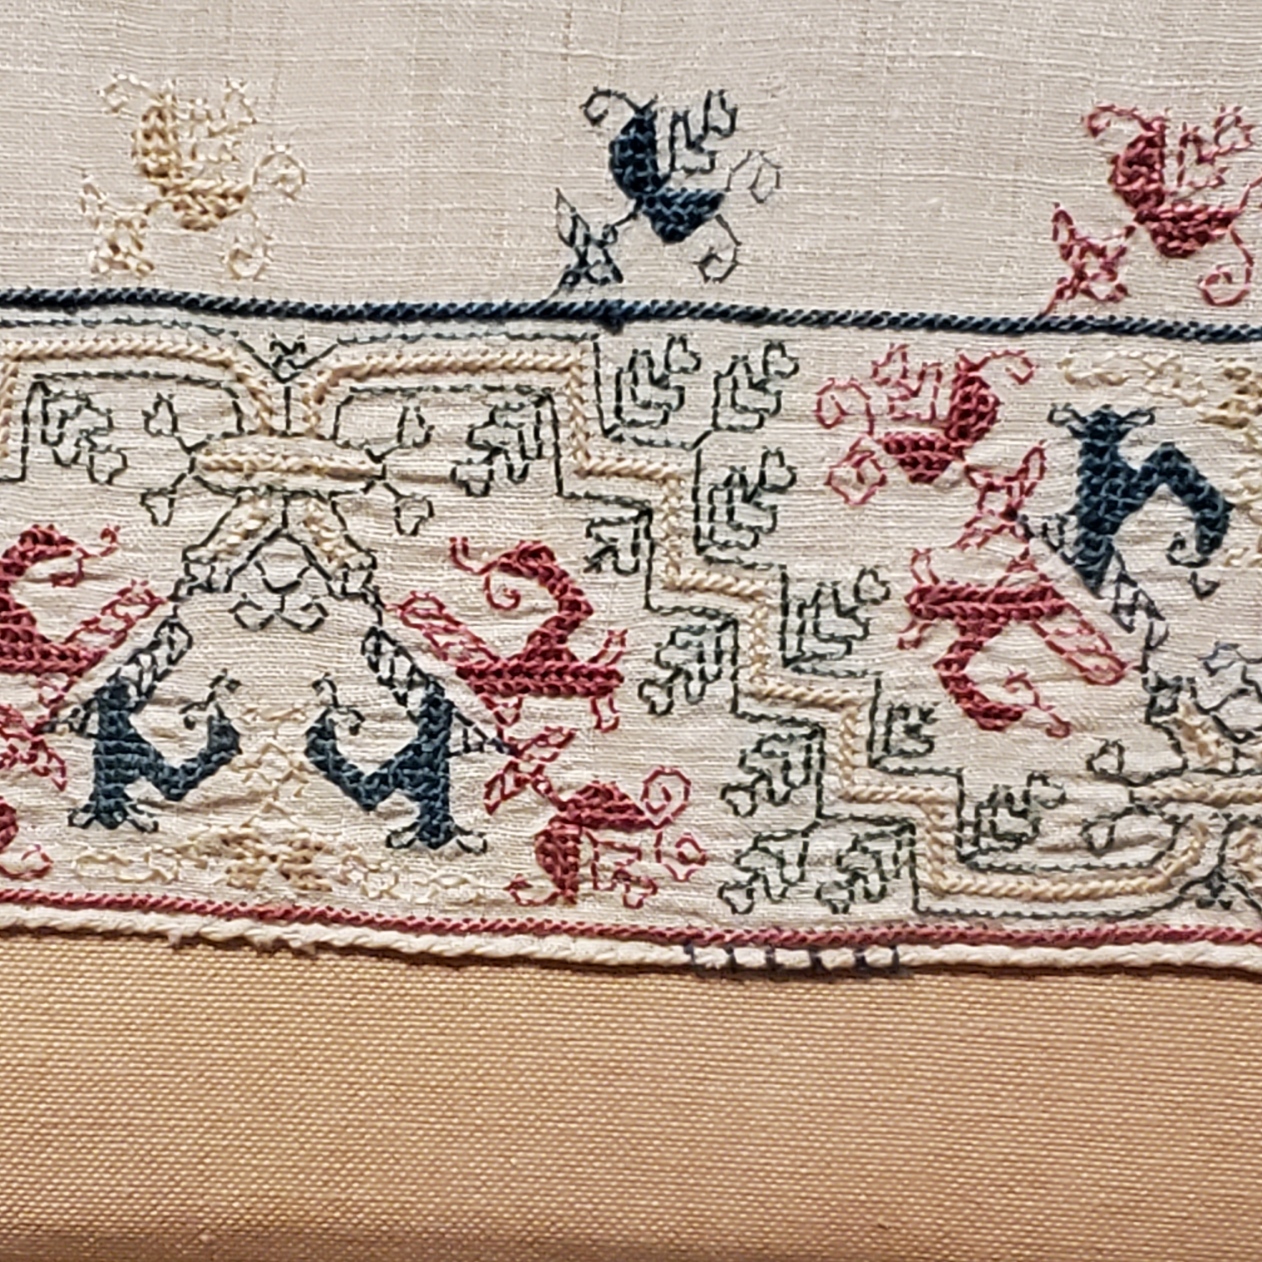
Now let’s compare mine to the 16th century original (Boston Museum of Fine Arts accession 83.242).

The Boston Museum of Fine Arts caption has been revised over the years. It now reads “Line stitch and tent stitch or long-legged cross stitch. A towel.” It is noted that the ground is linen, but the thread is not described (I assume it’s silk).
There is a bizarre discrepancy in the size listing. The description reads “970 x 1480 cm (381 7/8 x 582 11/16 in.); Legacy dimension: Height: x width: 58 5/16 x 38 3/16 in.” 582 inches wide would be 16 yards wide. When we saw it displayed in the MFA’s 2023 exhibit, it was certainly large, like a tablecloth for 6 to 8, but certainly not 16 yards long. Therefore I am going with the “legacy dimension” of 58 5/16 x 38 3/16 inches or 148.1 cm wide by 97 cm.
That means that the 148.1 cm x 97 cm original is about 2.5 times wider and 2.1 times taller than my 60 cm x 45 cm rendition. This to me makes sense when you look at the repeats. I posit that my work stitching 2×2 on my 40 count ground is not far from the gauge at which the original was worked, although it might have been done on finer linen over 3×3 threads. My photos and the museum photos are not sharp enough to make that determination. As to the stitches used, I do think I hit the nail on the head, although using cotton instead of silk restricted the amount of tension I was able to get on the meshy two-sided Italian cross stitch bits. I would have preferred that they be more open, but the cotton wasn’t up to the savage yanking needed to get that look. Still, you can see the meshy effect on mine.
I can also say that at more than four times larger than my piece, along with variances in execution of the design on each of the four sides, plus irregularities in the corners, that I believe the original was executed by a group, perhaps in a workshop or other communal working situation, with one or more individuals working on each side, simultaneously. Those original corners look like kludge mash-ups where folk resolved alignment problems on the fly. Tiny differences in execution seem to cluster on sides, and don’t appear randomly scattered about. That would argue for several people working at the same time, copying from a common source, but replicating their own individual “mistakes” within arms reach.
All in all I am quite pleased with my rendition. I have absolutely no idea what we will do with it, or on what surface we will display it, but I am pleased none the less.
Moral of the story – the Ancients did wonderful work. But they were not superhuman, and didn’t demand the icy perfection and merciless symmetry that Victorian and later stitchers have striven to achieve. Approaching the level of virtuosity seen in historical pieces is NOT outside of the realm of modern possibility. All it takes is time, practice, and attention to detail.
STITCHING FINISH, BUT NOT FINISHED-FINISHED
And so the stitching on the Italian multicolor piece is complete!

The sprigs are done. I will do a final patrol over the thing to see if I might have forgotten to fill a spot, or left out a curlicue, but unless something surfaces, there is no more double running, Montenegrin, or two-sided Italian cross stitch to work.
What I am up to now is the narrow rolled hem. I want to thank long-distance friend Rhaeya for posting a how-to photo of her method of hand-working a narrow rolled hem on linen. It’s far more efficient and easier than the method I learned from my Grandmother. Granted – the family method was predicated for use on chiffon and it came in handy for a wedding I attended decades ago, which required a bridesmaid’s dress with ruffled tiers of that stuff in light blue. But it didn’t work quite as elegantly as Rhaeya’s does for this heavier linen.
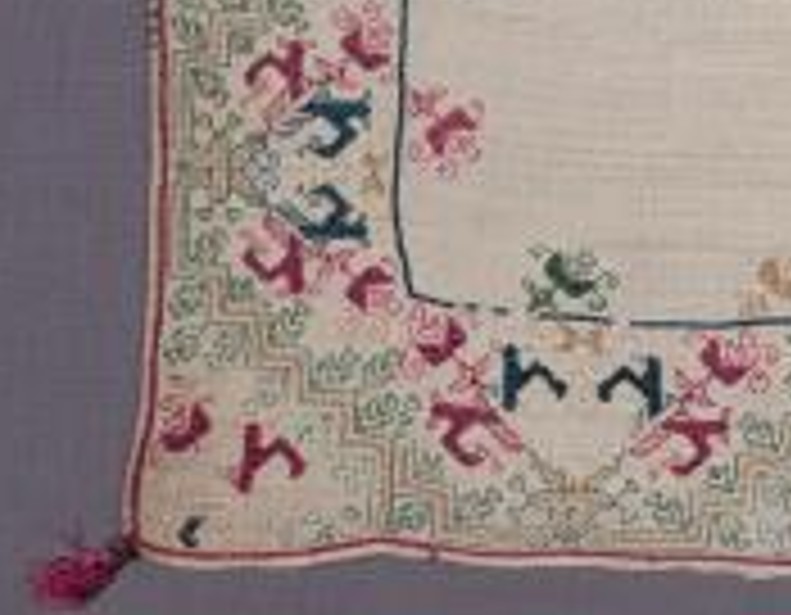
You can see I’ve done the bottom edge, and have begun the side on the left. The remaining hem will probably take another two or three days to do with absolute precision. After that comes a layer of decorative stitching around the edge. The inspiration for that is this photo of the museum original:
See the green verticals? After staring at the thing and doing lots of thought experiments, I have decided to not work them as simple blanket stitch or buttonhole stitch. There’s no real evidence for the “spine” of color those stitches would create along the edge. Nor are these stitches whipped at at angle. A bit of experimentation might be in order, but I do think that some sort of open chain stitch or looping/knotting logic was used here, one that left verticals on both sides, but with a line of horizontals on only the reverse, linking the verticals at the base adjacent to the red border.
I have no pix of the back of the work to confirm my guess, but I do think that it is logical. The only other option would be to take invisible stitches between each rising green line through the body of the hem, with no horizontal stitches seen on the surface front or back. A possibility, but too fussy. The more I look at this, the more I consider the labor that went into my small quotation of the whole, and the more I think on how the larger piece might have been made, the more I believe it was a workshop product. Done as quickly as possible, by a team of stitchers. Discontinuities in corners, very slight differences in the design as stitched on the different sides, and the size of the piece are the main drivers of my thoughts.
So the simpler I can do it, the better. Done as quickly and efficiently as I can, in the spirit of my posited long-ago workshop. And when that stage is done – probably another four to six days, I will cap it all off with my initials and date hidden someplace in the piece, plus little red tassels on each corner, again in homage to the original, as seen below.
UPDATE:
Folk have asked me for more details on the rolled hem methods I mentioned. I have gone back to my friend and received permission to publish the info and photo below.
First is my Grandmother’s method. She showed it to me way back when I was a kid, no older than about 12. She was mending the frilly collar of my Great Aunt’s best blouse, which had snagged on something. The collar was a froth of chiffon ruffles. To fix the bit of blown-out rolled hem, she teased out a bit of the hem on either side of the snag, then took a toothpick or darning needle and rolled the exposed material tightly around the end of it, making sure that the raw edge was inside the roll. Then she took a very fine needle and sewing silk (not fat cotton thread she used for machine sewing), and with tiny stitches, stitched from the edge of the roll catching just a tiny nip of the fabric – fixing the rolled hem in place. She did a few stitches, then advanced the toothpick or darning needle, rerolled as needed, and continued on. The result was nearly invisible. Hard to tell that where the snag had been. The hem “dipped in” just a bit; but the mended bit was uniform with the diameter of the rolled hem north and south of the former damage.
But rolling that way around a core isn’t practical for the 40 count linen I’m using. Too bulky. So I was dreading having to finish. Then my friend, professionally known as Rhaeya Mars, Costume Designer M.F.A, posted this photo of a work in progress in her Facebook feed:
Now this method of folding, nip-stitching, and drawing up to encase the edge may be old hat to many of you, but to me it was Dawn Over Marblehead. I could do that! I could do it on the count to ensure an even width! I could hide the nips along the edge of my established border row of red Montenegrin stitch.
And so I am.
Thank you again Rhaeya! You saved me from endless fumbling, and ensured a clean finish for my project. Oh, and for the record she is the same talent who SINGLEHANDEDLY made her own Elizabethan embroidered jacket – the whole thing, from drafting and testing the garment pattern, to drawing the stitching design, working it in historically accurate methods and materials, and then assembling, trimming out and wearing the thing, to spectacular effect. Just to dazzle you, here is a display of it in modern context (minus the rest of the complimenting outfit).
