EYES ON ASSEMBLY. AT LAST.
The multi-month eyeball square bolster project continues to roll along. I began this project around 25 September 2022, and first posted about it back at the beginning of October. The end may be in sight (pun intended) but it’s not imminent. Yet.
When last we visited this effort, I had just finished constructing the base pillow form to be covered by the (then) recently completed crocheted squares. I also in the final stages of joining the squares together to make the six sides of the cushion cover.
Now crochet in this style is not as opaque as knitting. There are holes, most notably in the points of the squares, and at the two sharp corners of the eyeball itself. These are large enough to see whatever is behind the crocheted layer. Obviously I didn’t want the Pepto-Bismol pink of the blanket covered foam slab to show, so I needed an inner cover. I tossed around the idea of making an entire second zippered cover out of black cotton duck – a canvas-like fabric, for durability and washability (after pre-shrinking). But then I thought about other pillows I’ve covered in knitting and crochet. The yarn layer on them was stretchy, and sometimes wandered around the inner pillow as it was used. Given that this piece is so big – the entire back of a low mid-century sofa – wandering could be expected. So I decided to cut panels of prewashed fabric, hem them, and then tack them to the assembled crocheted sides prior to joining those sides into the final pillow cover.
The first step was to measure the enrobed foam slab. Sure enough, a small bit was added to my final dimensions. Since I had the foam cut to size for my blocked but relaxed crochet assemblages, I am reasonably confident that stitching the crochet to panels in the newly measured dimensions would yield a good, close fit – stretching the crochet out a bit, providing inner stability against shifting and bagging. Note that I did subtract a quarter inch all the way around to leave the edge stitch of the crocheted squares revealed since I need to use those in fastening the sides together, and added a hem allowance.
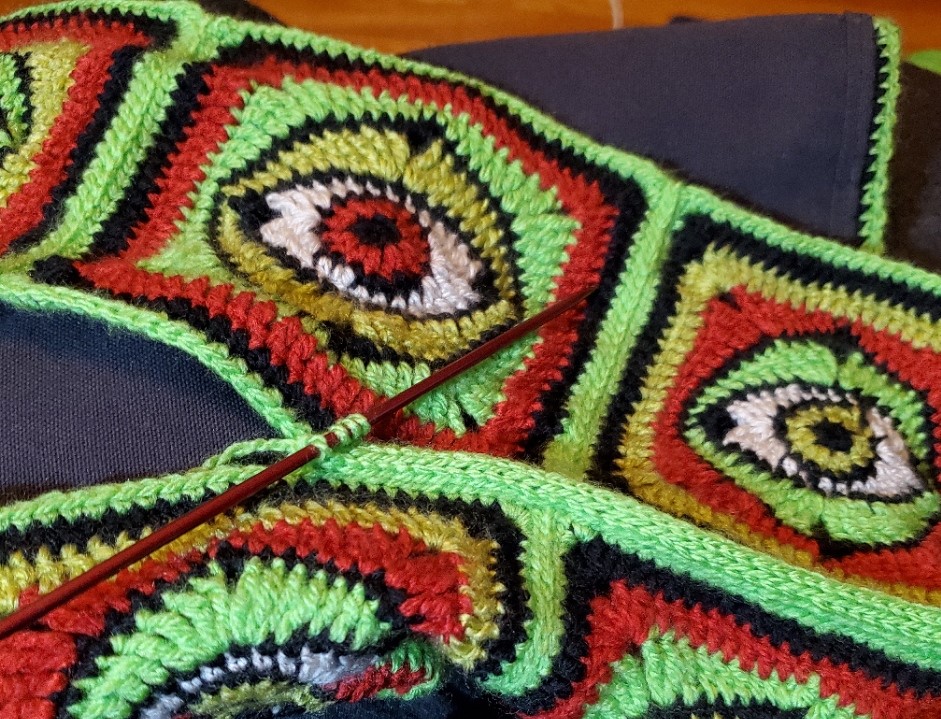
First I machine-hemmed all of the sides of each modesty panel EXCEPT for the edges on which I expect to mount the zipper. Not up to that yet, so I’m still thinking that out. In any case, here’s a mid-tack photo showing the machine hemmed panel being affixed to the back, leaving the edge row of crochet (green) free for later attachment.

After all six pieces were prepped with their backings, I was ready to begin assembly.

That’s all 128 eyeballs. There are four more – two worked while achieving gauge, and two unknowingly worked in excess of need. One of the side strips is flipped over on top to show the backing. A loose edge which will be employed in zipper installation is at the bottom of that strip. Right after this I sewed three of the four narrow strips together to make one continuous band that wraps around the edges of my foam block. I left the last one free. It’s going to be the “drop seat” around which that zipper wraps, and needs special treatment.
Now to join with I-Cord. It’s simple once the right needle size is determined. I experimented on those spare squares until I found the needle size that produced an I-Cord that was stitch for stitch even in height to the width of my edge crochet chains.
To attach, I took those DPNs, and cast on four. Then holding my designated pieces back to back, I picked up another stitch through the outermost loop of the first chain on both edges to be joined. That makes five stitches on my DPN. I knit off three, then did a SSK, and picked up a stitch through the next chain stitch on both edges to be joined. And I kept going, making sure that each square was neatly butted to its neighbor, with an additional row of joining I-Cord worked into the columns of slip stitch that attach the squares together. For that my DPN needle tip wasn’t enough to tease a loop through, I had to pull out a smaller crochet hook to grab a loop, pull it up and mount it at the end of my DPN.
The image above shows four stitches on the DPN, ending with the SSK, just before I picked up the next stitch through the crocheted edge chains of the squares to be joined.
Now it was time for the corner. For that I needed a bit of ease, but I didn’t want to make a big loop like I had done before. I experimented a bit and decided to work up to the corner stitch on the squares, then make ONE round of free I-Cord, work the corner stitch in attached I-Cord, work another round of free I-Cord, and then continue on in my new direction as usual. That made a tight but non-distorting 90-degree turn:

Here’s the piece so far. First long side seam done, first short side seam done, along with the two corner transitions between them. I’m quite pleased with the way the raised “piped” seam looks. Now to continue on to finish this side, and begin the Special Treatment for the zippered end. Wish me luck!

