Alcazar progress:
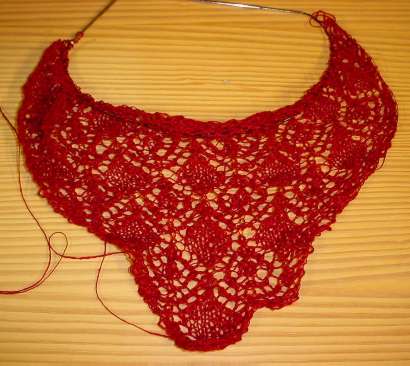
Hazel Carter’s Alcazar is another of her multi-page lace patterns that looks incredibly complex, but with a bit of care and attention, is not that hard to follow. It’s worked slightly differently than the Spider Queen, but follows the same sort of general logic. First a center panel is knit – in this case, from corner to corner on the diagonal; then stitches are picked up around the edges and the secondary layer is knit center-out. Finally an edging is knit onto the live stitches of the outer layer. One small difference – Spider Queen’s outer layer was knit one side at a time, and the four resulting trapezoids were seamed together at the corners. Alcazar’s pattern says that the sides may be knit separately like the Spider Queen’s, or they may be worked all at once by knitting in the round, thereby eliminating the corner seams. I suppose I could have done SQ that way, too, but it was my first large bit of rectangular lace, and I was deeply into beginners’ mode – following directions verbatim – because my understanding of the piece as a whole was so limited.
Also unlike the all-pivot format Spider Queen, some (but not all) of Alcazar’s charts are provided in full format in addition to her standard pivot format. The pivot format is sort of a shorthand notation very useful for symmetrical designs and multiple repeats. This idea isn’t unique to Hazel Carter. Embroidery modelbooks dating back to the dawn of publishing showed graphed repeats that could be mirrored along two axes to produce infinite strips of patterning. It’s a very useful trick that hasn’t caught on as widely as it might for knitting charts.
The picture below shows a single pattern row (of my own invention, not taken from Alcazar). You can see it has edge stitches plus several iterations of the main pattern. I could have graphed it up to show one full iteration of that center pattern, plus the edge stitches. That’s pretty condensed compared to the original. But it takes even less space to show it in pivot format – the tiny row below the long one.
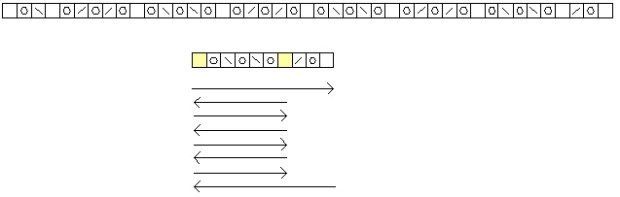
To follow the shorter row you’d start at the lower right, and work across to the leftmost stitch. That’s the first pivot point. I like to mark my pivot columns with a highlighter so that they’re easy to spot. When I get to that first pivot point, I pretend that stitch is a mirror, and begin to follow the chart back in the direction from which I just came. Work to pivot stitch. Work pivot stitch once. I keep knitting in the same direction, without flipping my actual piece over or making a short row, BUT I begin to follow the chart back in the direction from which I came.
Now, those among you who noticed that there were decreases in the first trip will wonder what to do about them on the "return." Mirror them. If they was a SSK on the march from right to left, THE SAME BOX will be worked as a K2tog on the march from left to right, and vice versa. This sounds like quite a bit of mental gymnastics, but it’s no more difficult to do than it is doing the conceptual flip to interpret the even numbered rows of a chart when knitting in the flat.
Another challenge – on my minichart below, on the first pass from right to left I sailed over a highlighted stitch. That’s a secondary pivot point. After I make my turn at the chart’s leftmost edge, I work back to the second pivot stitch, work it, then begin following the chart from right to left again – starting at the secondary pivot point.
I continue zinging back and forth between my two pivot points like an ant trapped in a demonic game of Pong until I have only the final few edge stitches remaining. At that point I "go through" the secondary pivot point and finish out my row.
Now. Why would anyone want to do this?
- Many people find it much easier to keep track of their place on a smaller chart.
- Charts for large lace projects can be unwieldy, this cuts down the bulk somewhat.
- Pivot charts highlight the logic of a piece, and make memorizing a complex row easier.
Your mileage may vary – you may find this all terribly confusing, and wonder why anyone would subject his or herself to such conceptual convolutions, but I like having yet another tool in my toolkit, ready to pull out when the need for it presents itself. If you’re lace-minded, you never know when you’ll need to graph a 300-stitch row, and here’s a way to do it if you don’t have access to a drafting program and a D-size plotter.
