…More like month-of-Saturdays, actually.
Here’s the outfit that accompanies the hat I showed off in my last post:

You can’t see the watch-type pendant and magnifying glass hanging from the chains at her waist.
The blouse and vest were flea market finds, along with the buttons and broken necklace chains that adorn it. We made the skirt and petticoat, the hat and the woven ribbon bag. The hat is a cut down New Year’s Eve party top hat, plus feathers and other adornments. The belt is an 80s-era retread from my closet, and the gear necklace and earrings were holiday presents this year past.
Here’s a close-up of the skirt trim. It’s a wide strip of brown ribbon, edged with black ribbon, folded and ironed into points:

I don’t remember where I first read about doing the points – possibly in an ancient Threads magazine, before they abandoned fine handwork, possibly in a Victorian era ladies magazine or millinery guide. The ribbon folding isn’t quite ruching, since no gathers are stitched, and it isn’t pleating, because the folds are not perpendicular to the ribbon. I used it once before, to make teeth on a dinosaur costume, when Elder Daughter was a toddler.
Wherever this trick came from was, it’s a very useful technique for producing custom, flexible trim that eases nicely around corners. I did mine in inexpensive double sided satin ribbon. A two-tone ribbon with different colors on each side would make points of alternating colors. Here’s how:


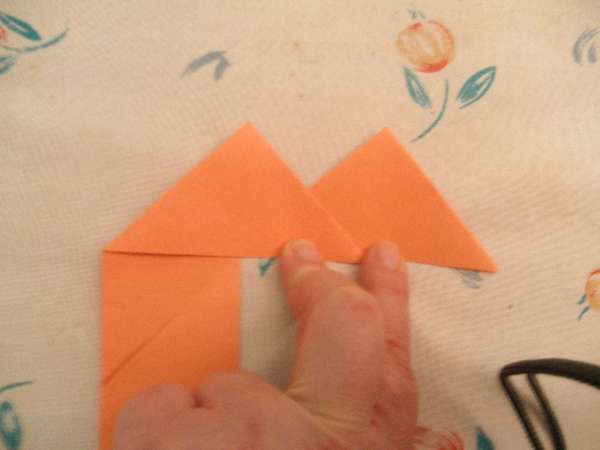
Fold a triangle, tucking the leading edge underneath. Then do an inverse triangle. Finally, flip the inverse triangle up so that it lies on top of the completed one.
You can see that if you wanted to make rick-rack instead of a row of upward pointing triangles, that second fold step would be done so that the “good side” landed on top, and the third step would be omitted.
Here’s the same process in actual ribbon, with firm steam pressing on the silk setting in between manipulations:

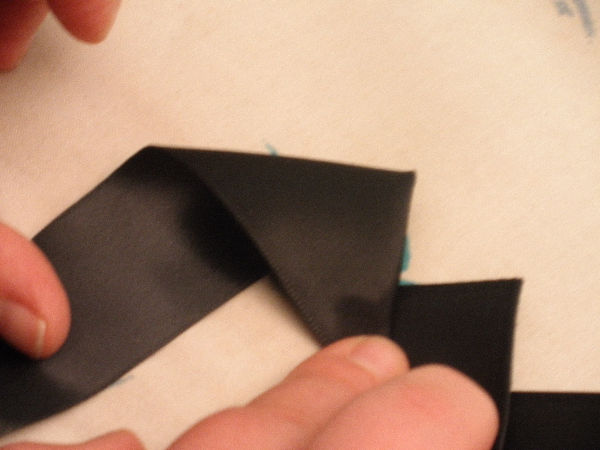

and the final product, ready to be pinned and sewn in place. Note the flexibility that can accommodate both inner and outer curves:

Younger daughter wore this to the Waltham Watch City Steampunk Festival, at the Charles River Museum of Industry and Innovation. After planning and accumulating the bits for the better part of the year, she was thrilled to do so, and had a great time.

Hello – the outfit looks fantastic! Thank you for posting the photo. I would like to correspond with you about a photo that you had in a previous post (in August 2005). I would like to ask you some questions about it – I can be emailed on alison@alisoncoleembroidery.com.au Thanking you in anticipation. Regards, Alison
[…] Kim from String-Or-Nothing shows how you can fold ribbon to create a pointed trim. It’s a continuous strip of points so it’s easier than trying to place individual prairie points. It also works well around curves. She points out that a two-toned ribbon (different colors on front and back) would create points in alternative colors. Go to her tutorial. […]
[…] thanks to the folks at Craftgossip.com who picked up the folded ribbon trim method I used on the Steampunk dress. If you’ve found String due to their link, welcome! I’ve got a lot more to show […]
[…] brown and gold silks is giving the piece a particularly steampunk look. Again welcome, since Younger Daughter is a big steampunk fan. I suppose those bands could work, but now I have been seized upon by a Concept, one that has […]
[…] used this tutorial. The tutorial is for a ribbon but I wanted to “bust some stash” and I wanted it to […]