Just finishing up Don’t. I think the Mystery Neice will be happy with it. We worked together to pick out the colors, typefaces, and border design used, so there was ample recipient-input on this one.
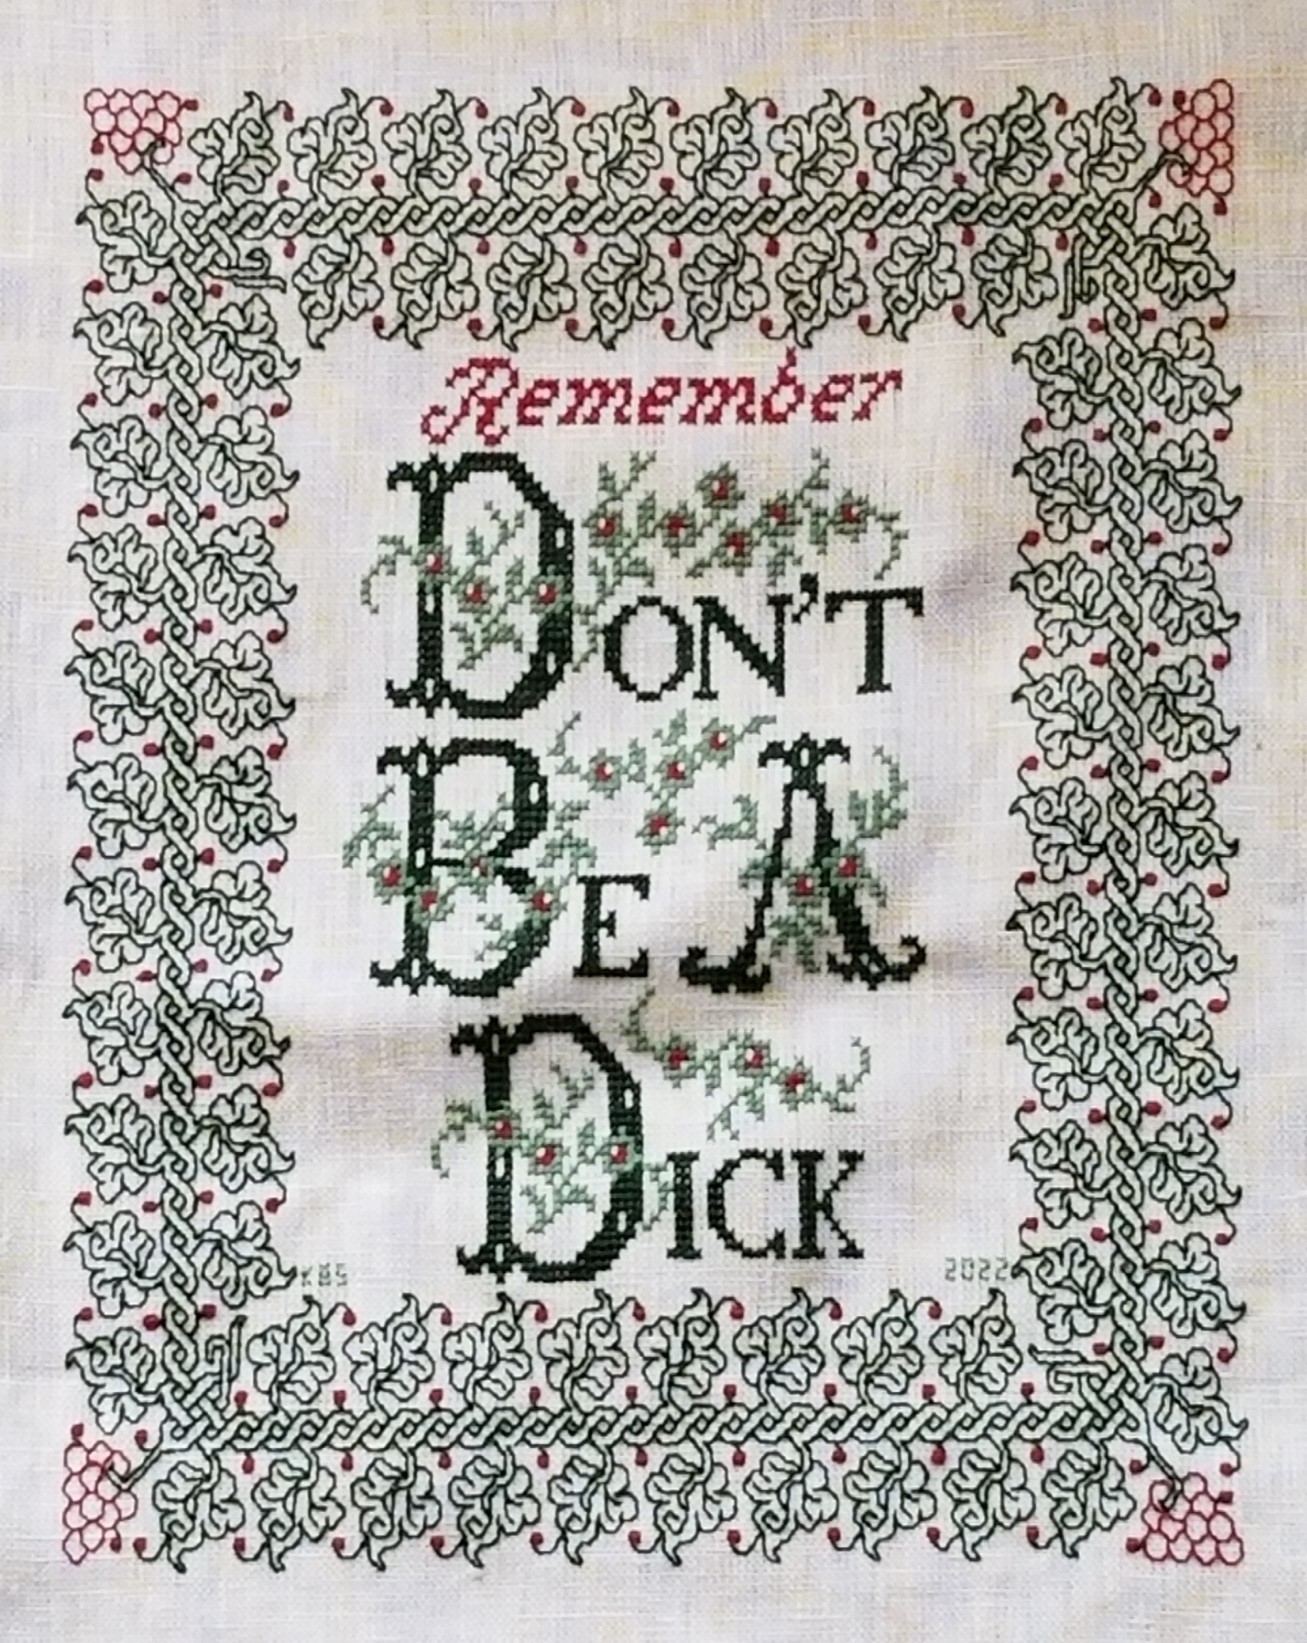
I’m happy with it, too. Although I have to confess a bit of a mistake at the outset, which has necessitated a somewhat rueful kludge.

The original did not include “Remember.” Why is it there?
Because when I started stitching the border at the left center line, instead of starting it at the center of one of the sprigged spirals, I started with one of the spirals that grows a leaf. That de-centered the inscription north/south. I walked happily down the left edge, across the bottom, and up the right side. When I got to the top I noticed that (horrors!) to make my corner fit there would be larger space between it and the words than there is at the bottom. Nine units more, to be exact. So I thought about what I could put there. More flowers? Possibly. Another ornament? Again possible. But the more I thought about it, the more I wanted to NOT add mass on top which would draw attention to the lack of space at the bottom. So a word was the way to go.
I decided on adding “Remember” and went pawing through alphabet resources to find something thin, elegant, and nine units tall – something that would fill space without adding too much bulk. The initial script R is from an antique Sajou booklet at the Patternmaker Charts site. The lower case letters needed to be smaller, and I found a good candidate in Creating Historic Samplers by Grow and McGrail – the same source I used for the lower case letters in the main area. It’s not a profoundly useful book, but it does have a section of beginners’ advice, plus some sample US Colonial era motifs, alphabets, and borders. Best of all for those just starting out, it’s very inexpensive on the used market.
Now on to the next – Grape Sideboard Scarf.
For the next project I’ve decided to use a well washed linen piece I picked up at a yard sale in Silver Spring, Maryland easily 42 years ago. It’s a dresser scarf, trimmed with a hand-turned hem secured by a simple crochet, with a crochet picot edge on the short sides. Based on the materials and back story I suspect it was cut down from a larger cloth and trimmed out sometime in the late 1930s or 1940s. I got it the same time as I got the larger finished linen piece that became my Everything is Worth Doing Well sampler, although they were not cut from the same source. Yes, it’s worn and a bit discolored from storage even before I got it, but it’s sound.

The stitchable area is about 16.5 inches x 28.5 inches (about 49.9 cm x 72.4 cm), and the thread count is roughly 32 threads per inch. That’s about16 units per inch using a 2×2 thread grid, with a total design area of 264 units x 456 units. That varies a bit across the piece, so I’m averaging measurements taken at several spots (penny method for easy thread counting here).

I’m going to stitch it in red, using a pattern I’ve recently redacted from a 17th century Italian cushion cover held in the Hermitage Museum (Accession T-2736 in case the link breaks). A thumbnail of the original is below. It’s about 40 x 48 cm, roughly 15.75 x 19 inches. No info on the thread count of the artifact.

Obviously I am going to maintain the dresser scarf’s edging. Also depending on the scale the design works up to I may only stitch to within 1.5 inches of the existing hems, then devise a coordinating sprouting edge to encircle the center field.
As far as the charted redaction went – this one was tricksy. There’s a major sub-sub-element that is off-grid; meaning that when I get to it (and write this here so I remember) I will have to “split the difference” on my evenweave, and shunt that bit over one thread.
Since this will be used as a protective placemat on my sideboard largely for opening the evening wine, the grape motif is appropriate. And I’ll use a DMC 6 ply floss, one of the garnets – 615 or 616, I haven’t decided yet on which one yet. I go for cotton instead of silk on this for washability because spills WILL happen.
The next step is to baste in my horizontal and vertical center lines, plus that 1.5 inch margin inside the hems. Then I begin, working center out.

Nice recovery on the spacing! I like the finished item.
I think I missed that tip about using a penny and phone, I’m glad you put a link to it. I’ll have to try that, as I’ve also had counting with pins… erroneous, and those rulers slip and slide. And if worse comes to worst, the photo can be printed out and scribbled on, I definitely wouldn’t want to do that with the fabric.
By the way, how’s the basement work going?