I’ve started in trying out various approaches and threads for the Unstitched Coif project. Here’s last night’s progress on my sidecar companion piece. It’s the same ground and threads I will use on the main project, but done to keep mistakes off “center stage.”
This isn’t final work, just doodles. I am not proud of it, there are lots of things that are sub-optimal. Let’s go through the bits.
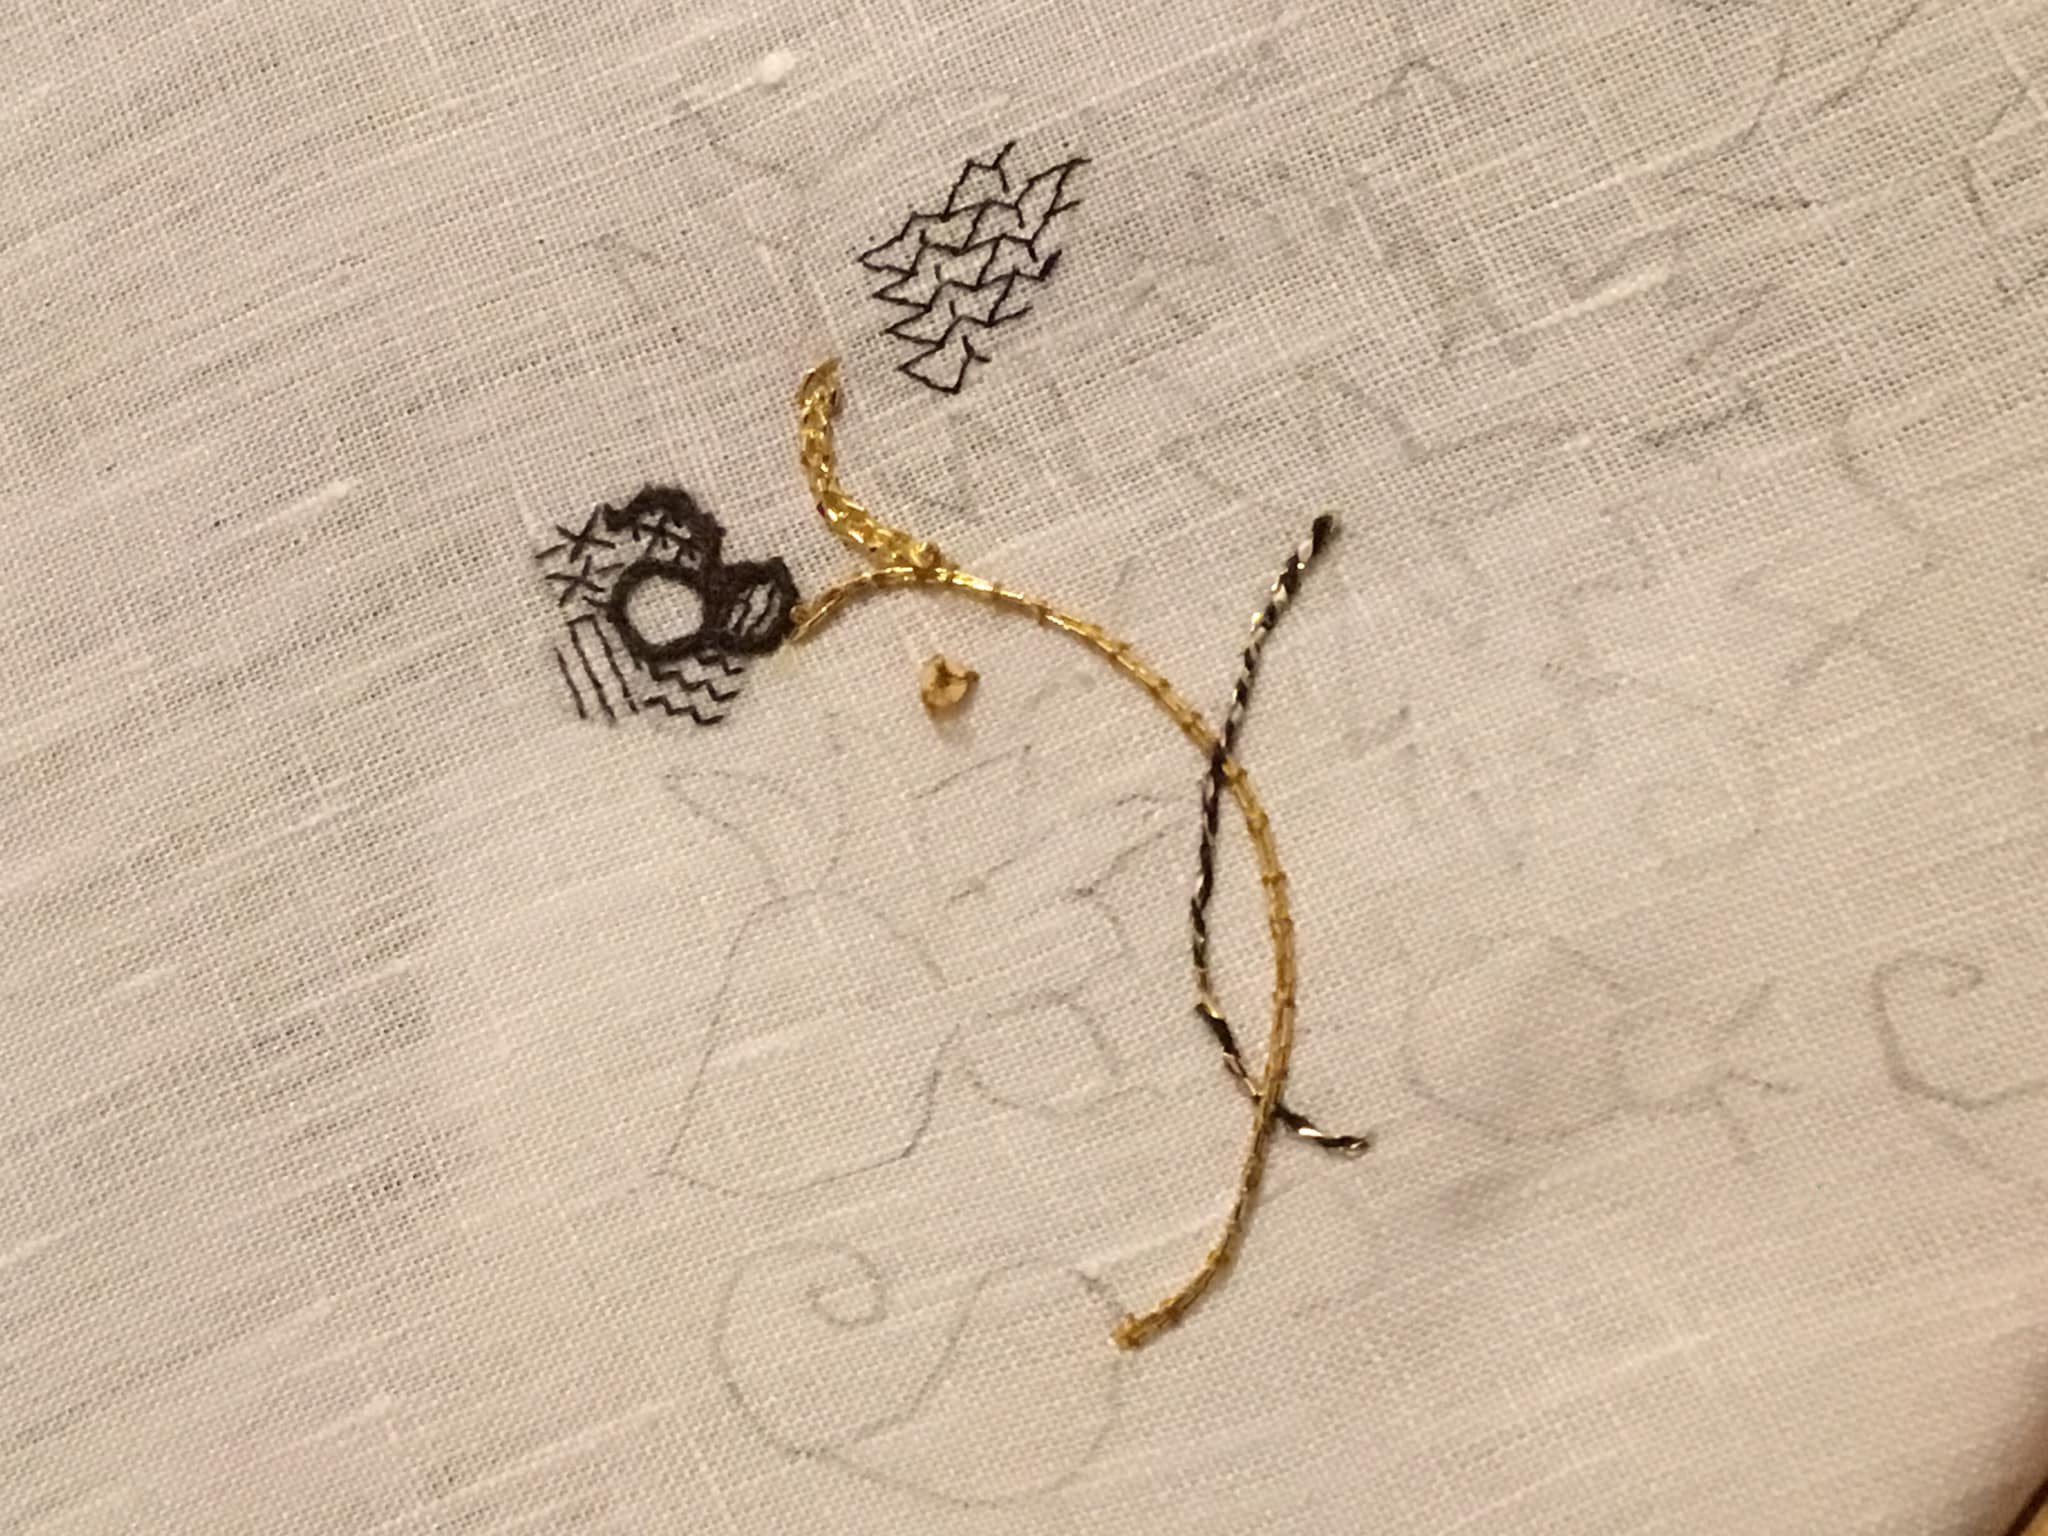
First, the couched double strand of Japanese Gold #5. Still getting my mojo back with metal thread couching, I did cross my strands at the beginning of the bit up near the sad little flower, but by and large it worked. And it’s much easier on the flat frame where I can use two hands to stitch, rather than on this little round, where one hand is used to hold the frame itself. If the other hand manipulates the couching thread, I still need a third to tension and bend the metal thread around curves. Sadly, I am only equipped with two hands.
I used a gold color “art silk” for the couching threads, and was able to plunge the ends neatly using a loop of polyester sewing thread to capture them. That thread does not remain in the project. I thread a folded strand into a needle that’s slightly larger than what I would use to stitch, and with the loop trailing, pass it from top to bottom through my ground, then use that loop to nab the metal threads’ ends and pull them through to the reverse.
As far as appearance, not bad. I’ve managed tight curves using this stuff before, and I am confident that I could do it again. But the contrast between the blackwork and the many gold stems might be too great. We will see….
The 2mm paillette sewn just south of the gold stem. It works. It’s the right size for the uninhabited spaces between motifs. I will probably use them to spangle the piece once the majority of the stitching is done. And yes, I used the same faux gold tone silk to affix it, with three stitches.
The thicker gold sprig at the top. Again, that’s the Japanese Gold #5, but used as a passing thread. Only partial success with this bit. I used a reverse chain stitch, and passed the chain loop underneath the legs of the previous stitch, but did not pierce the fabric. While I like the sparkle it adds, it was not easy to do. The wrapped thread denatures, and the #28 needle was impossible to thread. I most definitely need a different needle if I want to use this stuff as a passing thread. Still even though it’s not a heavy plaited stitch and may not be exactly documented as a specific stitch used on historical coifs, the texture sings to me, as an echo of Elizabethan/Stuart era aesthetic. If I can figure out a better needle size, I may use it for some of the logically thicker stem sections. But like the plain couched bit, I am afraid of overwhelming the blackwork. Even more so with with sparkle.
The black and gold stem. Two strands of one of my thicker, stash-aged filament silks. Very fuzzy and prone to catching. I tried out both regular chain stitch and reverse chain (top and bottom of the stem respectively), then I whipped the entire stem with a single strand of the Japanese Gold. Again I had problems with the gold thread unraveling, even though the only place I pierced the ground was at the beginning and end of the stem. Different needle, for sure. And possibly doing it in the other spiral direction. Perhaps I was unknowingly adding to the metal thread’s twist by working in the established direction. But if I can make it work, I do like the look. Perhaps as shown here, I could vary stem treatments, twining full gold with black/gold. Or I could try out a line of double running, back or outline stitch done off count, and whip that, or work another threaded-behind surface treatment with the gold. More thought (and a better needle) is required.
The sad little flower. Been over this one before. My initial stab at counting on this ground. Working over 3×3 threads with one strand of Golden Schelle thread. Not pleased. Nothing wrong with the thread but it but a touch too heavy for the effect I want. That plus my own eyes, the needle size and unfamiliarity with working so fine a count make this bit suboptimal. I also tried using two strands of my slightly thicker stash silk for the outlines, in reverse chain. Too thick. Good for stems at that thickness. Have to experiment with using only one. Or perhaps using two of the Schelle strands for the outlines. More work is needed before I settle on “just right.”
The bit of fill at the very top. This is the debut try-out of one of the finer, newly purchased threads. This one is the one I got off Amazon – YLI 100 weight silk. The tiny spool holds 200 meters.

It has a very smooth finish compared to the others I have, and is quite ethereal. I waxed it with beeswax (as I do all of my threads used for countwork), and that helped give it more body. It was difficult to keep my needle threaded though, because being that fine it could have held a state banquet for fifty more threads of its diameter in the ample eye space of my #28 tapestry needle.
On the effect achieved – yes, I made a mistake in the fill design I was playing with (Ensamplario Atlantio II, #29). I chose that one because it would magnify differences in warp and weft stitch length, both straight and on the diagonal. I am getting more used to working with the magnifier three inches from my nose, and although I have some stitches wrong, they are all in the right spots. The effect though is rather leggy and spider like. This thread may be too tightly spun and smooth for best effect. I will try it out with a double strand next.
So there is my first round-up of experiments. Nothing done yet on the main project. Some food for thought. Some nope. And I am on tenterhooks waiting for the other two threads and the finer needles. But until they arrive, back to the lab for more bench tests!

I find this fascinating and your attention to detail inspiring. More, please! 🙂
[…] It’s getting confusing, so to supplement the last post, I have added identification letters. Items not discussed in today’s note are in the last one. […]
When couching gold the third hand problem is solved by using koma. If you think #5 is too heavy it comes in smaller sizes #4 or even #3 could be what you want. In Japanese Embroidery only sizes #1 and #2 are considered stitchable anything larger is for couching only. I love reading your blog and maybe you already know this information. If so I apologize. I look forward to seeing what you come up with.
You are right. If I were stitching with the frame parallel to the ground, a Koma would be very handy. But I work at an angle, seated in my recliner or on a chair. I’ve been cutting lengths of the gold, doubling them, and using one hand below and one above, plus an occasional pin to corral the strand. If the runs were longer, I would be tempted to modify my working angle, but for now it suffices.