First, let’s get the present out of the way, since that’s what most of you are here to see. In honor of the Year of the Horse, here is a linear strip, for your personal/non-commercial use.
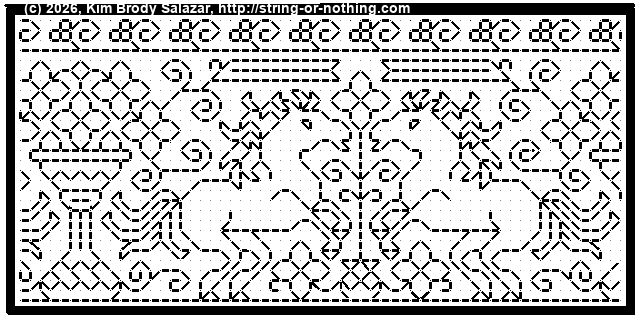
Now on to the blather.
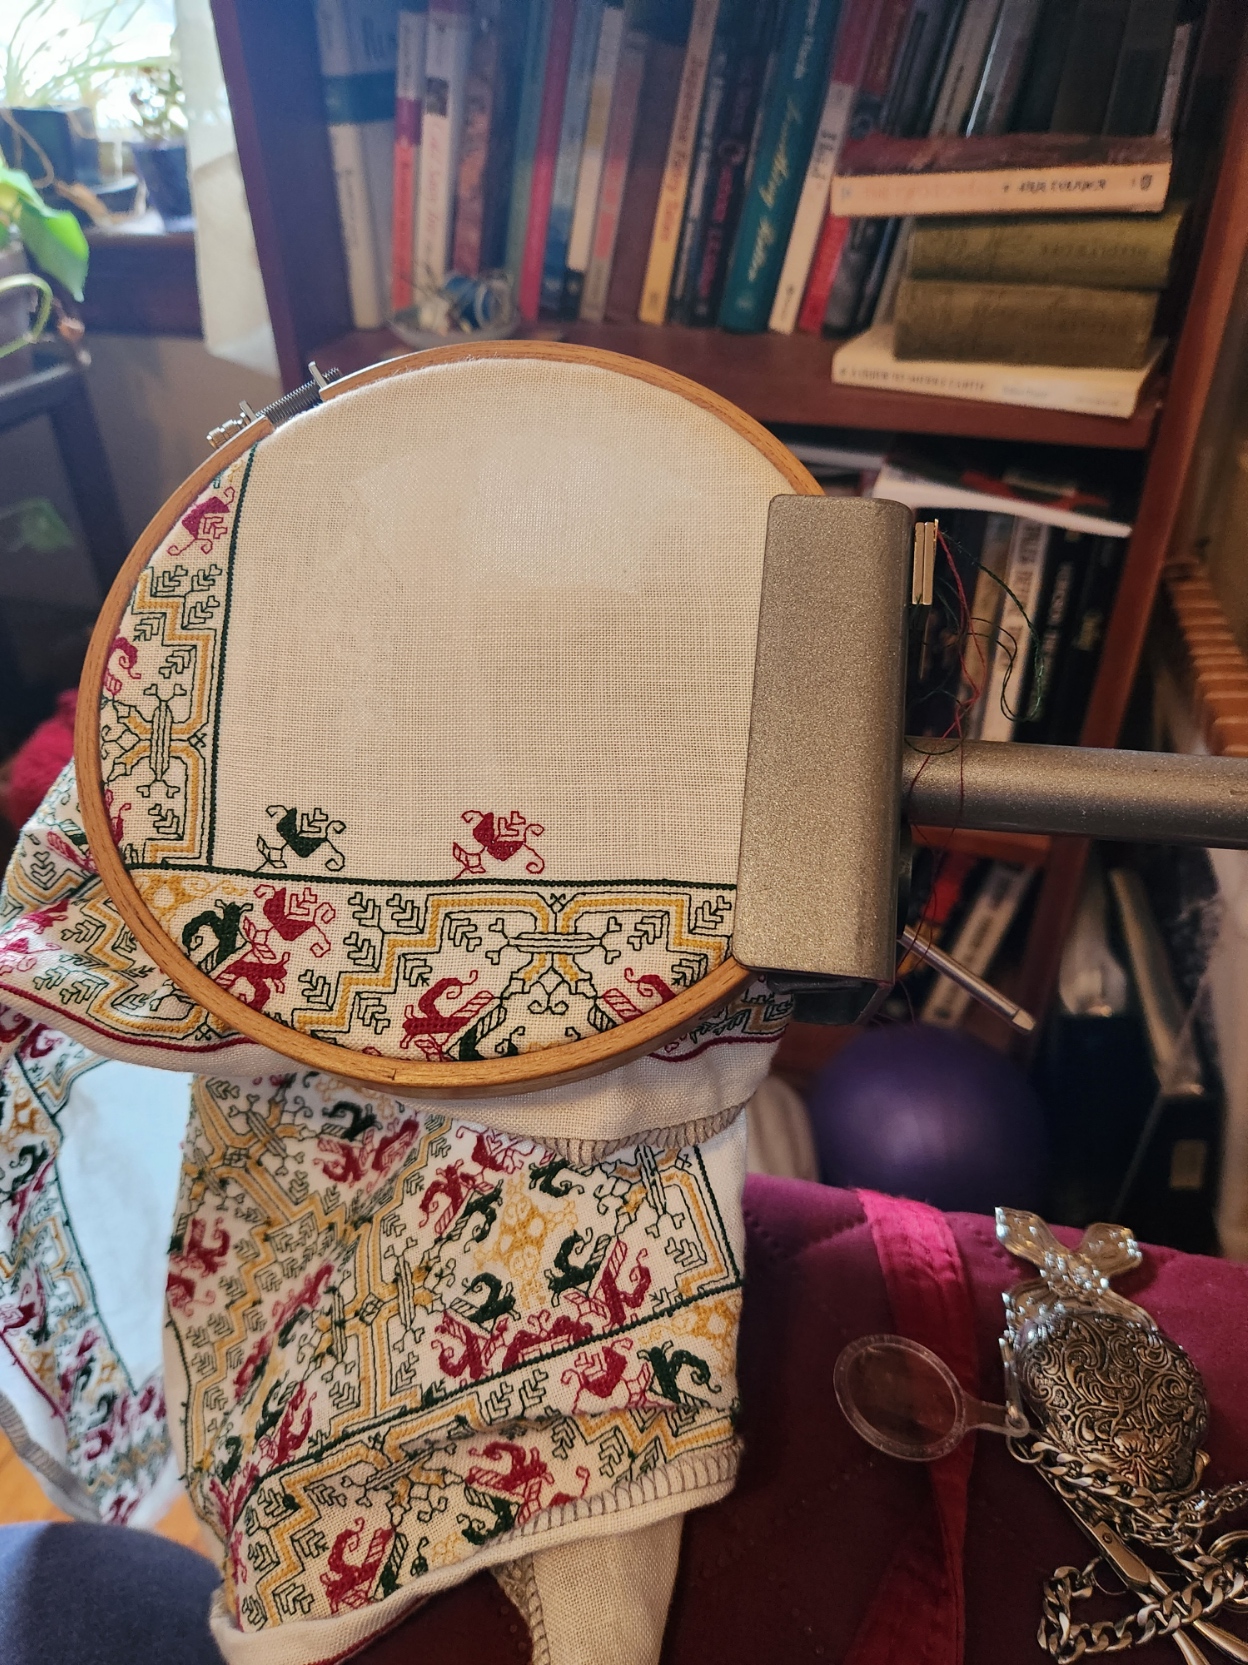
I have finished the outer frame and wide inner band on my Italian multicolor piece.
The next step is the interior edging of sprigs that circle the two empty panels, left and right. (Also proof that I do use my Lowery stand with hoops as well as large, heavy frames.
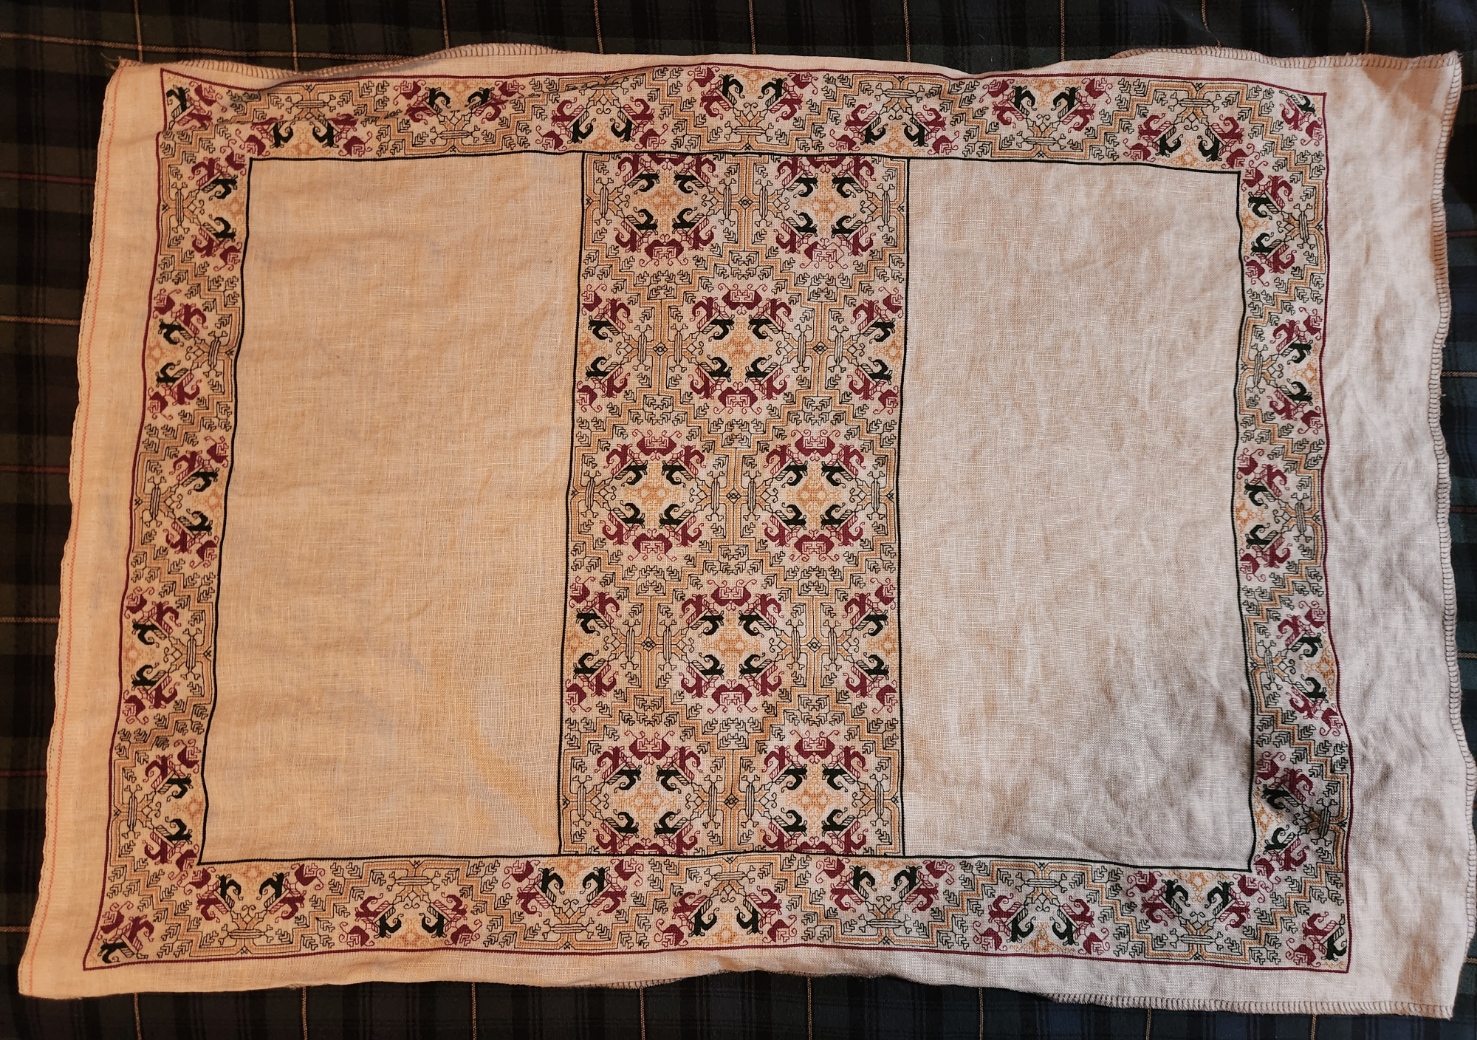
I am basing the use of these sprigs on the original artifact. The original however was significantly bigger than mine. It features both large and smaller sprigs, all quotes from the border and band design. But because my piece is smaller, I think that alternating big ones and little ones will make it a bit crowded, so I will be using only the smaller sprigs. This next photo is of the original – MFA Accession 83.242, Italian, 16th century.
All in all I’m pretty pleased with my fidelity to the original. There are some deviations, but not many. Note that edge bit where the wide center strip joins the frame. My rendition hits in exactly the same spot of the repeat. Which surprises me since no corner of the original was identical to mine (a deviation for sure), and no two corners of the original were identical.
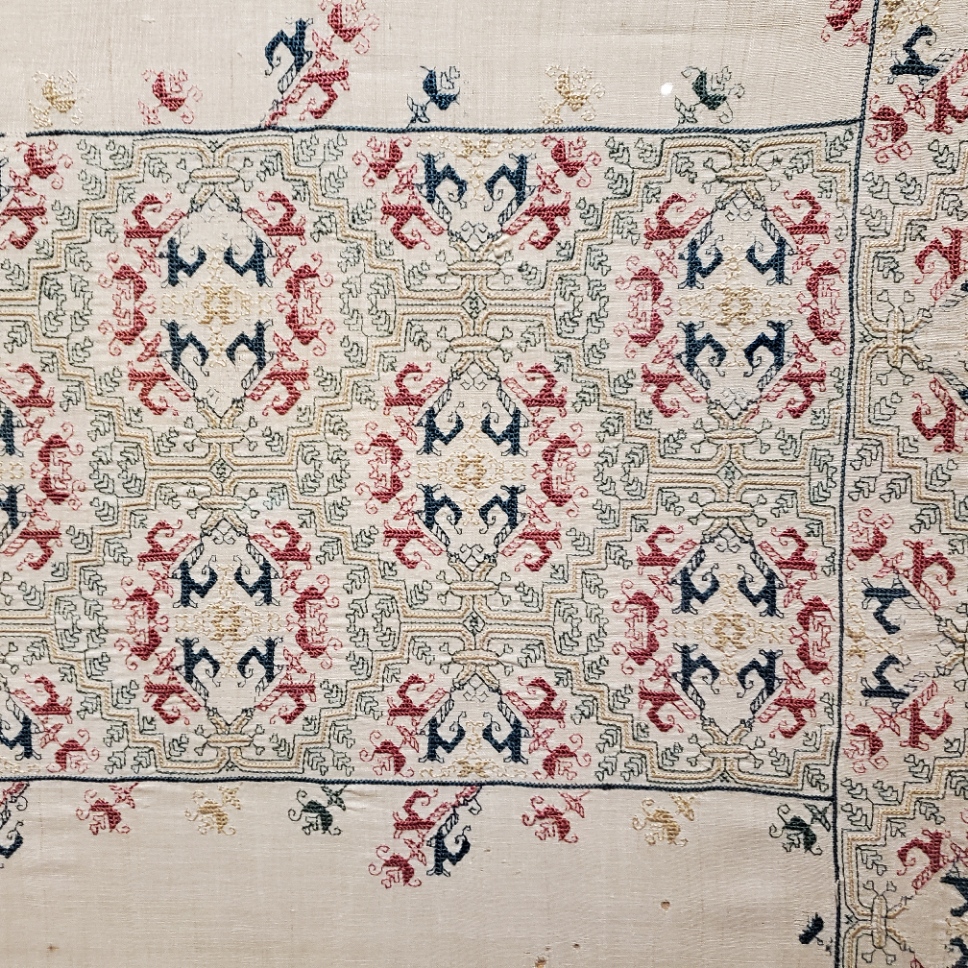
Hmm… Looking at this a bit more closely…
I may rip my first two sprigs back and fix the length of the lower curl, then re-plot the spacing accordingly.

The Italian piece is absolutely gorgeous. Absolutely no offence meant, but the distance shots remind me of the dainty Laura Ashley floral prints of decades past. Something about the colours and the density of the design. Not so much the close-ups that show your wonderful stitching. Oh, and thanks for the horsies!
LOVE
IT
!!!
Very fine work.
The line up of the center band with the edging *is* a surprise.
The lack of fussiness and matchy-matchy obsession by stitchers of the past is foreign to me, but I recognize it as a result of the machined environment in which I live. I try to relax about such things.
Thanks for the kind words!
In general, I’m not fussy about the corners and alignments. As you say, these things were not major considerations for the 15th-17th century folk doing these styles. But on this one, since the second corner was so close to being true, I decided just to go for it. I’ll be back to my normal hand-waving approach to geometric precision on the next project. Which I am beginning to think about as I get down to the end of this one.
Dear Miss Kim,
Thank you so much for this chart. I am looking forward to stitching it. My question though… exactly where would I make the first stitch?
Thank you again, Sincerely, Michelle Castanon ________________________________
Sorry to be tardy in responding. Life intrudes.
To stitch a linear design like this in double running stitch it is simplest to identify a baseline, and begin along that. I have a series of free tutorial posts on beginning blackwork technique, including baseline identification here on String:
https://string-or-nothing.com/category/reference-shelf/tutorials/double-running-stitch/
To add this particular strip to a band sampler, the first thing I’d do would be to identify the center of the area to be stitched, and align my chart to that point. Then I would work out from that (imaginary) center line to the right, using the baseline logic described in the tutorials. Once that was completed, I would return to the center and work the remaining half of the design, filling in the portion on the left of the center line.
One caution – if you have never followed double running logic before, I would not suggest you begin with this strip. It has lots of detours and tricky bits that could catch you in a cul de sac, or cause you to lose your place. It does take a bit of practice to “see” the path, and understand how to move along it efficiently. To that end, I have also released the class handout I use when I teach workshops It is pretty much a self-contained blackwork lesson series, with the easiest charted patterns at the upper left, and increasing in complexity and challenge as you move down the page and to the right. It would be a fun project to take that handout and use it do to a band sampler – working each of those designs in order. And by the time you’ve completed the last design of that set you would be ready to take on the horse strip I shared on this post. The worksheet is also a free download, and can be found here: https://string-or-nothing.com/embroidery-patterns/
Hope this helps!