RED AND GROWING
[Repost of material appearing on 23 August 2006]
Still fiddling with lacy knitting and doilies here. I’m making progress. Although the notation used in the Schnelling pattern is squirrelly, once the unfamiliarity factor is removed, it’s not difficult to follow. I’m now up to round 58 or so. I plan on working this pattern out to round 125 or so, so you can see I’m a little way over a third through with this project. (Remember, as the rounds progress, they get larger, so while I may be almost half-way through the round count, my later rounds will be much larger than the initial ones, so there are lots more stitches to go).

What’s next in terms of lace knitting? I’m not sure. I’ve got the Princess Shawl pattern safely stored away, waiting for the inspiration to work up. I’m sorely tempted to buy the Wedding Ring pattern, too. But those are both very large life-consuming projects. I am sure I’ll enjoy them, but I’m not in the mood to give over to yet another monster project right now. So Princess will sit a while. In the back of my mind lurks the thought that someday my two rugrats will be female adults, and that it would be nice to provide them each with an heirloom. But they’re both still in the anime, Popsicles, and homework phase of life, so I’ve got lots of time.
To answer yet another question – the tiny stitch markers. What are they?
They’re inexpensive silver color 4mm split rings, bought at a crafts store. 4mm is big enough to sit comfortably on needle sizes up to 3.5mm, perfect for lace. I think a little bag of 50 set me back a princely $1.75. They’re thicker than single jump rings, and so stay put instead of wandering off under YOs. I save the wildly fancy dinglebob-graced silver marker for end-of-round use, and flick these little cheapies in to mark each repeat. At that price and quantity, if some end up under the sofa or in the wash, I don’t mind.

Why mark each repeat? Because doing so is way of proofing the lace as I knit. I don’t use a lifeline (lifeline video from KnittingHelp) and rarely have to rip back a full row. I avoid that by using lots of markers and making sure that each repeat is correct before I move on past the upcoming marker to the next section.
YET ANOTHER RED DOILY
[Repost of material originally appearing 21 August 2006]
After dithering about finishing off the red doily with a sawtooth or similar style edging, I decided to end it as the pattern recommends – with two rounds of simple chain loops. Here’s the result. I haven’t blocked it yet. That has to wait until Elder Daughter returns from camp. Why? Because the checked sheet I prefer to use for precision blocking is part of her sleep-away camp accouterments, and I have to wait for it (and her) to return.

I’m happy with the result. It’s about 15 inches across, pre-block. I ‘d like something larger, but I do have a perfect spot for this one. It’s serving its doily-emergency mission right now, but will soon be sidelined to another use. So that means that having found out that doilies are the potato chips of lacy knitting, I get to do another. (Now I understand those houses that are covered in the things.) You can see that I’ve begun:

This one is from The Complete Works of Rachel Schnelling, a leaflet compiled by Gloria Penning of that designer’s patterns (On her website, Penning writes that Schelling probably translated patterns by Christine Duchrow). I bought this leaflet direct from Gloria about seven years ago and am just now getting around to playing with its patterns.
My new doily is built on an octagonal rather than hexagonal logic. The pattern itself might be a bit daunting for some, although it’s really not difficult once you get the hang of the thing. Unlike the one I made last week that was written up in prose directions, this one is graphed. But with an idiosyncratic notation system all the author’s own. Stitches are shown as boxes, with SSKs represented by a boxed letter D, K2togs as a boxed letter T, and YOs by a boxed letter I, etc. Unlike my preferred graphed notation, no effort whatsoever is taken to relate the visual presented by the pattern to the actual appearance of the knitting. Margins of the repeat wander right and left in synch with the knitter’s repeat rather than the way the finished item looks. Edge notations indicate rows on which the graphing shifts over a stitch or two. Heavier outlines are supposed to unite visual elements, but (to me at least) do little to introduce clarity.
This is not to say that the patterns are inferior – they’re not. They’ve e got the nice, crisp lines I like, and (once you’re used to the notation) are very easy to work – just knits, K2tog, SSK, YOs and double YOs, with all patterning restricted to the even numbered rounds. So far the thing has been error-free and both quick and enjoyable to knit. Plus the round motifs come in several graduated sized sets. For example, in the piece above, the outer pineapple-like areas grow out to become petals, making an eight-petaled flower. The smallest finished object stops there. Then there’s a second tier of design, after which the second largest finished object stops. And so on until the final full tablecloth sized expression. I’ll stop somewhere after the piece grows sufficiently large.
MORE DOILY MODS
[Repost of material originally appearing on 18 August 2006]
Yesterday’s mod was clearly indicated by comparing the directions to the photo. But today’s are a result of NOT wanting to make something that looks like the original.
Around the outer edge of my doily are 24 arrowhead or heart-like shapes, with the pointy tip facing the thing’s edge. In the original photo and directions, these are oddly placed. While they could have easily fit in between the points of the larger leaf/tulip motifs in the previous ring of design, they are skewed off the repeat, almost as if they were tossed on as afterthought. I like the minor asymmetry of the base of the leaf/tulips. It made sense there both visually and in knitting logic. This outer ring’s perturbation however is just …odd.
So not being able to leave well enough alone, I played with the thing, centering the arrowhead shapes in the areas between the leaf/tulip points. I haven’t changed the motifs – just shifted them to the left by a couple of stitches so they align between the ribs formed by the center stitch of the leaf/tulips. I think it’s an improvement:

If anyone else is interested in doing this pattern, here’s the whole modification – rows 63-71.
I’m using the pattern’s own notation system present in the rest of Nurhanne’s translation. Note that while it’s written for sl1-k1-psso type decreases, when working, I substituted SSKs throughout.
Alternate final motif area for FANDUGEN
Row 63. *K7, k2tog, yo, K1, yo, sl1-k1-psso*
Row 65. ->1stitch *K5, k2tog, yo, k3, yo, sl1-k1-psso*
Row 67. -> 1 stitch *K3, k2tog, yo, k5, yo, sl1-k1-psso*
Row 69. -> 1 stitch *(K1, K2tog, yo, k1, yo, sl1-k1-psso)2x*
Row 71. ->2 stitches (sl1-k2tog-psso, yo, k3, yo)2x*
DOILY – NOW WITH VISIBLE PHOTO!
[Repost of material originally appearing on 17 August 2006]
O.K. I’ve found a mistake in the FANDUGEN pattern. It appears to be in the original Danish pattern, and is carried through into the uber-accurate translation posted on Nurhanne’s Yarn Over website.
Here’s the original problem line:
Row 61: <- 1 stitch, *K3, yo, sl1, k2tog, psso, yo*
It should read:
Row 61: <- 1 stitch, *Sl1-k2tog-psso, yo, K3, yo*
It’s a simple transposition of the k3 unit and the double decrease. It’s very evident in the photo that accompanies the pattern that the area of small roundels at the top of the tulip like unit contain three little round units, and that the outer two of each triad are finished the same way as the innermost one. If you work the pattern as written, the little circles aren’t finished off nicely with that center double decrease. It just doesn’t look right and the oddness in logic leaps out at the knitter immediately.
Here’s the result so far, schlepped around the house to find something light colored against which to take the photo:

And a detail shot:

Single Crochet
On the UK usage of “single crochet” I admit that it’s very rare today, but it’s not unknown. Especially in historical patterns. If I had the time I’d comb through my collection and find examples. I know that I’ve worked my way through this problem more than once, having made the erroneous assumption that because I saw the term “single crochet” the rest of the pattern’s nomenclature must be American usage. I learned long ago never to say “never.”
DOILY PROGRESS
[Repost of material originally appearing on 16 August 2006]
Miserable excuse for a camera and non-existent photo skills aside, you can see that I’m making good progress on the red doily. I have just completed row 52 of 72, and am beginning to think how I would like to end it off.
The original instructions use a very simple crocheted bind-off, using one single crochet to gather together three knitting stitches, then chaining nine before gathering the next three knits with another single crochet. Two small complications – the instructions are from Europe and with 99% probability conform to UK term standards. That means that there’s a high possibility that the stitch referred to as a SC in the instructions, here in the US (and parts of Canada) is known as a slip stitch. More on this problem here. I’d have to play with both to see which look I like better.
The second complication is a minor one – the photo of the original pattern clearly shows two rounds of the stuff, with the first worked to end off the knit stitches, and the second worked “belly to belly” of the chains formed in the first round. It would also not be a bad guess to surmise that the second round of slip stitch/chain loops uses chain segments that are one or two stitches longer than the previous row. Experimentation would be advised.
Now. Do I stick with the original simple-yet-elegant crochet bind-off solution, or do I do something nutsy like knitting around the thing with a small saw-tooth edging? Only time will tell. That and the final diameter of my piece. The lousy photo? Here:

So far no errors whatsoever, and the pattern has been very easy to follow.
DPN DILEMMA
[Repost of material appearing on 15 August 2006]
I think I’ve hit on one of the reasons so many people despise DPNs: insufficiency of length.
I love DPNs. I use them happily with no problems whatsoever. I have employed up to 15 or so at a time on larger projects for which I had no equivalent circ. And that’s what I thought was going to happen with my red doily. I have about three sets of the unusual 2.5mm size. Give or take for previous losses. 2.5mm sits somewhere between a standard US #1 and US#2. Addi Turbo’s standard equivalent of a US # is 2.5mm (that’s what these are), while most other makers label 2.25mm as a 1. Needle size comparisons across makers here.
My problem is that my 2.5mm needles are stubby, little six-inchers. They’re the only needles I have of that diminutive length, probably bought for glove projects long ago. I normally consider eight-inchers to be the absolutely minimum usable size. I routinely seek out longer ones when I can find them.
My problem with the teeny needles on this project is that I have large hands for a fem. That coupled with too many stitches has meant that I knock the stitches off the butt ends as I work. Yes, I know I could use needle end protectors, or introduce more needles, but I don’t have time to fiddle with point protectors on both ends of 12 needles (I’m up to 12 now). This a new empathy-building experience for me, as I never have this problem. Last night I spent as much time recovering dropped stitches as I did creating new ones. If only I were using needles of my favored length, I wouldn’t be having this ultra-frustrating problem!
Now on to the second half of my dilemma. I don’t have a 2.5mm circ of any length. Nor the time or inclination to track one down. But I do know that I knit more loosely on DPNs than I don on a circ, and i do have an overly long 2.75mm circ. So tonight I knit all my stitches off those little DPNs and onto something safer.
A quick answer to the question about that silver stitch marker in yesterday’s photo. It’s marking the beginning of the round. With 6 or more needles in the work and tiny stitches, plus a pattern that migrates left a stitch or two as it progresses, I find it convenient to idiot-proof my beginning point. Aside from assorting stitches so that the round begins mid-needle it’s impossible to use a standard marker on the end of a DPN round. So I use something slightly different.
When I was on a business trip a while back I happened on the Tucson Gem and Mineral Show. I went into a booth selling silver fittings, pieces, and beads imported from India. There I got a bunch of tiny dangles all set with semiprecious stones, plus a half-dozen tiny little silver earrings. The kind that people wear by the half dozen, marching up along the edge of their ears, or through an eyebrow piercing. The whole lot was amazingly inexpensive, even considering that neither the silver nor the gems used are the highest grade. The result:

Stitch markers that can be clipped anywhere I need them. The one shown yesterday is the leftmost of this lot, and one of only three I have left. The others have all gone out into the world as gifts. If I ever get to the gem show again I’m heading back to that tent and stocking up. With luck I’ll help subsidize a village of people who spend their days working on these tiny bits of filigree, and not just the middlemen who haul it across oceans to sell in the desert in January.
PLACEMAT OR DOILY
[Repost of material originally appearing 14 August 2006]
I don’t know if anyone else has “doily emergencies.” but I do. Here’s the problem scenario. Cozy library/TV room, comfy chairs, optimally placed small table just big enough for a wine bottle and two glasses (and a remote or two). But I don’t want to drip all over the new small table.

I suppose I could haul out coasters or adapt one of the dining room placemats. But why overlook a perfectly good opportunity for the application of knitting. So it’s off to the stash to get my massive amount of red lace-weight, left over from Alcazar (rayon but borderline washable and expendable), then hunt down one of Nurhanne’s translations of a traditional Danish doily. Yes, I know. It’s red, not the classic white. But hey. Red won’t show wine spills as quickly.
I end up here. Then cast on and knit a bit. Here’s the result. I’m somewhere north of a third of the way through the rows, on Round 37:

I’ve finished the center star and am at the beginning of the tulip-like shapes that surround it. My piece is about 6 inches across. I chose this particular pattern because there are several good stopping points from a design perspective. I needn’t finish it all the way to the end if my piece is sufficiently wide before then. So far Nurhanne’s translation is spot on. No problems at all.
Still, for domestic consumption, this piece is filed under the category “placemat” not “doily.” It seems less …prissy.
DIGRESSION – BLACKWORK EMBROIDERY
[Repost of material originally appearing 10 August 2006]
My old friend Marian pointed me at a fascinating Web-based resource. The Web Gallery of Art. It’s an on-line (sort of) searchable collection of art images from pre-1800. I’m in the middle of thumbing my way through Renaissance-era portraiture, in part to plain old enjoy it, but also with an eye to the embroidery used on clothing.
Now the few folk who visit here may know that in addition to knitting, I’m a sucker for embroidery. Especially counted embroidery from before 1600. My favorite family of styles is often lumped under the term “blackwork,” and had a popularity run spanning about 100 years or so, until it morphed into other things and/or fell out of fashion for upper-class clothing, sometime between 1600 and 1630. It did however live on through its descendants (most familiarly some of the bandwork common on early samplers) and peasant embroideries of several regions Through these descendants some of blackwork’s substyles have enjoyed little renaissances in the centuries since.
So. What is blackwork?
Not to be facetious, it’s monochrome embroidery worked in black thread on white ground. Most but not all of the time. Non-black or multiple colors were occasionally used. Most people think of it as counted work – embroidery that uses the threads of the ground fabric as a foundation “graph”.. Again, most but not all of the time. Some sub styles are clearly worked on the count. Others may have been, and still others are clearly freehand drawn. Some people are under the impression that there are clearly defined national or regional substyles, with English work being distinct from say German or Italian. Again, that’s partly but not entirely true. If you’re unfamiliar with the basics, The Skinner Sisters website has an excellent survey of Blackwork styles available on line.
Here’s one of the most famous examples of band style blackwork, worked on the count. It’s seen on the sleeves of Jane Seymour, as painted by Holbein in 1536 (you can click on the images in the linked pages to display them in greater detail). Very linear, clearly done both two-sided and on the count in a stitch that today goes by several names – Holbein Stitch, Spanish Stitch, Double Running Stitch. Harder to see (peeking out just above the gold and red units at the edge of the bodice – is a tiny line of blackwork on Catherine of Aragon, painted circa 1525-7 by Lucas Horenbout. Catherine is often said to have introduced the fashion for blackwork to the English court.
Here are heavier outlines, but still very geometric, suggesting a counted ground to me: Pierfrancesco di Jacopo’s Portrait of a Lady, dated to 1530-1535. This one, too – Gentleman in Adoratio nby Giovanni Battista Moroni, dated 1560. Moroni’s Gentleman wears a style that I associate more with English strapwork than embroidery of Northern Italy. To some extent, these styles traveled via printed pattern books and were international.
These suggest work on the count, but possibly in satin stitch rather than double running or another linear stitch. Bernadino Luini’s Portrait of a Lady, 1525. (See. Not all early blackwork is double running!). Also this one – Romanino’s Portrait of a Man, 1516-1519. This is the picture that Marian alerted me to, starting this whole rumination. The regularity of the piece leads me to think “counted.” The angles of the ends of the leaves makes me think “satin stitch” rather than a solid filling done in another method.
This one – Portrait of a Venetian Man by Jan van Scorel (1520) looks very much like cross stitch is used to form the stitched repeat. It’s also done in red. There is no zoomable detail page for it on the website.
Of the most famous types is the inhabited style, in which outlines were infilled with all-over patterns, done on the count. My own forever project is an example of this type, although it’s my own composition and not a repro of a historical piece:

Bettes’ 1585-90 portrait of Elizabeth shows sleeves that are (at least in part) done in the inhabited style (Link via the Tudor Portraits site)
Yet another sub-style, again outlines done freehand (or drawn) rather than on the count, and accented with metal thread work. The most famous again is in a portrait by Holbein – Catherine Howard‘s cuffs, 1541. Here’s another example of freehand outlines but without the infilling geometrics: the shoulder area of Hillard’s portrait of Elizabeth I, 1575-6. Some examples of this subgroup use stippling (tiny scattered stitches) almost like pen-done line shading to provide textural or shadowed interest, or include embellishments like seed beads, pearls, or spangles.
More blackwork using colored threads? Here’s Caterina van Hemessen’s self portrait, 1548. Although tough to see, I’m pretty sure there are red cuffs and collar bands there. Red was the most popular color used after black. (I wish I could see her coif better)
There were other styles, too. All confusingly lumped together under the modern term “blackwork.”
Finally, there are portraits that show things that look vaguely familiar, but not in enough detail to be sure they are related.
- Band stitching, done in gold, with details too small to determine whether it was worked on the count – Jan Sanders van Hemessen’s Woman Wearing Gold, (undated, but the artist lived 1500-1556).
- A small collar worn by a man. Looks vaguely blackwork like, but detail isn’t very clear. Foschi’s Portrait of a Man (1530s)
- Matching(?) bands on chemises of both husband and wife. Lorenzo Lotto, 1523. Possibly freehand.
- More red blackwork? This time possibly on the collar of Charles V’s undershirt, in a piece by Bernaert van Orley, 1519-1520.
- Blackwork on edge of chemise? It’s so light as to be doubtful. Portrait of Jacquemyne Buuck, by Pieter Pourbus, dated 1551
- An all-over design produced by counted black stitching, or some sort of brocade? Hard to tell. Ambrogio de Predis Portrait of a man, dated 1500
QUESTIONS AND SOURCES ON MEDALLION KNITTING
[Repost of material originally appearing on 8 August 2006]
More questions and comments today via eMail.
Do you always use the half-hitch cast-on on two needles for medallions?
No. For octagonal or square medallions predicated on a starting stitch count of 4, or for triangular or hex medallions that start out with 3 stitches, I tend to use an I-cord beginning, working one round of I-cord, then introducing more needles as the work grows. But my I-cord also starts out with half-hitches rather than another, firmer cast-on. I often use the cast-on tail to thread through the half hitch “spine,” drawing up the center purse-string style to make it nice and solid, but not lumpy. The only exception to this is if the center of the medallion is a large hole rather than a solid bit. If the edge of the cast on will be on display because it frames a central hole and structural integrity is key to a neat hole, then I use something more solid – either long-tail or one of the knit-on cast-on family.
I see several sources for learning how to knit lace in the flat, how about a source for the basics on inventing your own in-the-round medallions?
It’s true that analyzing and inventing medallions aren’t as widely addressed as flat lace. Some of the shawl books and specialized Shetland Knitting do go into a quite bit of detail on using lace patterns for center-out, radial increase pieces, but they mostly stick to squares. The most recent edition of Interweave Knits (Fall ’06) has an informative article on what to do if your lacy pattern is interrupted by changing stitch counts – again very useful, but only part of the story. The Lewis Knitting Counterpanes book put out by Taunton gives lots of patterns for medallions, but is rather less useful as a source of hints for designing your own.
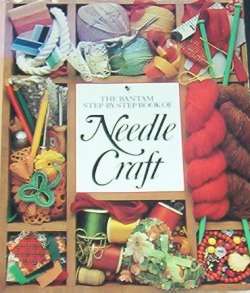
In spite of all these great sources, my at-the-elbow source for medallion knitting tips remains the venerable Mary Thomas Book of Knitting Patterns. It’s the companion volume to her Knitting Book. Thomas is one of my personal heroes, both for these books and for her embroidery series. Judith in Oxon in the UK tells me that Mary Thomas grew up in her town, but is now forgotten there. What a shame.


Knitting Pattterns was first published in 1943, and has been in print ever since – most recently in an inexpensive Dover re-issue (pictured above). There’s an extensive on-the-web preview of some content at Google Books if you’re unfamiliar with it (the 1938 Knitting Book preview is also available, current inexpensive Dover edition shown above). For two slim volumes I am constantly amazed at how much info they contain.
The Thomas books bridge the Victorian and post-Victorian era ladies’ pattern magazines, compendiums and encyclopedias of needlework (Weldon’s, de Dillmont) and modern knitting guides (Vogue, Principles of Knitting). Thomas tried to seek out what was offered in conteporary scholarly info on textile history, and to explain some of the more esoteric aspects of craft execution in a non-ambiguous way – targeting an audience interested in process and technique rather than in devised patterns. For example, she was one of the first to use a system of standard block symbols to represent knitting texture and colorwork patterns in graphed format.
Of course nothing is perfect. Her knitting history reflects the state of research at the time she was writing, and is not as devoid of folk myth as is R. Rutt’s, but it’s not bad either. The biggest criticism people have of the Thomas books is of the small illustrations sprinkled throughout. The drawings are by “Miss H. Lyon-Wood, Miss Dorothy Dunmore and Miss Margaret Agutter” and reflect a rather colonial world view (especially of non-Europeans) that today would be considered culturally and racially insensitive. Of all the books, the Knitting Patterns (her last) has the least of these little cartoons, and her earlier works on embroidery, the most. As an aside, it’s also worth noting that Agutter wrote books on cross stitch, crochet and patchwork quilting, and as a respected knitting expert, worked with James Norbury on Odham’s Encyclopaedia of Knitting. I’ve heard rumors that the other two seem to have provided small illustrations and marginalia for several other contemporary books, plus some childrens’ book illustrations, but haven’t been able to confirm them.
Overlooking these flaws, things that recommend Knitting Patterns include sections on all sorts of lesser seen esoterica, including Filet Knitting (knitting in imitation of fliet crochet); picot point knitting (an amazingly fiddly bit of freeform scrumwork to make petal and flower-shaped bits of detached knitting for edgings or raised decoration); and basic steps in medallion knitting geometries. On the whole, given the ubiquity and extreme inexpensiveness of the Thomas books (both can be found used for under $2.00 each), they are useful additions to anyone’s knitting library.
Other sources that delve into the mysteries of knitting medallions in the round include B. Walker’s recently compiled Fourth Treasury of Knitting Patterns, in which a non-traditional approach to medallion knititng is addressed as an offshoot of directional knitting; and unlikely as it sounds – in the standard center-out method, inJudy Brittain’s Bantam Step by Step Book of Needlecraft. I’ve written about the Bantam book before.

MORE TRURO QUESTIONS
[Repost of material originally appearing 7 August 2006]
More North Truro questions from my inbox:
Why are there blue boxes on the hex graph? They’re not in the symbol key.
That’s an example of what happens when you write for yourself, use the same graph oodles of time, and then release it into the wild without doing a due diligence review. I shaded them for myself, as a reminder that those stitches were supposed to be purled because on the first couple of iterations, I’d forget and breeze right over them in stockinette. When I publish a full version of the pattern I’ll remember to kill the blue shading.
How do you cast on at the center of the hex? Your directions just sort of assume that there are six stitching somewhere. How do they get there?
For this particular piece, I usually cast six stitches onto one needle, using a half-hitch cast-on. Then I move three stitches onto a second needle. I hold the two needles like this,

and using a third needle, begin working my rounds, starting with the first stitch I cast on. I’ll introduce more needles as the thing grows, redistributing the stitches (or mentally spanning one side over the spot where two needles meet if required). By the sixth round, I’ll have all seven needles employed (one per side, plus one in the hand).
Do you use the same cast-on for all the units?
No. For the squares and triangles, I do a standard long-tail cast-on, but work it over two needles held together. This introduces a bit more looseness into that first row, which can be impossibly tight in a non-stretchy yarn like my cotton. Credit for this very simple trick goes to my mom, who showed it to me an aeon ago during her initial fruitless attempts to teach a 10-year old me how to knit.
How many hexes did you knit this week?
Sadly, none. It was super hot here last week. I couldn’t bear to knit anything at all. This weekend though I have started in again, easing my way with a sock. Pix as soon as I find my misplaced camera and the batteries to power it.
