UPDATE: THE PATTERN BELOW IS NOW AVAILABLE AS A QUICK DOWNLOAD PDF AT THE KNITTING PATTERNS LINK, ABOVE.
Sigh. Still no monitor. Perhaps today. At least today I’ve got Internet connectivity. Yesterday I experienced several hours of intermittent service interruptions (that’s why there was no Monday edition of String).
In the mean time, I’ve managed to get one of the other machines in this house to accept input from my bargain-basement digital camera. It’s blurry, but you get the idea:
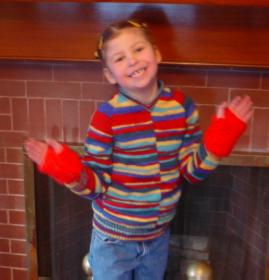
I finished the Crazy Raglan. Now it’s lurid and not my best effort, but it’s to the exact specifications of the target Small One, and she loves it. Perhaps this explains why:
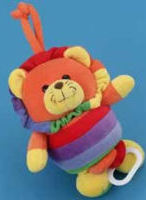
She’s got one of these. It’s been her favorite toy since she was only a couple of months old. Her Squeaky is now much less pristine than this catalog shot, and (mercifully) no longer plays a music box rendition of “Born Free.”? She?picked out the self striping yarn because she wanted a “Squeaky Sweater,” and now she’s got one. But I?think you have to be six to truly appreciate such things.
In terms of technical?performance and lessons learned – there were several. First, going back to mid-summer, there were all sorts of things to be experienced?managing the repeat and?width of the area being knit so as to best manipulate the striping. Second, I used?Sweater Wizard software to devise the basic raglan shape. I really like having that shortcut available to me, but I have to say that for kids sizes at least,?the templates do?run a bit small.I added both copious width/ease and length to make a custom fit on my string-bean kidlet, and it still turned out to be snug.
I’m not entirely pleased with the raglan angle. I should have made the armholes deeper. That would have changed the angles and made the sweater a bit more proportional. I also bowed to kid-preference and made a very shallow V-neck instead of a crew or deeper V, trimming it with a very narrow band of ribbing. She likes it, but I don’t – again the proportions are a bit off. Finally, I did a slip stitch selvedge edge on all pieces. I’ve done that before on raglans and had no problems, but they were solid color raglans, sewn with yarn of the same color. The mattress stitch seaming in the space dyed yarn – especially on the raglan seams – was VERY evident. I ended up taking it out and redoing it as pierced double running stitch to tighten up those shoulder seams and make them gap less. I also selectively cut bits of the darkest green to use for my redone seams. That helped a bit, too.
One thing I did do right was to use provisional cast-ons for the body and sleeves. I also knit both back and front at the same time, and both sleeves at the same time. After I sewed the seams, I went back and picked up the bottom edge stitches at body hem and cuffs, and knit the ribbing in the round. I did the body ribbing first, and liked the contrast between the narrow one-row stripes in it, and the wider stripes in the body. When I did the cuff and neckline ribbing I used two balls of yarn starting at two different points in the color cycle to ensure that they matched the waist ribbing.
So I post an equivocal success. The target audience was pleased, but I’m not enirely so.
Why “By and For?” in the title?? Because those little hand-mitt wristlets The Small One is wearing are a knitting product entirely of her own manufacture. They’re lumpen, odd little superbulky yarn paw-warmers but she’s very, very proud of them. Here’s the pattern. Such as it is:
Morgan’s Paw Warmers
Will fit a small child, age 6-10.
Small quantity of?leftover superbulky yarn. I can’t say what we used. I bought it years ago for holiday present ties. My guess is that it’s 100% acrylic.
US #10.5 straight single pointed needles. Tapestry needle for sewing up.
Gauge – roughly 2 stitches = 1 inch in garter stitch.
Cast on 16 stitches. Knit in garter stitch until piece measures about 6 inches long. Bind off four stitches, and knit across remainder of row. Knit next row, casting on four stitches at the end. On the next row, (K3, K2tog), repeat across the row, ending K1. Knit three more rows on the remaining 13 stitches. Bind off. Sew side seam, taking care to leave the thumb slit open.
