I’m finishing up the second corner on my sampler, and beginning the strip across the bottom of the piece, headed for the bottom center, then on to the third corner.
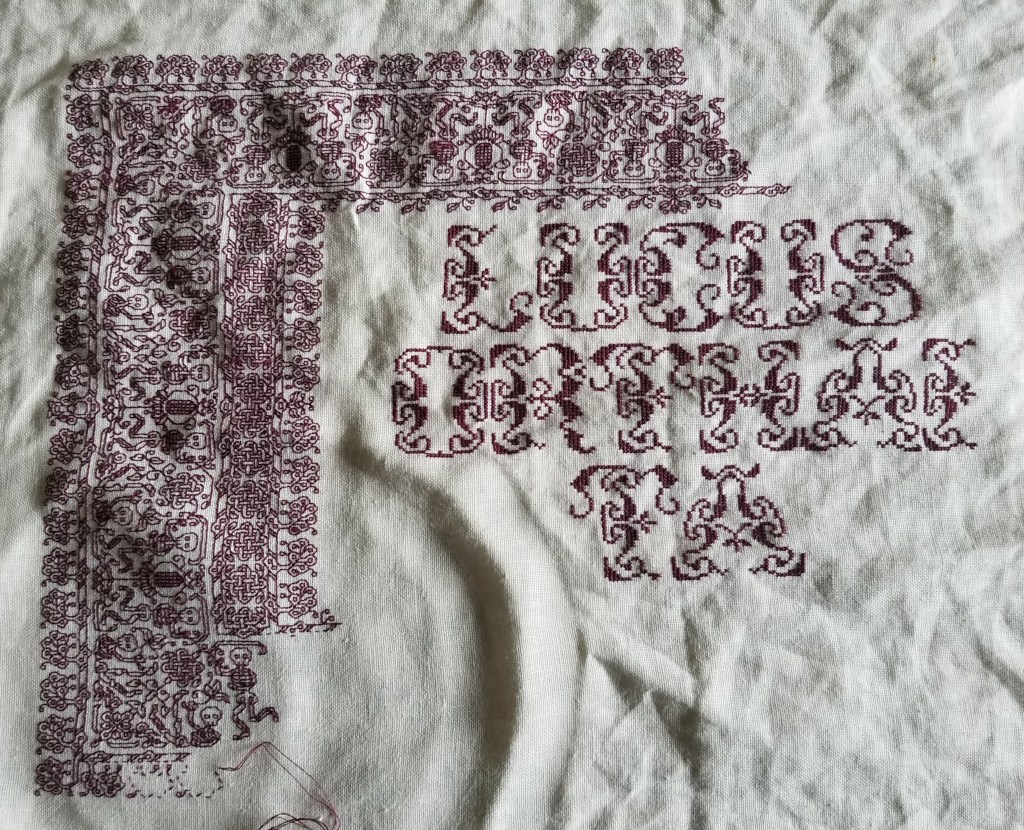
It’s going faster now because I’m free of the chart. I’ve (mostly) memorized the design now, and have ample reference stitching to refer to if I need reminders. The remaining two sides are just mirrors of what’s there already – with the corner and both centers established, there’s nothing on the chart that I haven’t already worked.
Questions from my inbox:
Why aren’t you working on a grid/why haven’t you basted guidelines every ten stitches so you can keep your place?
I don’t need to, although I do have two basted guidelines that mark the center of the piece, one north/south, and one east/west. I proof carefully of established stitching. That’s why you never see a long run “out in front” of the design as I work. For me, that’s a recipe for disaster.
I AM working in double running stitch. You can see the baseline for the bottom plume border in process. I will keep going in this direction until I finish this piece of silk. Then having established the bottom border (note that I work the branch from which the plumes bloom as I go), I’ll switch to the center strip and do more of the skeletons. When I catch up, I’ll hop up to the top border and do more of that. The whole design progresses more or less evenly across the design, keeping pace with itself as I go.
Why are you working left to right?
I’m right handed, and stitch with my right on top and my left below, using (in this case) a sit-upon hoop so both hands are free for stitching. I keep a very bright light over my left shoulder. By working left to right, I can see the previously worked bits (they are not covered by my right hand), so I can keep check on alignment of the new stitching, plus there is no shadow from my hand or shoulder occluding the work in progress. And when I start not at the left or right edge of my piece, but at the center, I often flip my work upside down, so I am also working the second half of my strip from left to right. Were I left handed or favored my left hand for the top when working two-handed, I would probably work from right to left, with the light over my right shoulder.
Can this piece be done double-sided?
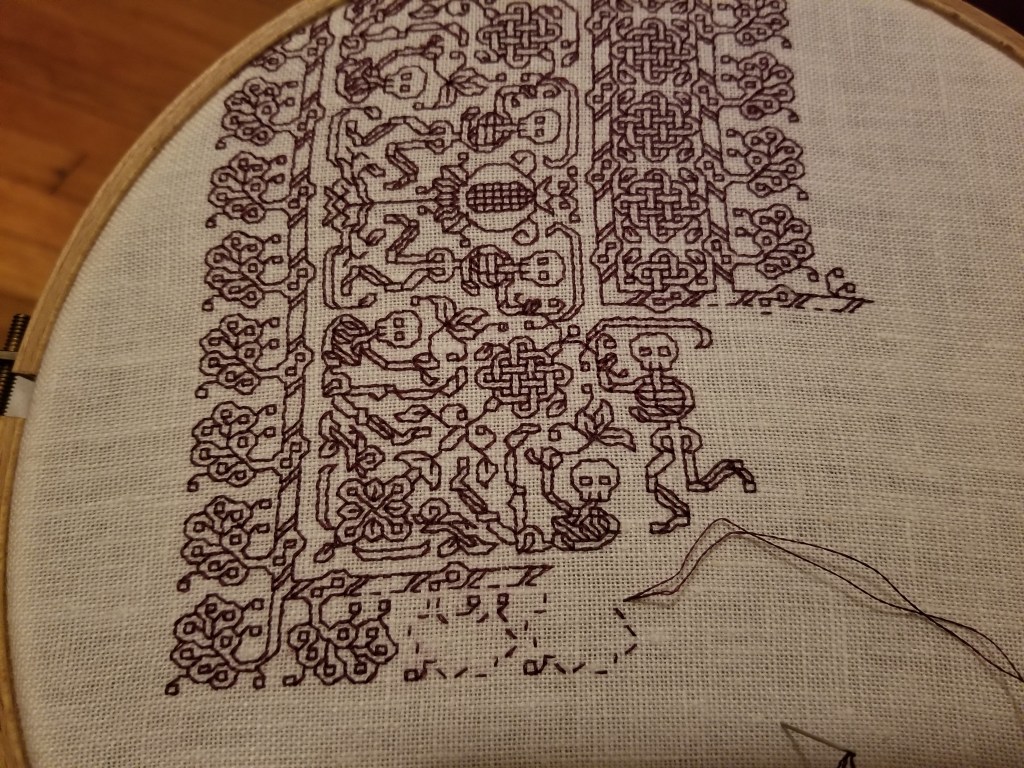
Yes and no. Right now it can be done mostly double-sided in double running stitch (aka Holbein Stitch, or Punto Scritto). But not entirely. The skeletons and the pomegranates are their own units, large enough for burying the ends invisibly on the reverse. Not so the snail – he’s rather small and would be difficult to stitch on his own, with invisible starts/endings. There is also the problem of tiny isolated elements. The eyes are the most obvious example, but the plume border has that little skew two-box spot at the base of each plume, plus a floating square in one of the lobes of the plume.
If I were to set this up for totally two-sided work, I would run a single unifying baseline across the entire bottom of the piece, and adding a stitch to tie the ribbons held by the skeletons to the side curlicue of the pomegranate. I’d also add a brow line to the skeletons, and anchor down the floating spots in the plume flowers. The red stitches below show the general idea:

With the red additions, all floating elements have been locked into the main trace. There are no islands left, large or small. The bois can now be done entirely double sided. And if contemplating another design with isolated bits, similar additions will render it likewise. (The astute will note that this doesn’t contain the snails in the as-stitched piece – I improvised them on the fly, and never bothered adding them to my quick and dirty project chart.)
Why didn’t I do this in the first place? It didn’t occur to me, and I like the rather puzzled look of the browless, wide-eyed bois.
Where can I find the pattern?
Look here for the broadside that contains the dancing skeletons and plume border, plus the reason why I don’t think they are morbid or creepy. And if you want to see all previous posts on this project, here’s the link.
No Cerberus?
One observant reader noted the skeletons and pomegranates and suggested a Cerberus (three headed hell hound) as the logical thematic accompaniment. Not a bad idea, and more grist for my imagination mill. Thanks!
Questions, comments, derision, criticism, suggestions? Send them in either in the comments here, or to the contact address alluded to in the About tab, above.

The inside of the border on your embroidery is different from the chart. I’ve been doing it with the swords version and am running into trouble turning the second corner. The narrow edge of what I think of as bones doesn’t turn symmetrically. Help!
Oh dear. I was afraid this would happen. The Dance chart is a pattern reference broadside, and was never intended to be a finished full-project chart to be stitched as-is. None of the strips on it bear numerical relationship to any of the others – each has a different period of repeat. That’s why I stressed every time it was posted that this was the case, and why I went into detail on the blog and in FB posts on why the fudge factor in the center existed. I apologize that my warnings were insufficient or unclear, and that you were led astray.
But that doesn’t help you.
NONE of the other designs on the page will finish out the second corner evenly in concert with the skeleton strip. What I suggest you do is work the skeletons to their natural corner, but end off the others short, just after the last full repeat, and design a large or small supplemental fill in with signature/dedication/date or small motif to visually balance the space. Note that if you do this in (picking at random) the lower right hand corner, you will probably need to do the same thing when you get to the upper left, because the count problem will be the same. If designing the fudge or fill is not your cup of tea, to make amends, if you send me the stitch count for the parts you are shy, plus a request for what you would like to fit in there, I will do my best.
Again I deeply apologize for your misapprehension, that I was deficient in explaining clearly (and often) that I had made and shared modelbook reference style broadsheet, and not a to-be-done-verbatim project.
And yes – I adapted my own printed design, as described in this post for this project. In part to show how using these and other (mostly historical) pattern strips can be used to make original works. It also was never intended to showcase the not-a-pattern Dance sheet in literal iteration.
Thanks. I will play with it. Thats what this is all about.
I had gotten into a stitching fugue and mindlessly kept stitching and couldn’t figure out how I had gotten into trouble. I really had read what you wrote. Just lost it in the trance. I find blackwork is great for tranquilizing trances.