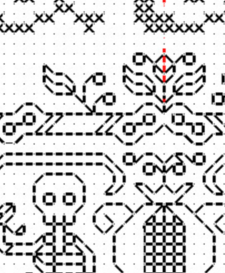
And we march around the perimeter, making skeleton after skeleton.

I’m just shy of half-way now, and I had to extend a tendril out to that point to make sure that I’m hitting my center mark. And I did!

As you can see comparing the blue line on the photo and the red line on the snippet of my chart, I’m spot on for alignment – not even a thread left or right of my center line.
One question I keep getting is how I maintain my location and ensure everything is in the correct spot without pre-gridding my work (without basting in an extensive set of guidelines to establish larger 10 (or 20) unit location aid across the entire groundcloth). I generally reply, “By proofing against established work,” but that then generates the second question. “How?”
So I attempt to answer.
For the most part I almost never work on fully charted out projects, with every stitch of the piece carefully plotted in beforehand. I compose my own pieces rather than working kits or charts done by others, and as a result I never have a full every-stitch representation as my model. My working method is to define center lines (and sometimes edge boundaries), but I pick strips or fills on the fly, starting them from my established centers, and working from smaller charts that are specific to the particular motif or fill that’s on deck. However, if lettering is involved I am more likely to graph that part out to completion prior to stitching, to ensure good letter and line spacing. (Leading, spacing, and kerning are close to my heart both as someone whose day job deals in documents, and as a printer’s granddaughter.)
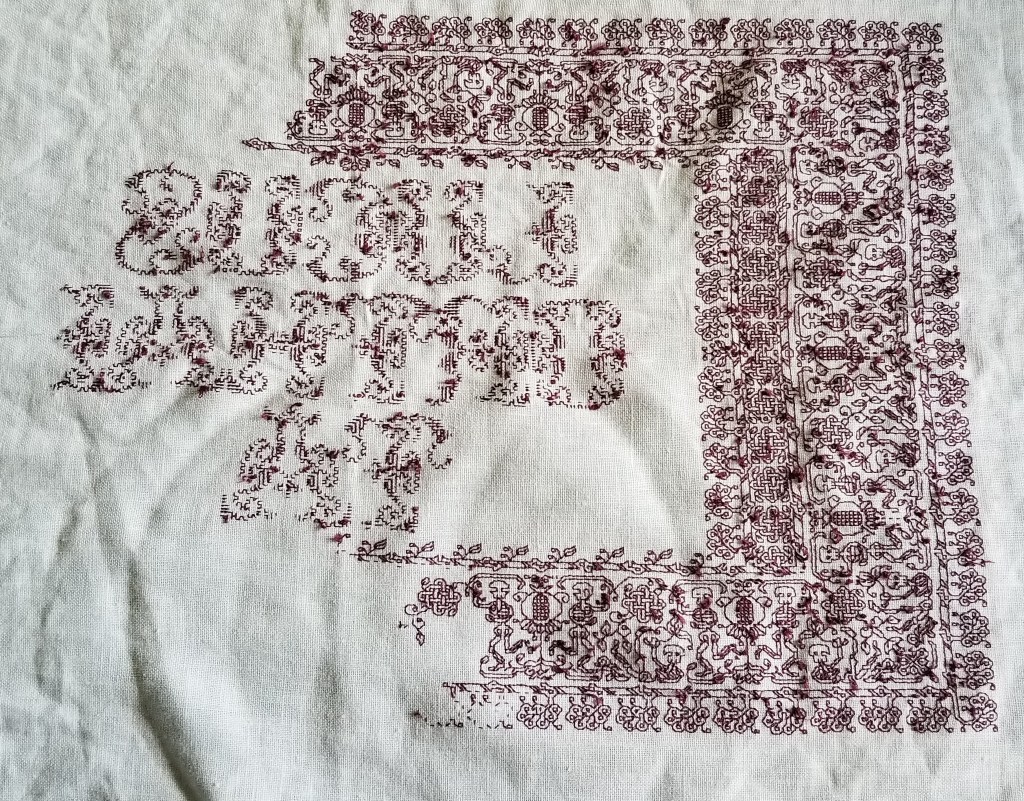
For this project I DID prepare a full graph to ensure the centered placement of my very prominent text motto against the frame. I also wanted to miter the corners of the frame (reflect on a 45-degree angle) rather than work strips that butt up against each other, AND I wanted the skeleton repeat to work out perfectly on all four legs of the frame. To do that I had to plan ahead more than I usually do. (Note that the repeat frequency of the accompanying smaller edgings are different from the skeleton strip, so I also had to “fudge” center treatments for them so they would mirror neatly – another reason to graph the entire project).
But even with a full project graph available against which work, I didn’t grid – I worked as I always do, relying on entirely on close proofing as I go along.
The first step is a “know your weaknesses” compensation. To make sure I am on target I almost never extend a single long line ahead of myself, especially not on the diagonal because I make the majority of my mistakes miscounting a long diagonal. Instead I try to grow slowly, never stitching very far away from established bits, so I can make these checks as I work:
- Does the stitching of my new bit align both vertically and horizontally with the prior work? Am I off by as little as one thread? Am I true to grid?
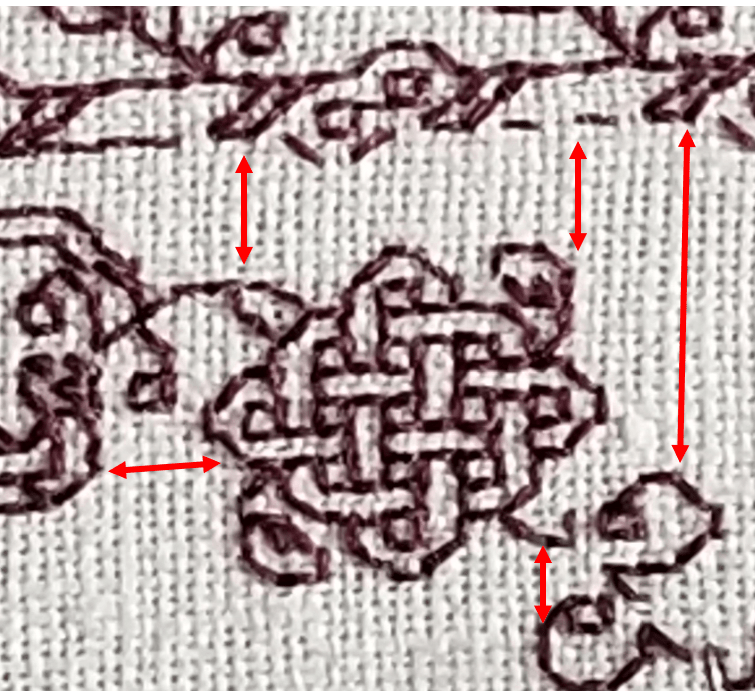
- Is my new bit in the right place? Does the placement of the design element align with what’s been stitched before? For example, in this case, is do the toes of the mirror imaged bois back to back to the pomegranates match in placement in relation to each other and to the bottom of the pomegranate’s leaves?

Are my motifs in the right place?
- Am I working properly to pattern? It doesn’t matter if I am using a small snippet with just the strip design or fill that’s being stitched, a full project chart, or (as I am now) using prior stitching as my pattern – copying what’s been laid down on the cloth. Am I true to my design as depicted?


(Note the compression due to uneven thread count of the fabric.)
As I work, I constantly proof in these three ways – checking to make sure that my work is true. And if I discover a problem, I trace back to see where I went wrong, and I ruthlessly eliminate the mistake. For the record – there’s nothing to be gained by letting off-count stand in the hope of compensating later. Trust me – you’ll forget, mistakes will compound on mistakes, and you’ll end up wasting even more time, thread, and psychic energy on the eventual fix.
I hope this explains what I mean by proofing as you go. I know for most of the readers here, this will be second nature, and they won’t have thought of it as a disciplined approach, but for newer stitchers the old maxim “Trust but verify” should become a mantra. Verify, verify, verify. The sanity you save will be your own.
Finally, for Felice, who doubted I was using double running stitch for such a complex project in spite of the in process photos that showed the dashes of half-completed passes, here’s the reverse.
Yes, I do use knots for work with backs that won’t be seen, but I do it carefully so that the knots don’t pull through. Point and laugh if you must, but I reserve the right to ignore you.

Thank you for showing the back! A lot of people won’t and then you can’t see all the working out of the pattern. Proofing is something I’ve been doing without knowing there was a name for it. Unlike you, I do graph a lot, especially if it’s for someone else, or something I’m likely to want to repeat, or something that is really not clear in someone else’s drawing. I work things out on my samplers, too, which is what I’m up to at the moment.
As you can see from the books, I do a lot of charting, but not whole-project-charting. At least not for me. I’ve done several whole-project pieces as gifts for friends over the past couple of months. Largely because the stress abatement is so sorely needed. Both for them to stitch, and for me because fast as I am, my ideas fly ahead of my fingers.
That back is a thing of beauty!
[…] and had no problems mating up perfectly when I joined back up with the start after my journey. I proof constantly, and I admit a fair bit of picking out and re-doing to stay on count and […]
[…] Proofing. How I check alignment as I stitch, to make sure I’m not wandering off count. […]