ANOTHER NEW TOY
If you’ve been reading here over the past month, you’ll have seen me working the current project in a hand held hoop. I love hoops, especially their portability and versatility. But I vastly prefer the “real estate,” tautness, and ability to use two hands that using a scrolling frame gives. I’ve had two sizes of the Needle Needs Millennium frame for quite a while. I tend to pull those out for the big projects, especially those with metal threads, or that feature easily crushed or disarranged stitches (satin stitch, knot stitches). I also have a sit-upon hoop. I do use that extensively for the smaller pieces with less fragile work on them. It has some of the advantages of the other two types, but as a compromise, with less ability to place the piece in exactly the optimal spot and angle for visual acuity and best lighting. The hands down most efficient way for me to stitch is the big Millennium on my Lowery stand.
After months of hoop-in-hand, I was yearning for the scroll frame experience. I heard that Needle Needs had a new junior size frame, and was also offering smaller roller bar and side extension pieces for the Millennium system. So I sat down and weighed price, stitched area size, and the fact that pieces from the new junior frame are not compatible with its larger brother, then splurged on a pair of new extenders and roller bars.

I have two sets of the older 8-10″ side stretchers. I got that relatively small size because I realized that the bigger ones would produce a stitching area that would be difficult to reach. That bore out when I was working the coif using the 24″ roller bars and the 8-10″ extenders. My behind-the-work left arm could reach only 60% of the available area with it set at full extension – barely making it to the top edge of my piece, and I had to flip the frame over to work the remaining spaces. But while I might have gotten the even smaller 5-7″ sides this time around, I had the feeling that a space that small in combo with the Lowery frame extender arm would be less than optimal.
Obviously the new components arrived yesterday and were immediately deployed:
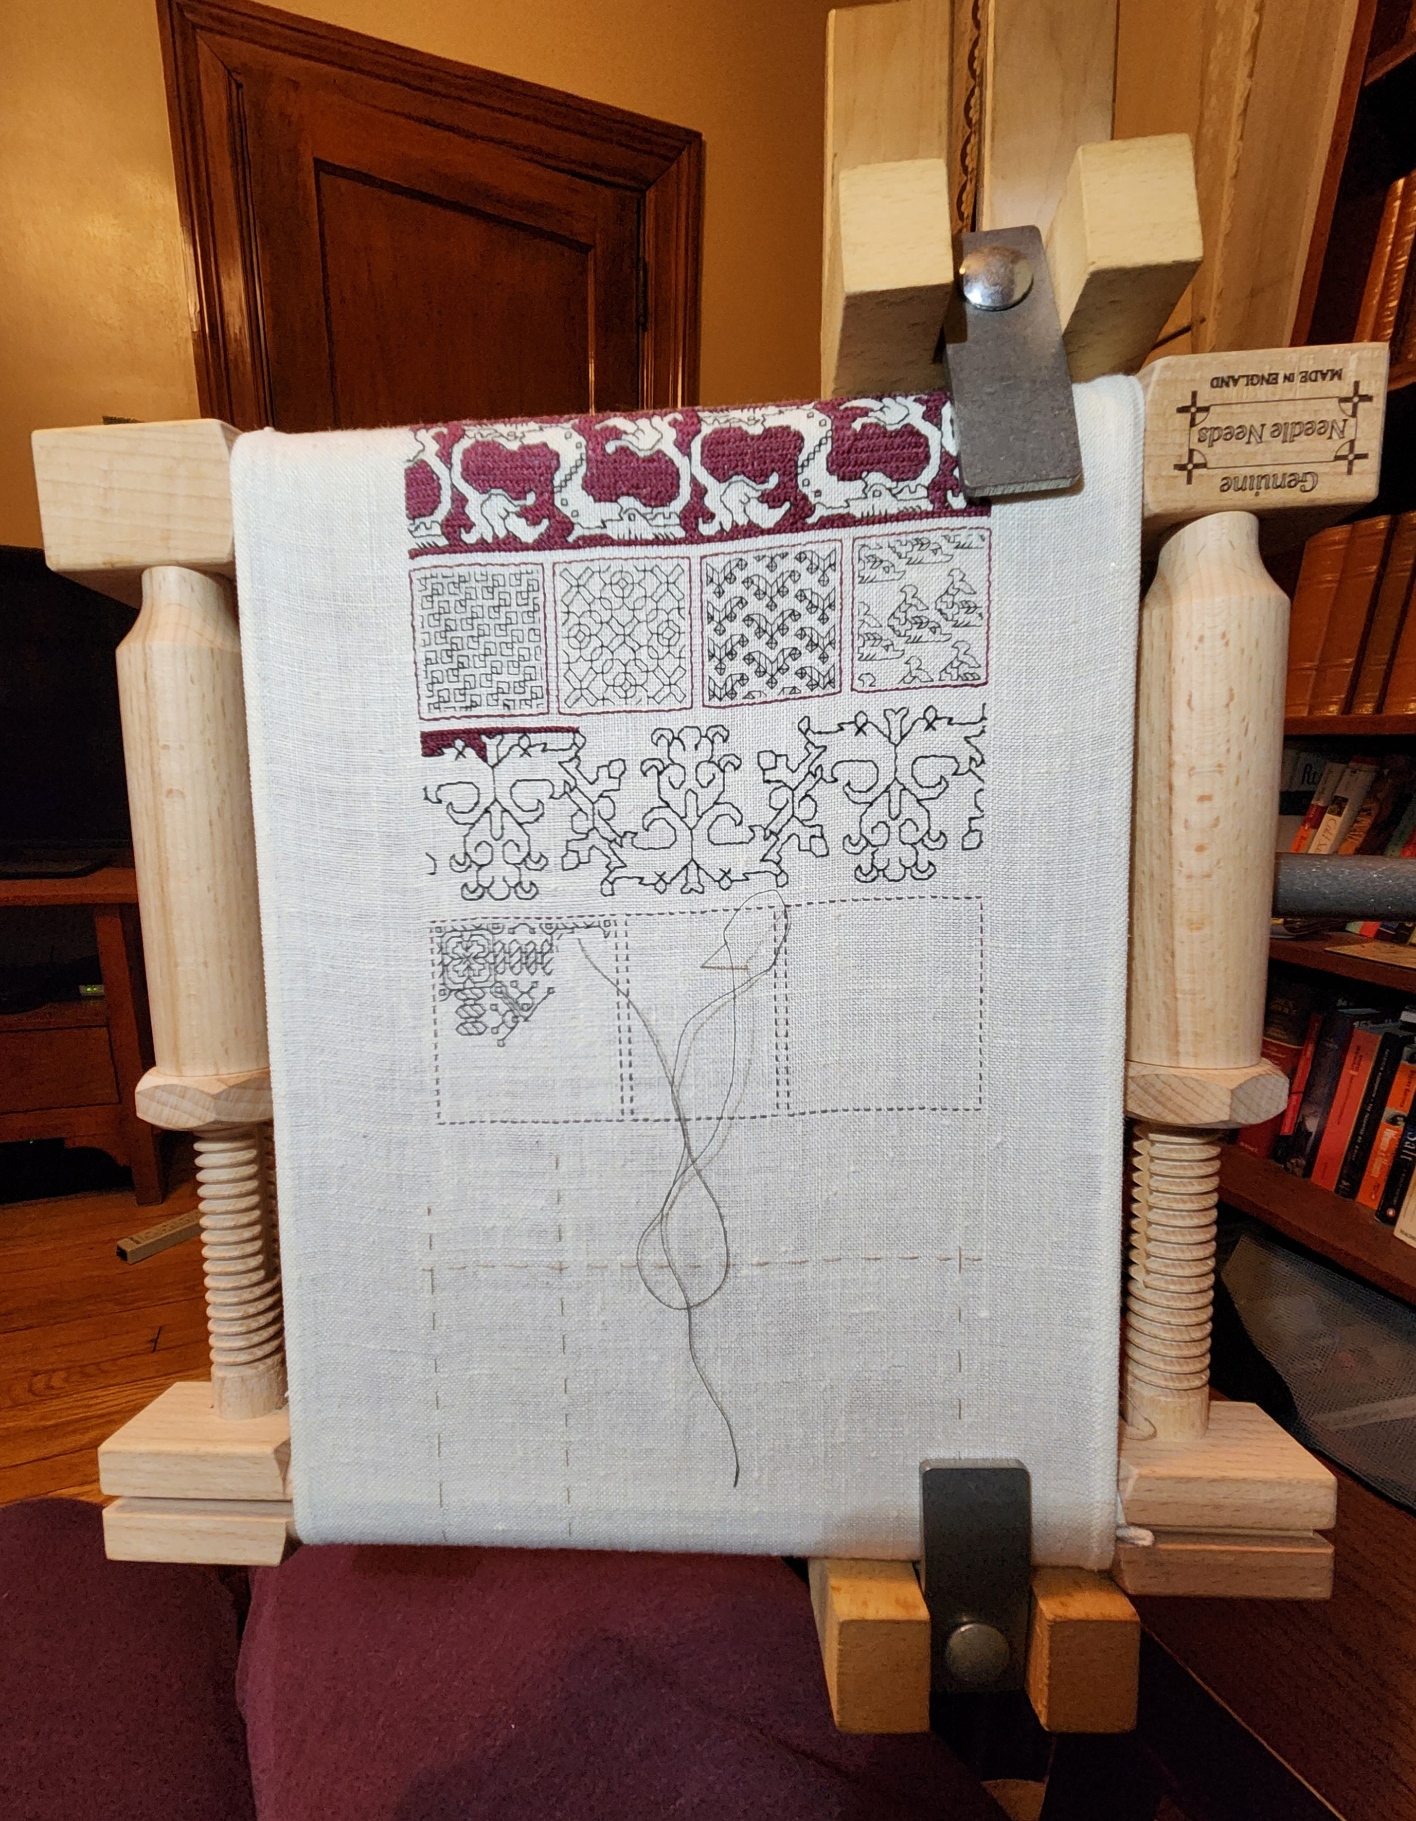
And I was right. You can see how much of the available area is “eaten” by the width of the gripping Large Frame Extender. Even if I position the frame so that the clamp is grasping the corners of the roller bars, it’s awkward to work right up against the Extender’s upright. But just like with the larger set-up for the Coif, I can flip the frame upside down to work that side of the piece.
I know that not all my new projects will be narrow band samplers, but between the new short roller, and the new short side stretchers, plus the pieces I have on hand used in new size mix combos, my toolkit has valuable extended capability.
As for more on the design on this sampler, the types of symmetry often seen in fills and how to best center them depending on the type of symmetry, that will have to wait until the next post. For some reason the blogging software is having indigestion, and I’ll have to cut today’s intended post into two. Will finish that one out and get it up by the end of the week.
BADGE TETHERS AND MORE METHOD DESCRIPTION
In the last post I started a method description on working a large project without having to do a full chart of the entire design. I’ve now finished the first end and am starting on the second, so I continue the discussion.

I worked both the top and bottom borders to the same logical stopping point. Since I had begun both of them aligned to the exact center of my piece and was careful to follow the design exactly, the ends of both lined up. More or less. There’s actually one FEWER unit one one end of the top of the end strip than there is at the bottom. But I also bet that without knowing it was there, zooming in and looking for it, you would never have noticed. Again, a variance but not a fatal error, and far less egregious than the errors I’ve spotted on historical pieces.
There’s a lot of “white space” to the right of the stitching, but bear in mind that the opposite side is the one with the wonky end has less free space to play around in (it’s not just photo foreshortening, it’s really not parallel to the edge line I based on the true grain of the fabric). So in order to leave enough room even at the narrowest point, I have allowed for more “waste ground” on the more generous edges. I also am not sure exactly what I will be doing for the border yet. I was thinking a simple hem and some needle lace (picking up something I haven’t done in decades), but there’s also the temptation of a withdrawn element Italian style hemmed edge. And I may just leave all such elaborations off for a bit, to mull it over some more and possibly rehearse those very rusty techniques.
Anyway, back to the stitching at hand. Note also that in the shot above, I was working the bottom border out to the left, to the exact same stopping point as the edge on the right. I continued and finished both long side borders. So it was on to the second short side.
In the photo below the piece has been flipped so that the bottom in the shot below is now at the top. But where to place that second border?

Since the left and right ends of both long side strips end in exactly the same place, it’s easy. I went over to the finished work, determined that the “collision line” where the border meets the field pattern aligns with the curly end of one of the little sprigs that grows up from it. So I found the corresponding point on the second side and began the first pass of double running down it. I didn’t do the whole side, because I know I’ll be working those curls and sprigs eventually, and rather than risk a massive miscount due to the long run between those sets, I would prefer to work the larger floral border, then fill in the little secondary one once that’s been finished. But I DO need to know where the collision line is so I can fill out the truncated edges of my main field design.
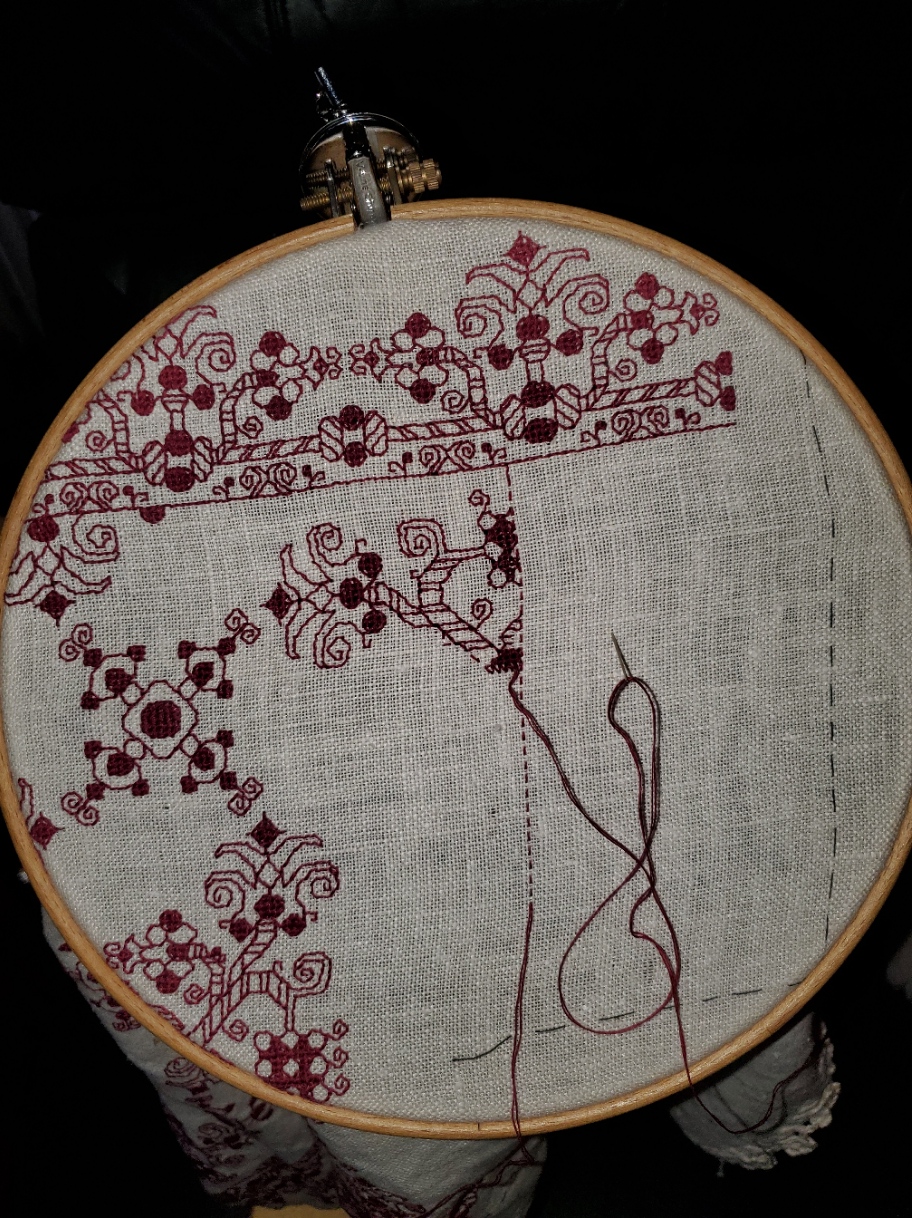
I will probably begin the large border again from the center, although since the end points of my other short side border are known, I could just mirror those. We will see where whim and fancy take me. At this point, all of the known issues have been worked out, mitigated, or blissfully ignored. It’s just dogged completion of the motifs and borders from now on.
GADGETS – THE BADGE TETHER
Last year I mentioned using a retractable badge holder to help corral my scissors at the beach.

I clipped it onto the straps of the drink holder of my beach chair. That worked so well, I’ve been looking for ways to do something similar at home. I tried clipping the things to me or wearing my old work lanyards. Too fussy. My favorite stitching chair is wood and leather, with no good clipping spots on it. But I’ve been working this current project on my Hardwicke Manor sit-upon hoop/stand combo. It has a nice, long screw clamp. The clip jaws of one of my badge holders fits exactly on the exposed screw.

While I’m showing the thing holding my favorite scissors and laying tool, with both lapped in front of the work, in actual play the angle of the badge head suspends them behind and away from the fabric, so catching isn’t a hazard. I love the convenience of not fishing around for often-used tools, and the fun of repurposing these tiny work albatrosses for greater ease.
Oh, and on my big flat scrolling frame, remember those penny size strong magnets I glued to the uprights? They hold the badge leashes quite securely, too. So I have the advantage of tools-to-hand on my flat frames, too.

