In the last post I started a method description on working a large project without having to do a full chart of the entire design. I’ve now finished the first end and am starting on the second, so I continue the discussion.

I worked both the top and bottom borders to the same logical stopping point. Since I had begun both of them aligned to the exact center of my piece and was careful to follow the design exactly, the ends of both lined up. More or less. There’s actually one FEWER unit one one end of the top of the end strip than there is at the bottom. But I also bet that without knowing it was there, zooming in and looking for it, you would never have noticed. Again, a variance but not a fatal error, and far less egregious than the errors I’ve spotted on historical pieces.
There’s a lot of “white space” to the right of the stitching, but bear in mind that the opposite side is the one with the wonky end has less free space to play around in (it’s not just photo foreshortening, it’s really not parallel to the edge line I based on the true grain of the fabric). So in order to leave enough room even at the narrowest point, I have allowed for more “waste ground” on the more generous edges. I also am not sure exactly what I will be doing for the border yet. I was thinking a simple hem and some needle lace (picking up something I haven’t done in decades), but there’s also the temptation of a withdrawn element Italian style hemmed edge. And I may just leave all such elaborations off for a bit, to mull it over some more and possibly rehearse those very rusty techniques.
Anyway, back to the stitching at hand. Note also that in the shot above, I was working the bottom border out to the left, to the exact same stopping point as the edge on the right. I continued and finished both long side borders. So it was on to the second short side.
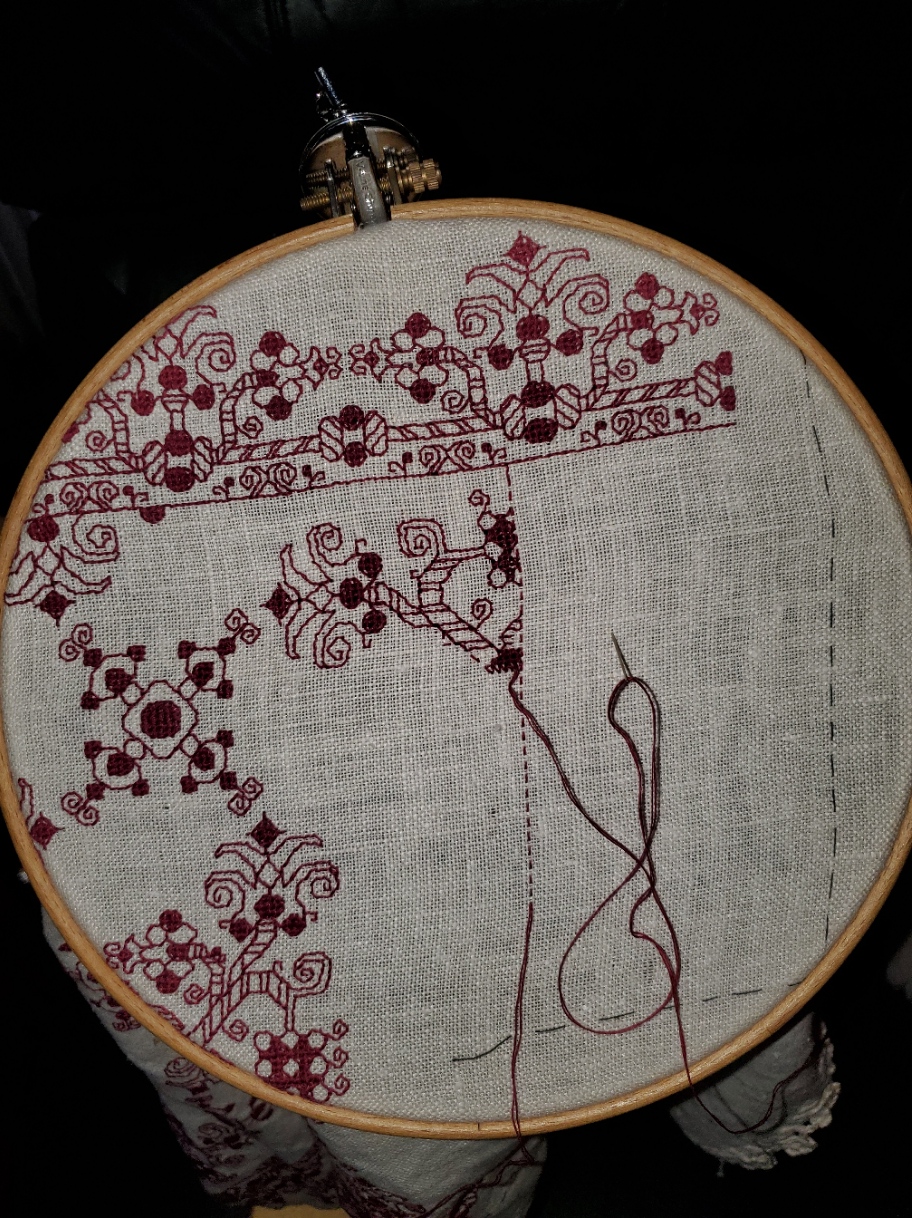
In the photo below the piece has been flipped so that the bottom in the shot below is now at the top. But where to place that second border?

Since the left and right ends of both long side strips end in exactly the same place, it’s easy. I went over to the finished work, determined that the “collision line” where the border meets the field pattern aligns with the curly end of one of the little sprigs that grows up from it. So I found the corresponding point on the second side and began the first pass of double running down it. I didn’t do the whole side, because I know I’ll be working those curls and sprigs eventually, and rather than risk a massive miscount due to the long run between those sets, I would prefer to work the larger floral border, then fill in the little secondary one once that’s been finished. But I DO need to know where the collision line is so I can fill out the truncated edges of my main field design.
I will probably begin the large border again from the center, although since the end points of my other short side border are known, I could just mirror those. We will see where whim and fancy take me. At this point, all of the known issues have been worked out, mitigated, or blissfully ignored. It’s just dogged completion of the motifs and borders from now on.
GADGETS – THE BADGE TETHER
Last year I mentioned using a retractable badge holder to help corral my scissors at the beach.

I clipped it onto the straps of the drink holder of my beach chair. That worked so well, I’ve been looking for ways to do something similar at home. I tried clipping the things to me or wearing my old work lanyards. Too fussy. My favorite stitching chair is wood and leather, with no good clipping spots on it. But I’ve been working this current project on my Hardwicke Manor sit-upon hoop/stand combo. It has a nice, long screw clamp. The clip jaws of one of my badge holders fits exactly on the exposed screw.

While I’m showing the thing holding my favorite scissors and laying tool, with both lapped in front of the work, in actual play the angle of the badge head suspends them behind and away from the fabric, so catching isn’t a hazard. I love the convenience of not fishing around for often-used tools, and the fun of repurposing these tiny work albatrosses for greater ease.
Oh, and on my big flat scrolling frame, remember those penny size strong magnets I glued to the uprights? They hold the badge leashes quite securely, too. So I have the advantage of tools-to-hand on my flat frames, too.


I attach my scissors as well as a needle threader to the gadget and clip it to my shirt or blouse for daily stitching. I place a magnet on my canvas for my needles and have a little holder for my laying tool. Voila!!!
On the big flat scrolling frame I have more places to put stuff, and use magnets to attach page holders, keep snips handy, and to keep needles and a laying tool at hand. But on the round sit-upon there’s less real estate to play with. On that one I sometimes use an on-the-fabric magnetic needle minder for some of the lighter things, like needles or a needle threader, or even a pattern page. But the heavier things like scissors had no place. I did try clipping to my shirt, but it was never comfortable for me. The current solution for the hoop-on-a-stick frame is much more workable. Here’s a prior post on kitting out the flat frame: https://string-or-nothing.com/2021/02/01/meshy-done-plus-kitting-out-the-frame/