A couple of people have sent me private notes asking about how I go about designing a larger project without graphing the entire thing. I attempt to answer, using the current Dizzy Grapes sideboard scarf/placemat as a possible approach.
It’s true I didn’t know how I was going to proceed when I began this project. I had a graph for the main field repeat, but only one iteration of the design, but not a chart for the entire area that design would inhabit. I didn’t have a border (yet). I had a piece of cloth of dubious cut and unknown count, and I had picked a thread well represented in my stash, with known easy-care laundry properties. I knew I wanted to make a large placemat type sideboard scarf, as big as attainable given the materials on hand.
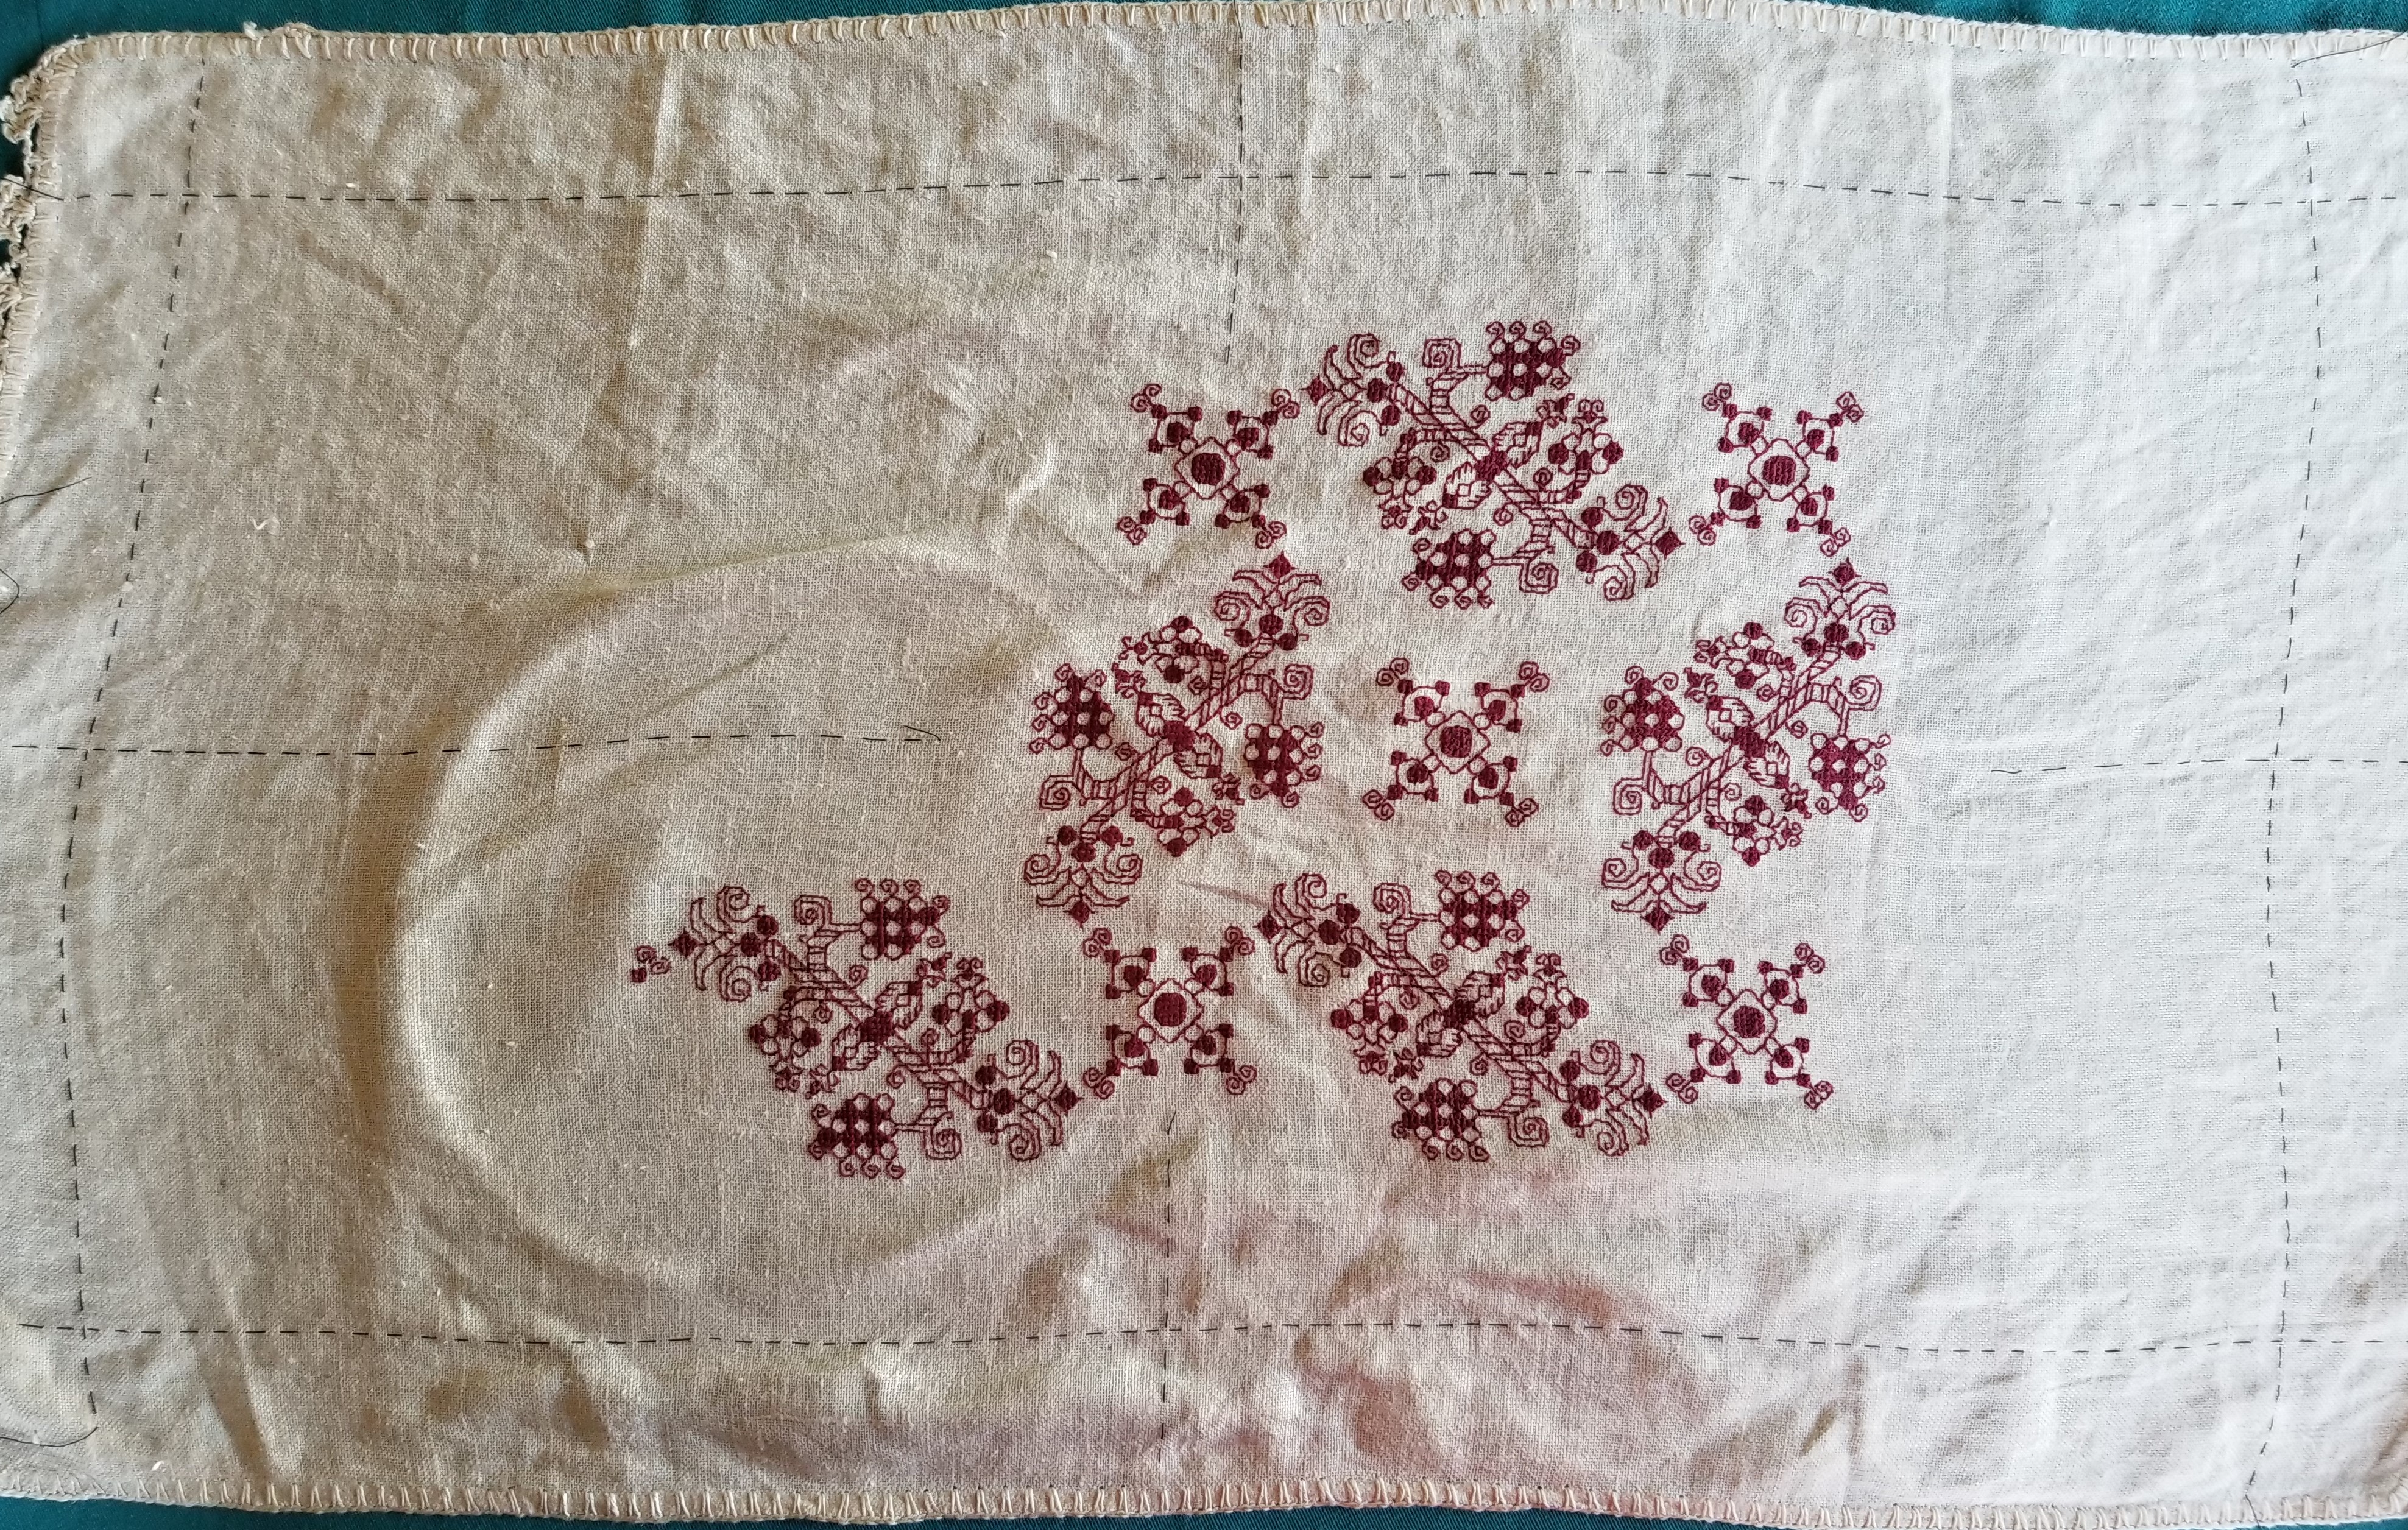
The first thing to do was to figure out the largest possible area I could stitch on my unevenly hemmed ground. Leaving a bit of a margin around for easy hooping, I took plain old sewing thread and basted in a to-stitch area, with a bit of a margin. In doing this I discovered that the person who had reclaimed this bit of antique linen and done the crocheted edge treatments had a rather liberal interpretation of rectangles in general. Once my edges were basted in, I used simple measure/fold to determine the center lines, both north/south and east/west. Those were basted, too. Here’s that first step:

I also determined the thread count of this well washed, buttery soft vintage linen. It averages about 32 threads per inch, but is quite uneven, ranging from 28 to 34 in places, but didn’t dwell on that beyond satisfying myself that there was enough “real estate” inside my designated area to accommodate at least two full repeats of my chosen design across the narrow dimension.
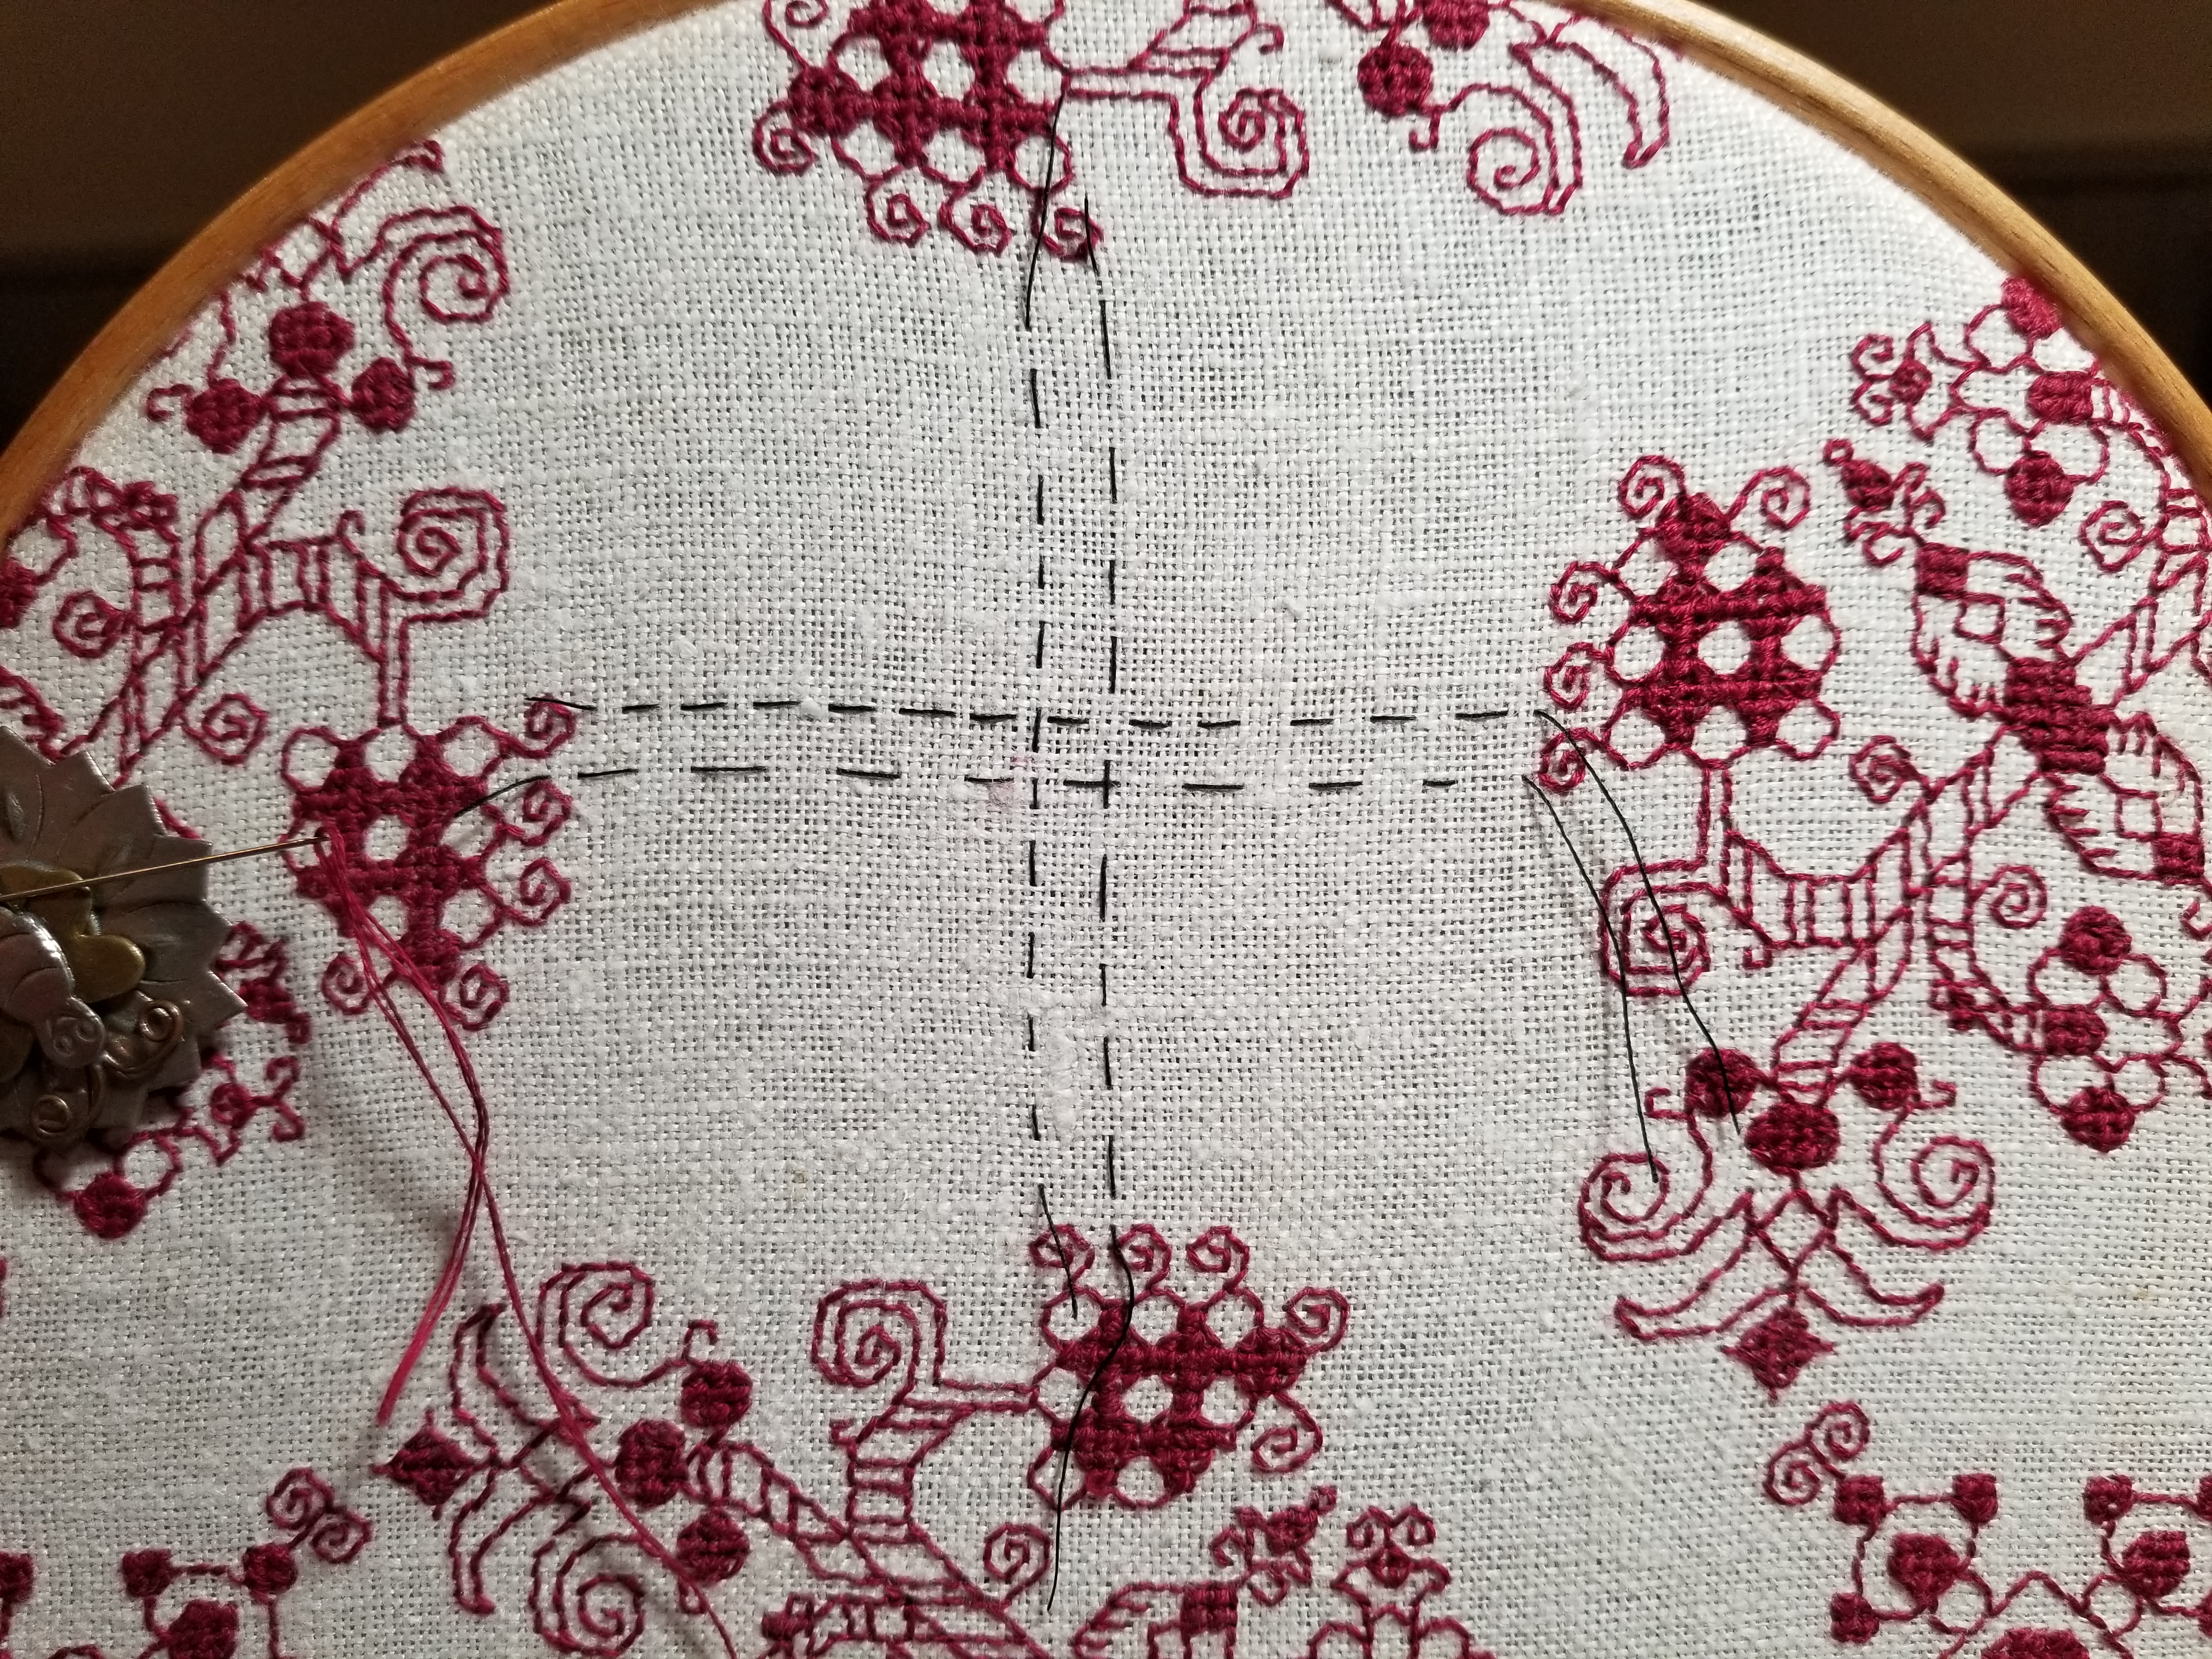
Having the dead center of the piece determined, I chose a center point on the field design. I could have used the center of the smaller motif. That would probably have been easier, but I wanted the large rotating floral shapes to dominate instead of the largely unworked area surrounding the smaller motif. That was a bit tricky because the motif has a square unit in the dead-center, but I worked that straddling my basted center mark. Then I began working, snipping back my basted center guides as I went. (From here on the piece is shown rotated, with the narrow dimension north/south and the wide one east/west).

The shot above shows that first center motif in process, with the center guides being snipped back as the work encroached.
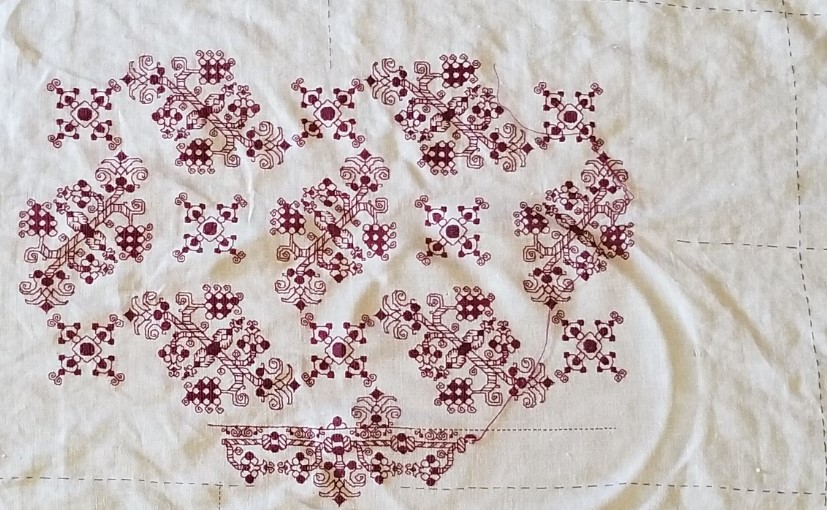
From there it was a simple matter of adding more floral motifs and the smaller X motifs they spiral around. Then after a group of four florals were complete, defining the space between them, centering the free-floating X in that area. Here are shots of those two processes. Note that as a Lazy Person, instead of tedious counting in from the established stitching, I used temporary basting to determine the centerpoint for the free-floating X motifs.
How did I know where to stop? No clue initially. I figured I’d get as close to the edge of my defined real estate as I could with full motifs, then pause to assess. It’s clear in the left photo that another full cycle of the repeat would not fit neatly between the established work and the basted guideline. But that area is also a bit wide to be entirely border. The proportions would be off. Plus that small X motif in the center bottom looks odd without at least a partial snippet of the floral motif spinning off its bottom leg.
So I did a rough count of the width left and decided I wanted a border that was about two inches wide at its widest (about 5 cm). Back to the drawing board to draft out something that complemented the design, and was somewhere around 30 units tall. I doodled up a couple of possibilities before settling on one. One strong consideration was the use of an inner line to contain the field pattern, so it had something even against which to truncate.
Once I had my border in hand, I decided that a bit of the center flower in its repeat could scallop below the basted edge line, so allowing for those 6 units, I counted up from my basted edge guide, and beginning at the center point I started the border of the first side. Then I worked right and left until I got to the edge of the “uncertainty zone” – the area as yet unworked at the left and right of the piece. Here’s the first side’s border in process.
As I established the border’s top edge (that field containment line), I went back to the main field, and worked the truncated snippet of the floral motif to fit. You can see that first snippet in the photo above.
Now on to that second side. But I had a cheat! Instead of starting it by counting down, I looked at that center floral snippet on the first side. Then I worked the floral snippet on the opposite side to the same point. That established the containment line on the second side, and I began the border at the center of the second side, working out to the left and right.

Now on to the ends. You can see now that I’m making these decisions on the fly. When I started I had no clear idea of what I was going to do beyond “Field. Border. Big.” I’m handling the problems and decisions as they are encountered, with minimal fretting about perfection along the way.
I chose to do butted borders on this piece. Neatly mitered, squared, or fudged border corners do exist on historical pieces, but they are in the minority. Even though my self-designed border isn’t particularly period representative (those repeating centered units with their own bounce repeat, as opposed to simple twigs all marching it the same direction), I wanted to use a non-mitered corner. I could have ended each off, designed a separate corner square, but I didn’t want to introduce another design variant – the border was already too busy.
Where to start that side border? What happens to the longer top and bottom borders? Do they just end or should I try to end at a visually logical place? Well, I chose the latter. I kept going on the bottom border to the right until I ended at the center of the bounce repeat. It’s just a few units shy of my designated basted edge. Not a lot of waste there. And knowing the height of the border, I established my north-south containment line.

You can see that I’m working on the first of the two spin-off floral sprigs along this side. When that’s done I will go to the centerpoint of the right hand edge and begin working the border from there, headed back to the corner shown. The side borders will end where they end. They will truncate oddly for sure, but having made the bottom and top congruent, what is on the sides, will be what it is. The side as a whole however should truncate in the same spot where it meets up to the border on the top. But no one is perfect. If it’s off by a unit or two, I will have accomplished the same degree of precision as most of the Ancients. They weren’t perfect either.
Stay tuned! The Grand Excitement of seeing the final product remains; and with it how things meet up, how close to symmetry I achieve, and how any as yet unknown problems are solved. And that’s before I decide how I’m going to edge and trim the piece out. Needle lace and/or a withdrawn/pulled element hem are both possibilities I haven’t yet ruled out.
So there you have it. Another adventure in bungee-jump stitching – starting a project with little or no detailed planning, no full project chart (just a partial chart showing the minimum needed), and no clear idea at outset on handling challenges encountered en route. I hope sharing this process inspires folk to take up their own self-composed projects.

That is an impressive process, and an impressive project! I find it hard to start before I have (most of) my stitching planned out.
So, in short, define the usable area, find center, work out from there in all directions, deal with borders and corners as you approach the area edges? Awesome method, and it could be applied to nearly all needlework I’d think.
The corner treatments you linked to remind me of quilting. Somehow my brain connects fabric mismatches and blends them together beautifully, just as it does when a fabric is pieced together in a quilt. It takes a pretty big pattern or color mismatch for me to pick it out without some careful observation. Even then, it does nothing to distract from the quilt IMHO.
Yup. Pretty much!
My goal is to empower folk to trust their own creativity.
There’s nothing wrong with working up a kitted or otherwise fully described project authored by someone else. Knowing that all the problems are worked out can help people nestle into their comfort zone. Or picking a project with challenges might stretch one’s own boundaries, knowing that someone else has proofed the piece and all challenges are in fact surmountable.
But there are also a lot of people out there who would LIKE to design their own pieces, but are fearful of failure, or haven’t found method descriptions of how to start. They would if they could, and might even take a stab at it, with the assurance that total every-stitch-perfection isn’t a hurdle to overcome, or that full realization doesn’t have to be achieved before the first needle is threaded. Those are my people and I hope I can help set them on their own journeys of discovery.