Having gone on and on about straight repeats as my bony bois march across the top of my piece, we have now come to the first corner.
Thankfully, my count is spot-on and everything is in place.
But why did I start with the strip of skeletons doomed to dance upside down? Because I knew that I would probably make some tiny adjustments to the design as I went along. The viewer’s eye is drawn to the closest point of the work, and the most logical part – that’s always the strip across the bottom, where the motifs are all right-side-up.
It’s unlikely that any small tweaks would be noticeable in the upside-down part at the top. So being too lazy (and waaay too short of thread I can’t replenish) I started there, knowing that I would not be ripping back vast regions to norm those tweaks.
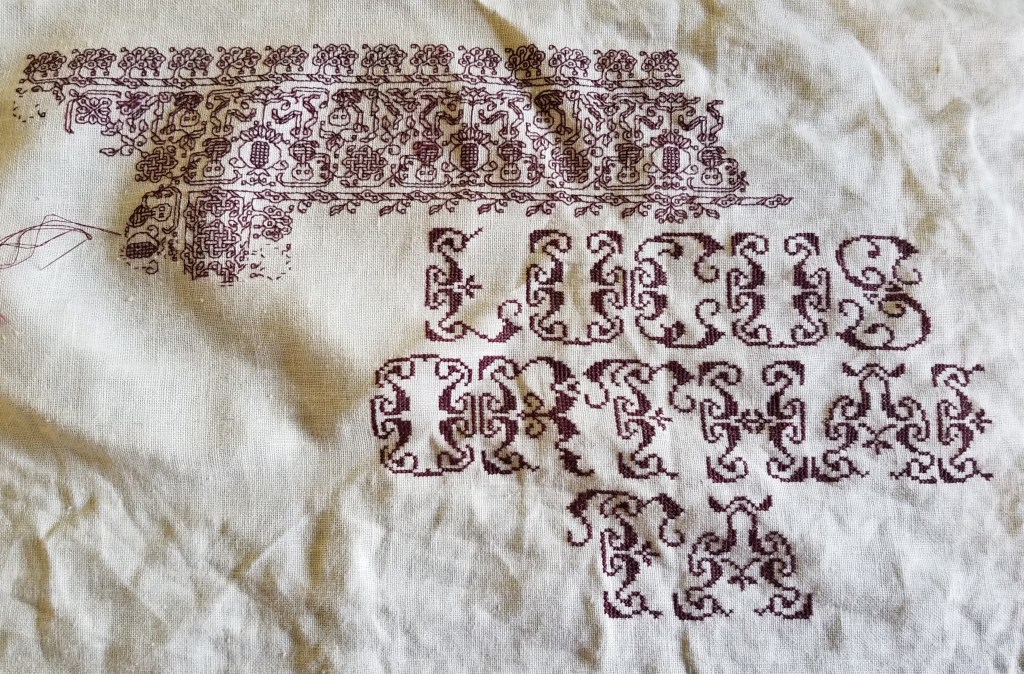
Closer up, in a more normal orientation:

My last post discussed the non-historical use of the same framing element on either side of a mirrored repeat with horizontal directionality. Here’s another feature of this strip that’s not often seen in museum artifacts – the mitered corner.
The majority of corner treatments in surviving historical fragments have butted-up or improvised corners. Carefully plotted mirror images across a diagonal (mitering) are quite hard to find. But I decided to do one anyway. You can spot the diagonal running through the center line of the rightmost internal knot, down through some leafy bits, and into a flower-like shape. I’ve also established the beginning of the 90-degree flipped border, with the upper part of that skeleton plus the first pomegranate underway.
I’ve also rounded the outside corner. In a serendipitous happenstance (I can’t claim I planned it ahead of time), the width and height counts of my marching plumes are equal, so I was able to fudge the corner with one last plume on a long stem.
Side note: At this point I really don’t need to refer to my printed pattern any more, I am mostly working off prior stitching, with occasional glances back at my chart to make sure all is aligned and true.
But that inside edging – it’s different. I’ve introduced another element, playing with the eternity knots and tying them into the plume strip. I did this because the thread count of the warp (the threads that stretch up-down in the detail photo) is denser than the thread count of the weft (those that go across in the detail photo). The closer together the threads are, the more compressed the design will be in that direction. My skeletons marching up/down the sides of my piece will end up looking ever so slightly shorter and chunkier compared to their more lanky brothers that tumble across the top and bottom. BUT I can draw the eye away from that difference by adding the additional knotwork strip.
So it turns out that my design is all about insouciance, breaking historical composition precepts, and visual deception. Still for all of that I think that its look is more closely aligned to the aesthetic of historical blackwork rather than more modern pieces. Just my opinion, feel free to differ.
Class Handout Page
And for having the patience to read down this far, here’s another present. I was going through some older files and came across this class handout page. I’ve taught several workshops using it. The last one I came equipped to do was for a public SCA demo in Rhode Island, although the circumstances and attendees made just sitting and chatting about the stitching a better option. Still, I did update the handout, and it may as well be of use to someone.
The patterns are (more or less) ordered in level of complexity, and are intended to be a self-tutorial in double running stitch. When I teach I provide the page below, a strip of Monk’s cloth and length of standard embroidery floss and needle, plus an inexpensive hand hoop (if I have some to spare). Depending on prior experience, stitching proficiency, confidence level I encourage the participant to select one of the designs from the leftmost two columns, to try out face-to-face in the workshop. Then I encourage everyone to use the rest for self-study at home.
For self study, what I suggest is to just grab a piece of cloth and begin – no need to plan an intense, composed sampler. Pick a point anywhere on your chosen ground, then starting at the spot in the upper left column where you feel comfortable, continue down that column to the simple acorns. Then keep going. The next design in the complexity sequence is the flower spring at the top of the next column. Go down that column to the folded ribbons.
After that, I’d suggest attempting the birds at the bottom left. From there the vertical star flowers, then the knots, four-petal flower meander, and the design immediately above the title. Once you’ve done all that the remaining four intermediate patterns on the page should be well within your grasp (the heart flower all-over, fancy acorns, geometric strip, and oddly sprouting peppermint-stick squash blossoms).
Of course you can be totally random and just use these designs as you will. No need to march in lock step with the protocol, above.

Download this handout in PDF format from my Embroidery Patterns page. It’s the last one listed (click on the thumbnail there to get it, then save it locally).
As ever, if you stitch up something from any of my designs, please feel free to send pix. I always get a big smile out of seeing you having fun with the pattern children. And if you specifically say so and give permission to re-use your photo, I will be happy to post it here and index it under “Gallery”.

[…] Class handout. (Also available on the Embroidery Patterns tab). […]
[…] strip above is from my Workshop Handout broadside, another free download here at String you can access via this post or via the Embroidery Patterns tab at the top of every […]