First, thanks to Callie of NotAnotherCostumingBlog for this question, which takes me tumbling down another chasm, dragging all of you along with me. Callie asks,
“…do you have any tips for converting patterns charted for LACS to charts for double running? I seem to have a bit of a mental block about it and the best idea I’ve got is to print them out, estimate where the lines would be instead of blocks, draw those on, and then transfer them to clean graph paper. I have a lot of patterns that I would really prefer to work linearly because it is so much faster but I’m not yet at the point where I can look at a block chart and just mentally convert it.”
I break down the answer into several parts, and try to respond to each.
Outlines in historical examples of voided stitching
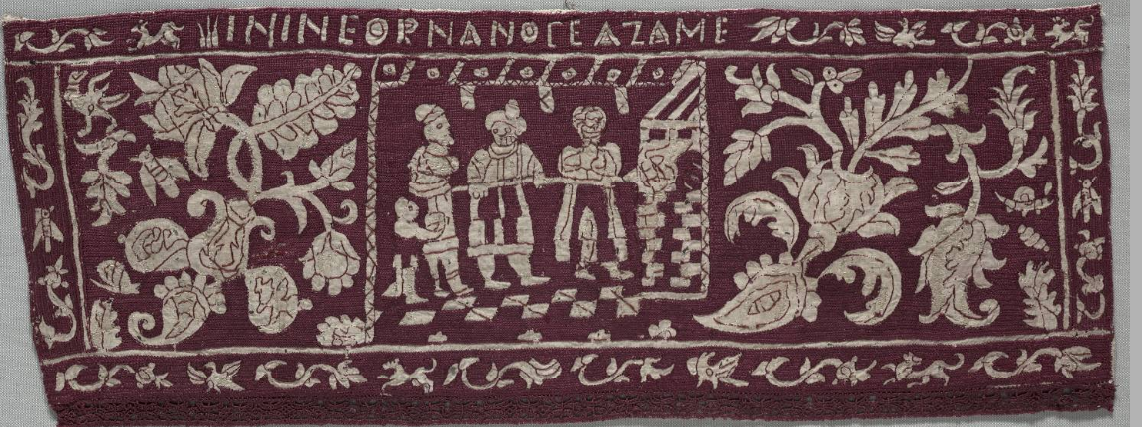
Were historical voided pieces worked with or without outlines? The answer is “Yes.” There are some with stitched outlines and some without, and the presence of stitched outlines does not correlate neatly to the technique used to fill in the background. In addition, there look to have been voided pieces that used drawings as their “outlines” – working the fill right up to and sometimes over those markings, which seem to have (mostly) been stitched.
The one thing about outlines in these pieces that is different from their use in modern needle-painting style cross stitch is that in the historical works, close inspection shows the dense coverage stitching (of whatever type) encroaching on the linear stitching. This says to me that the lines were worked in one of two manners:
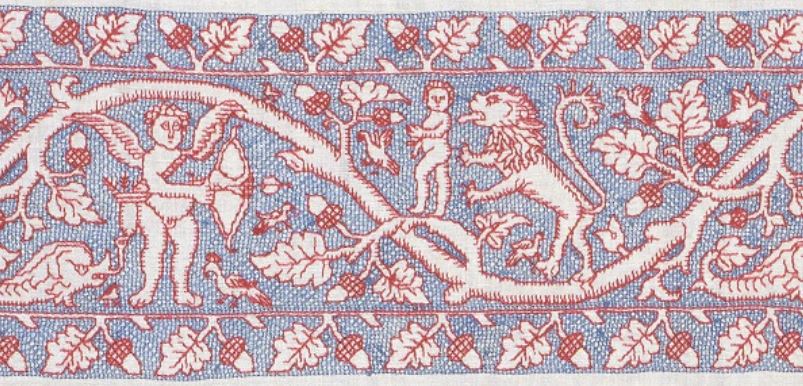
- laid down first, and the background filled in later (the most common approach, especially for meshy or long-arm cross stitch fills; also logically on the pieces where the fill leaves a unworked “halo” around the linear stitched foreground, as in the lowermost right example of the first group below)
- Stitched at the same time as the ground behind (more usual for square fill as in the lowermost left example of the first group below)
Modern cross stitch pieces generally direct the stitcher to finish the ground areas, then go back and work the linear bits on top of them.
Historical examples of voided work with counted outlines:


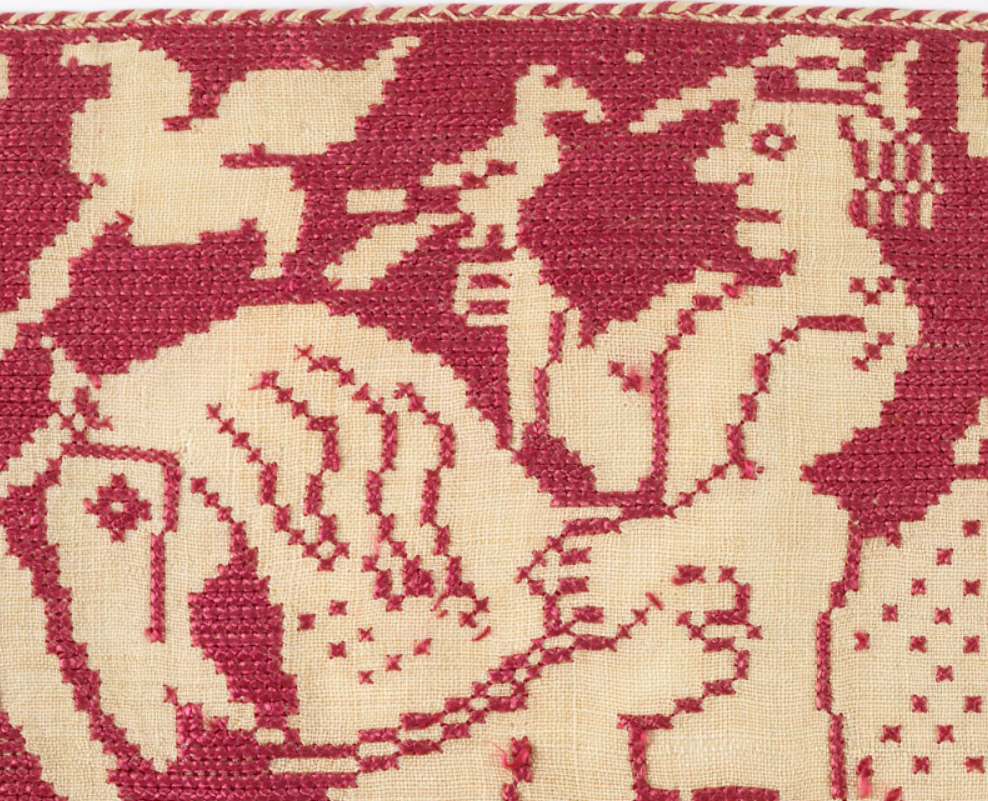
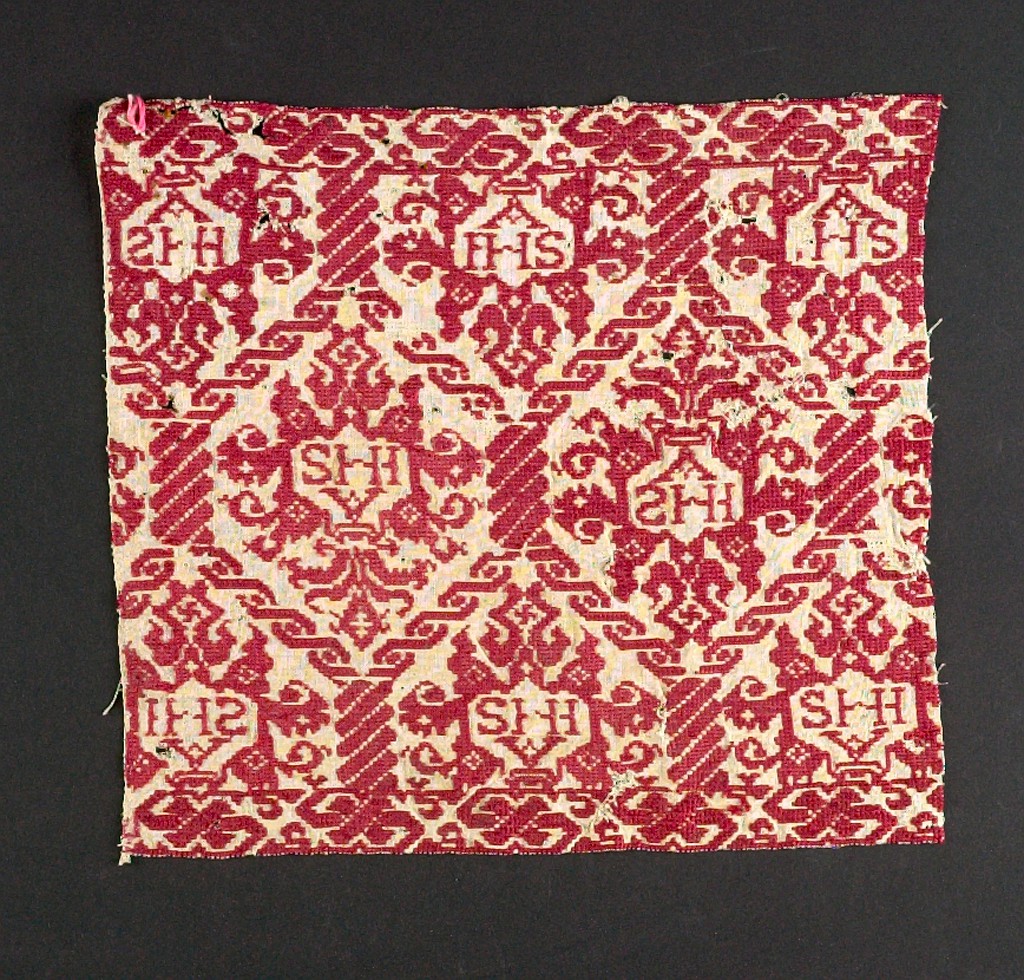
Historical examples of voided work without counted outlines:
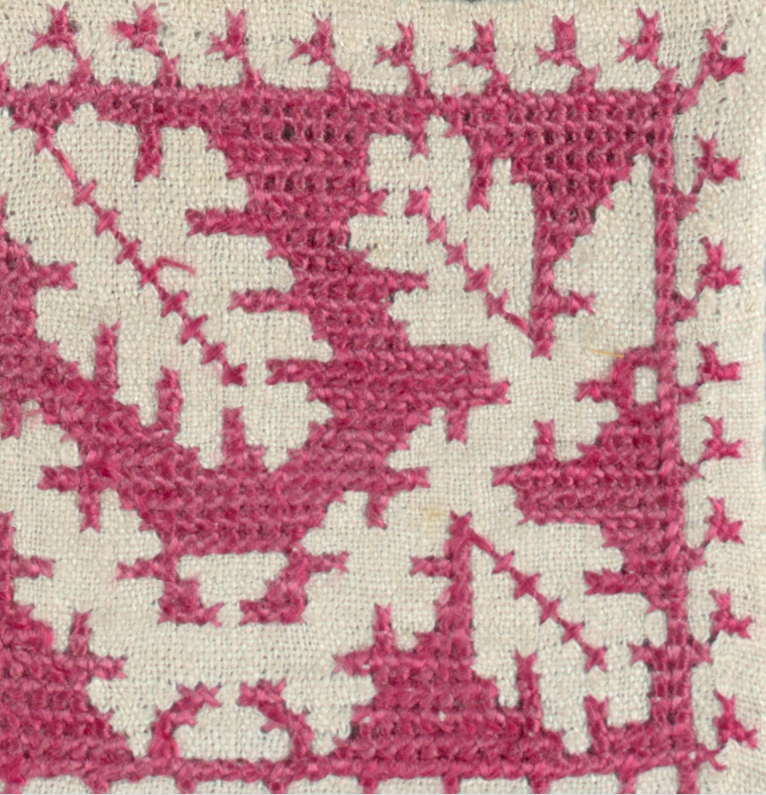
Historical examples of voided work with (probable) outlines drawn freehand, then stitched.


Another thing that can’t be determined is whether the historical embroiderers finished ALL of the outlines first, then went back and did the fills; did them section by section; or if in fact the SAME stitcher did both. I can well envision a large group project like a set of bed hangings, where someone proficient in laying down the outlines did that, copying from a chart or a previously stitched piece; with a team following on behind filling in the voiding.
Being a team of one myself, I tend to work section by section, defining my outlines, proofing them, and filling in the voiding – then leapfrogging on to the next bit.
Representing outlines in modern charting
In my own work, if I’m redacting or adapting from a piece that has evident outlines, I use a specific convention for charting. I employ the same dot-and-line method I use for plain un-voided linear work, but flood-fill a portion of the background to indicate the areas to be filled in with stitching after the outlines are completed. The sample bit I worked up for a previous discussion on charting methods (derived Kathryn Goodwyn’s redaction) illustrates this method (left). If the piece had no outlines or was charted from a graphed original or a historical piece in a medium that did not show outlines (some lacis, buratto or other darned-mesh type pieces), then I use the standard square in box technique (right) although usually without the red line 5-unit notation and count, which I tend to do mostly for use for knitting. Both my The New Carolingian Modelbook and its forthcoming sequel The Second Carolingian Modelbook include linear unit and block unit sections.


There’s one other style I use on rare occasion, mostly for linear pieces that include large, dark areas, and whose edges are defined not by prior outlines, but by half cross stitches worked at the same time as the fully covered internal areas. This spider panel from Ensamplario Atlantio II is an example – note that the ultra-dense spider is done in boxed cross stitch (aka 4-sided cross stitch), with half cross stitches to smooth out the outlines.

Conversion from voided chart to a linear chart
This is something I hadn’t considered doing before. It presupposes a finished chart in the block unit style.
First, I have to apologize. I don’t use commercial charting software, relying instead on a homegrown solution based on the freeware drafting program, GIMP. (I offer a free tutorial and templates for my method elsewhere on this blog.) You could do this with a photocopying machine and a pencil, but please bear with me.
Let’s use the bunny seen above, which I previously charted and made available for free download as a PDF.
The approach is pretty straightforward, but there are no shortcuts. Take the chart you want to convert, photocopy it, and pencil in your adaptation over the established boxes. Or regraph it as I did, then use an outlining tool manually, box by box, to smooth the edges until you get a look you like. You will want to take liberties with the diagonals, instead of outlining every 90-degree intersection (although that’s a clear alternative). You may also wish to add details, like the toes, nose, eyeball, and ear openings. That’s also a design choice and up to you.

Finally, please note that I do not use “knight’s move” stitches (two units over, one unit up, to make a 30/60-degree angle). That’s a conscious design decision on my part. They are absent from 16th and 17th century artifacts with the rare exception of when they are used to form eyelets, or in later 18th century works – solid blocks of stitching radiating from a central point. I’ve not yet found a single 16th or 17th century voided or linear work artifact that employs knight’s move angles. They are a great addition to the charter’s tool set for sure and can be used to expand the stitcher’s design vocabulary. But they are also a clear indication of modern design aesthetic, so I leave them to other modern blackwork designers, and limit myself to 90 and 45-degree angles exclusively, even in my contemporary “nerd-culture” pieces.
So there’s the long answer for Callie. She is absolutely right. The solution is as she suggested in her question. If you need to draw it out before hand rather than adapt on the fly, you will need pencil and paper (or a charting design drafting solution) and I know of no shortcuts.

Thank you! The question mostly came about because I was flipping through Lipperheide and found a lot of patterns that I think would be good for an upcoming project, but I wanted to work them double-running instead of voided. I will just have to sit down at some point with graph paper and a pencil and work them out.
Lipperheide is a gateway drug, for sure! Best wishes for project success. It sounds like a fun one. 🙂
[…] Voided Pieces and Outlines. Do historical voided pieces always sport outlines? Were they done first? Were they always on the count? […]