UPDATING THE PENNY METHOD
A while back I posted about using a penny, a cell phone, and a bit of math to determine the thread count of linens, both evenweave and skew. And now the US penny is quickly charging to extinction, abandoned by the US Mint, and soon to disappear entirely from circulation. Which means that I need to issue an update.
Voila!
The Dime Method.
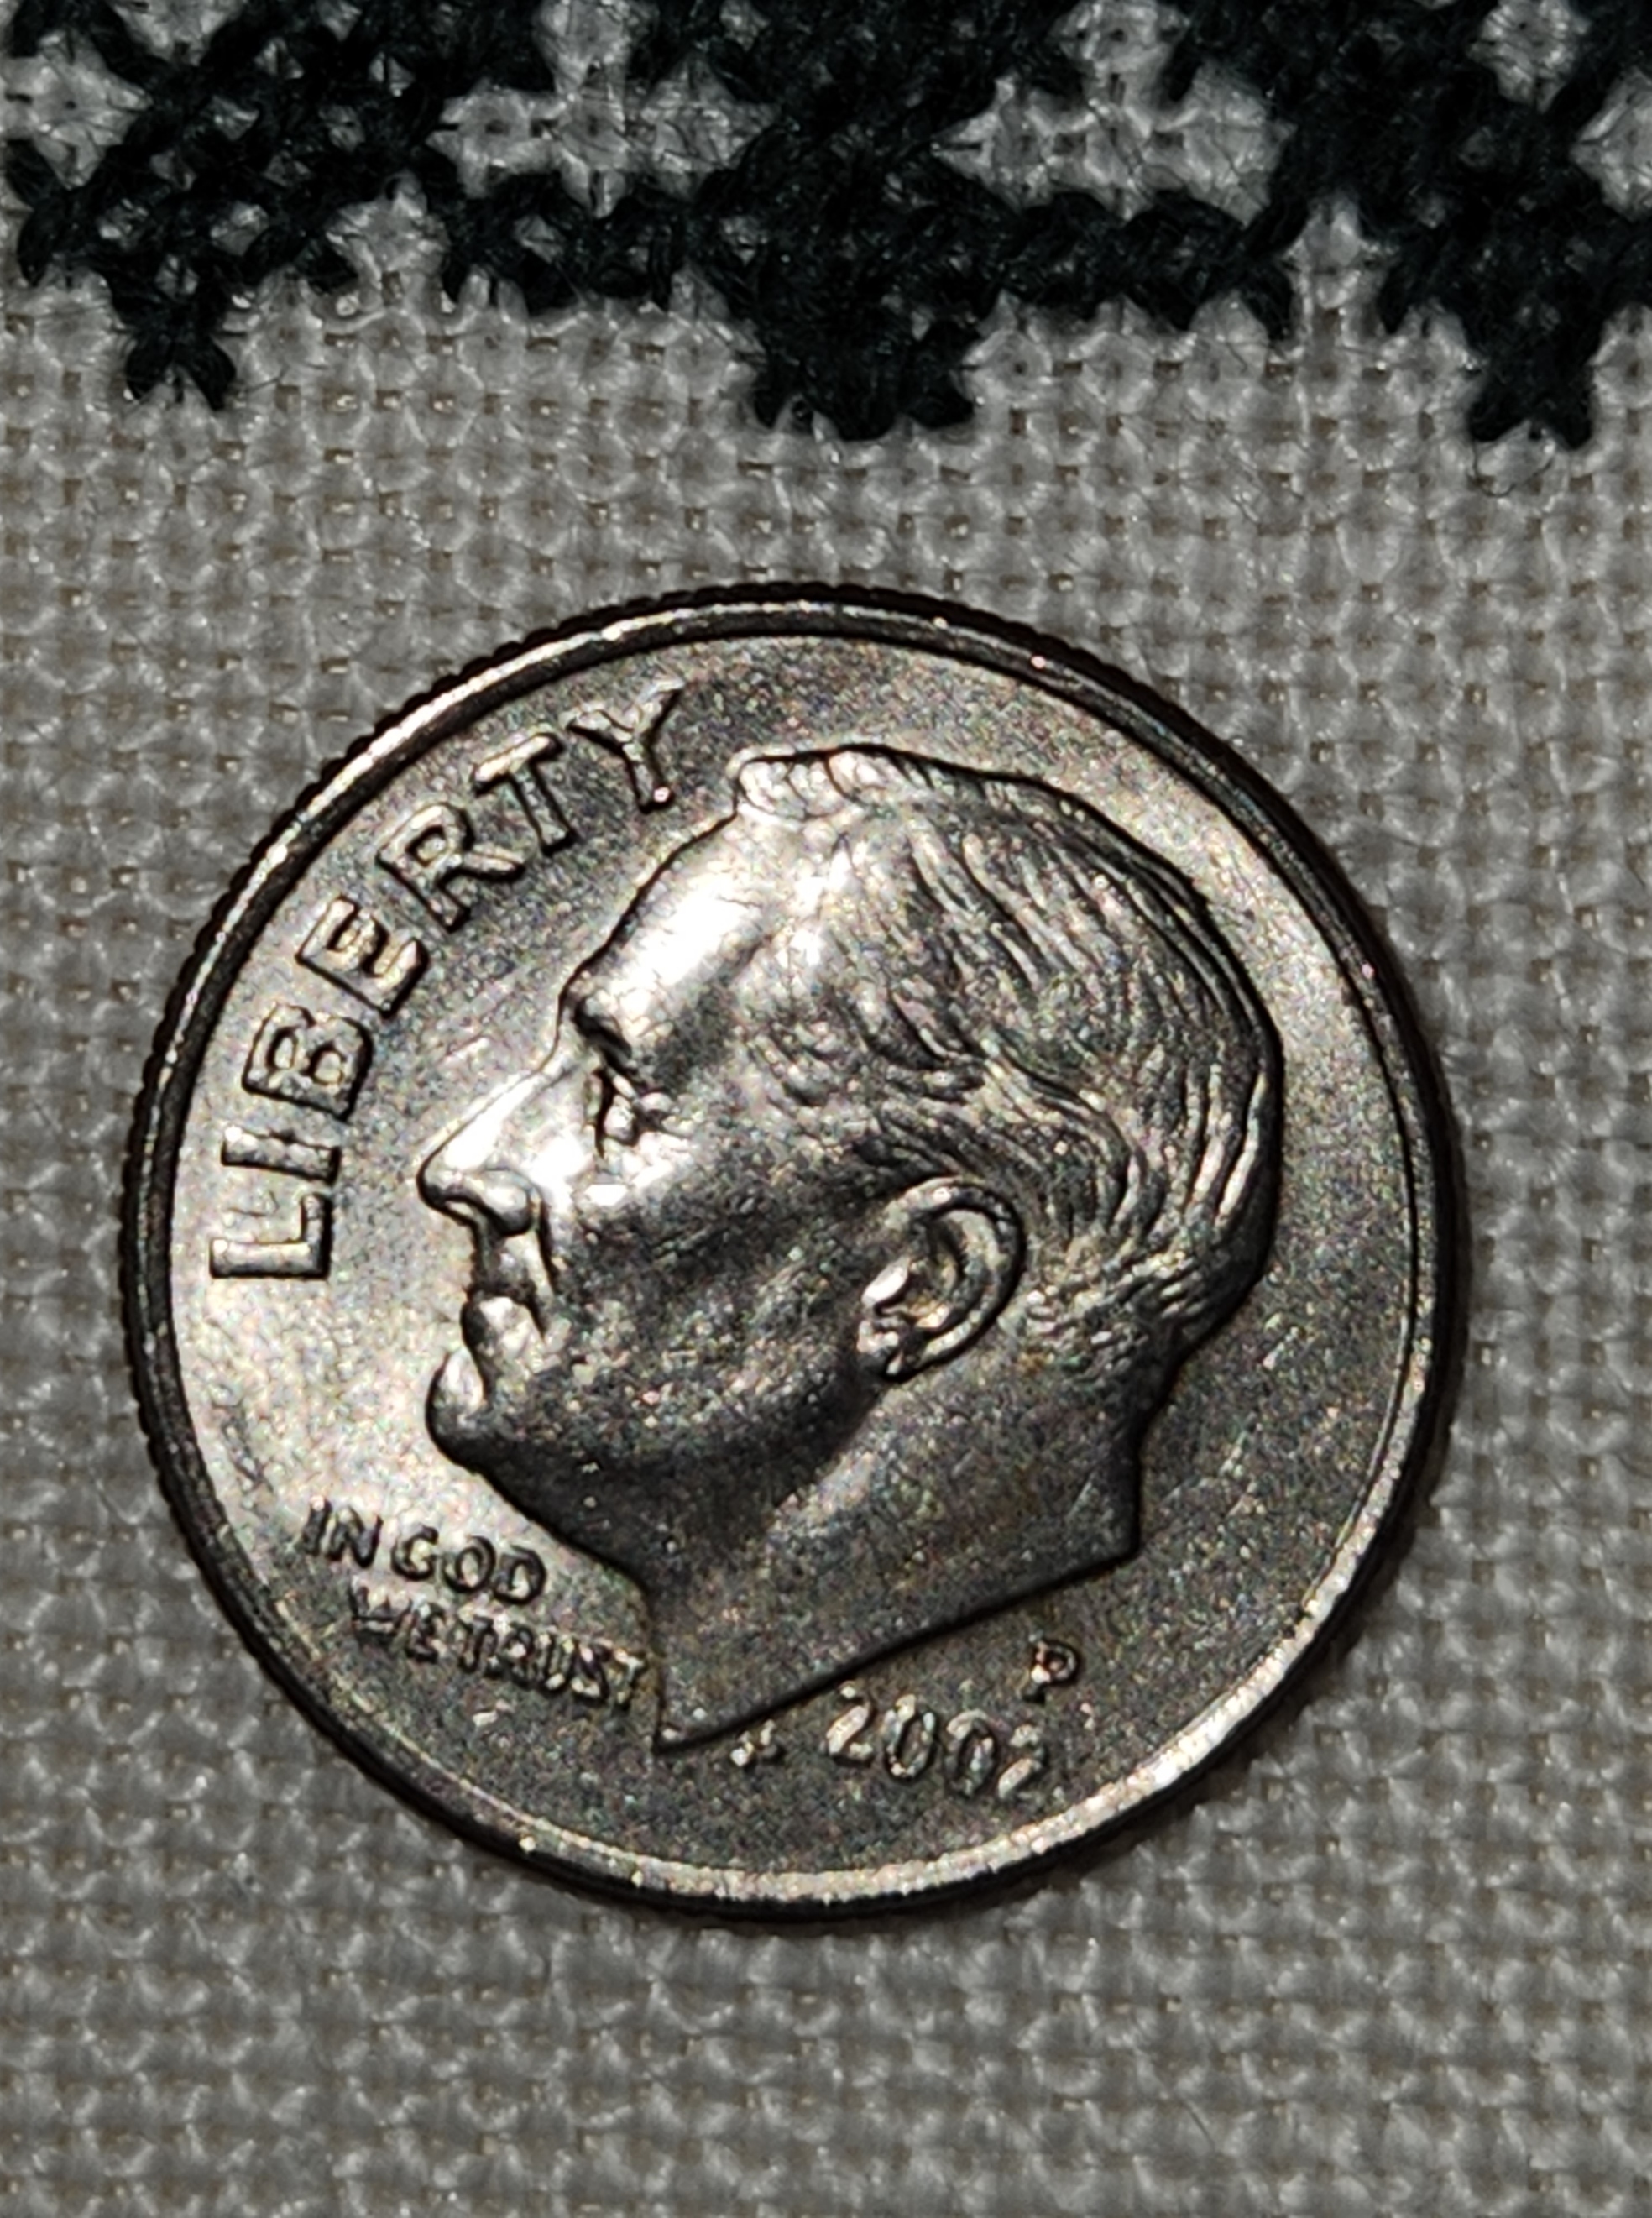
I picked the dime because it’s smaller than the nickel or quarter, and easier to count around the outside edge without losing your place. Counting the threads totally covered by the dime, heading north to south, we get a total of 26. And by counting the number of totally covered threads east to west, we also get 26. The first conclusion is a happy one. We have an evenweave.
Now for the math.
The official diameter of a US dime, as stated by the US mint, is 0.705 inch (17.91mm). I will continue the math here with threads per inch rather than metric to avoid confusing US folk, but the same method works perfectly well with metric measurements. And if you know the measurements of any other coin used anywhere else in the world, you can adapt this for local convenience, worldwide.
So what we have is 26 threads over 0.705 inches. We divide 26 by 0.705 and we get 36.88 (roughly). We can round that up to 37. My fabric in this sample is 37×37 threads per inch.
Let’s confirm that.

Yes, 37.
And you are right that’s a decimal inch ruler. I am proud to be an Engineer’s Daughter, and have many of my dad’s old drafting aides. I deliberately did NOT add any assisting lines to the ruler photo as proof of my assertion that it is FAR easier to count the threads obscured by the coin, going around the edge of the coin, than it is to do a straight line count across a ruler’s edge. It’s also FAR more likely that I would have a dime handy than a ruler in my pocket when I am out and about in the wild.
Try again. This time finer.

I get 31 in the north-south direction and 28 in the east west direction. This piece of linen is a skew count, with more threads in the vertical than the horizontal. Doing the math:
- Vertical (north-south) 31/0.705 = 43.97, rounded up to 44 per inch
- Horizontal (east-west) 28/0.705 = 39.71, rounded up to 40 threads per inch
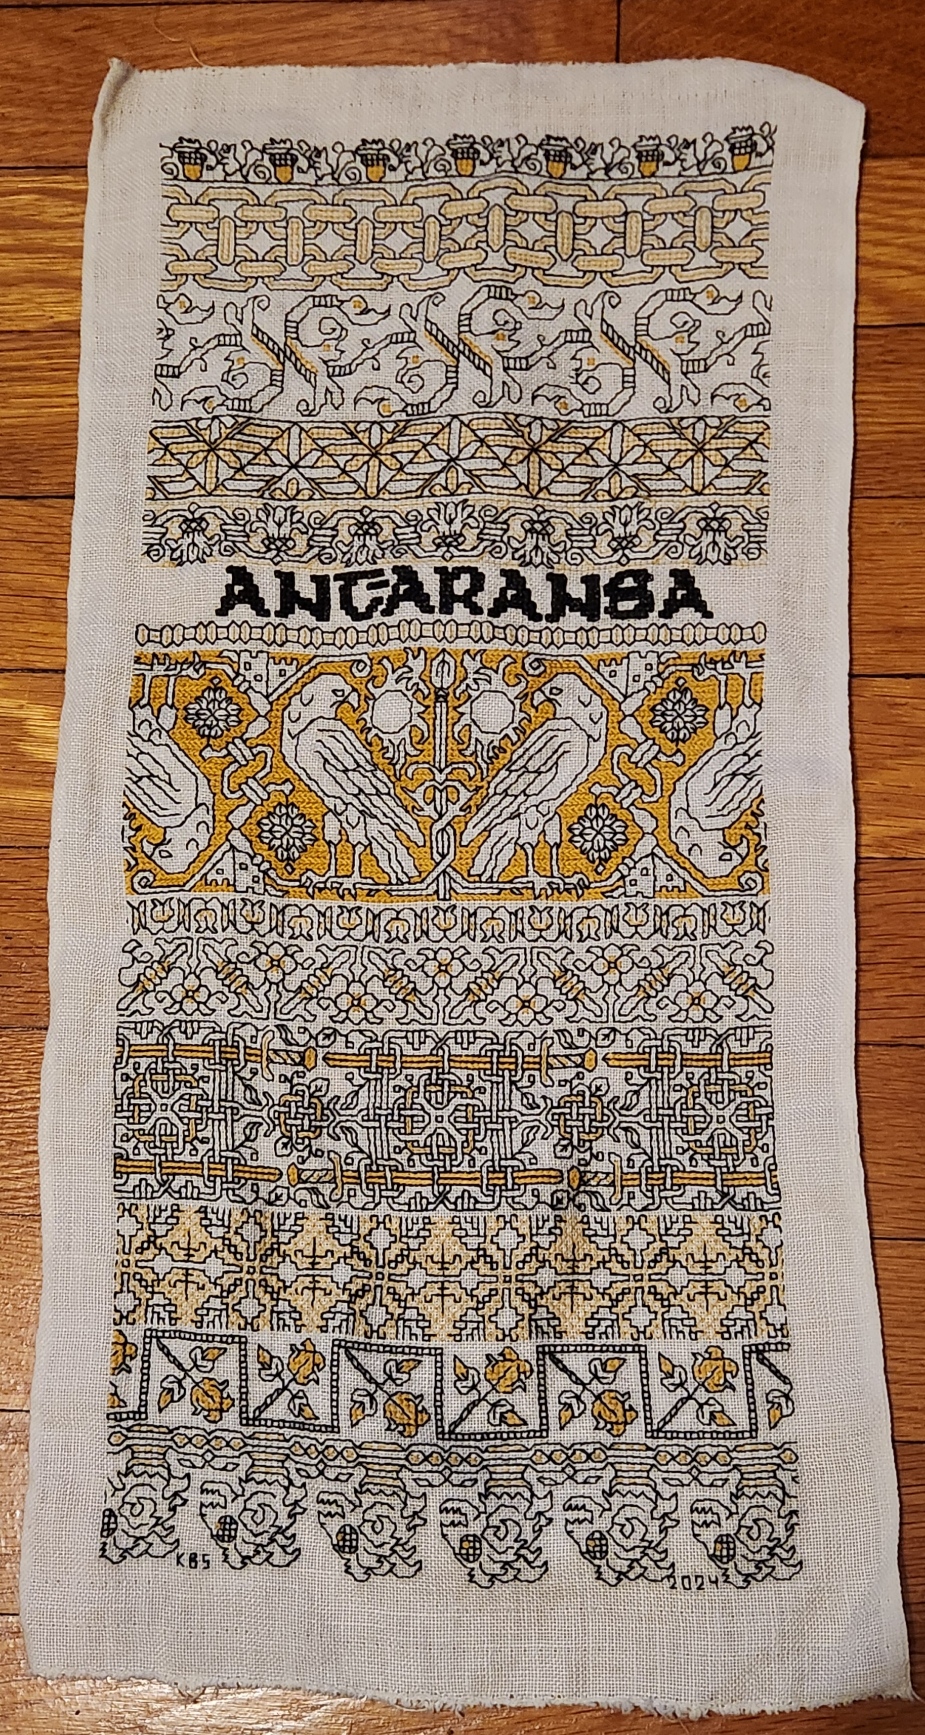
Now, does a skew count mean that effective countwork can’t be done? Absolutely not. Here is the piece that I used for the second example:

The slightly skew count means that over the same length there are more stitches in the vertical direction than there are in the horizontal. My mermaids are then a bit squished in height compared to their width because the vertical stitches are a tiny bit shorter than the same number of stitches over the horizontal. But the only place that this is evident are the large, symmetrical flowers just above their tails. You can just make out the height elongation in them because (logically) they are supposed to fill a square volume, not a rectangular one. Here is an old post that discusses this challenge further, and shows what happens when you wrap a design around a corner on a skew count fabric, and confesses that flipping your measurements is an easy mistake that even I make..
For the record, I stitched this piece in 1994, from a chart I redacted myself. The photo source that I worked from was in Schuette and Mueller-Christensen’s Pictorial History of Embroidery. I presented this chart along with my own original accompanying border on Plate 75 in my own The New Carolingian Modelbook, published in 1995.
As for the piece I used for the first example? The full Don’t Panic chart is a free download on my embroidery patterns tab, right here on String-or-Nothing.
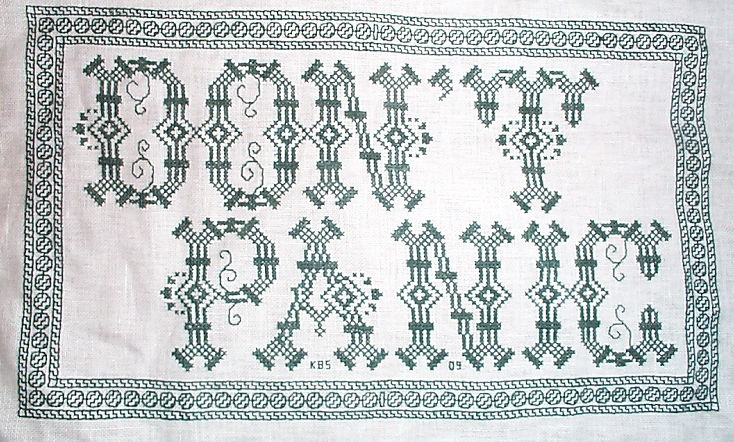
Don’t Panic is in fact the best advice I can give to the math anxious among us.
PROGRESS ON A WEALTH OF FRONTS
It’s been half a month since the last post, and all sorts of things have happened.
First, I’ve finished the wildly intricate interlace panel on my current sampler.

Second, as I was doing so I found an error in my chart for it as it appeared in the original edition of The New Carolingian Modelbook. The error was a minor one, a copyists/flip and mirror problem with two side by side crossings. It’s my guess that no one has attempted this particular design before, otherwise they would have either contacted me about it, or trumpeted my incompetence on social media. So of course I had to correct the problem. For a legible copy of the correction, including the original TNCM source attribution, and two chart versions – one for the border as shown, and one for a wider border or all-over design, please click here download a PDF file.

I have also been able to draft out a couple of tribute specific bands for this sampler, referencing the in-process novel Forlorn Toys in specific. They will be coming up after I finish the latest leafy strip. So stay tuned!
In other news, at long last, the Victoria and Albert Museum has updated all of the pages for the individual contributors under the Unstitched Coif Project. Again thanks to Fearless Leader Toni Buckby! My page can be found here, and has both the essay I did to accompany my work, plus ultra high resolution ZOOMABLE photographs of the back and front of the piece. For some reason the museum chose to lead with the photo of the backs of all of the pieces.

And for those of you who have asked about my personal health odyssey – I am improving. I’m in the middle of graduating from walker to cane. I can get around well with the cane, but I am still shaky with it over uneven terrain, so I mostly stick to it indoors, and continue to rack up practice distance. I have also been able to sit longer, as my stitching and blogging progress demonstrate.
There are still some hurdles to go, including a stint of proactive/preventive radiation to minimize any chance of chordoma recurrence, but I will take that in stride like all the rest. In the mean time, I’m feeling further along to being my old self than I have in months. No doubt due to the incessant care, coaching, and excellent cooking of my Resident Male.
OFF AND RUNNING!
On the ground, it’s more like walking slowly getting used to the transition from walker to cane, but in stitching, we’re galloping. Here is progress since the last post.

Several strips so far, a combo of reach-backs to my older books, and to the more recent Ensamplario Atlantio Volume III. I am still drafting up the custom bands that are specific references to the content of Forlorn Toys, the book that The Resident Male is writing right now. When you see them you will realize what’s taking so long (other than limits on how long I can stand at the computer in a day).
I do have to report an oops. One that dates back to the publication of The New Carolingian Modelbook in 1995. I hadn’t stitched the current strip before, mostly for reasons of size. It’s quite tall. But this being a very long piece of cloth, I thought it would work well on this piece. Lo and behold. There is a small crossings error in the original. It’s small enough to be an easy fix, but I will put redoing that page in queue and eventually publish it in here, and on the errata section on the “My Books” tab elsewhere on this site.
In the mean time I’m at the point in this complex interlace that I can go off-book. I’m just copying what I’ve stitched to date now, flipping/mirroring/inverting the crosses as required. Yes, it’s an eye-bender, but each subsection is logical, and if I keep the precision up so that all of the subsections meet up nicely, no where near as difficult as it looks.
ENSAMPLARIO ATLANTIO VOLUME III!
I am delighted to announce that the third volume in my free-to-download series of blackwork pattern booklets is now up and available here on String-or-Nothing.

Like the previous two volumes, Ensamplario Atlantio Volume III contains original (and a very few redacted) filling designs of the type used in inhabited blackwork. That’s the style that fills outlined shapes with fields of diapered fillings, as seen in my Unstitched Coif project submission, and in my current sampler. The new fills I created or redacted for the Coif are all in here (I had to do more – I actually ran out of suitable ones!)

It also contains most of the strips found on the several tribute and protest samplers I’ve done over the past several months – the various mythical beasts, interlaces, swords, and other fantasies in thread. (The ones not found in here are from Ensamplario Atlantio II, The New Carolingian Modelbook, or The Second Carolingian Modelbook.)


And to top that off, there are lots more designs in there I haven’t stitched yet, including tunic yokes and pieces with corners that could be used for framing necklines, or table linen. For SCA folk there are a few items of special interest – the populace badges of the East and Atlantia, and a belt motif that can be infilled with the colors that signify patronage relationships (squires, protegees, apprentices).
In truth, I’ve rushed this one to release. I apologize if there are errors or inconsistencies. I plead time pressure. If major errors turn up and I get a chance, I’ll go back and fix them. However, the very few source attributions in it have been thoroughly confirmed and are genuine. Except for those redactions, all of the other material in there is my original output.
Why free? Why not? My goal is to promulgate the spread of stitching, and to make it easy to do so. Yes, I could have bundled these books up and sold them on Amazon, like the Carolingian Modelbook series. But in truth, the yield is a pittance because I am under pressure to price the books low enough to discourage massive piracy. Higher pricing restricts access and defeats my goal of spreading the joy.
For the record, The Carolingian Modelbooks are the product of a lot of research, exacting redaction, writing, and indexing. The Ensamplario series is a lark. Largely just my doodle notebooks, produced with minimal effort. I felt justified in asking for recompense for them on the basis of labor alone. But EnsAtl books are candy to be shared just for the fun of it. You can pay me back by sharing photos of works you’ve done using these designs, teaching someone else to stitch, flaunting blackwork-embroidered garments or accessories in public to increase appreciation and awareness, or just by doing a good deed for someone in need (I release my pattern broadsides as Good Deed Ware, too.)
HOWEVER I retain copyright of my drawings, and release these designs for PERSONAL USE ONLY. For any other uses including including duplication, inclusion of the patterns on patterns or finished items for sale or charitable distribution, I request you contact me privately. I’m not an ogre, but neither do I want to see my goodwill answered with appropriation. My terms (if any) will be mild, and reasonable. Oh, and feeding them into AI for training is total anathema, and is expressly forbidden.
You can download Ensamplario Atlantio Volume III by clicking the link below, or by hopping to the MY BOOKS tab at the top of every page here on String. The earlier EnsAtl volumes are on MY BOOKS, too.
>>> CLICK TO DOWNLOAD THE PDF FILE OF ENSAMPLARIO ATLANTIO III <<<
Comments? Questions? Random remarks? Go right ahead.
FALCONS AND SWORDS
Of course we’ve got them. This is of course an homage to an epic fantasy adventure.

A finish on the voided falcon panel. Foreground first in double running stitch, using black thread. Background then worked in the same accent yellow I’ve been using, in long armed cross stitch (LACS). The telltale plaited look of LACS done in rows that alternate direction is clear:

Working the voiding after the outlines can be tricky. First, on a design this dense, there are lots of angles and small spaces that need to be accommodated. Those starts and stops are a headache for sure, and make the texture a bit murky in that last stitch where the fill abuts an outline. And then there’s the care taken to not snag or penetrate the outline stitching itself, so that it isn’t covered by the voiding. You can see a couple little spots on this were I wasn’t totally successful, and a black outline has been eclipsed by the later work in yellow. I did my best, but no one is perfect.
On to the subsequent three strips. First two fillers – a simple bud meander to balance the narrow border just above the falcons. My own invention, and destined for Ensamplario Atlantio volume III (EnsAtl3). Just a touch of yellow in the tulip like flower, and a stitch in the long leaves to bring the color into this band.
The one below with small quad flowers and slanting rods with fleur-de-lys terminals is also my own, and will be in EnsAtl3. I was thinking the rods or staves of office held by seneschals and stewards. A design element congruent with such folk in Treyavir. Again, just a touch of accent yellow to keep it in play.
The current panel is a bit of a departure. I did a spot motif of similar style on my big dancing skeleton Fangirl Sampler, based on an entirely different as yet unpublished book by my Resident Male.

I have since done some modifications, morphing that spot motif into a repeating border. I really like it – lacy and complex. That border will also be in EnsAtl3. But the design didn’t quite fit here. There was too much empty space, and that was distracting. So I picked out the small bit that I had started, and redid my concept specifically for this sampler. The main elements of the design are still there, but they are denser. I think that it will balance out the lighter, more airy two strips just above it. I’m not sure how to deploy the yellow. Possibly filling in the sword blades and embellishing other elements of the interlace. We will see where fancy takes me as I continue with this strip. This variant will NOT be in EnsAtl3.
After this comes one or two more bands, tops. No clue as to what they will be yet. Existing pieces? Prior art reworked? Something entirely new, doodled up to fit? Keep watching these skies and you’ll find out.
IT’S BEEN A WHILE
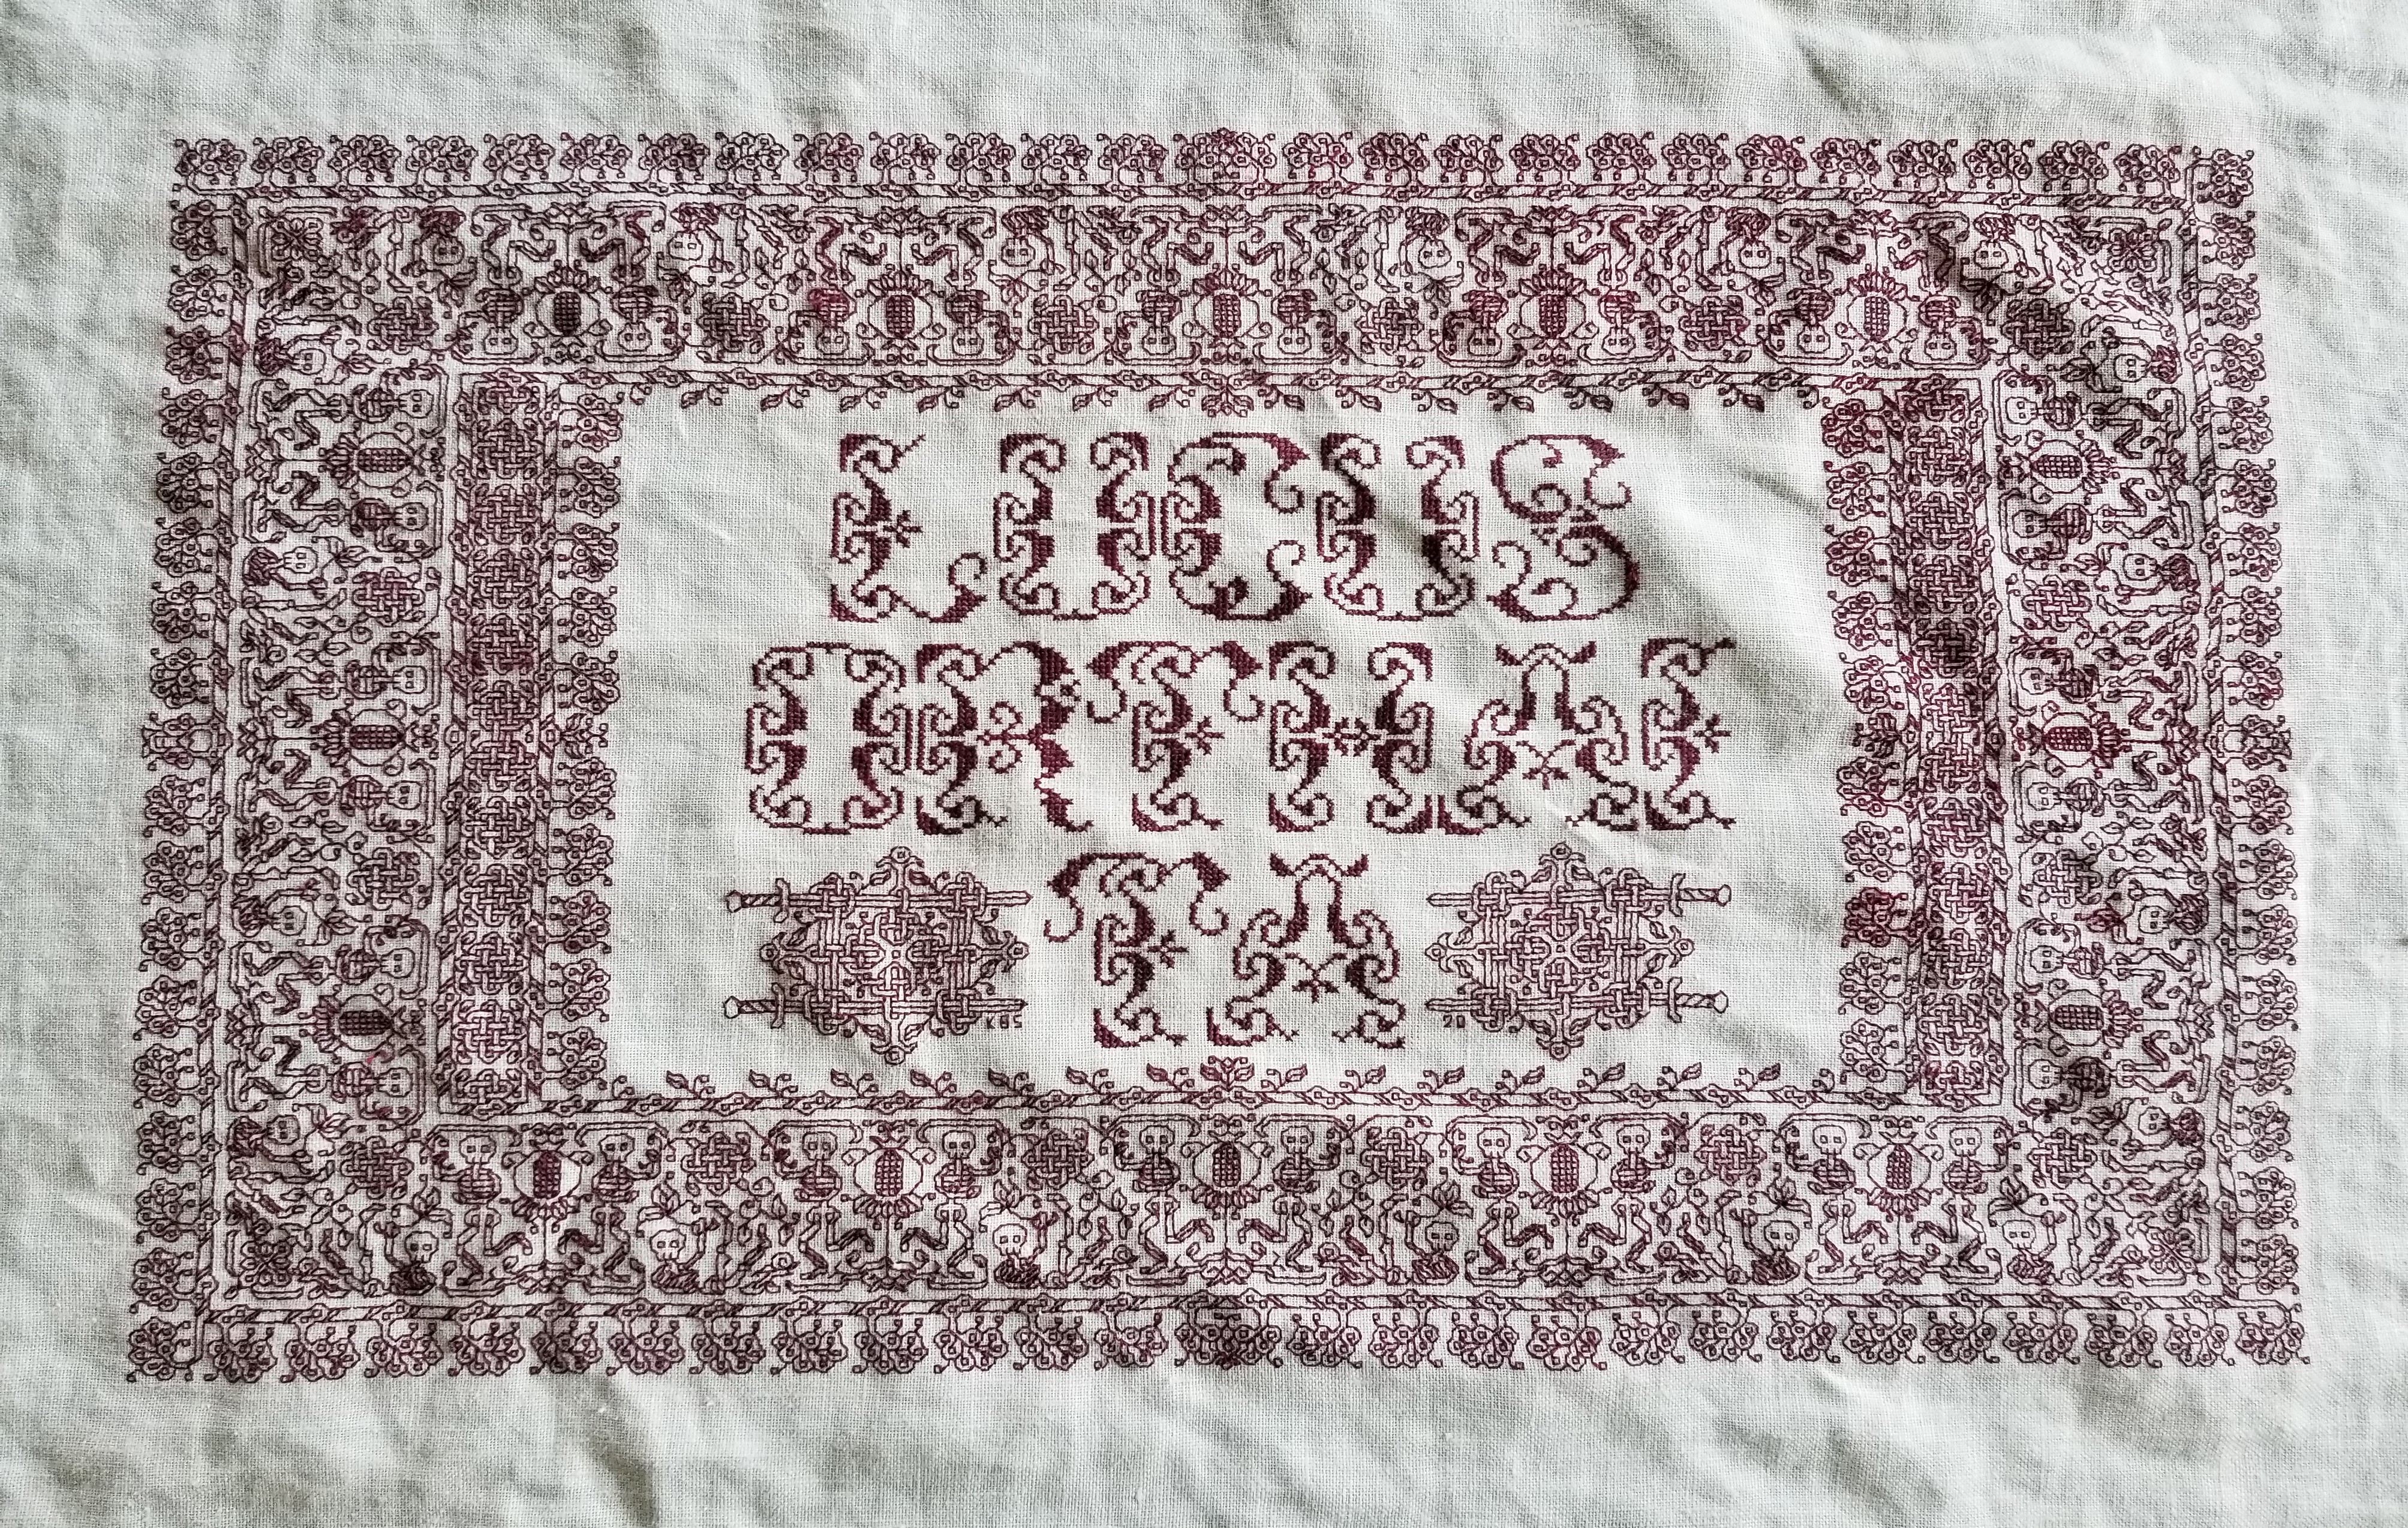
A catch-up post on what’s been stitched since I explained the Mystery Saying. Just a bit over two weeks, in fact. This is what I’ve been up to:

Forgive the tilt. The lacing is a bit uneven and the work appears skewed. All will be nice and parallel when it’s finally off the frame.
I was in the middle of the fish strip when I last posted. Obviously that plus three more have been completed. Plus a partial that I’m currently stitching. All of these new designs are my own. The fish, pretzel knots, crystal-like flowers, toothed border, and strange furry beast will be in Ensamplario Atlantio III when that’s finally released.
The fish, crystal flowers, and the current monster-bearing strip are all keyed on various stories in Fractured Symmetry, the Resident Male’s book that I am using as inspiration for this piece.
- The fish is well, an otherworldly fish, not much to say about them other than they are a point of minor triumph when they appear.
- The crystal flowers are an interpretation of fractalites – engineered/grown aesthetic constructs that are a special hobby of Terrendurr, the alien half of the detective duo whose adventures the book chronicles.
- And the menacing yeti/gorilla/bigfoot creature is a Yyrgamon, a forest dweller native to the planet Raylic – a bit less mythical than a yeti, rarer than gorillas, and of greater cultural significance than the bigfoot; and of highly significant appearance in one of the books’ stories.
On the sampler the Yyrgamon’s presence will bring some balance to the bottom half of the piece, and provide weight to compliment the saying block, above.
Note that basted line down below my current strip. That’s the bottom edge of the stitching area. I have room for one more band. Or possibly one with a “sprouting” narrow edging across the bottom. No clue as to what will end up there yet. I might have to draft up something new to fit.
Stay tuned!
SOME DEPARTURES
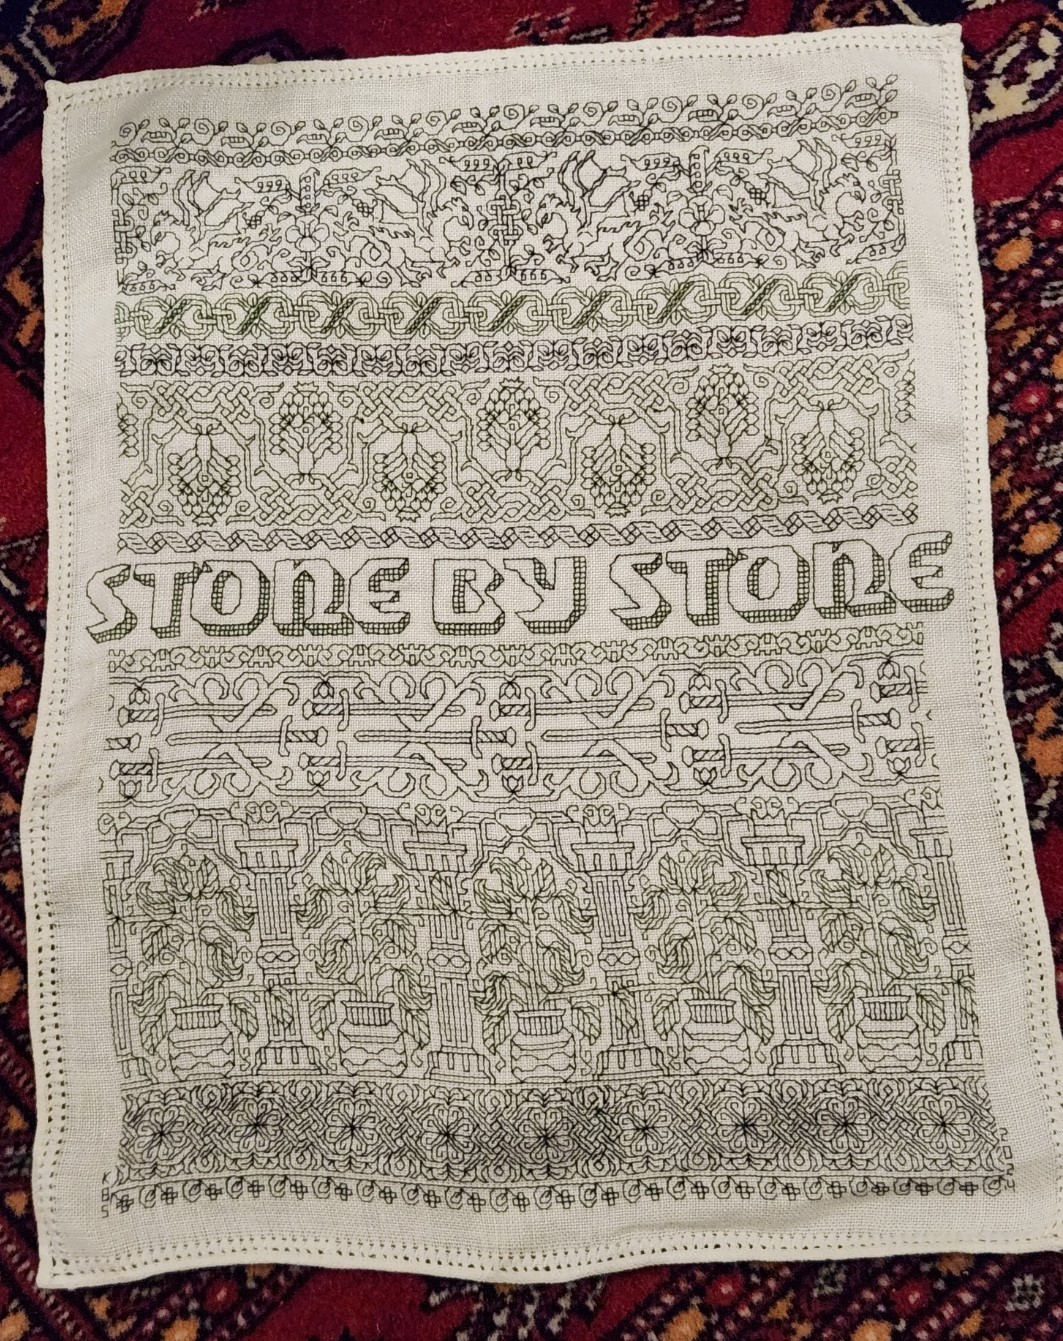
On the final stretch of the Stone by Stone mini sampler. I decided a while back that I wanted to include something with columns in the piece. I had a chart picked out – something I had redacted a while back, destined for T3CM, but was saving for book publication rather than sharing here. But I miscalculated, and the remaining space after the sword panel wasn’t tall enough, so I had to quickly doodle up a solution. It’s not entirely successful. And I’ll detail why after the photo.

First the departures. When I doodle, I stick (mostly) to a list of guidelines I’ve deduced from decades of redacting historical designs. These include sticking to 45/90/180 degree angles – the simple angles formed by the sides and corner to corner diagonals that can be achieved in one square unit. No “knights move,” 2×1 or other multiple unit spanning stitches, and (if at all avoidable) no half stitches. I also try to comply with specific ways that repeats and meanders are formed.
The peacock panel has a small sin – the center point of the peacock’s crown is formed by two half-diagonal stitches. In cross stitch they’d be termed “quarter stitches.” The current columns and potted plants panel doesn’t use any partial stitches, but the urn/plant components aren’t obviously symmetrical to the center line determined by the arch. However you are seeing only one half of the full repeat here. The thing is mirrored as what I described as a type 2 repeat in my earlier post, linked above:

It’s also further complicated by the overlap of the leaf bearing tendril alternating right and left. You’ll see that in better detail as I get further along. This gives it a rather complicated and unexpected adherence to type 2. I’m hoping it will make more visual sense as I go along.
Aside from the issue of the overly complex symmetry the arrangement of the leaves, while formalized is far more naturalistic than historical pieces in general. So is the veining in the leaves. Again a departure from the standard aesthetic.
I’m also not pleased by the minimization of the arch compared to the columns and plant pot. That difference in size and weight does have historical precedent, but it doesn’t complement the overall design as well as I hoped.
And the last bit that didn’t work as well as I hoped is the use of the two colors in this strip. Stone by Stone is stitched in black and green. A very deep green. It alternates by strip except for the motto, in which the foreground of the letters is worked in black, while the shadowing is done in green. The vegetable bits and tendrils of this band are all in green. The columns, arches, and urns are in black. I’m hoping that the green leaves in front of the black columns won’t be so confusing looking when more of them have been completed.
Still, for all of these criticisms, I am not totally displeased. This strip stays. I am not sure what will be the final band below, but whatever it is, it will be densely stitched and black. Thumbing through my notes now looking for just the right thing…
Oh, these two strips – the sword interlace and this historical/modern inspiration mash-up, will be in Ensamplario Atlantio volume III. I’m anticipating that the quick-to-stitch sword one in particular will be popular shirt trim among the SCA’s sword-wielding community. I’m planning on drafting up a matching yoke for it, too.
STONE BY STONE
And just like that my mini-sampler is past the half-way mark.

The stitched area is about 9.25″ wide, except for the motto that clocks in at 10.25″ (about 23.5 and 26 cm, respectively). I originally planned the motto at half the current scale, but after working just one letter, saw that it was overwhelmed by the rest of the stitching. So I doubled the scale – each block unit in my drafting became a box of 2×2 units. And I changed the treatment of the shadowed areas, converting them to box fill in green against the black of the main letter outline. To me that squared fill in this application hints at cobblestones. When I doubled the scale I knew that I’d blow past my originally laid out left and right borders, but that I’d be close. I may devise a narrow border strip to surround the rest of the piece and eke out the previously stitched area to align with the new width. It will be tricky though. I would probably have to work unsupported in hand rather than on a frame or hoop. I don’t like doing that.
Because I know folks will ask, I’m afraid I can’t point to the specific typeface source I used for the original expression of the phrase (before I scaled up and altered it). I found a screen capture of that alphabet with no attribution in my folder of miscellaneous things. But I’ll keep hunting to find it because sources should be acknowledged.
As for the rest of the patterns on the piece, with one exception they are all of my own devising. The only one that isn’t my own is a redaction I did of a band appearing on this sampler, dated 1674 in the collection of the National Trust, at Montacute House, Somerset, UK, Accession NT597706. That band is the narrow ribbon scroll appearing just above the motto. I may do more from that particular sampler on this piece. Its patterns were a challenge to chart because the stitcher recorded only the absolute minimum needed to parse the repeat and spacing. I often rely on multiples to reconcile problems in motif and spacing, but without them there’s a lot of guesswork in working out the fills and repeats.
For the rest – as you know I pick on the fly, and while I know what the next design will be (another of my own), I haven’t begun thinking of what happens after that.
Now about that odd motto. It’s no secret that my Resident Male is well embarked on a career as a writer of science fiction and fantasy. He’s got several self-published novels, and is now tirelessly seeking an agent with the goal of full professional publication. To that end, he has written several more books above and beyond those available on Amazon. A few times now, something he has penned or described has resonated with me, and that required expression in needlework. As his Fangirl Army of One, I am delighted to have answered that call.

Stone by Stone is a phrase integral to his latest work, just as “Lucus Orthai Ta” is central to another of his yet-to-be-released novels. And long ago he described a cloth stitched with circling koi in one of his very early stories, a pivotal scene that led to my creating the Two Fish piece.
If you go far back enough to when we just met, although I had dabbled in counted thread work based on early sampler strips before we met, my initial headfirst plunge into blackwork was done for him as well. This piece is dated AS IX (1974/1975). It guess it has been a symbiotic relationship of pen, sword, and needle ever since.
LONGEVITY UNDER HARD WEAR, AND MOVING FORWARD
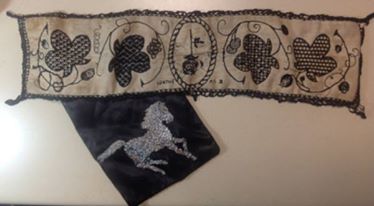
Some of the long-time readers here may remember the forehead cloths I stitched back in the Pre-Plague Era. I used some linen that was approximately 32 count (a remnant of off the bolt, not a purpose-woven needlework ground), plus some stranded silk custom dyed by my Stealth Apprentice. The black used was a historically researched tannin/iron recipe, and the thread was a prototype of the threads that Stealth Apprentice sold through Golden Schelle. The Schelle retail effort is currently in hiatus, but I do hope it will restart in the future. In any case I now report on wear and tear.
As you can see, now about seven years later and after heavy wear and washing, the forehead cloths and their embroidery have both held up well. I didn’t do much special to launder them. I threw them in my regular cold water/cold rinse wash, but hung them on a rack to dry. I’m particularly impressed by the performance of the dyed silk. It’s as dark today as it was when I first stitched it. Now I understand why black silk was so ubiquitous on body linen. It survives frequent wear and harsh laundering unscathed.
What did suffer were the ties. I used the same ground cloth to make them, cutting strips, folding them in half the long way, then tucking both raw edges inside, seaming, and turning the tubes inside out – pretty much the standard way ties are made, although I had to do mine on grain and not on the bias because I had so little fabric available.

Three of the four have disintegrated. To to little more than fuzzy strands. You can see one of the less frayed tie cut from the cloth on the bottom near the spool of twill tape in the photo above.
I am in the process of replacing all of the ties with twill tape. The finished redo of the first is at the bottom of the photo above. I hand-stitched the edge of the tape to the edge of the cloth, then folded it over and hand-hemmed the other side down to the back. When I got to the ends of the triangle, I continued on with the folded twill, whipping the edge as I went. Next comes the darker, larger cloth at the left side of the photo. Then comes the cloth I just finished embroidering. I won’t bother with the fabric ties on that one, I’ll leap direct to the twill ties.
As for the current mini-sampler stitching project, I’m rolling along with that, too.

Since my last post about it I’ve completed the green twisted link strip, and the delicate black flower strip below it. Now I’m up to another band in green. Peacocks, or if you prefer, bling chickens – my rendition lacking much of the grace and nobility of the actual birds. Note that I am not using the silk for this one. I’m still experimenting with the Sulky threads. (Partial verdict – I MUCH prefer the silk.)
The peacock strip, like the others in this piece are of my own devising, and will be in Ensamplario Atlantio Volume III. Please don’t ask me when it will be released. It’s still in process. I’ve got about twenty pages of brand new fills, plus about eight pages of larger borders and all-over designs. I am toying with the idea of including the Epic Fandom strips in this one, too, just so that they are in one easy to thumb through collection. Opinions on that are solicited.
LOWERY STAND HACK
In one of those “this never happens” moments, I ran across a Lowery stand being offered on my local freecycle exchange. Of course I leapt on the opportunity. Although I have one I now have a second to use in another room, or to leave at our Cape hideaway, so I have less to schlep when we visit.
This one is a bit older than the one I bought several years ago. It came with two attachments – a plastic tray in daisy form meant to hold stitchers’ oddments, and a bar with a pincushion, plus a crosspiece of unknown purpose. I took off the tray because it was very awkward and space-inefficient.
Some digging led me to the answer for the crosspiece bar – originally it held a plastic comb-like attachment, over which waiting threads were to be draped. But this re-homed stand has seen some hard use, and the plastic comb insert was long gone. And for me – not missed. I generally do monochrome or limited color set pieces, and have no need for an extra set of fingers to hold my rainbow of threads.

But the crossbar did suggest something to me. I have always wanted to display a design page alongside my work. Using my big scrolling frame mounted on the Lowery large frame extension, this wasn’t a problem. I could easily affix a page to my working surface or to a little magnet mounted on the end of the frame’s stretcher bars, using a magnetic needle minder. But if I plan on employing the Lowery to hold a smaller hoop, there isn’t enough real estate for that.
I have a flat metal magnet board of the type commonly sold for stitching. But the angle and aperture of the crossbar’s slit were wrong. The board didn’t sit well, nor was it at a useful angle. And it wobbled in the stand. So I went looking for something that might help.
More serendipity. This is the plastic “zipper style” cutting slider strip that comes with large boxes of Stretch-Tite brand plastic wrap. I find them pretty useless for their intended function, but being a packrat, I tend to keep the slider bar in the drawer with the box of wrap until the wrap is used up and the box is consigned to recycling. Here you see it clipped onto the leading edge of the crossbar. I haven’t pushed it all the way on so you can see how they engage.

Obviously I will eventually cut the plastic to length and discard the blue thumb slider. But here is the magnet bar, mounted behind the now-thicker/plastic covered front edge of the crossbar, wedged between it and the crossbar’s back. Nice and secure. At a useful angle, and ready for pattern page deployment.

Oh. That thing I’m stitching? A very small piece of linen I rescued from yet another estate sale. It came neatly hand-hemmed. It’s too small even for my hoop-on-a-stick sit-upon, so I had to pull out my hand-hoop for it. It’s exceptionally nice fabric, with evenly spaced, easy to count warp and weft. There’s a couple of minor stains on it, but once it’s stitched they won’t be noticeable. I’m looking forward to working a hoop on my hand-me-down Lowery. It will be a first, since I usually only pull it out for larger pieces.


The count on this is roughly 33.25 threads per inch in each direction (penny count method – 25 threads covered x 1.33). I’m using this doodle piece to test if I like using Sulky 30 as a single, and to beta some of the designs that will be in Ensamplario Atlantio Volume III, which I’m composing right now.
You can see my basted guidelines marking the center, and on two sides, marking about a half-inch in from the edges. That’s all I need. Gridding for this isn’t necessary. I will stitch out from the center to the right edge, and note where in the pattern I am when I reach my edge-mark guideline. Then I’ll go back and stitch to the same point at the right. For the strips symmetrical to a center line that will be the same point left and right. For strips that are centered on a box unit instead of a line, that will be within one box unit further than the iteration on the right (assuming I center the left edge of the central box on my based centerline). And for non-symmetrical or unidirectional borders like the one I’ve established on top, I’ll just work in the general direction left/right but wait until I’ve established an edge with the symmetrical strips, then I’ll “catch up” to them and make the edges even.
Do I have any idea what strips I will be using? What the overall design will be? What motto or word (if any) this will bear? To what use I will put so fully an embroidered small cloth?
Nope.
No clue as to any of those things. But that hasn’t stopped me before. Like I said – this is an experimental doodle, a portable bit of amusement to eke out the summer’s migrations. Not a deathless Project For The Ages, or an incipient family heirloom. Stay tuned to see how this one evolves. If nothing else, it will be a bit of bungee-jump stitching fun.
