The first side is done! You can see that I’ve filled the entire defined stitching area, and that I’ve mirrored the border all the way around.

You can also see that I’ve left in the basted lines that mark the flap areas I will need to form the slipcover parts.
Now on to the second side. (I’m not going to call these front and back because I intend to let the recipient decide which one she likes better.)
IF YOU ARE WORKING A BOOK COVER YOU CAN STOP STITCHING HERE. Decorating the back and spine areas is a personal choice. You may want to skip one or both of those in order to finish more quickly. No shame in that, but you’ll have to wait a bit for the finishing instructions because I am going to do both.
Finding a Center Point on an Eccentric Repeat
Centering the pattern for the first side was pretty easy. I had basting stitches that marked the exact center point of my stitching area, and I had a pattern with a lovely swirly flower, complete with a perfectly defined center point. I could have used the center of the yellow lattice, but I chose to make the flower the focal point.
But what about an eccentric repeat? One that doesn’t rely on quadrilateral symmetry like the flower does. Or mostly does – that directional swirly center mixes it up just a bit, but the outline of the flower and lattice is solidly four-square symmetrical – you can flip it up, down or left/right and the outline remains the same.
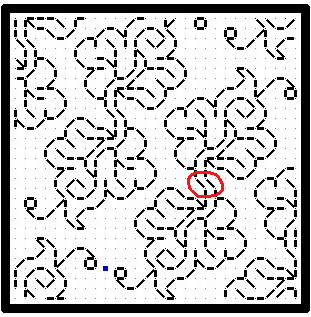
Here’s the eccentric repeat I’ve chosen for this side:

Wow. Where is the center? The double-leaf sprigs do reverse-mirror up and down, but the reflection point is a box, not a dot (the dots representing the “holes” in our ground cloth). I’ve circled it in red.
We COULD work the piece on skew count compared to the established prior work . That’s one of the advantages of using even weave instead of one of the purpose-woven grounds like Aida, but I don’t want to. I’ve left one two-thread unit as a clear zone between the border and the field on the first side. I don’t want to make that clear zone wider or narrower on this side.
Instead let’s find a better “center dot” location to line up with the the basted center lines. Ideally i want the piece to be visually balanced, in spite of the eccentric repeat. So let’s look in the spaces BETWEEN the sprigs. It just so happens that there is a perfect spot. There is a two-stitch gap between the buds on the curlicues – that tendrils that looks like they end with a berry. I’ve marked the dot between them. That’s the spot I mated with my designated center point in this stitching area.
Here’s the start of my stitching. You can just make out the remains of the basted center line to the left (the vertical one is already too picked out to show on this photo). But I’ve included the Blue Dot that matches up to the chart above. That’s the exact center of my area, and that’s my alignment/starting point for this one.

One thing to remember about aligning eccentric repeats this way – they do truncate around the edges. My chosen area is large compared to the scale of the motif. Several full repeats will fit both up and down and across that field. If I were to employ this filling in a smaller area, instead of looking for a visual center point for the design as a whole, I might place the design so that at least one full repeat was shown, or I might center the most prominent part of it (the leaf) in my area-to-be-filled, and let the rest of the design be cut off as it may.
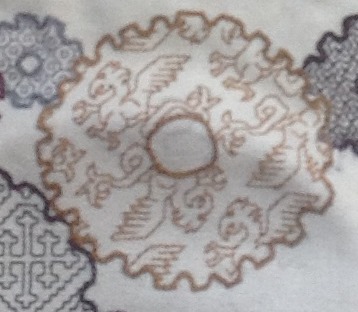
Here’s an example of trying to shoehorn a larger repeat into a smaller area. The dragon won’t fit cleanly on any one side of the gear shape into which it was jammed. But by moving it around a bit rather than trying to center it cleanly, I was able to get enough of it in to make the thing “legible.”
And I continued on. Just as before I worked my way out to the right, until I got close to but not right up against the area where my border should go. I’m using the same border on both sides of the book, so it was easy to count and copy from established stitching. Once I had aligned the center knot on my basted horizontal center line, I worked down from that to the corner, copying the stitching I had already done on the finished cover. Then with my border established, I went back and filled in more of the field.
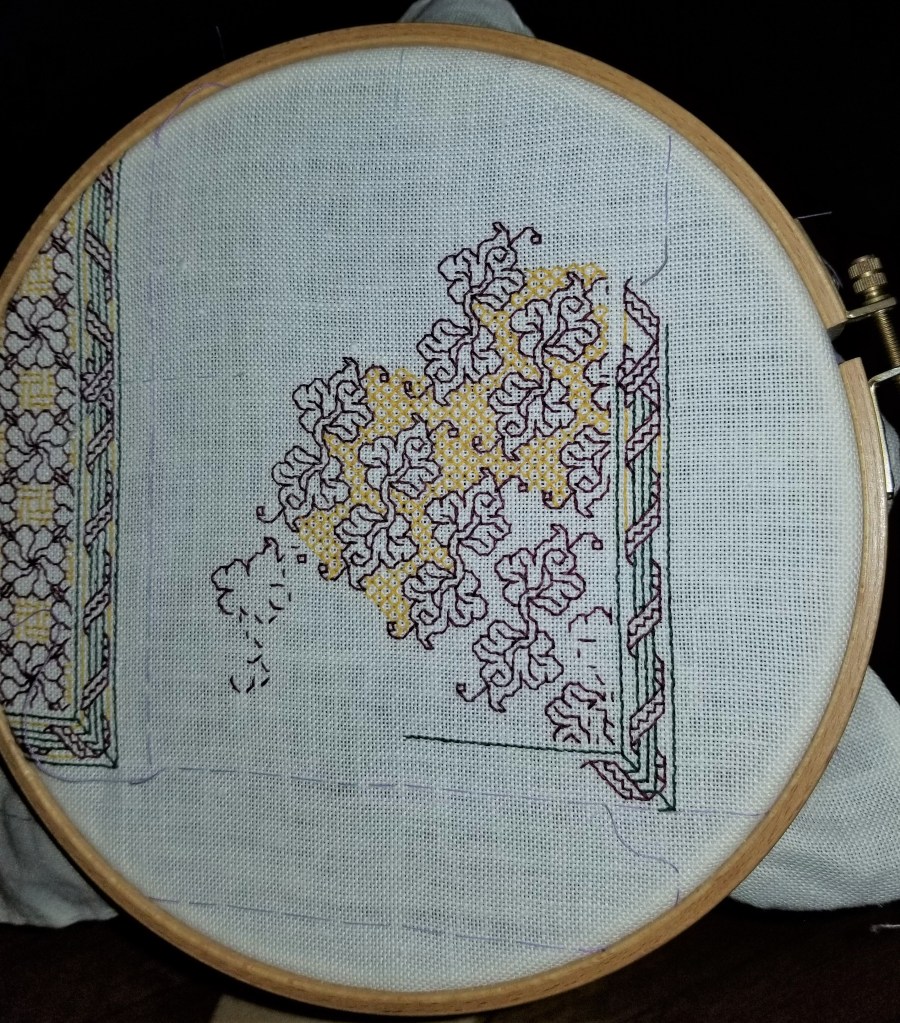
I liked the almost-voided effect of the yellow lattice on the first side, so I decided to work this design in true voided style. And since just the other day I found an example of a diamond voided fill on a historical piece, why not?
I’m fairly flying on this second side. Being able to copy the border (and being familiar with it at this point), plus the simplicity of the diamond ground is making this bit quite speedy. What you see above is more or less what I was able to stitch in about four hours total time, spread out over two evenings.
And I am liking this fill. A lot. I may have to use it again. Possibly in combo with border I designed to match. Both are in my free book, Ensamplario Atlantio II.
So. Is all of this clear as mud? Do you have any questions? Are you thinking of working an original project based on these principles? It could be a book, a pincushion, a pillowcase, a box top, a small hanging piece – anything. The same hints on defining a stitching area, centering a design, and working on the fly (as opposed to fully drafting out an entire stitch-for-stitch full project chart) all would be helpful.
Unleash your inner doodler/designer! Go for it! I know you can.
