CHARTING
I’ve gotten some recent feedback about the way I chart my designs – both positive and negative. However, the oddest feedback was from a couple of people who couldn’t put their finger on what I was doing different, or why. I attempt to explain
First off, I thank long-time Needlework Pal Kathryn for letting me use a snippet of her recently released redaction of a Lipperheide design. Because this design is so difficult to work out, I am using her stellar rendition as a “poster child” for a complex design drafted out using standard tools. Kathryn uses Pattern Maker by Hobbyware to chart. It produces a standard grid, and is largely intended for cross stitch. But with a a bit of work its outlining feature can be used to depict linear stitching (back stitch or double running). With even more tweaking those outlines can be made thicker so they read better against the background grid. Here’s a snippet from a chart she recently released.

In the chart above, each little gridded square represents one “unit” for the stitcher. That unit is most properly worked as a single stitch, and depending on the chosen ground cloth can cover one prominent square of Aida or Monk’s cloth, or a count of anywhere from one to four threads of an evenweave (or near evenweave) simple tabby ground. Work over 2×2 threads of evenweave is the most common.
By contrast, here’s the same snippet, more or less, in my own drafting method:

In my method, instead of showing the background grid, I show dots – the “holes” of the ground cloth. If one is working with Aida or Monks Cloth, each hole corresponds to a hole on the fabric. If working with evenweave, the dots represent the spots where a needle would plunge (every 2×2 threads, 3×3 threads, whatever the stitcher chooses to work). I eliminate the grid entirely. The lines that make up the pattern are broken into direct representations of the individual stitches to be taken. I also have the option of flood-filling the background to indicate an area to be overstitched if a voided effect is desired, without obscuring the “counting dots” of the ground (the grey area on the left).
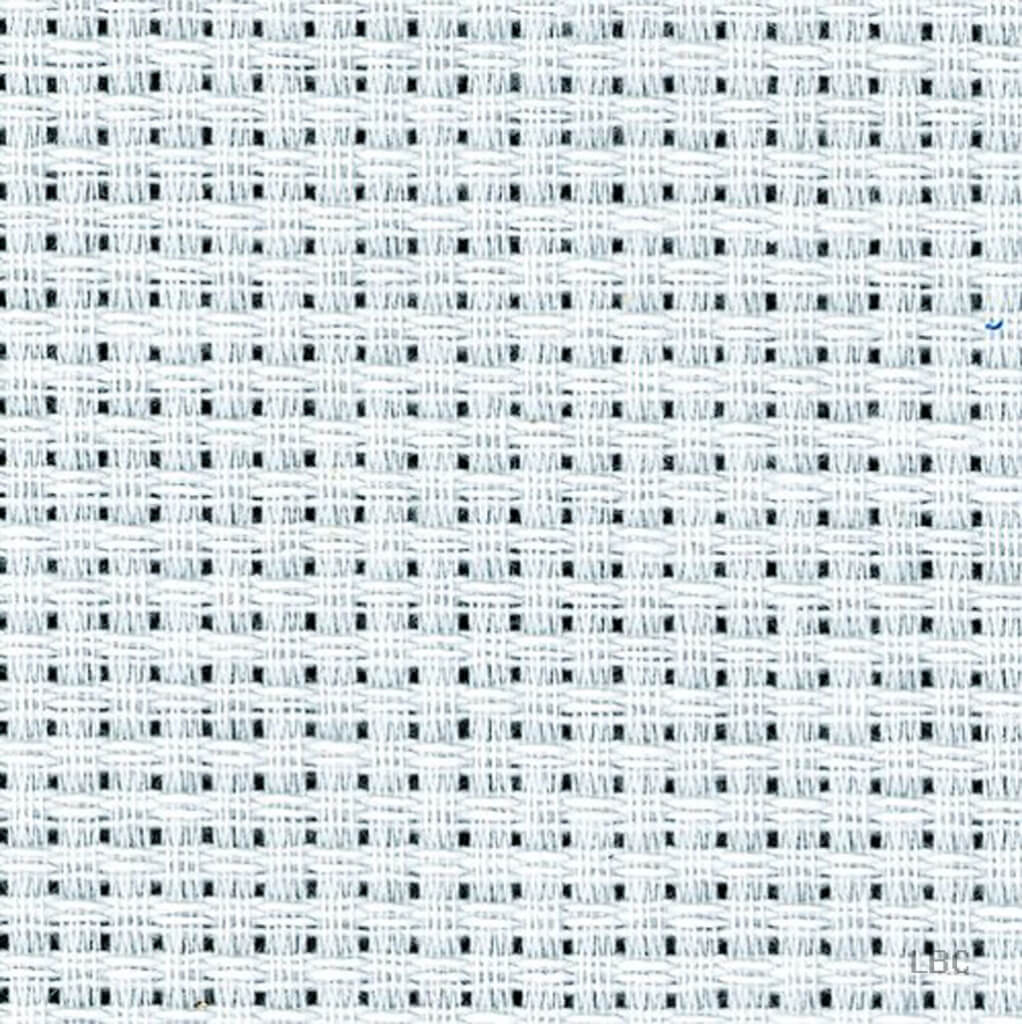
Quick aside: Here are the three types of grounds, but the samples are not to scale since Monks Cloth usually has fewer stitches per inch or cm than does Aida. Note though that both purpose-woven grounds have very prominent holes, and on each stitches are generally worked over 1×1 unit. Evenweave by contrast is undifferentiated, and stitches can be taken over any number of threads.
 Aida |
 Monks Cloth |
 Evenweave |
As far as I know, I’m the only one who uses the dot/line method of charting. I devised it initially in 1990 for The New Carolingian Modelbook, (released in ’95) and I’ve stuck to it ever since. Yes, it’s different. And for people who are VERY used to the standard grid – my method may be difficult to get used to. But I do think it is an improvement on legibility and a reduction in visual clutter.
One thing I’ve toyed with is instead of using shading to indicate areas to be covered in voiding, using it instead with a color to emphasize the count, for the folks who like to baste guide lines onto their ground, to assist in keeping their place. That would look something like this:
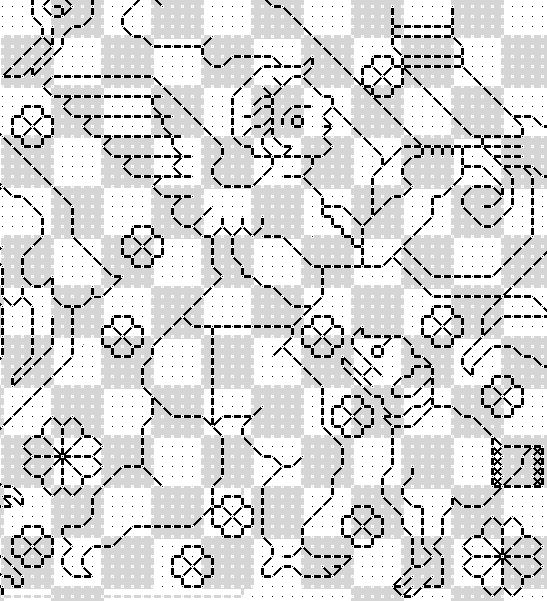
I don’t particularly care for the checkerboard look though – I find it busy and distracting. I think that if anyone is tied to guidelines they are probably better served by printing out the pattern and taking a highlight marker to it, rather than my trying to add that info for everyone.
On my full page graphs, I do indicate the centermost point, and provide margin hashmarks, major ones every 10 units, with minor ones between on the 5s. 5 10 15 20 25 and so on, with the longer major ones on the bold numbers, and the minor smaller ones on the ones in between. But I do not provide the numerals themselves.
How do I go about using my aberrant method? Sadly, it’s not supported by any commercial needlework charting program at either the consumer or professional level. Instead I use a standard open source drafting program – GIMP, and a system of templates and predetermined settings to match those templates. I offer those templates here free on String, along with a detailed tutorial on setting up GIMP and using them (read up from the bottom – the blogging software arranges my lessons in reverse chronological order). One warning – GIMP works on the same layering principle as other advanced drafting programs, assembling finished images from a stack of transparent or semitransparent layers, much the way that cartoon animators build up their on-screen images from stacks of cels. If you’ve used Adobe Illustrator or PhotoShop you will be familiar with that paradigm. If you’ve only used standard needlework charting software you may need to take some time to get used to the concept. But it’s worth it. I may not be able to estimate total thread consumption by color used from my charts (a handy feature of needlework-specific programs), but I have far greater legibility, and no limit to page size or chart scale.
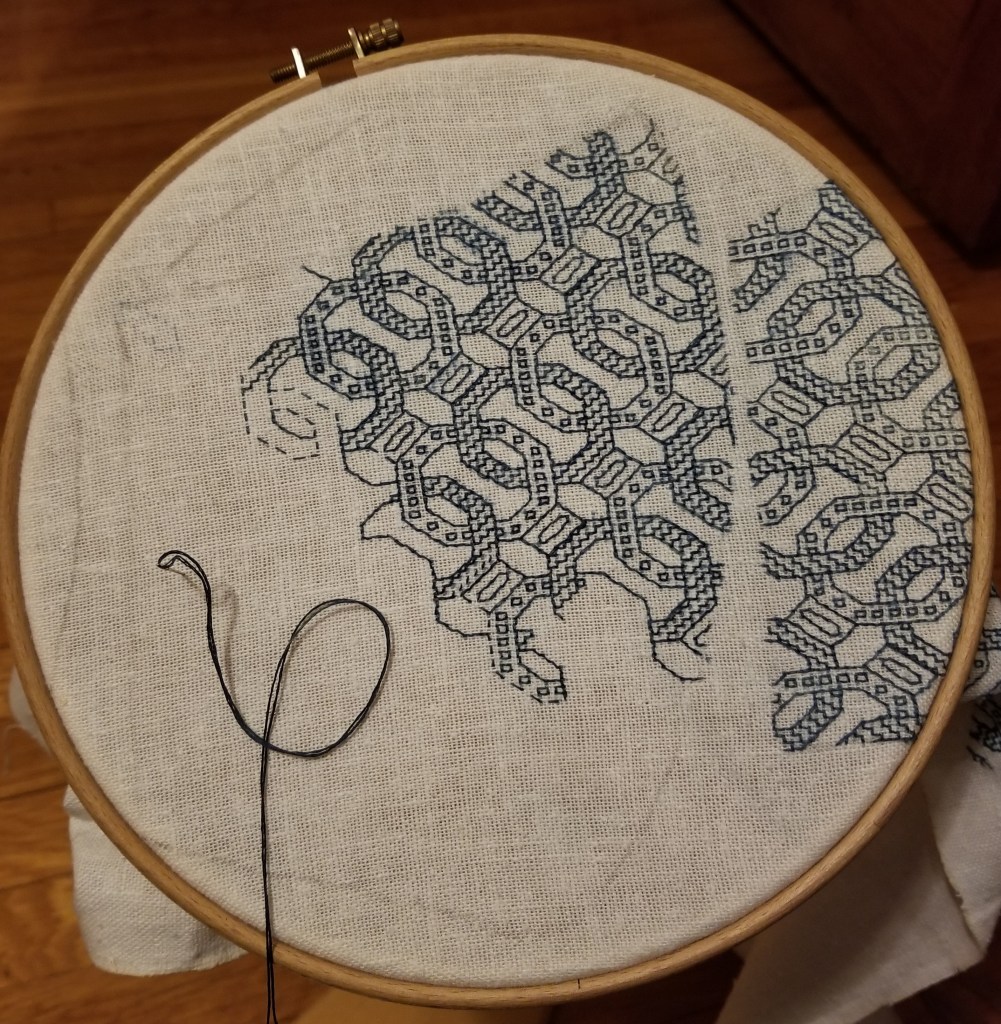
And progress on the current project? I’m about 40% of the way thorough the second side of the first mask. I’ve done a mental flip of the design, too. Not quite mirrored, but enough to complement across the center seam. Thinking of overstitching that center seam with one of the Elizabethan raised plaited stitches, too.
MASK MADNESS
I am working on a couple of things here at String Central. One I can talk about. The other is mysterious and can’t be shown yet.
First – the progress on the masks. First side of the first one about at the half-way point. I had to take a week off from stitching for family reasons.
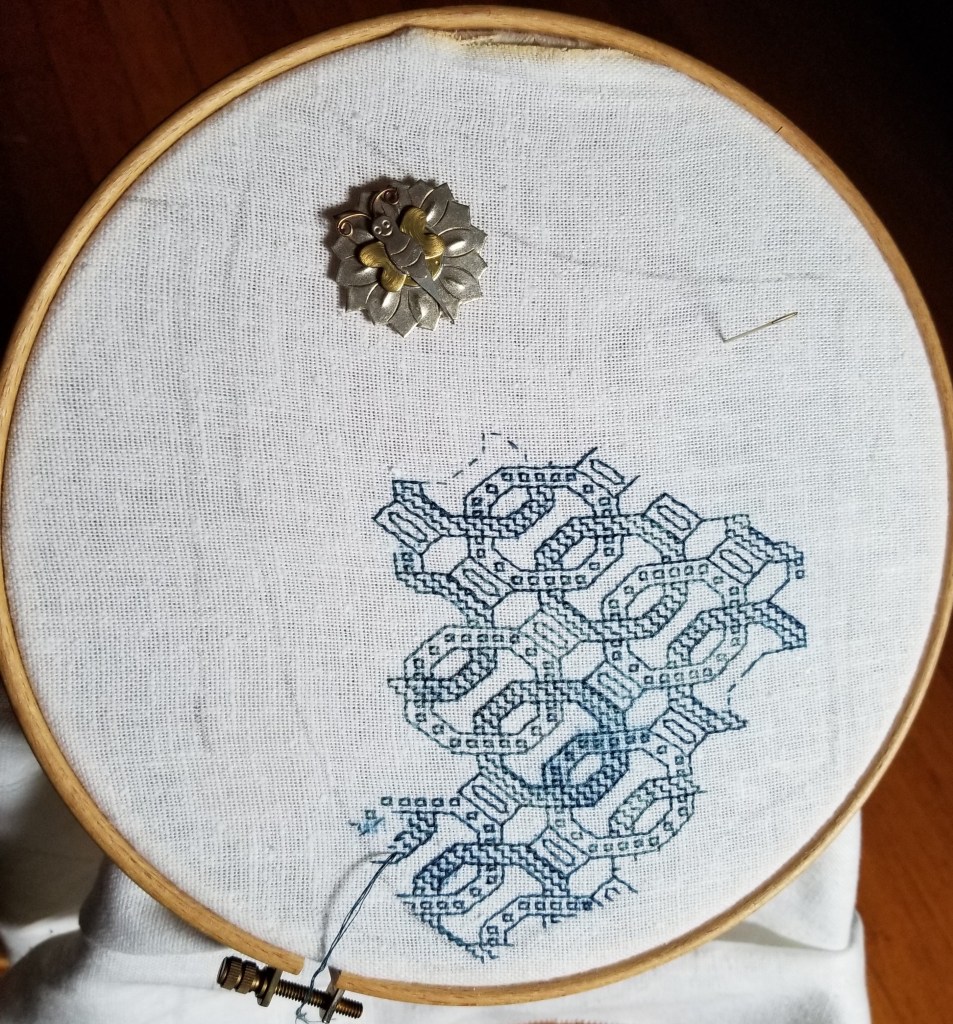
As anticipated, this early-experiment thread sheds dye, and picking it out leaves smudges. As explained before, I don’t care. These masks are not undying heirlooms of my house. They will bleed and spread dye during wash anyway. And I think that once that happens, the effect will be interesting.
The pencil outline you see barely traced onto the cloth is for a mask of this style:
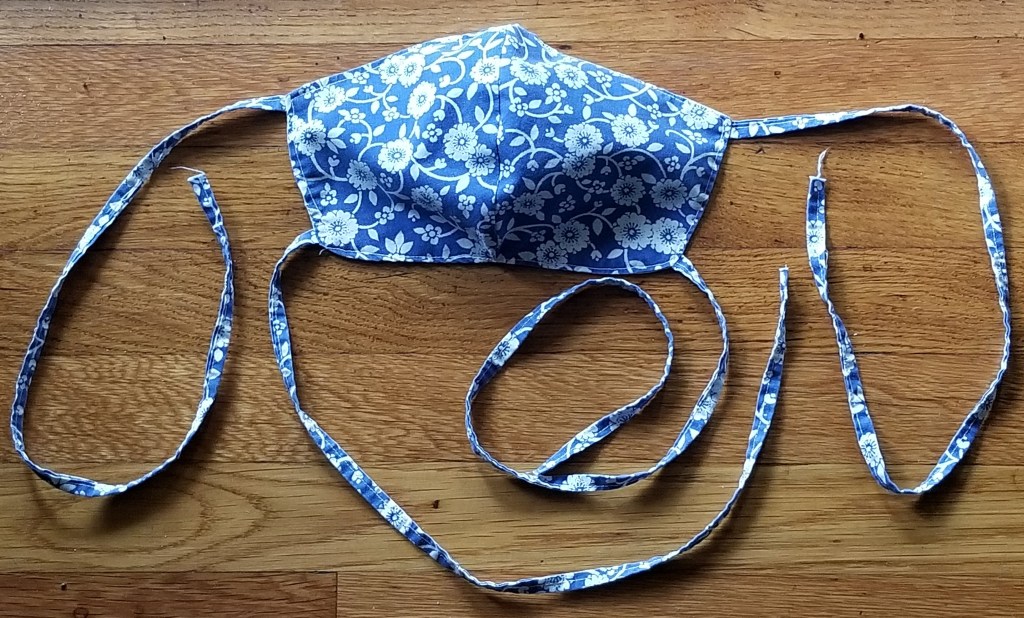
The source of the pattern is the two-tie fitted variant published in the New York Times, back in March.
UPDATE: The link above appears to lead to a page that’s behind the New York Times paywall now. But fear not! They in turn got their design from FreeSewing.org, The edition of the design The Times posted nests three sizes on one printable PDF page, a pretty standard approach for sewing patterns. But since their original issue in March, FreeSewing has expanded the range of sizes for their design. If you click here, you’ll go to a page that lists a full range, from toddler to men’s ultra, plus how-to directions. More sizes for sure, but still the same basic pattern I used.
I’ve made quite a few of these for family and friends. It’s a bit more complicated than the pleated kind, but it fits us better. I make the largest size for adults (what in the update is now called Men’s Large), and use two or three layers of tightly woven 100% cotton percale (well washed). I substitute a long double-folded strip of the same fabric for the ribbon ties called for in the original pattern directions – mostly for durability in the wash. Precision isn’t important for the ties – I cut a long strip on the grain (not bias) – about 5 to 6 feet long and about 1.5 to 2 inches wide (152 to about 183 cm long, and about 3.8 to 4.5 cm wide). I iron it in half, folded down the center of the strip (parallel with the long side), then iron the cut edges to the center fold. Then I sew down the entire length of the long strip, an cut it into four equal pieces for the tie.
The blue flowered one above is sewn from the last remnant of the sheet set I took off to college in 1974. I had this print in red and blue, with a matching comforter. Over time the set became curtains, tote bags, cushion covers, baby carriers and crib furnishings. Ever dwindling in size, and picked apart for reuse multiple times, I had just enough left for several masks.
The fabric on which I am stitching the fancy design is no where near tight enough to provide effective coverage, so it will be a top, decorative layer over a double thickness of the standard high-count bedsheet percale.
My ground cloth has four two-unit sets traced onto it (each mask has a left and right side, seamed together at the center). I intend to stitch as many as I have the patience to do, but not cut them out until all I will be making are complete. But the loose weave and the embroidery both pose problems. I could cut veeerrrryyyy carefully to avoid nicking the stitching, but even if I did, the edges of the rather coarsely woven ground would ravel either during assembly or more probably, when the things are washed between uses.
So I am deliberately stitching past the half-inch seam line, right up to the cutting line (my pencil mark). The seaming line is a half inch (about 13mm) inside the cutting line. That half inch is the seam allowance – the bit you see turned inside at the seams in most sewn items.
Before I cut these apart I will throw the entire piece onto my Ancient Elna sewing machine, and stay-stitch all the way around each mask piece. I will probably sew multiple rows of reinforcement, but all within the seam allowance area. Then I will cut out the individual pieces and assemble the finished masks. The stay-stitching should secure both the ground cloth and the stitching. Since the reinforced area will be turned under into the seam, it won’t be visible. And I may even go a bit further and apply one of the non-fray fixatives sometimes used to reinforce stress points in applique or quilting. But I’m not sure about that yet – I never use the stuff and I am a bit wary of how it will survive laundering.
Will this work? Stay tuned! Eventually you will find out.
HARSH FINISH, SOFT BEGINNING
Setting a new overland speed record for completion, I offer my Harsh Language piece. I began it on 22 August, and finished on 30 August. Eight days. Lightning fast, especially considering that I only stitch for an average of an hour and a half per day (more on weekend days, less midweek). Here it is in all its glory. I’ve redacted not the offending verb but the dedication, because as I’ve said before, the recipient wishes to remain anonymous.
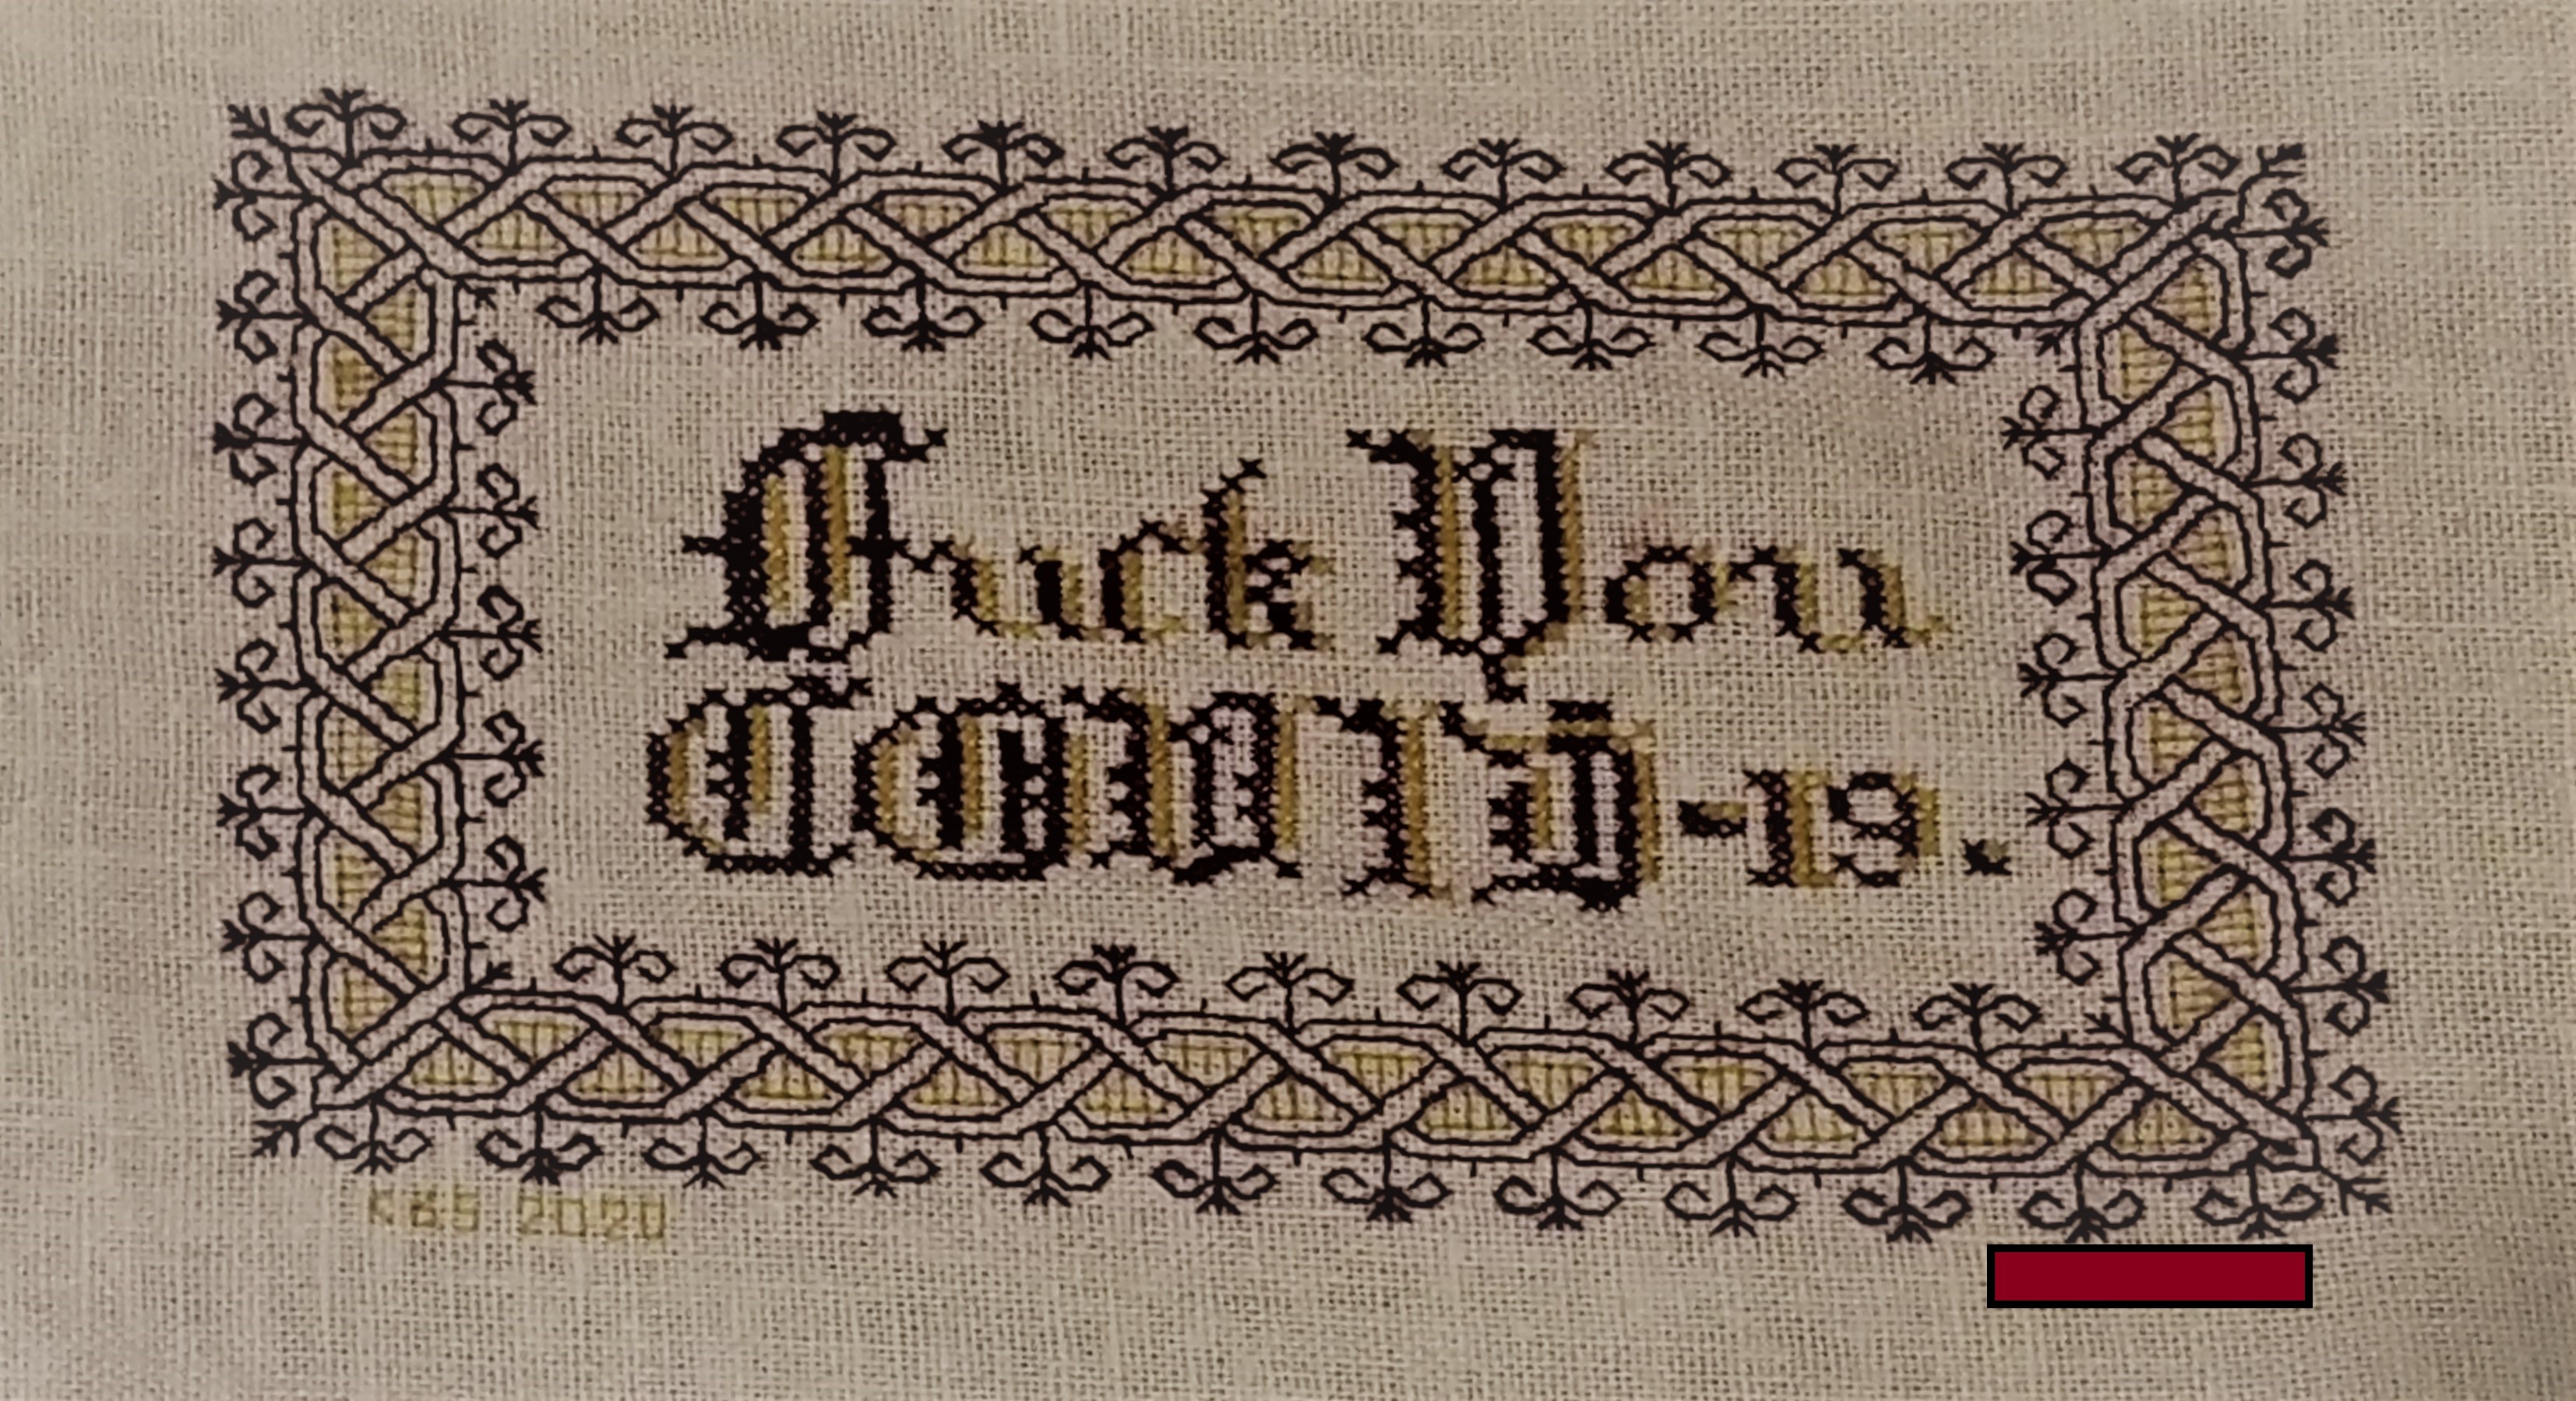
I did have fun playing with the wool. It was much thinner and more tightly spun and cleanly finished (read non-fuzzy) than tapestry/needlepoint wools, and a joy to use.
In addition to the hints I offered up before, I would add that even with the shorter length, care must be taken to let the needle and strand spin freely, in order to counteract the twist imposed during the stitching process. That twist can loosen the spin of the wool strand enough to denature it to the point of shredding. You can see a couple of heavy stitches in the piece, where I was nearing the end of the strand, and the thread had “bloomed” but I kept going.
And yes, the weave of the ground wasn’t quite proportionally even. I don’t remember where this stuff came from – purchased retail, found at a yard sale, acquired as a gift – but it’s been in my stash easily since 1996, and has a yellowed selvage edge to prove it. But aside from that flappy edge (no where near this stitching), it was sound. It’s probably a cotton/linen blend. You can see the skewing in this detail. Horizontal stitches are just a tad wider than verticals, and diagonals are not 45-degrees.

What’s next?
Well I pulled out this remnant, and used about a third of it on this little piece. The remainder will go to become decorative outer layers for some masks. This open weave fabric is pretty useless as any sort of barrier, so I will line the masks with two or more layers of nice, tight 100% cotton 300-count pillowcases (retired from their prior duty). They are navy blue.
I will be using more thread provided by Stealth Apprentice for beta-testing. It’s luscious silk, dyed in one of her early indigo vat experiments. The color of the thread ranges from a nice deep denim down to Wedgewood, and was the child of serendipity, not a planned effort to produce a variegated.
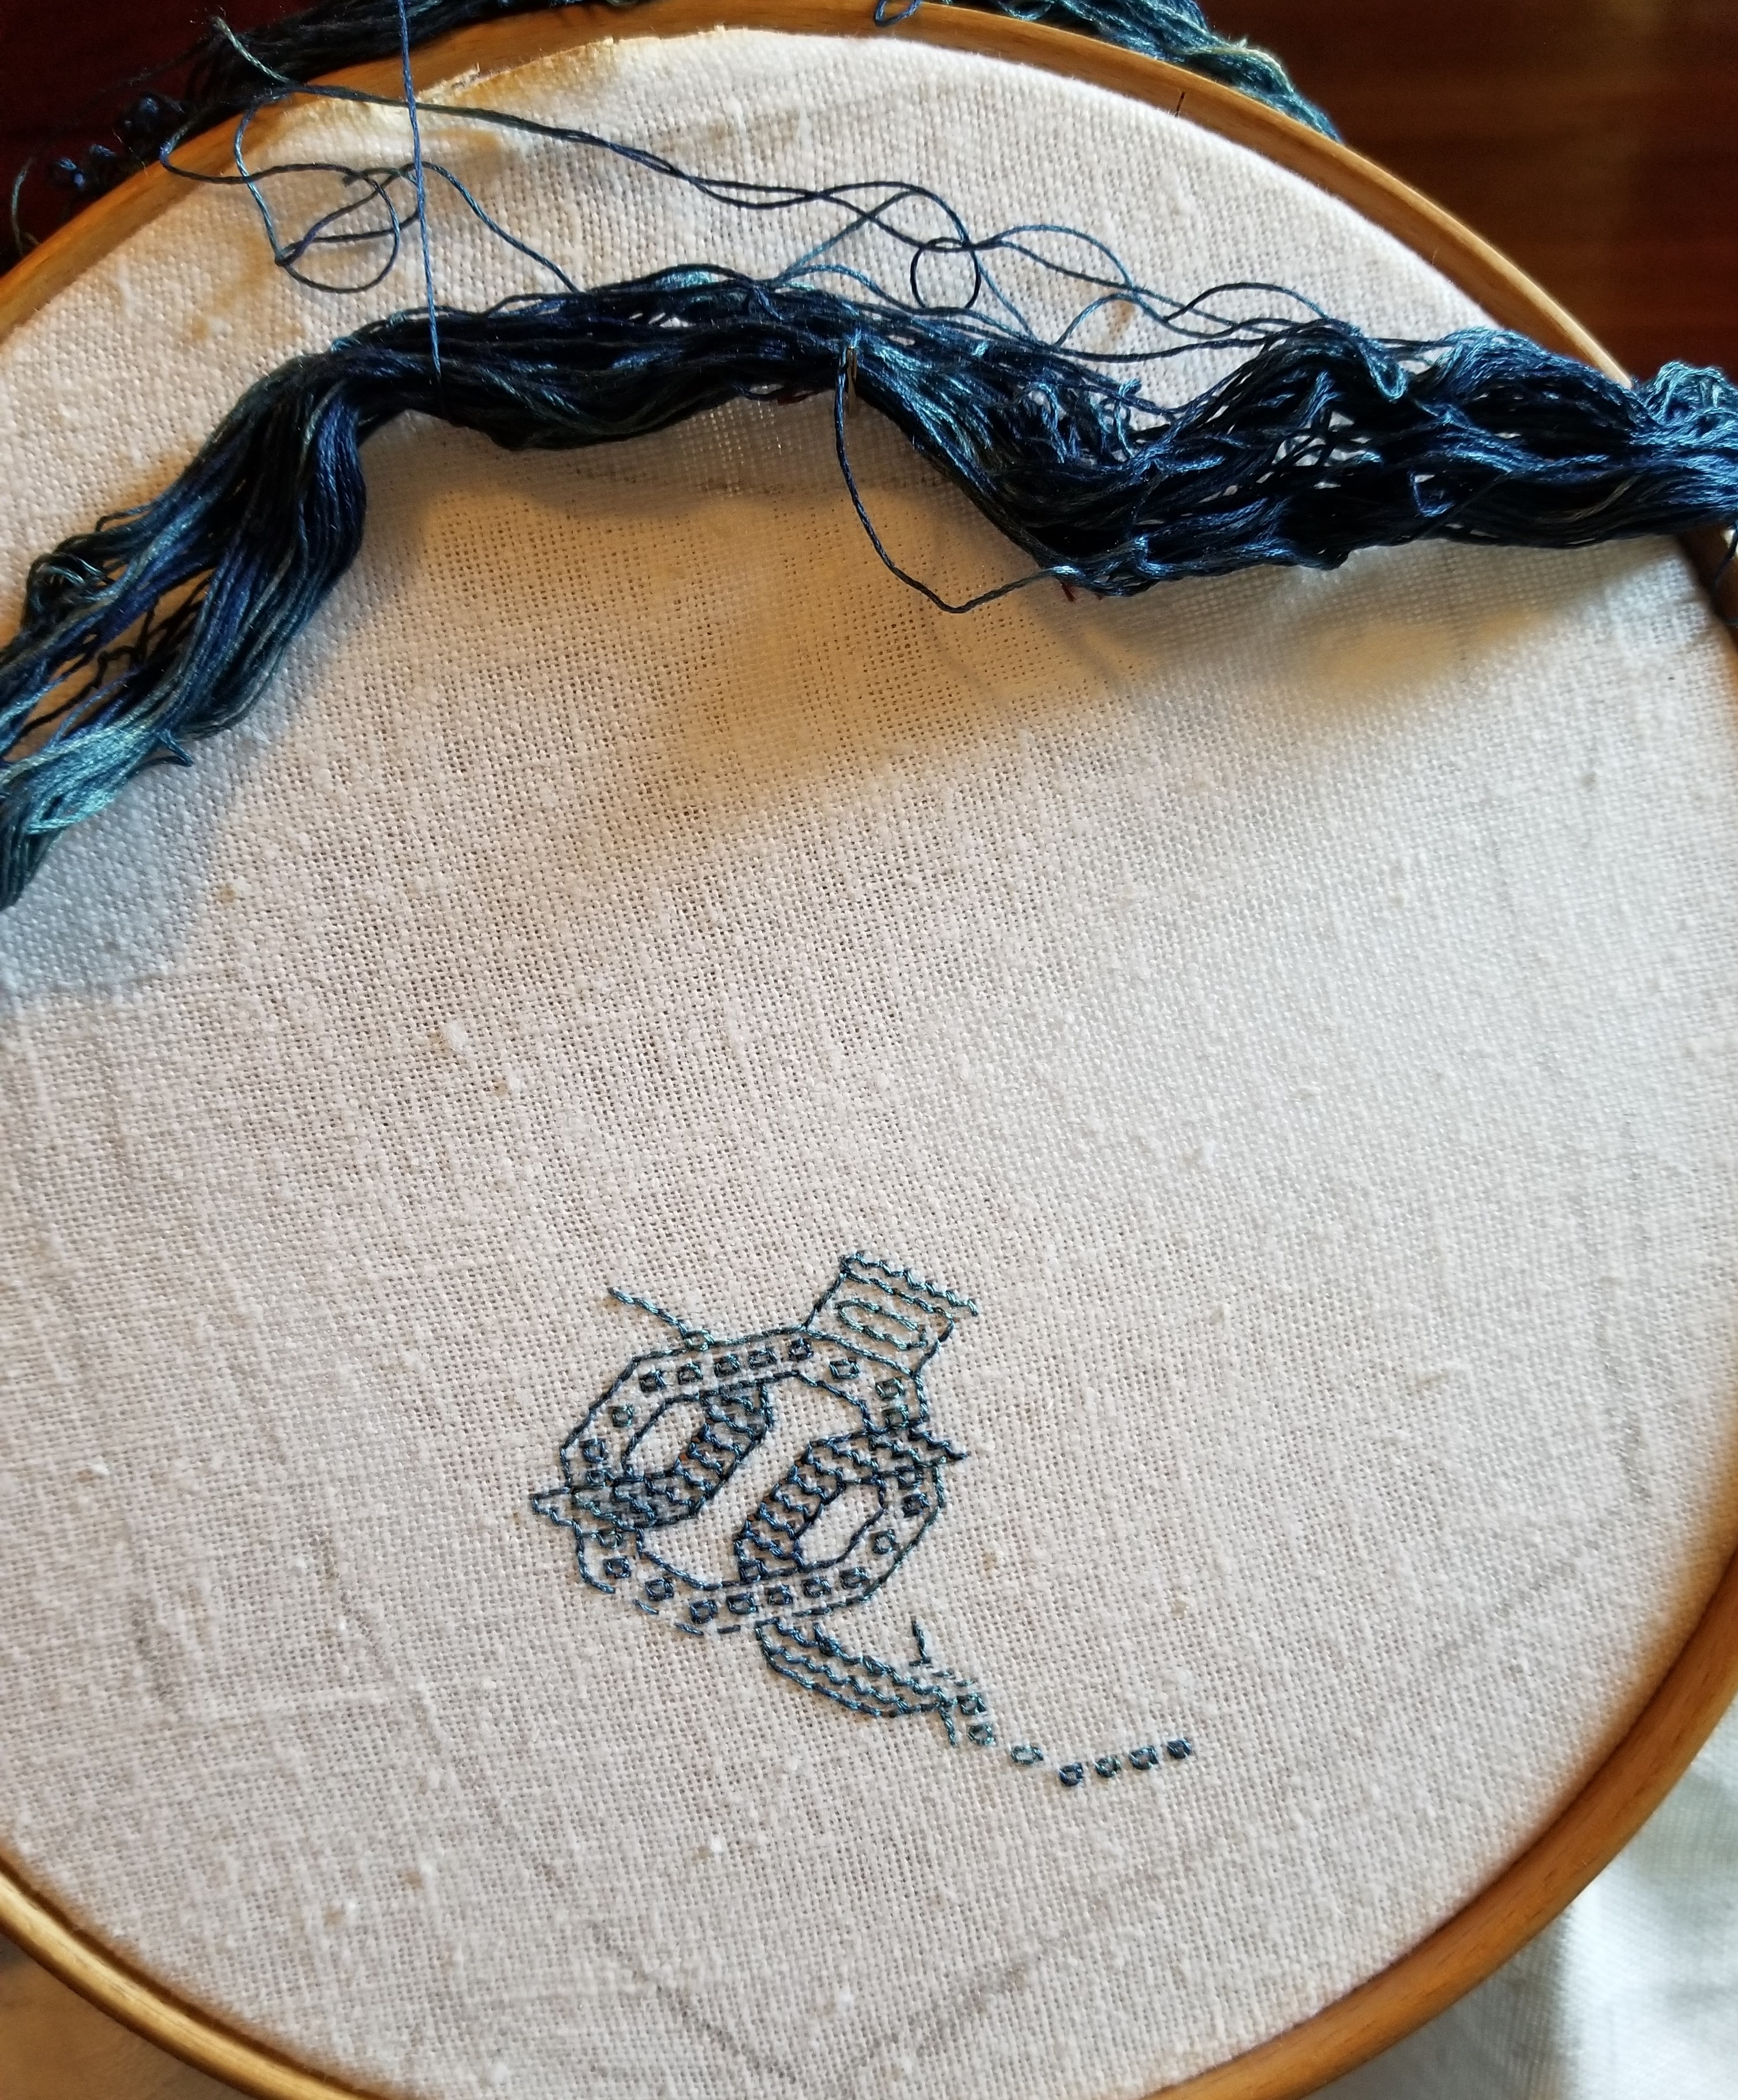
I admit I put this hank off because it posed some minor problems. It’s a multi-strand floss, but during color processing it became rather matted and tangled (it was before she learned better methods to secure the hanks during dyeing), and the indigo itself does crock quite a bit, leaving blue fingers and traces on the ground as it is stitched. However this blue was an very early experiment long before she went retail with her products, so all is forgiven.
To deal with the matting I’m using the full strand and not trying to separate the plies. To tame the tangle, instead of trying to wind it I cut the skein in one place, and looped it over a stick. I’m teasing out strands one by one at the loop, and using them in full “cut length.”
There can be no mistakes with this stuff – it does leave very evident marks if picked out. And I fully expect the color to migrate onto the backing during washing. But that’s o.k., too. I think the look will be quite interesting after haloing. The navy inner layers may peek through the somewhat loose weave and camouflage some of that halo.
Challenges considered, I am very glad I saved this thread until just the right project appeared. This piece will certainly change over time as it is subjected to my ungentle care. Masks after all need vigorous cleaning. The blue may bloom onto the ground cloth. Such leeched color may dissipate over subsequent washes, or the threads themselves might do a old-jeans fade. All are anticipated and none are unwelcome. So while the thread might not have been optimal for some other more formal projects, it’s spot on perfect for this one.
I’ve got enough fabric for at least four masks. Possibly five. I’m not sure if I will do them all in this blue, or I’ll play with other threads – either monochrome or in a wild mix (I think there’s only enough blue for two, anyway). I don’t know if I’ll stick to all-over designs. I might for example doodle up one in an inhabited blackwork design – the scrolling flowers with heavy outlines, with patterned or speckled fillings. I’ll probably skip metal threads and spangles though, due to the laundering requirement. Or I may do one with scattered, themed spot motifs – insects, for example. Or I may do several “zones” and use different fillings in each. Or I’ll work band designs on the diagonal. The possibilities are endless, and (sadly) I don’t see the need for masks going away any time soon.
Will I make all four? How will they play out? Will something else catch my easily distractable eye, and I’ll do that instead? Will I keep these or give them away? Stay tuned. (And they say needlework has no excitement, mystery, or suspense.)
Oh. And there is no “bad” thread. There’s a perfect project for just about anything that can be used. I love this blue silk and I will enjoy stitching with every inch.
 String-Or-Nothing