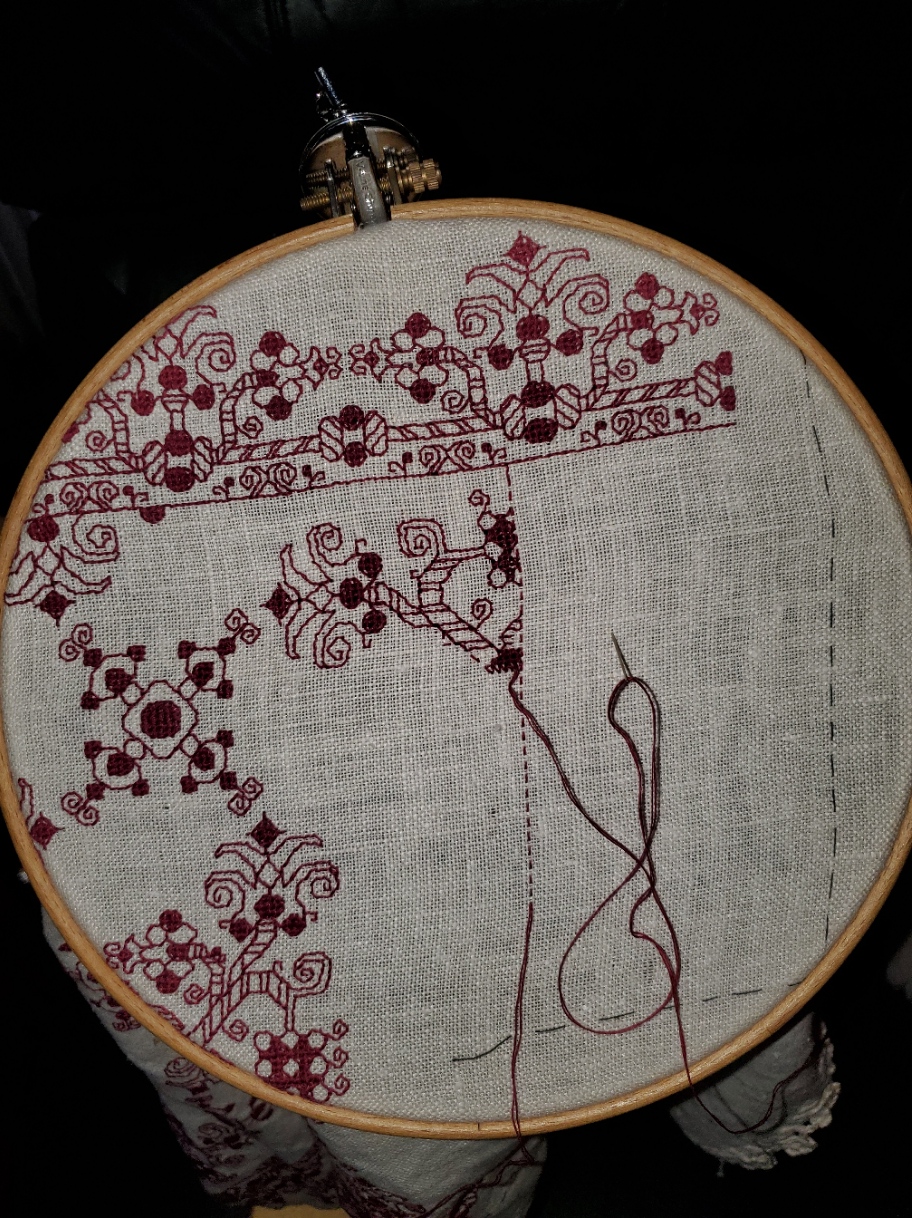
FIELD OF FLOWERS FOREHEAD CLOTH
My quick project gets off to a flying start. I’m about 20% done already. I started out with my hand-held 6 inch hoop to get close to the irregular corner of my linen scrap, but now have moved back to the larger 8 inch sit-upon.

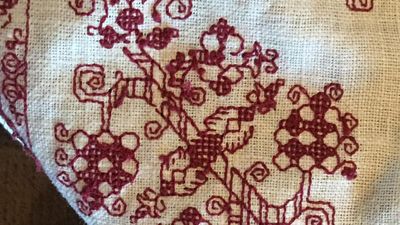
The pattern itself is an original doodle destined for the next volume of Ensamplario Atlantio (as usual, no ETA on its release yet, but I’ve got the first 8 pages done). It requires a bit of attention, the diagonal columns connecting the saltire flowers carry twists in various directions, depending on where in the design they are, but overall the pattern itself is more repetitive than difficult. So to up the interest factor, I’ve transformed my original strip/border/edging layout into large, interlocking hashmark-shaped motifs, and am working each one in a different color. The final will have a patchwork meets jigsaw puzzle effect, kind of like a kid’s puzzle mat.
The other item of interest in this one is the thread. After reading about how others were using Sulky, a single ply hard twist thread intended for both hand and machine embroidery, I decided to give it a try. The ground is roughly 32 threads per inch linen, give or take. I am using a double strand of Sulky 30 weight.

First impressions are quite good. The 500 yard spool put-up is very convenient, as is not having to separate plies as with floss. It works up very quickly in linear stitching – the hard twist, firm nature of the thread eliminating the occasional snags and catches that can slow down softer, more friable floss and silk, when stitching with one hand above and one below. It also is amenable to being used in much longer lengths than regular embroidery floss. Longer thread length means fewer stops to end and begin new threads, so that speeds up stitching a bit. And it makes very crisp lines and corners. The hard twist paired with a blunt point needle makes the junctions where stitches cohabit easier to keep clean. There’s far less chance of a split stitch when stitching back up or down through a hole that is already used by a previous stitch, even when using (near) evenweave linen. I also like the way the dense, round thread keeps its “height,” with the stitches standing proud of the surface, rather than splaying out like floss strands do. Of course that means that floss strands provide better coverage for other types of stitches, but for linear work, clean lines and sharp corners take precedence. I try to capture the “depth” of the stitches below.

On the down side, I do note that colors do crock a bit onto the ground cloth even though the thread is not fuzzy. This is mostly evident when mistakes are picked out. Hints of the previously stitched color remain. To be fair, floss does this too, with the added annoyance of more stray fibers. My Silly Putty kludge works well enough on the color halo left when picking out Sulky, though.
So in my opinion Sulky 30 (double stranded) on 32 count linen is a good pairing. I will continue to explore its use, and report back on wash properties and durability. I would even go so far as to recommend it for folk who are interested in trying double running stitch on medium to high count evenweave. I think the properties outlined above would make it easier for those just starting out on their own blackwork journeys to achieve superior results.
Please note that I pay full retail for the materials I use. I do not accept freebies in exchange for reviews, nor does String participate in product placement schemes. Opinions here are entirely my own.
DIZZY GRAPES DONE!
A finish. I began at our Cape place around 14 July, and finished last night at the Cape place on 25 September, about 73 days of stitching, working an average of about 2 hours per day.

To recap, this was a vintage dresser scarf, clearly cut down and re-edged from some older piece of linen. It was very well washed, and although it had no broken warp or weft threads, there was a lot of blooming, where the linen breaks down a bit, with threads fused together and some slubs. The count wasn’t consistent, with some threads being much thicker than others, but spot measurements ranged from 28 to 34 threads per inch, mostly averaging out to between 30 and 32. It was ever so slightly skewed, but no where near as badly as other non-evenweave grounds I’ve worked lately.
The pattern has two parts – the main field which I redacted from a 17th century Italian cushion cover held in the Hermitage Museum, shown below (Accession T-2736 in case the link breaks). The companion border I doodled up myself.

Amusingly the skew count of the ground used in the original is greater than the skew of my vintage linen. You can see that clearly in the smaller motifs which chart out as squares, but appear taller than they are wide. Also my redaction norms the spacing of the motifs, which in the original does vary by quite a bit. But I preserve the “creep”. Look at the partials around the edge of my piece. They rise from/sink into the static edge line, each iteration of the swirl being offset from the previous one by a stitch or two in each direction. You can see the same thing on the original.
I stitched the design in garnet cotton (DMC #815). It took almost all of seven skeins. I worked the linear bits in double running, and the solid bits in a variant of Italian four sided cross stitch (basically cross stitch, but in a box). The version I chose is NOT double sided, instead it produces a grid on the reverse. The only reason why I chose that version is that I hadn’t attempted it before. I have no historical reason to pick it over the more usually done fully two-sided version. The full double sided version is more or less the same stitch that forms meshy totally overstitched grounds, but done “gently” as surface stitching, and not pulled to the max to both totally encase the ground threads and produce the characteristic mesh ground found in so many museum artifacts. Here’s my back showing the grid structure of my single-sided interpretation.
On the whole I am quite pleased. My goal of making a splendid runner for our sideboard has been achieved, and I can retire the old, ratty placemat that’s there now. It’s The Resident Male’s favorite spot for opening bottles of wine, and now he can do so in a style appropriate for a Renaissance princeling.
Things I would do differently. Hmmm…. I now wish I HAD done the solids in the reversible variant. Not because I want to have a true double-sided piece, but because I want to play with the challenge of that stitch some more. (Additional future experiments are warranted.) I’m also not entirely pleased with leaving the original dresser scarf edging on this. For one, the non-rectangular nature of the cloth is more evident with my on-grain, symmetrically sized stitched area. It bothers me. But consensus seems to be to leave it alone. So I will. For now at least.
And so I move on to an interim project. I have a wild departure queued up for my next big thing, but the materials to do it aren’t here yet, so I digress.
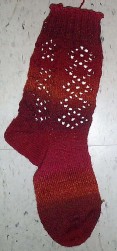
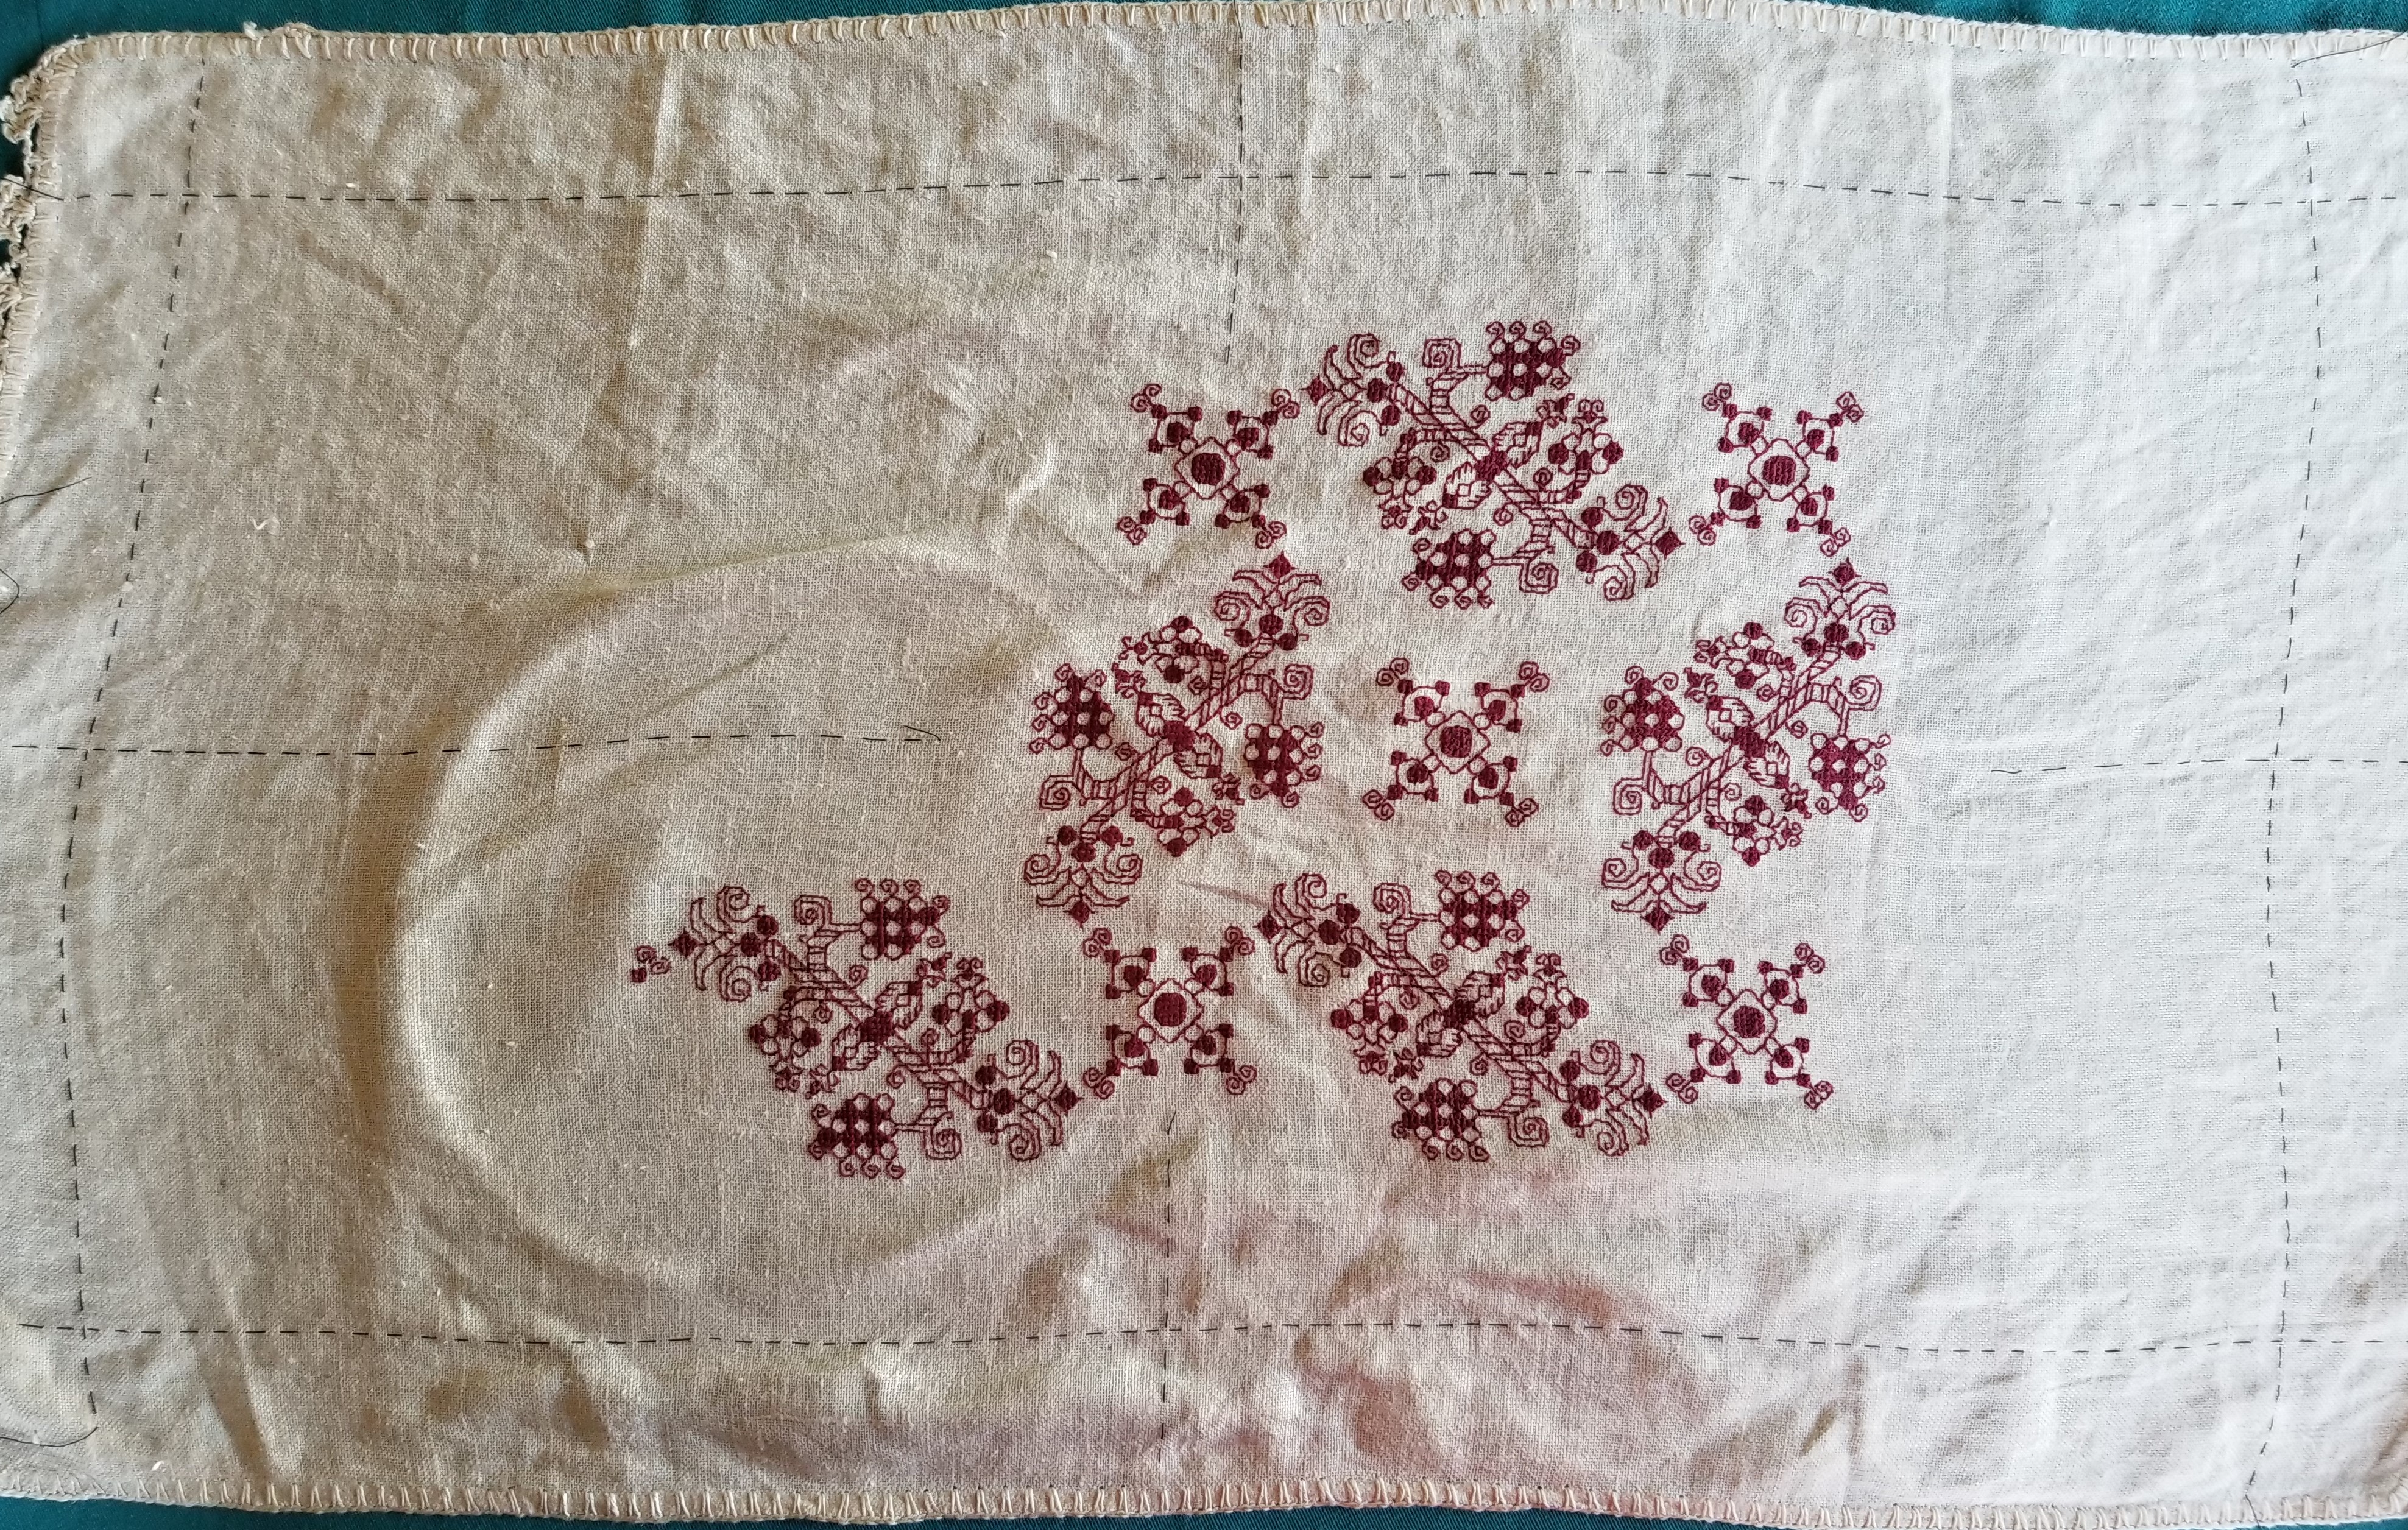
I want to make another forehead cloth. I really enjoy wearing the two I did a few years back. They are more fun than bandannas or scarves, and do a good job of keeping the hair out of my eyes. I have a piece of linen scrap I am considering. It’s very densely woven though at about 32 threads per inch, and I am not sure that it will show off my chosen design to good effect. (I do have an airier alternative, but I prefer the look of the scrap.) I don’t remember whose leftover this is, but send thanks again to The Anonymous Donor. As you can see I’ve plotted out the corner of my triangle.
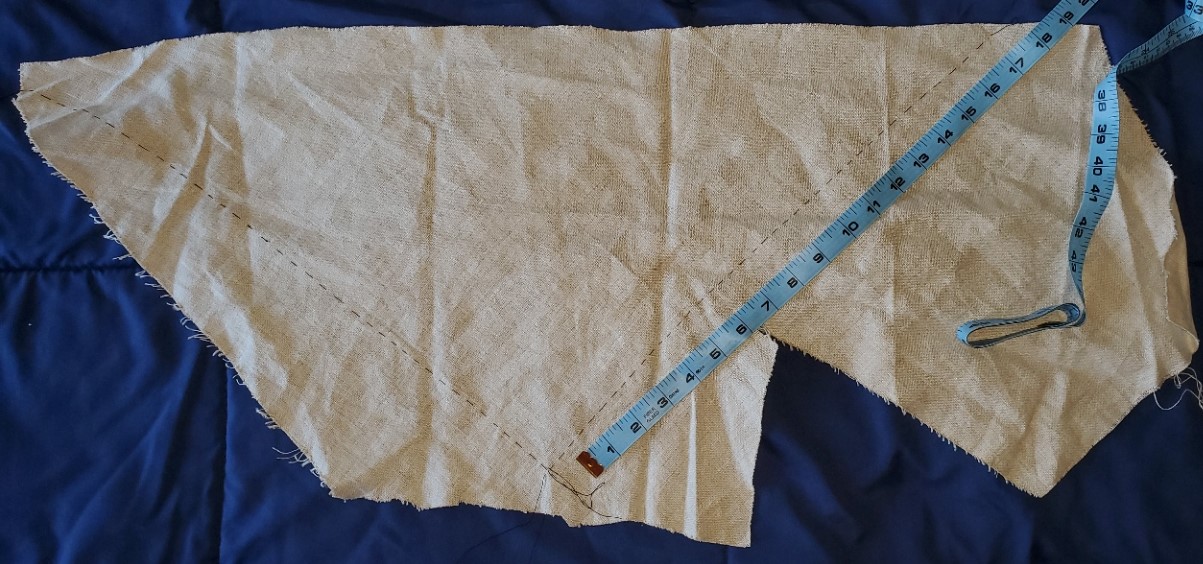
There is plenty of real estate on this piece of spill, left over from Anonymous Donor’s sewing project. I’m aiming to make something midway in size between the two forehead cloths I already have. Something in the range of 14 inches for the non-hypotenuse sides.

Shameless plug department: These two pieces have been worn heavily and washed without mercy for the past three years, as can be seen by the frayed ties. But look at the stitching, it’s as good as the day I finished. I did it in the stranded silk thread hand dyed by my apprentice using a historical recipe. NO fading, no breakage in spite of the ground’s distortion from being stretched in wear. No harm to the ground beneath the stitches from the dye used. It’s a small batch item, and not always available, but when it is, it’s worth it. Highly recommended.
Back to the project at hand. I will be stitching a rather dense design I recently doodled up. I’m working on Ensamplario Atlantio III, and that pattern will be part of it. And I will be trying out Sulky thread, a spooled mercerized single strand cotton sold for hand and machine stitching. Possibly in polychrome. I have black, red, blue, and green, so I have scope to play.
More on this one as it develops, of course…
HORN TOOTING
We’re now in the run-up to the holiday gift-giving season. New folk reading here may not realize that in addition to stitching I also knit. And I have dabbled in knitwear design in addition to embroidery design. I didn’t pursue knit design intensely because selling patterns to publications and yarn houses requires adherence to deadline, production of the photographic model, working up a wide range of sizes, and use of yarns/colors I did not always favor. But I have released some patterns over the years that make excellent, quickly made gifts. Many of those are here on String-or-Nothing, and are free downloads. Here’s a round-up of them.
Chanterelle
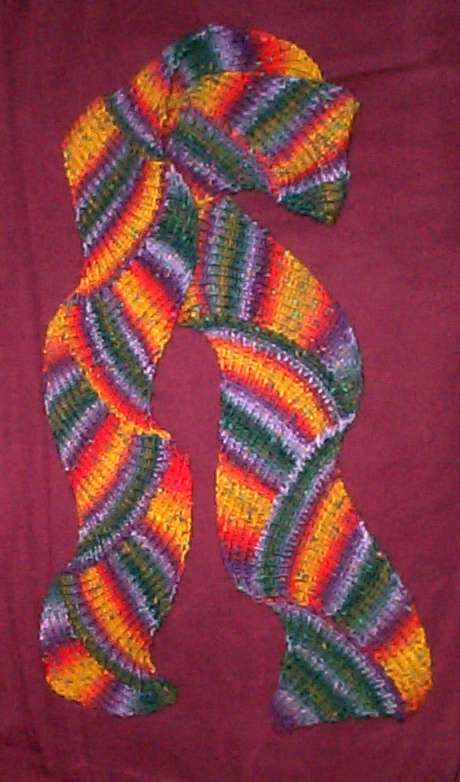
Chanterelle is a scarf requiring just one skein of variegated or self-striping fingering weight or sock yarn (aka 4-ply). For me it’s like potato chips, hard to make just one because every ball produces a different and unexpected result.
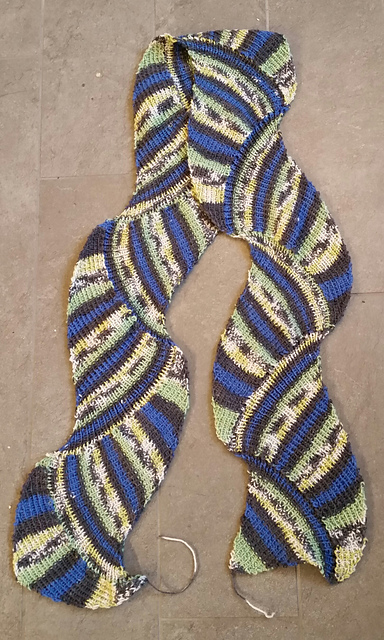

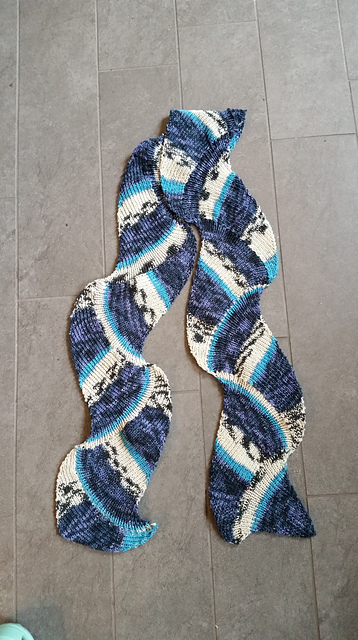


The flag scarf was especially surprising. That one was from a stash-aged ball of Schoeller and Stahl’s Fortisimma Socka Color, #1776. I gave it to a friend who wore it to cheer on her kid in an international sports competition. By contrast the glowing purples creams and blues next to it was worked up from a single ball of Schoppel Zauberball Crazy Colors.
Other notes on knitting this one up include that it uses US #5s, making it less dense than the same yarn knit into socks, and that blocking is NOT recommended. You want to preserve those gentle curves.
You can download the pattern PDF directly here, and also find it under the Knitting Patterns tab, at the top of every page here on String. It also has a Ravelry page so you can see what others have done with the thing.
Kureopatora’s Snake
Not everyone loves working with fine yarns. Here’s an alternative.
This was the original expression of the idea I adapted into Chanterelle. It’s exactly the same pattern, but designed for a heavier yarn. Noro Kureopatora was a DK, and one of the first wildly variegated yarns I ran into and this one evolved from idle play with some leftovers from another project. This pattern works well for DK, Worsted, and Aran weight (native label gauges of 22 to 18 stitches over 4 inches or 10 cm). At DK gauge on a US #6 one scarf needs about 250 yards of yarn. A bit more for the heavier gauges or for a wider scarf.
Kureopatora’s Snake can be downloaded here, or found under the knitting patterns tab I mentioned before, and a Ravelry page.
Kombu
Kombu, named after the Japanese name for Kelp, also features gentle undulations, but it’s a lace patterned piece that starts with a small bit of edging. The main body is picked up from the edging and knit up from there. The same edging is used left and right – worked simultaneously with the scarf body. When the desired length is achieved, the same edging is worked across the live stitches of the top. I’ve done it several times in DK, sport, and worsted weight. It’s dreamy in luxury fibers, and just as nice in inexpensive yarns and even cotton. Pick something that’s not too fuzzy for this one though, the drama is best seen in a yarn that shows crisp stitch definition.
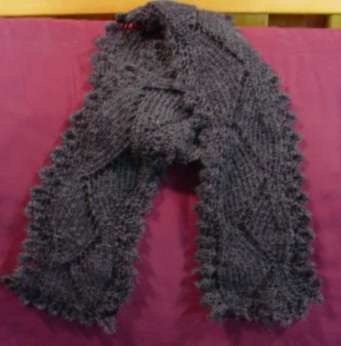

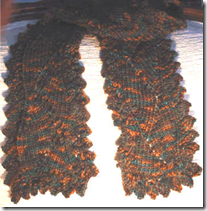

The blue one is in Marks and Kattens Indigo Jeansgarn, a guaranteed to shrink and mellow DK weight 100% cotton. The grey is in a cashmere blend. The red is a stash-aged nubbly worsted weight cotton/wool blend – possibly a mill end from Classic Elite circa 1997. It even looks good in a variegated, although truthfully I prefer the solids for this one.
Click here to download Kombu. Like the others it’s on the Patterns tab, although that page also has a link to a German language translation of the thing. Kombu also has its own Ravelry page.
Spring Lightning Lacy Scarf
This one is a bit more of an involved knit that the ones above. It’s more open, worked in lace weight yarn and like all lace requires savage blocking. I’ve done it in white and black. I don’t recommend the black sequin bearing mohair, but the white alpaca/wool blend from a small farm boutique producer was a delight to knit.

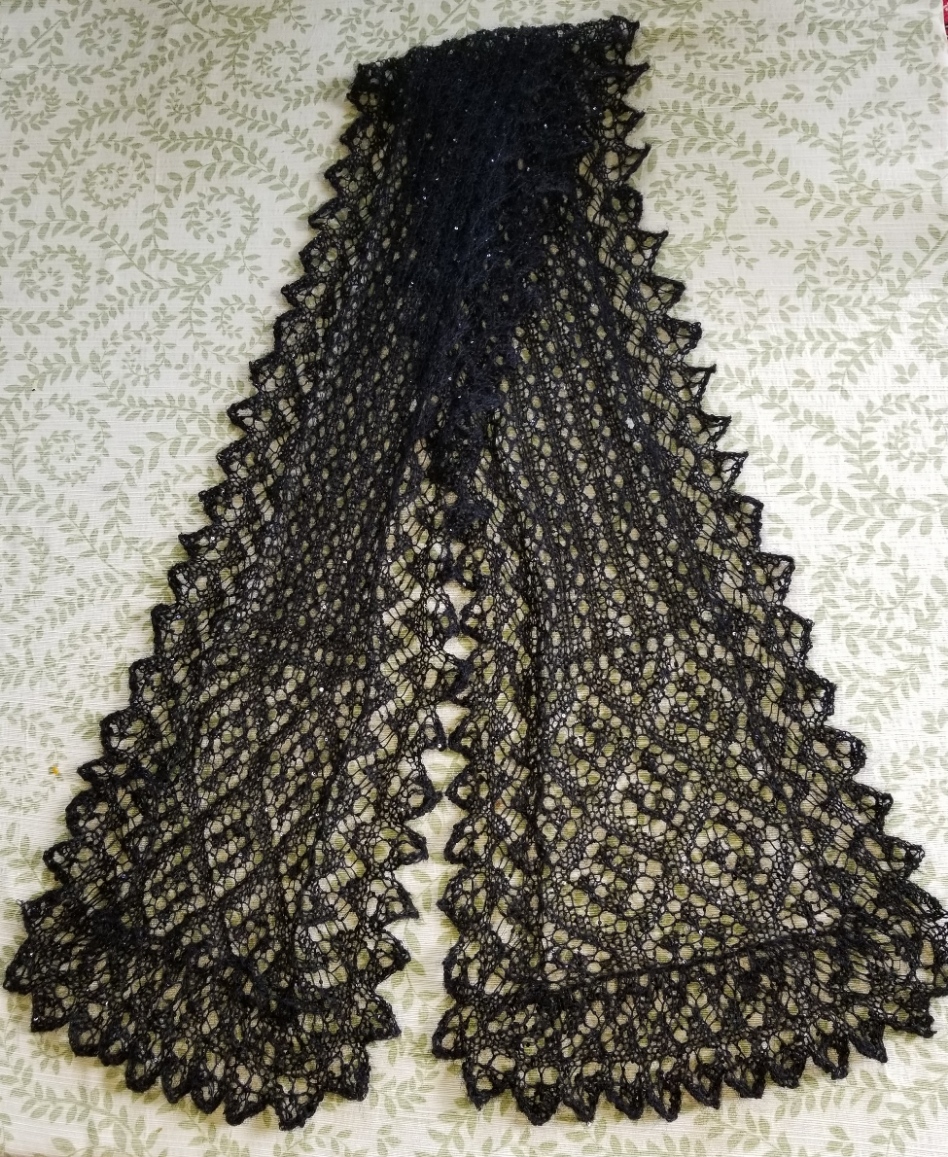
For this one the center panel was completed first, and then the edging was knit along the ends and sides after the center was complete.
Spring Lightning is here for direct download, and is also on the Patterns tab. It too has a Ravelry page, although so far I’ve been the only one to attempt it.
Darth Scarf
Back when the Resident Male was running every day he asked for a scarf that wouldn’t flop around. I took a really soft alpaca wool blend, a worsted weight, and using a simple Shaker rib, knit him a deeply corrugated tube to wear as a gaiter or cowl-style scarf. He named it because in black the ribbing pulled up over the nose and mouth looked vaguely Vader-like. This one is a very quick knit and uses about 300g of yarn.

Sadly, I really don’t have a good photo of it. Think of a deep, thick turtleneck, divorced from the rest of the sweater.
You can download Darth Scarf here, and on the Patterns tab. Its Ravelry page is here.
Knot A Hat Earwarmer Band
This one is still a favorite of mine. It’s my go-to for heavy outdoor labor in the winter, being warm enough on the ears, but not a sweat-inducing box for one’s head. It has however inspired quite a bit of creativity, with folk adapting it to be a dome-shaped hat or cornered toque by continuing to work a solid color crown after completing the stranded colorwork section. My own is double sided, but not double knit. After I finished the knotwork pattern, I did a couple of turning rows in purl, then did the same width in simple stripes of the two colors. When I was finished I turned the striped section inside and seamed it to the cast-on row.
The knotwork design isn’t Celtic – it’s adapted from “Opera Noua composta per dominco da Sera detto il Francoisino,” by Matteo Pagan and Guliemo da Fontaneto, a modelbook published as a resource for embroiderers, printed in Venice in 1546. The same design appears in several other similar works from that general timeframe (pattern sharing and pattern piracy are not new phenomena).

Knot a Hat is written for a 4-ply yarn. Something a bit loftier than standard hard-spun classic sock yarn would work best. It would be an excellent vehicle to show off the gorgeous hand-dyed fingering weight yarns produced by smaller, independent dyers.
Download Knot a Hat here. Or grab it from the Patterns tab, above. The range of adaptations into a true hat are on the Ravelry page. To see them go to the sidebar “About This Pattern” box, and click on the line “19 Projects in 110 queues”.
Socks
Socks, I got. Lots of socks. In everything from light fingering (3-ply) through Aran weight (12 ply). I even have a sock lapel pin knit from reinforcement thread. But I do specialize. My socks are all done the same way though – toe up with a figure-8 toe, a plain foot, and a short rowed heel. Then Something Happens for the ankle part (lace, ribbing, textured stitches, stripes, stranding, whatever tickles my fancy), and ended off with simple ribbing at the top. I usually try to use K2P2 ribbing for the cuff, but I enjoy trying to mate it organically with the texture pattern below, so it’s occasionally eccentric, with bits of K1P1 in there.
I know folk are hesitant about the figure-8 toe, but I don’t find it a burden. Use any toe you prefer. Also note that while I write for DPNs, it’s easy to do all of these patterns on two circular needles, or using the Magic Loop method. And since the heel is totally symmetrical, you COULD start and knit cuff down, and end with a traditional toe. In any case, these patterns are VERY easy to modify and adapt to use your choice of ankle treatment.


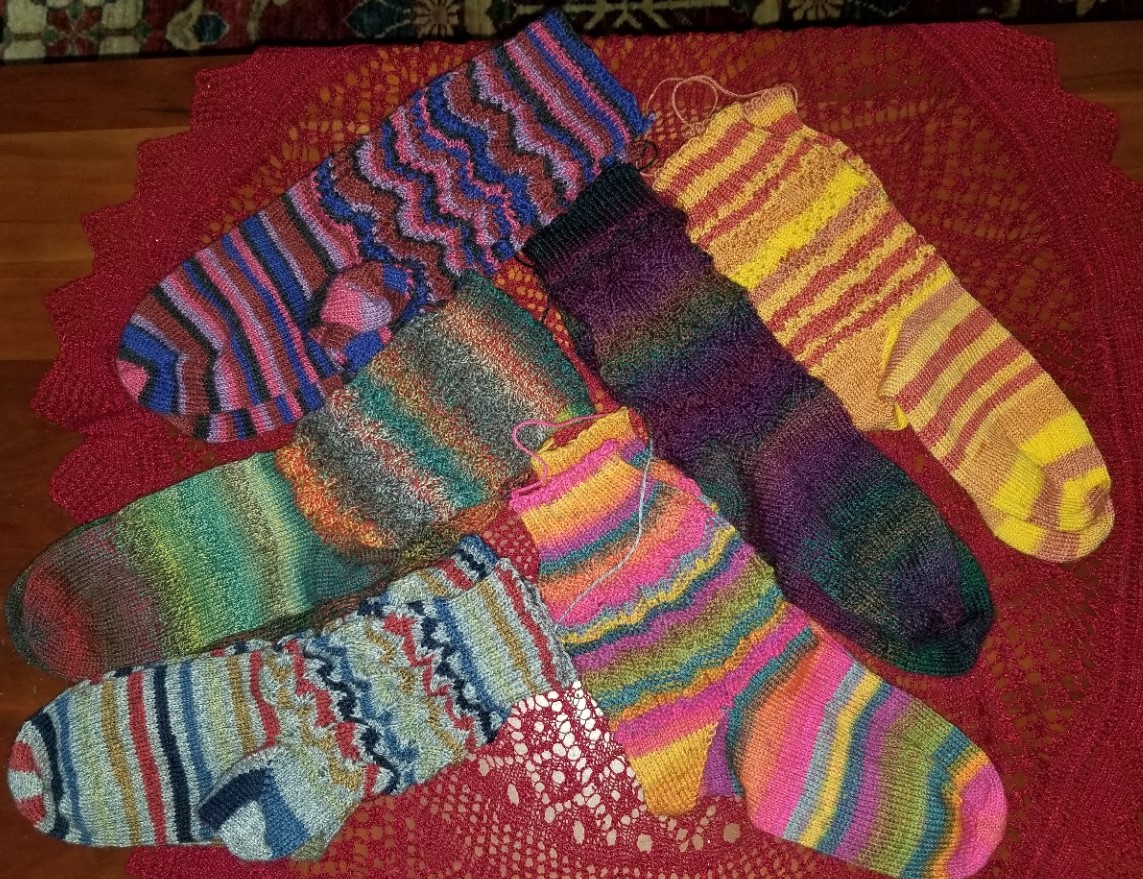

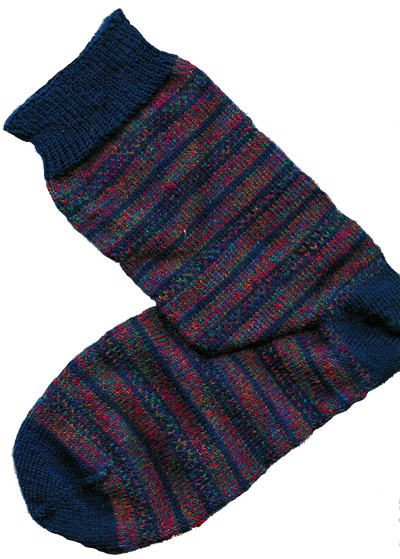
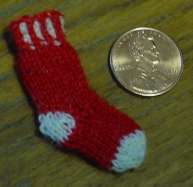

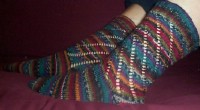
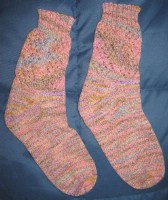


These are all representative of my production, and not all of them are drafted out in specific. They all follow the logic of the posted patterns, though. Firefighters Socks are done in heavy worsted/Aran weight yarn. Simple Toe Up Socks are in DK/light worsted. Jelly Bean, See Saw, and Pine Tree are in standard sock yarn. Impossible Socks are also in standard sock yarn in spite of the very fine gauge. And the Teeny Red Sox Sock is in reinforcement yarn. Instead of posting direct links to each of these sock patterns, I will just send you to the Sock section of the Pattern page. There are also several eyelet or texture patterns in the last section of that page that I’ve used on those socks. Most of the sock patterns also have Ravelry pages, but listing them all would also be confusing.
And More
There are lots more things to play with on the knitting patterns tab. If you are a quicker knitter and looking for a larger gift, there’s a kid’s poncho, a child-size faux chain mail outfit, several blankets – some knit in motifs and seamed together, others knit in one piece, several hats including one for Revolutionary War era re-enactors, and a backwards-engineered Bolivian Ch’ullu, a lace blouse and a knit jacket, plus mittens, wrist warmers, and texture/lace stitches. And my full Ravelry Designer Page is here.
So happy Holiday Gift Knitting! May neither time nor yarn run out before your chosen day of gift giving.
BADGE TETHERS AND MORE METHOD DESCRIPTION
In the last post I started a method description on working a large project without having to do a full chart of the entire design. I’ve now finished the first end and am starting on the second, so I continue the discussion.

I worked both the top and bottom borders to the same logical stopping point. Since I had begun both of them aligned to the exact center of my piece and was careful to follow the design exactly, the ends of both lined up. More or less. There’s actually one FEWER unit one one end of the top of the end strip than there is at the bottom. But I also bet that without knowing it was there, zooming in and looking for it, you would never have noticed. Again, a variance but not a fatal error, and far less egregious than the errors I’ve spotted on historical pieces.
There’s a lot of “white space” to the right of the stitching, but bear in mind that the opposite side is the one with the wonky end has less free space to play around in (it’s not just photo foreshortening, it’s really not parallel to the edge line I based on the true grain of the fabric). So in order to leave enough room even at the narrowest point, I have allowed for more “waste ground” on the more generous edges. I also am not sure exactly what I will be doing for the border yet. I was thinking a simple hem and some needle lace (picking up something I haven’t done in decades), but there’s also the temptation of a withdrawn element Italian style hemmed edge. And I may just leave all such elaborations off for a bit, to mull it over some more and possibly rehearse those very rusty techniques.
Anyway, back to the stitching at hand. Note also that in the shot above, I was working the bottom border out to the left, to the exact same stopping point as the edge on the right. I continued and finished both long side borders. So it was on to the second short side.
In the photo below the piece has been flipped so that the bottom in the shot below is now at the top. But where to place that second border?

Since the left and right ends of both long side strips end in exactly the same place, it’s easy. I went over to the finished work, determined that the “collision line” where the border meets the field pattern aligns with the curly end of one of the little sprigs that grows up from it. So I found the corresponding point on the second side and began the first pass of double running down it. I didn’t do the whole side, because I know I’ll be working those curls and sprigs eventually, and rather than risk a massive miscount due to the long run between those sets, I would prefer to work the larger floral border, then fill in the little secondary one once that’s been finished. But I DO need to know where the collision line is so I can fill out the truncated edges of my main field design.
I will probably begin the large border again from the center, although since the end points of my other short side border are known, I could just mirror those. We will see where whim and fancy take me. At this point, all of the known issues have been worked out, mitigated, or blissfully ignored. It’s just dogged completion of the motifs and borders from now on.
GADGETS – THE BADGE TETHER
Last year I mentioned using a retractable badge holder to help corral my scissors at the beach.

I clipped it onto the straps of the drink holder of my beach chair. That worked so well, I’ve been looking for ways to do something similar at home. I tried clipping the things to me or wearing my old work lanyards. Too fussy. My favorite stitching chair is wood and leather, with no good clipping spots on it. But I’ve been working this current project on my Hardwicke Manor sit-upon hoop/stand combo. It has a nice, long screw clamp. The clip jaws of one of my badge holders fits exactly on the exposed screw.

While I’m showing the thing holding my favorite scissors and laying tool, with both lapped in front of the work, in actual play the angle of the badge head suspends them behind and away from the fabric, so catching isn’t a hazard. I love the convenience of not fishing around for often-used tools, and the fun of repurposing these tiny work albatrosses for greater ease.
Oh, and on my big flat scrolling frame, remember those penny size strong magnets I glued to the uprights? They hold the badge leashes quite securely, too. So I have the advantage of tools-to-hand on my flat frames, too.

INTO UNKNOWN SEAS – METHOD DESCRIPTION
A couple of people have sent me private notes asking about how I go about designing a larger project without graphing the entire thing. I attempt to answer, using the current Dizzy Grapes sideboard scarf/placemat as a possible approach.
It’s true I didn’t know how I was going to proceed when I began this project. I had a graph for the main field repeat, but only one iteration of the design, but not a chart for the entire area that design would inhabit. I didn’t have a border (yet). I had a piece of cloth of dubious cut and unknown count, and I had picked a thread well represented in my stash, with known easy-care laundry properties. I knew I wanted to make a large placemat type sideboard scarf, as big as attainable given the materials on hand.
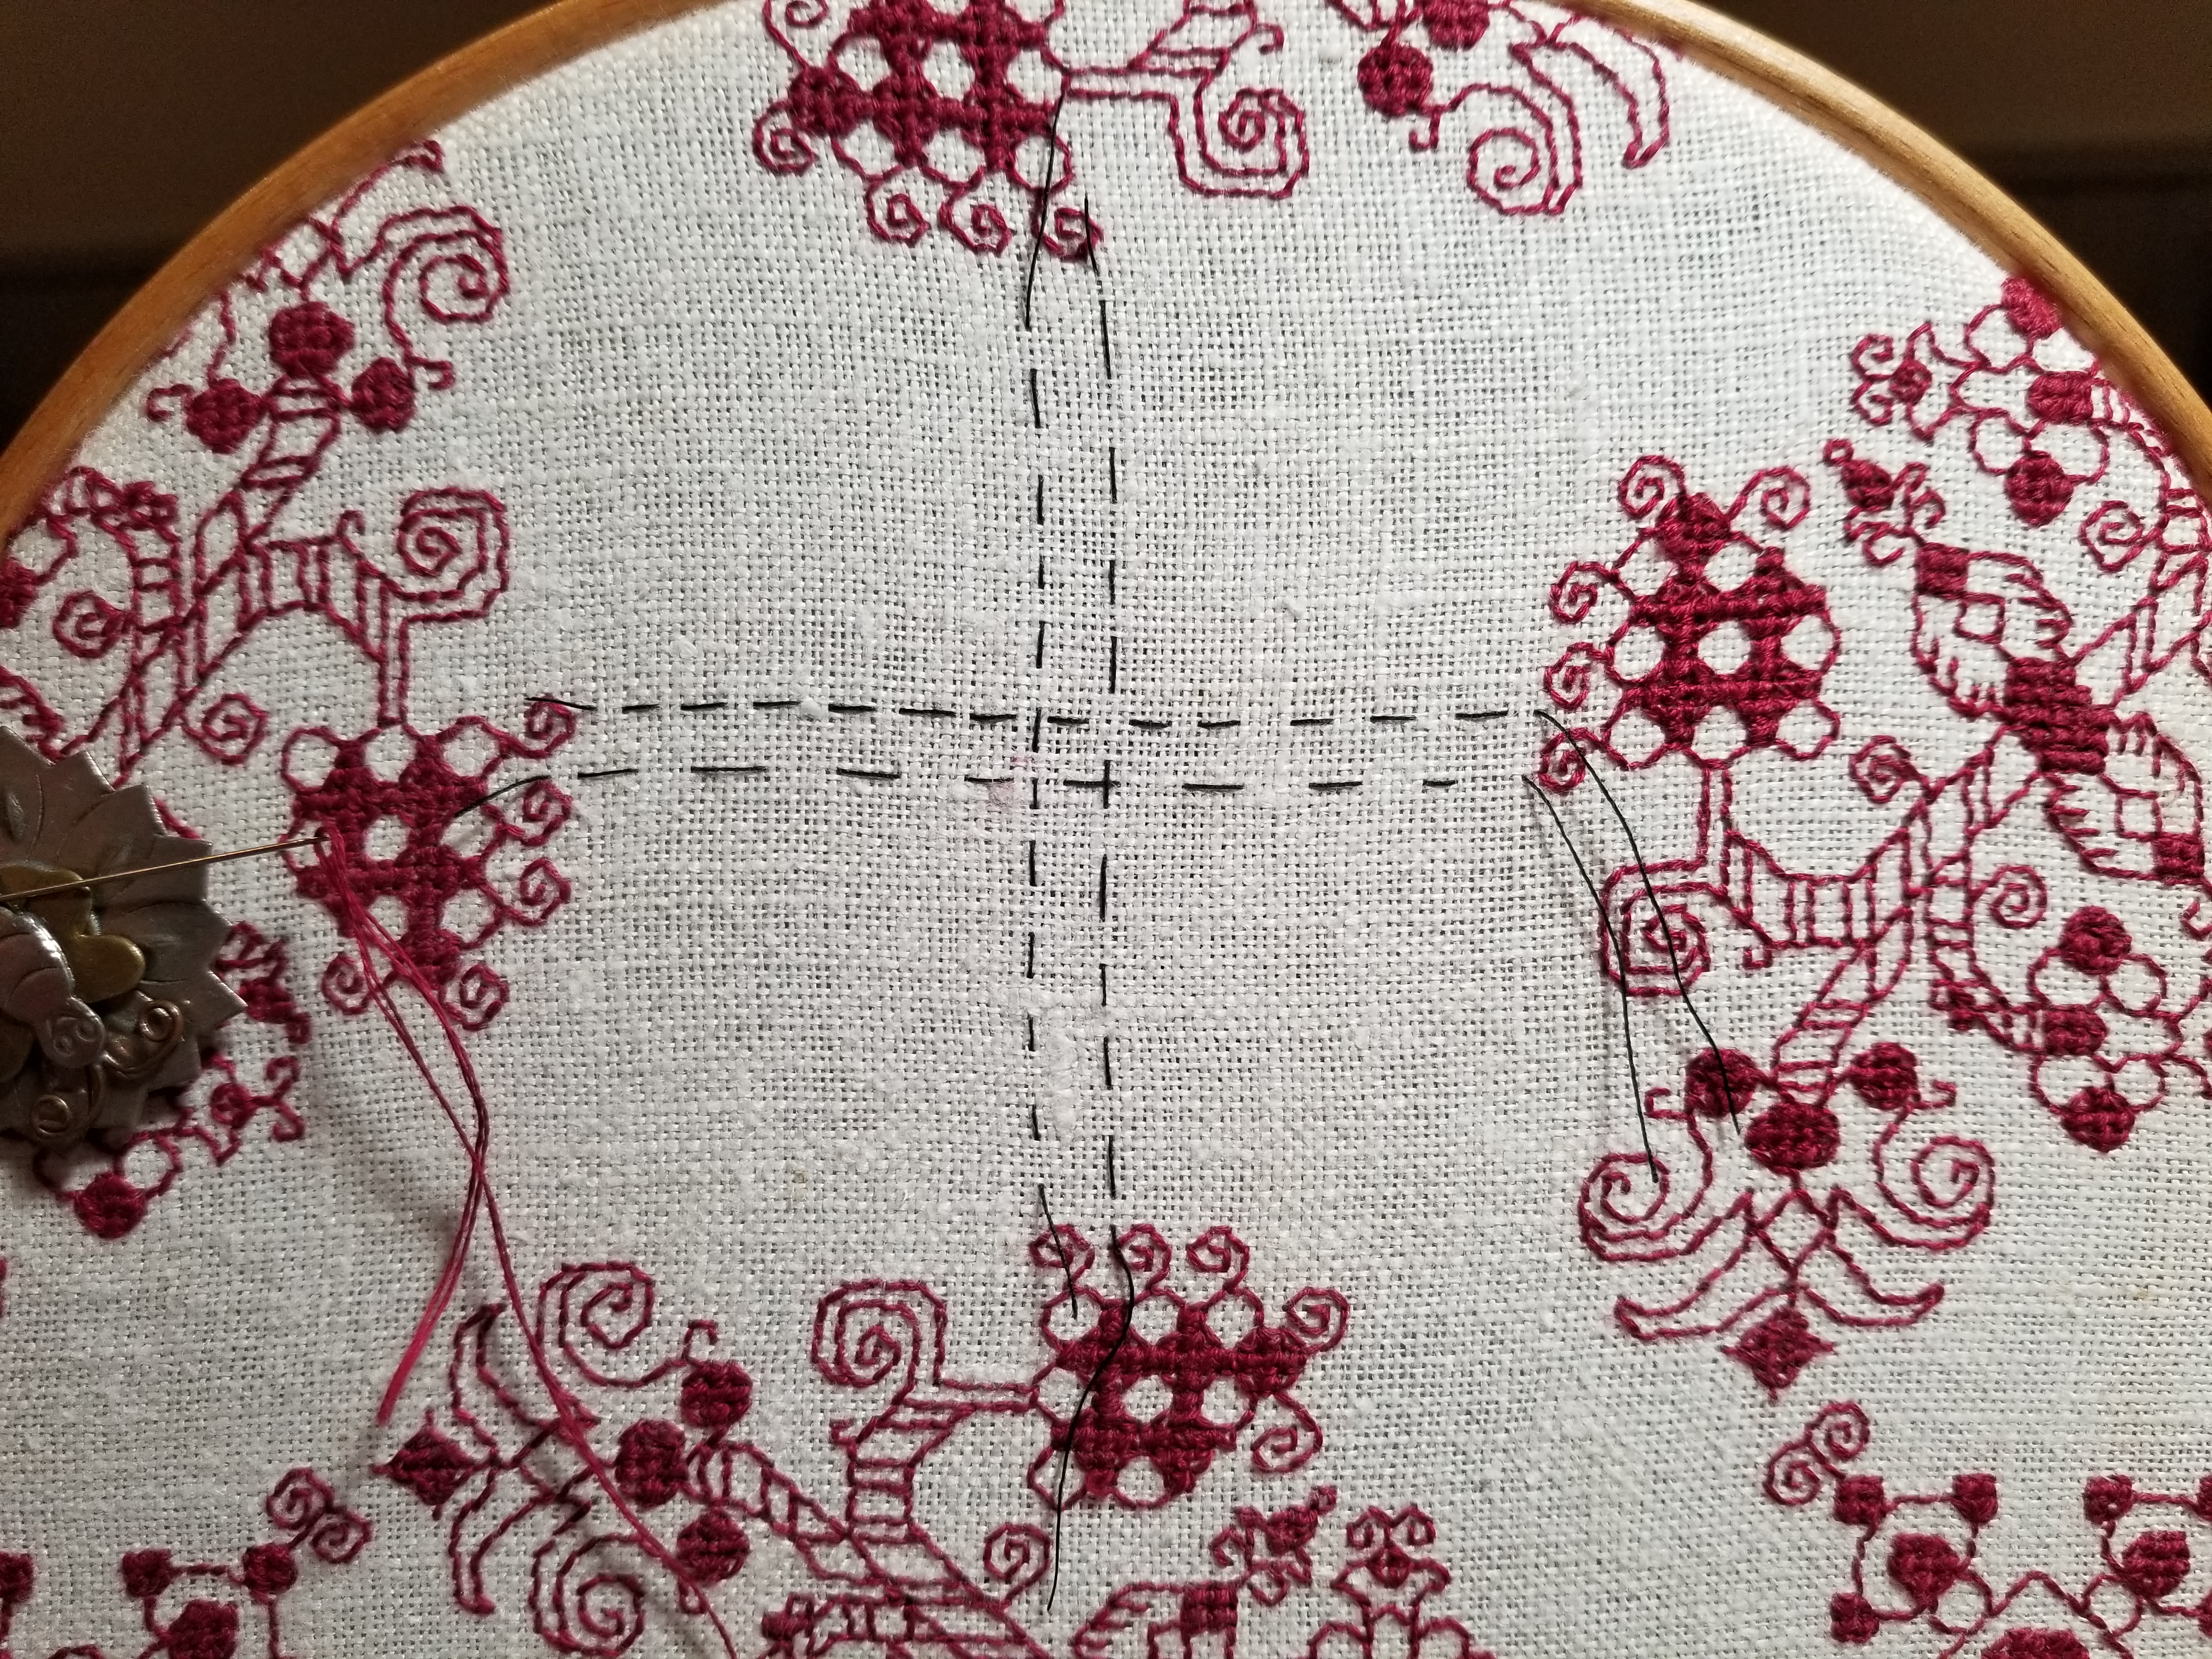
The first thing to do was to figure out the largest possible area I could stitch on my unevenly hemmed ground. Leaving a bit of a margin around for easy hooping, I took plain old sewing thread and basted in a to-stitch area, with a bit of a margin. In doing this I discovered that the person who had reclaimed this bit of antique linen and done the crocheted edge treatments had a rather liberal interpretation of rectangles in general. Once my edges were basted in, I used simple measure/fold to determine the center lines, both north/south and east/west. Those were basted, too. Here’s that first step:

I also determined the thread count of this well washed, buttery soft vintage linen. It averages about 32 threads per inch, but is quite uneven, ranging from 28 to 34 in places, but didn’t dwell on that beyond satisfying myself that there was enough “real estate” inside my designated area to accommodate at least two full repeats of my chosen design across the narrow dimension.
Having the dead center of the piece determined, I chose a center point on the field design. I could have used the center of the smaller motif. That would probably have been easier, but I wanted the large rotating floral shapes to dominate instead of the largely unworked area surrounding the smaller motif. That was a bit tricky because the motif has a square unit in the dead-center, but I worked that straddling my basted center mark. Then I began working, snipping back my basted center guides as I went. (From here on the piece is shown rotated, with the narrow dimension north/south and the wide one east/west).

The shot above shows that first center motif in process, with the center guides being snipped back as the work encroached.
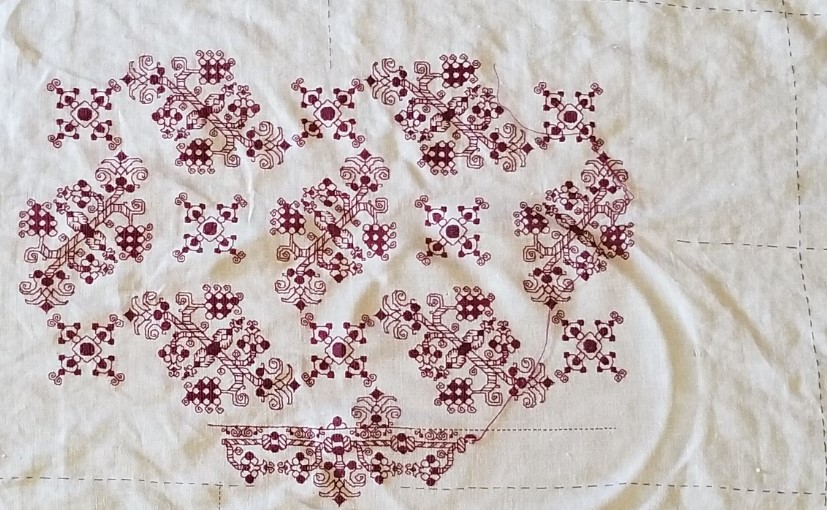
From there it was a simple matter of adding more floral motifs and the smaller X motifs they spiral around. Then after a group of four florals were complete, defining the space between them, centering the free-floating X in that area. Here are shots of those two processes. Note that as a Lazy Person, instead of tedious counting in from the established stitching, I used temporary basting to determine the centerpoint for the free-floating X motifs.
How did I know where to stop? No clue initially. I figured I’d get as close to the edge of my defined real estate as I could with full motifs, then pause to assess. It’s clear in the left photo that another full cycle of the repeat would not fit neatly between the established work and the basted guideline. But that area is also a bit wide to be entirely border. The proportions would be off. Plus that small X motif in the center bottom looks odd without at least a partial snippet of the floral motif spinning off its bottom leg.
So I did a rough count of the width left and decided I wanted a border that was about two inches wide at its widest (about 5 cm). Back to the drawing board to draft out something that complemented the design, and was somewhere around 30 units tall. I doodled up a couple of possibilities before settling on one. One strong consideration was the use of an inner line to contain the field pattern, so it had something even against which to truncate.
Once I had my border in hand, I decided that a bit of the center flower in its repeat could scallop below the basted edge line, so allowing for those 6 units, I counted up from my basted edge guide, and beginning at the center point I started the border of the first side. Then I worked right and left until I got to the edge of the “uncertainty zone” – the area as yet unworked at the left and right of the piece. Here’s the first side’s border in process.
As I established the border’s top edge (that field containment line), I went back to the main field, and worked the truncated snippet of the floral motif to fit. You can see that first snippet in the photo above.
Now on to that second side. But I had a cheat! Instead of starting it by counting down, I looked at that center floral snippet on the first side. Then I worked the floral snippet on the opposite side to the same point. That established the containment line on the second side, and I began the border at the center of the second side, working out to the left and right.

Now on to the ends. You can see now that I’m making these decisions on the fly. When I started I had no clear idea of what I was going to do beyond “Field. Border. Big.” I’m handling the problems and decisions as they are encountered, with minimal fretting about perfection along the way.
I chose to do butted borders on this piece. Neatly mitered, squared, or fudged border corners do exist on historical pieces, but they are in the minority. Even though my self-designed border isn’t particularly period representative (those repeating centered units with their own bounce repeat, as opposed to simple twigs all marching it the same direction), I wanted to use a non-mitered corner. I could have ended each off, designed a separate corner square, but I didn’t want to introduce another design variant – the border was already too busy.
Where to start that side border? What happens to the longer top and bottom borders? Do they just end or should I try to end at a visually logical place? Well, I chose the latter. I kept going on the bottom border to the right until I ended at the center of the bounce repeat. It’s just a few units shy of my designated basted edge. Not a lot of waste there. And knowing the height of the border, I established my north-south containment line.

You can see that I’m working on the first of the two spin-off floral sprigs along this side. When that’s done I will go to the centerpoint of the right hand edge and begin working the border from there, headed back to the corner shown. The side borders will end where they end. They will truncate oddly for sure, but having made the bottom and top congruent, what is on the sides, will be what it is. The side as a whole however should truncate in the same spot where it meets up to the border on the top. But no one is perfect. If it’s off by a unit or two, I will have accomplished the same degree of precision as most of the Ancients. They weren’t perfect either.
Stay tuned! The Grand Excitement of seeing the final product remains; and with it how things meet up, how close to symmetry I achieve, and how any as yet unknown problems are solved. And that’s before I decide how I’m going to edge and trim the piece out. Needle lace and/or a withdrawn/pulled element hem are both possibilities I haven’t yet ruled out.
So there you have it. Another adventure in bungee-jump stitching – starting a project with little or no detailed planning, no full project chart (just a partial chart showing the minimum needed), and no clear idea at outset on handling challenges encountered en route. I hope sharing this process inspires folk to take up their own self-composed projects.
