LONG-LOST TWINS, PART VII
Today’s my birthday, and needlework friend Barbara posted a snippet to my Facebook feed of a voided panel showing couples dancing. That bit of fun led to more digging on my part. I knew of similar panels in a couple of places, so I decided to do another of these posts that only a needlework geek could love.
First, here’s the one that was most prominent in my notes. It’s in the collection of the Rhode Island School of Design (RISD), accession 47.199. They attribute it as Italian, circa 1600, and cite both the ground and the stitching as being cotton. I have some doubts about the materials citation, but I’m not an expert and haven’t seen the piece up close and personal. I do note however that it would be one of the two easiest examples of this family to chart.

It’s hard to see, but the ground appears to be in that tightly pulled Meshy stitch I’ve written about before. I do not know if the foreground and outlines are done in double running or back stitch. There’s no other info on working method or object purpose. But I sort of suspect that this might have been part of household decor – possibly a bed valence or decorative cover sheet, remotely possible – a tablecloth, but for that I would expect to see a butted corner, and not the arbitrary unworked bit at the extreme right of the stitching. It is interesting to see the tease that confirms my working method – there’s a tiny bit of the foliage on the “room divider” at the right edge that was outlined, but the voiding wasn’t worked up and around that little bit of outline, leaving it orphaned and alone. More argument for this having been displayed with that selvedge bit tucked away and unseen, as I would expect for the upper hanging around a bed.
In any case, here are some relatives. First a piece from the Boston Museum of Fine Arts, accession 38.1104. They cite it as 16th century, and Italian, worked in red silk on linen. Looks like the Meshy background to me.

You can see that the design is very close, but isn’t spot on exact. There is a different treatment of detail in both the foliage divider and the castle tower divider. The border (if there was one) is also gone, but we can’t judge that in absentia. There are also lots more small bits and bobs surrounding the dancers and the little guy in the RISD sample. The male figure has traded his crowned turban-line hat for a lush head of hair. And the little guy looks to be better dressed. I’d be tempted to call him a page in this version and possibly a cupid or eros figure in the RISD piece, due to the bit of arrow fletching? sticking up over his shoulder. And although I haven’t counted the units, or investigated closely enough to see if the thread count of the two grounds are even, the MFA’s snippet does seem to be a bit compressed north-south, compared to the RISD one. But not uniformly so. The upper bodies appear to be less squished than their lower halves.
And the third – this one from the Cleveland Museum of Art, Accession 1929.840. They note their piece as being done in silk on linen. It’s pretty clear that this one is in Meshy, too.

Based on very strong similarity between this piece and the MFA holding, I suspect these might have been true siblings, pieces from the same original, cut apart and sold to two separate collectors, which then ended up in two different museum collections. In fact if you compare the right edge of the MFA piece, and the left edge of this one we can see a bifurcated page boy – it is pretty likely that we are looking at the exact snip line where they were separated. As an aside, I like the little unfinished bit underneath the lower left leaf of the foliage divider, at the left edge of the piece. Again, confirmation that outlines were laid down first, then the background was worked.
This one is in the Metropolitan Museum of Art in New York City, accession 47.40. They call it “Border” and cite it as being Italian, and 17th century, worked in silk on linen.

Their original photo is a bit fuzzy, but it’s pretty clear that this piece is possibly another section of the same original that furnished the RISD snippet. Not only are the borders and proportions intact, but the small details of crown/hat, arrow, interior detail on the dividing motifs, and even the dress border of the woman dancer is identical.
And to wrap up, I have one more snippet in my notes. This is also from the MET collection, accession 07.62.58. They cite it as Italian or Greek, 17th century, and note that it’s silk on linen. They rightly describe the meshy ground as drawnwork.

By now you should be familiar with the details of this design. Yes – it looks closer to the CMA and MFA snippets than it does to the RISD and the other MET holding. But there are some subtle differences. The ground line is most obvious. In the other two non-bordered bits of this variant, the stitchers have taken more pains to keep a stable bottom edge of the stitching. That’s not to say there aren’t deviations from that on both pieces, but on this one is is far more evident. There are also some other minor differences in detail on the dividers and on the dancers’ outfits. Now I suspect that it was not uncommon for a very large project like a set of bed hangings to be worked by multiple stitchers. Even if a master laid down the outlines and had a crew working “clean-up” behind, filling in background and detail, a large team working quickly might make these minor copyist errors. I don’t think that there is enough difference here to clearly claim that this has no chance of being a piece of the same original as the CMA and MFA fragments.
So to sum up, I do think that two original artifacts furnished all of these bits. And I would go further to posit that the unbordered one might have even been unfinished prior to its dismemberment. I thank the collectors of the “Indiana Jones” era for heading off on their Grand Tours, and bringing back these pieces. I thank the museums for hanging onto these rarely studied snippets, and for posting photos of them on line, so we can speculate about their origin. And I thank Barbara for flagging the dancers for my birthday.
I return you now to regularly scheduled, non-boring Internet content. 🙂
FIRST BUGS, NOW BIRDS
I’m edging into a new neighborhood on the Unstitched Coif Project. This one is inhabited by birds. The first one is stitched and I’m thinking on the fills for the second. You can see him at the center bottom of the piece, now presented in the correct orientation.

I think he looks a bit like a tiny raven, A slightly confused one at that. I could not resist the visual pun of using the feather fill from the collection presented at the official website for his body. You can make out another oddly shaped bird sketched in below and to the right of the pansy/viola flower.
All in all, I’m pleased with the way this is turning out, although like all participants, I wish my project was proceeding faster. Working so tiny is taxing. Mr. Raven for instance took about four hours to complete, counting the fills, outlining, sequin eye, and couched gold feet.
My game of not repeating fills between units is still afoot, although I am finding it harder and harder to find or devise fills for the particularly tiny areas, like the sepal-leaves on the pansy. And I have to go back and add lighter gold banding the the wings of the big bug.
One more challenge is that of adding the overstitched elements – the couched vein leaves and feather markings on Mr. Raven. I do the fills first, then neaten up their edges with the heavier outlines. But the fills obscure the placement of the overstitching. I do that by eye, referring to a printout of the master design. I’ve mentioned before that others do the outlines first, but with the heavy, embossed reverse chain stitch, working inside tiny spaces would be extremely difficult. I leave that to those who are using outline stitch, freehand fills, and speckling.
Today’s agenda will be filling out the spray of leaves at the (now) right edge, adding the gold stems to it, and flooding the few newly surrounded white space areas with spangles.
In other news, last weekend I visited Younger Spawn and surrendered the bespoken Eyeball Bolster Cushion, seen here in its forever home, on the target low back mid-century modern sofa for which it was designed. A perfect fit. The recipient was totally thrilled.

The sharp-eyed will spot my stitching set up near the sunny window. I added a hex wrench to my stitching kit, and can take the thing including the disassembled stand with me when I am on walkabout.
While I was out in Spawn’s neighborhood we went to a garden center/plant nursery. Spawn added to the resident collection of exotic houseplants that make the apartment a livable and calming oasis. I noticed that the prices for large, healthy outdoor plants were much lower there in the suburban Albany/Troy New York area than they are here in the outskirts of Boston, so I bought some plants to augment my growing perennial collection. Here they are, just before I plonked them into their spots.
The big blue pot in back is a Chocolate Eupatorium (aka Joe Pye Weed). It’s a fall bloomer, with white flowers. The white pot in the middle is a red-leafed Astilbe variant, with purple/red flowers in mid to late summer. And the little guy over near the hose is a low-growing creeping sedum, that blooms purple in the fall. They join the transplanted peony, curly leafed Hosta, lemon Hosta, pink Astilbe, and two types of Brunnera (one red leaf, one green) that survived last year’s drought and fierce heat that doomed my Aconitum (wolfbane), and Hellebore. A less poisonous garden this year, but one I hope will outlive my ungentle care.
PRICE ALERT
One last thing – if you are interested in buying my pattern collection The Second Carolingian Modelbook, you may want to do so before 30 June. Amazon Kindle is raising print fees, and because the thing is on a razor thin margin, I will be forced to raise the price. I am sorry for this. I tried hard to keep it under $30.00 US per copy, and it will remain so until the end of June, but after than the price will be going up.

BLACKWORK/STRAPWORK RESOURCES HERE ON STRING
NOTE: UPDATED TO BE CURRENT THROUGH 15 JULY 2025
Blackwork embroidery seems to be having an Official Moment right now, with tons of new interest. I’ve got a lot of resources here that might be useful to folk beginning or continuing their journeys, but it’s not well indexed. So I post this round-up of on site resources in the hope of lending a hand. And to be able to point to the whole set if asked. Image at the end for the eye candy effect. List below has been updated since it was originally posted.
Technique and Tools
- Double Running Stitch Logic. One of many times I’ve tried to explain double running stitch and two-sided work. This post led to the tutorial series listed below.
- Assorted Blackwork Hints. Answers to questions about my working methods. Making mistakes; guidelines; where to start; simple tracing using “the poor person’s light box”; multicolor; equipment hints (frames, needles, wax); and a list of tricks for path planning in double running logic.
- Blackwork Thread Thickness and Grounds. One strand or two for double running? Why is it sometimes hard to keep your lines straight and even.
- Blackwork Heresy. Back stitch, double running, and the hybrid that floats between them, which I nicknamed “Heresy Stitch.” Useful but not something I’ve documented in historical works. Can be easier for people who get lost when working double running, and saves thread when compared to back stitch.
- What Makes a Blackwork Pattern Difficult? Cautions and mitigations for three challenges, that might help simplify those trouble spots.
- On Charting. How to look at a photo and then translate the design to paper.
- Determining the Thread Count of Small-Gauge Linens. How to use a penny (or other tiny thing with a known and stable diameter) plus a cell phone camera to figure out the count of a hard-to-see ground.
- Cornered Again. One way to handle placement of bands on a band sampler and a wrap around frame edging, with minimal advanced planning.
- Filling In. More questions from the mailbag, including some unusual names for stitch techniques that appear in museum annotations.
- Proofing. How I check alignment as I stitch, to make sure I’m not wandering off count.
- Turning a Strip Repeat into an All-over. This one also belongs under the free linear stitch patterns heading below. A couple of ways to make a single width strip into a double, and how I ended up turning it into a Green Man square.
- Travel Cover for a Flat Frame. How I made mine, and how you can make one, too.
- Hoops! Sizes, thicknesses, wrapping, and more.
- Working on skew counts (non-evenweave linens). An aside in the discussion of a past project, but lots of tech info here.
- Typography in embroidery design. Choose your typefaces carefully!
- The Buzz on Beeswax. Why I am such a fan of using it in blackwork.
Inspiration
- Elizabethan Blackwork Smock. Photos of the famous Victoria & Albert Museum smock (1575-1585), Accession T.113 through 118-1997, plus my redaction of some of the fills used on it.
- Blackwork Inspiration. Some sources for folk looking for project ideas for original pieces of contemporary blackwork
- Digression – Blackwork Embroidery. Lots of links to portraits and other artworks showing blackwork. Some of them might still work.
- More Inspiration from Historical Sources. Another link roundup of countwork appearing in paintings and portraits. Some of these links may still be live, too.
- Forehead cloths. The coif’s companion. Much easier to wear in modern context (see Bragging, below).
- Ironwork at the V&A. These pieces sing “outline potential” to me.
Voided Works
- Voided Grounds. A roundup of various treatments for voided work, where the background is overstitched but the foreground remains (mostly) unworked. This is the style that was reborn in the 1800s as Assisi work, and is also known as reserva stitching.
- Voided Pieces and Outlines. Do historical voided pieces always sport outlines? Were they done first? Were they always on the count?
- Voided Narrative Panels. A style cluster of voided works probably done by drawing the foreground designs freehand, then working the background up to those lines.
- Meshy! Working that hard-pulled mesh like voided style that totally encapsulates the ground fabric’s threads.
History, Speculation, Pattern Clusters, Printing Block Migrations and Other Musings
- The Twain do Meet. Introduction to Kasuthi Kashida. Blackwork’s Indian cousin
- Looking East Again. Double running stitch pieces from the Wardak Hazara people of Pakistan. Another example of a South Asian stitching tradition that may be one of blackwork’s lesser known Eastern cousins.
- A Missing Link? A curious family of Egyptian Islamic artifacts of the 10th to 15th centuries, that have no proven relationship to inhabited blackwork (the kind with hard outlines and geometric fills), yet presage its aesthetic.
- The Azemmour Cluster. A group of patterns that in the time I’ve been paying attention has had their commonality and point of origin increasingly recognized, moving them from late 19th century source annotations that identified them as Renaissance era products made everywhere from Greece to Spain, and placing them in Morocco.
- The Spider Flower. A design that is probably part of the Azemmour Cluster
- Revisiting the Stupid Cupids – Multiple versions of the cupid and oak leaf meander.
- A Pattern’s Pedigree. Random thoughts about a specific family of patterns that shows up both voided and unvoided.
- The Leafy Family. A wide leaf-bearing meander that shows up multiple times in artifact inventories.
- More Cousins. The Leafy Bricks group.
- Cornered! Possible working direction and four different corner treatments of a famous, oft photographed handkerchief in the V&A.
- Italian Leafy, Occasionally Multicolor. Another design family of large panels and edgings that have curiously similar design elements, and a direct association of one example with the Jewish community of Rome, hard dated to 1582/1583.
- Long Lost Twins, Part I. That ubiquitous urns and piping harpies design. (I revisited this one in Part V, below)
- Long Lost Twins, Part II. Oak branch, leaf and acorn design, executed in both monochrome and polychrome, multiple versions.
- Long Lost Twins, Part III. Another very common pattern with multiple iterations, in multiple museums, two instances of which may have been cut from one original piece.
- Long Lost Twins, Part IV. Multiple instances of a simple Y and wrap meander.
- Long Lost Twins, Part V. Lots more on that harpies/urns design; found in many museums, many iterations, and even multiple stitching modalities.
- Long Lost Twins, Part VI. Two instances of a column design, very probably once cut from the same artifact. Fragments of which are held in two museums
- Long Lost Siblings? Another case of a single source artifact probably cut in two, now held by two different museums.
- Long Lost Twins, Part VII. Resuming the series. This is a voided pattern showing dancers, several pieces possibly cut from two originals before dispersal to various collectors.
- When is More of the Same Not More of the Same? Examining differences among different editions of various modelbooks, trying to parse out whether they were reprinted from the same block, hand tinted, or recarved.
- Modelbook Blocks: Acorns and Chickens. A classic. Was the block simply traded and reprinted, or was there copying afoot?
- One Design’s migration. Another look into multiple printings of the same design, and differences/similarities among those iterations.
- Early Marketing? Or Not… Speculation set aside by actually looking at the when and where of a pattern published both with and without religious mottoes.
- Repeating On and On on Repeats. A summary of the types of rotations and mirrorings commonly seen in long strip patterns
- Ocular Proof? My argument that Othello’s strawberry speckled handkerchief used in the play to implicate Desdemona might have been conceived of by Shakespeare as a countwork piece.
- A Curious Applique Technique. Not embroidery, but often appearing in modelbooks alongside it. Take a strip of leather or cloth, cut it with precision into a pattern that duplicates itself on either side of the bisecting line. Twice the yardage and no waste. Wildly clever.
- The Symmetries of Linear Stitched Fills and Strips. The difference between designs with even and odd numbered stitch counts, and how they can be used to best advantage. Plus pitfalls of aligning them with each other, especially when using purpose-woven grounds like Aida.
- Griffins. A discussion of a very common griffin design, and how it moved through time and across geography.
- The Unstitched Coif Project Exhibit. My photos and links for all of the coifs produced.
- More on 16th and 17th century pieces associated with Italy’s Foa family. Recognizable design elements characterize this cluster.
- Even More on Azemmour. Additional observations on a cluster of embroideries from Morocco, common in museum and private holdings. Some of which were sold to early collectors as Renaissance fragments.
The Unstitched Coif Project
- Completed coif – discussion of my materials, sources, and method. Includes a writeup of the stitches used, and why.
- Completed coif – discussion of my finish and fills. Close ups of the completed project, plus a motif by motif round up.
- The Unstitched Coif exhibit. All of the coifs submitted for display in December 2023.
- All of the posts tagged with Unstitched Coif. For those who want to get up close and personal with each motif as it was created.
 My Unstitched Coif Project contribution, now available in high definition photography of both the front and back. It was collected by the Victoria & Albert Museum, and they have updated the piece’s permanent on-line accession page with those images.
Talks and Classes
The Stitches Speak
These are the slides from a round-up of historical counted styles I presented at a Society for Creative Anachronism needlework and textiles gathering in 2012. Mostly eye candy, and divided for ease of posting, not by subject area. However sources are listed.
- My post-event summary
- Part 1. The rest of these are my slide deck as presented. No script, just the images.
- Part 2.
- Part 3.
- Part 4.
- Part 5.
- Part 6.
Workshop Handout
This is the broadside I hand out when I teach workshops on double running stitch. It’s pretty much a self-paced tutorial, with the simplest designs at the upper left, and progressing in difficulty to the lower right. If you work these at your own speed as a band or jumble sampler, by the time you’ve done them all you can tackle just about any linear design. And although I do use this to teach double running stitch logic, no one will say you sinned if you decide to complete it in back stitch.
- Class handout. (Also available on the Embroidery Patterns tab).
Patterns
Free
Linear Units (Line Segments)
- Ensamplario Atlantio. Seconnd Edition. A collection of blackwork fills from my doodle notebooks, some my own, some from artifacts, but when I started this I didn’t intend to publish, so I didn’t keep track. Some of the larger ones work well as all-over designs, or for small projects like biscornus or holiday ornaments. All four previous segments of the original release stitched back together, along with some additional content.
- Ensamplario Atlantio Volume II. More fills, plus some strip designs and yokes. 90% original (exceptions are footnoted). In one file this time, as technology marched on since publication of the first.
- Ensamplario Atlantio Volume III. You guessed it. Even more fills, plus lots of strip and all-over patterns and even a couple of yokes. Same paradigm as the previous volumes, with the few redacted designs called out in footnotes. Anything indicated with a star is my own original work.
- My Embroidery Patterns tab. Most but not all of the designs below also appear there, plus more.
- Rose Chart. Outline for a heraldic style rose
- Ganesh Project. How to replicate my blackwork method Lord Ganesh, done as a present for a family friend in India.
- Crowdsourced simple diamond interlace, with small motif fills provided by String’s followers. Use some or all. (Also on the Embroidery Patterns tab).
- Dancing Pirate Octopodes. The design that led to the crowdsourced project. (Also on the Embroidery Patterns tab)
- Leopards. (Also on the Embroidery Patterns tab)
- The Epic Fandom Stitch-Along. 19 bands, 9 of which are quasi-traditional, 10 of which are wildly anachronistic, with spaceships, dinosaurs, pirates, references to Star Trek, Star Wars, and Dr. Who. Guidance for the whole project is included.
- The Epic Fandom Stitch-Along in ONE easy to download PDF. The whole thing, informational posts, instructions and all charts for the project above.
- Cat and Mouse. A large panel with Art Deco style cats, mice, and yarn balls. (Also on the Embroidery Patterns tab).
- Bands from a 16th century Camica. Hem, collar, seam bands, and striping. (Also on the Embroidery Patterns tab)
- Those Snails. They crawl all over my work. I share some.
- Jesters at the Fence. A snippet from TNCM (see below).
- Bead border. (Also available on the Embroidery Patterns tab)
- Ring of Rats. Another Art Deco style chart (also available on the Embroidery Patterns tab)
- Tessellated Cats. This design is included in the free book Ensamplario Atlantio Volume III, available on the My Books Tab.
- Elizabeth Hardwick’s Sleeves. Another redacted chart for a historical alll-over design. Redacted from a portrait. (An easy downloadable PDF is also on the Embroidery Patterns tab).
- PERSIST sampler – a chart for a slightly slimmed down version of my Persist piece. (An easy downloadable PDF is also on the Embroidery Patterns tab).
- A Holbein Collar. Collar on a man’s shirt, redacted from a portrait. (An easy downloadable PDF is also on the Embroidery Patterns tab).
- Hebrew Alphabet and commonly embroidered words. I mashed up a few sources to come up with this one, including a very early Apple II pixelated typeface. But the letter forms are tweaked enough to be mine. (An easy downloadable PDF is also on the Embroidery Patterns tab).
- Border or strip design. I used this one on my chatelaine ribbon. It’s also in Ensamplario Atlantio III. (An easy downloadable PDF is also on the Embroidery Patterns tab).
- A Spanish Gentleman’s Collar. An actual example of Spanish blackwork. Redacted from a portrait. (An easy downloadable PDF is also on the Embroidery Patterns tab).
- Another Portrait, Another Redaction. Sleeve detail for a woman’s chemise charted from a circa 1500 Italian portrait. This one with chickens. (An easy downloadable PDF is also on the Embroidery Patterns tab).
- Pattern from a Gentleman’s collar, circa 1560. Chart and discussion of graphing from a painting. (An easy downloadable PDF is also on the Embroidery Patterns tab).
- Correction to The New Carolingian Modelbook, Plate 73 – the really wide interlace. I finally got around to stitching this one up and discovered that two of the overlaps as charted in the book were wrong. So I issue an update. Given the better layout and composition of my more recently composed plates, this pattern is now presented on two pages, both as a wide border and as an even wider iteration that can be used as an all over and as an even wider border. This PDF also available on the Embroidery Patterns tab
Box Units (squares)
- Unicorn. Box unit (not linear) chart for a unicorn, courtesy of Elder Offspring.
- Castles and Caravels. Box unit design featuring a three-towered castle, and its relationship of that motif to some Spanish pieces.
- Knot More Knots! Simple interlaces in box units (Also on the Embroidery Patterns tab)
- Simple Geometric from 1546. This one is also box units, and works well for stitching, knitting, and crochet.
- Da Sera Bud Interlace. Another box unit pattern. (Also available on the Embroidery Patterns tab)
- Fun with Odonata. Another box unit design, this one for dragonflies. Note that they can be used for knitting, too. (Also on the Embroidery Patterns tab)
- Fun with Lagomorphs. A box unit design for a leaping rabbit. (Also on the Embroidery Patterns tab)
- A Simple Interlace. I lost the source annotation for this box unit design aeons ago.
Not Free
- The New Carolingian Modelbook: Counted Patterns from Before 1600. Also known as TNCM. Sadly out of print. It’s in queue for update as scholarship has advanced in the years since it came out. There are corrections aplenty! You might be able to find it on the used market, but at a wildly inflated price.
- The Second Carolingian Modelbook: A Collection of Charted Patterns for Needleworkers and Artisans. Also known as T2CM Link to Amazon page is on the indicated post.
Tutorials
These are also accessible via the Tutorials tab at the top of every page here. but below they are listed in the correct chronological order
Double Running Stitch Logic
- Double Running Stitch Logic 101 – Two Sided Work and Baseline Identification. Basic logic of why baselines matter if you want to work something either totally two sided, or using two-sided logic for thread economy
- Double Running Stitch Logic 102 – Working from the Baseline. How to follow one, step by step.
- Double Running Stitch Logic 103 – Accreted and Hybrid Approaches. Breaking down a large non-linear chart for easier stitches.
- Double Running Stitch Logic 104. A review comparing back stitch and double running, and how to determine if a design can be worked totally two-sided or not.
Charting Linear Designs using GIMP Drafting Software
I found commercial charting software treats linear charts as an afterthought, so with help, I invented my own graphing method which I have used for all of my books. This series is for folk who want to move on to designing and drawing their own charts, and doing so using the dot and bar method I invented. GIMP is freeware, and if you’ve ever used Photoshop or Illustrator, and are familiar with layer-based drawing logic, the learning on-ramp for this method will be familiar. Although this was prepared for an earlier version of GIMP, these instructions are still relevant, although the GIMP menu screens now look slightly different.
- Charting. A comparison of my dot-and-bar method with the traditional drawn-on-quadrille-graph-paper method.
- GIMP Charting Tutorial 101. The logic of a layer-based drafting tool.
- GIMP Charting Tutorial 102. Getting started, basics of working with GIMP.
- GIMP Charting Tutorial 103. Building the dot layer of your template.
- GIMP Charting Tutorial 104. Layer management and building the design and mask layers of your template
- GIMP Charting Tutorial 105. Drawing the design.
- GIMP Charting Tutorial 106. Additional tools including those for erasing, flipping, alignment, and rotation
- GIMP Charting Tutorial 107. Hints on printing
- GIMP Charting Tutorial 108. Preconstructed templates to save you time.
Just Bragging
- My big underskirt forepart. Why I stitched it
- Forehead cloths for modern wear. Kind of like a kerchief, works well and keeps the hair out of my eyes in seaside winds, adapted from the companion piece often seen with a matching coif.
- Trifles wall hanging. Made as a “mom nag” for my younger spawn, done using blackwork techniques and fills.
- Blackwork sampler done in 1983. Musings on why this piece is not entirely successful in terms of stitching density distribution.
- Two Fish. No astrological connection, just two koi circling on couched gold water. Indigo and deep green silk on 40 count linen
- Fangirl Sampler – A key phrase from the science fiction series by my Resident Male, in an off-world language. It translates to “Life’ll kill you”. I am after all his fangirl army of one. Alphabet from an old Sajou leaflet, but the rest is all my design. The dancing skeletons border is available on the Embroidery Patterns tab.
- Grape Sideboard Scarf. An artifact-based main field with a self-designed companion border.
- Blackwork sampler done as the cover for T2CM, finished in 2012. Below.
A WEALTH OF POSSIBILITIES
Progress and some potentials to report. First the progress:
I’m closer to finishing the initial seaming of the eyeball squares for the bolster cushion. Here are all of them. The group indicated by the yellow brackets on top is the front. It’s 12×4 units, all sewn together. The group in the yellow brackets at the bottom of the page is the back. I’ve just begun sewing the last course of 12 onto the other three.

Then there are the loose piles between the front and back, and to the right of the back. Those are the squares that will make up the sides. That’s another two strips of 12, and two strips of four. After I finish the seams on the back I will assemble those strips. After that will come an orgy of darning in ends. Once all six pieces are neatly finished off I will begin final assembly. I intend to sew the side strips in sequence – long-short-long (leaving one short side out briefly) with the same slip stitch method I used for the front and back. But when I unite the side strips to the front and back I will use a knit-based method rather than a crocheted one. I intend to use knit-on I-Cord edging as my seaming method, to make what will look like a piped edge, to make a green “frame” for the front and back. Somewhere along the way I will introduce a hand-stitched zipper into one short end, which is the reason for reserving that last short side.
I’ve done the I-Cord edging before to excellent effect on pillows. The one in front uses it. (I won’t be doing the free-loop corners though on this piece.)

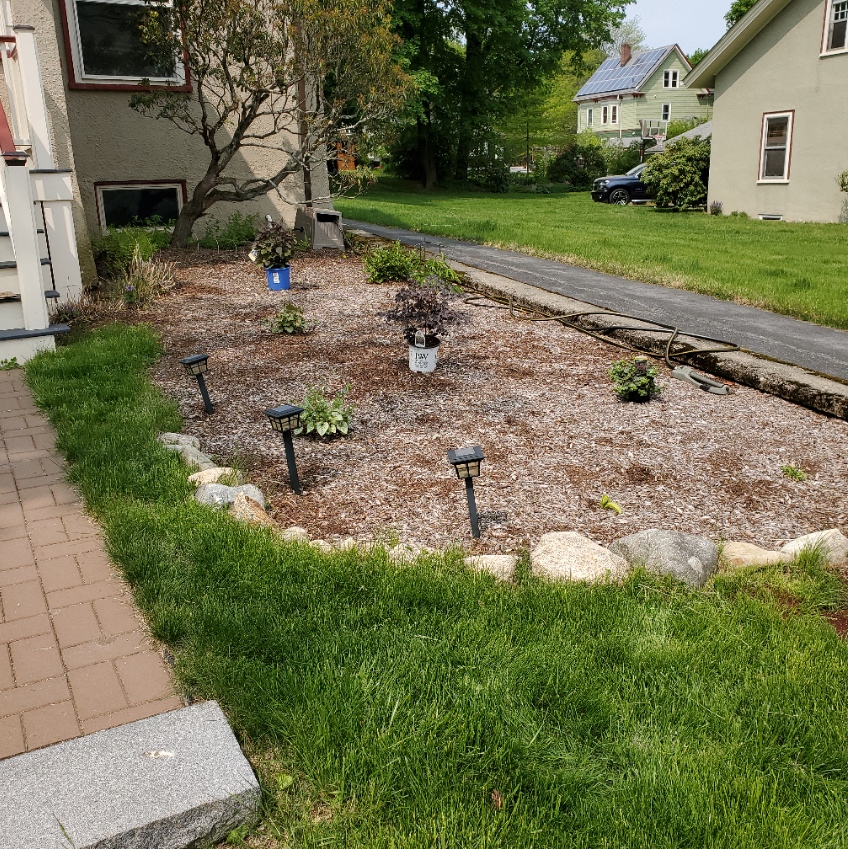
This is the general look I’m aiming for. This is a bench-type cushion I built and covered for a storage settee that’s now on our enclosed front porch. This piece was sewn, and that corded piping was introduced with it was seamed together.
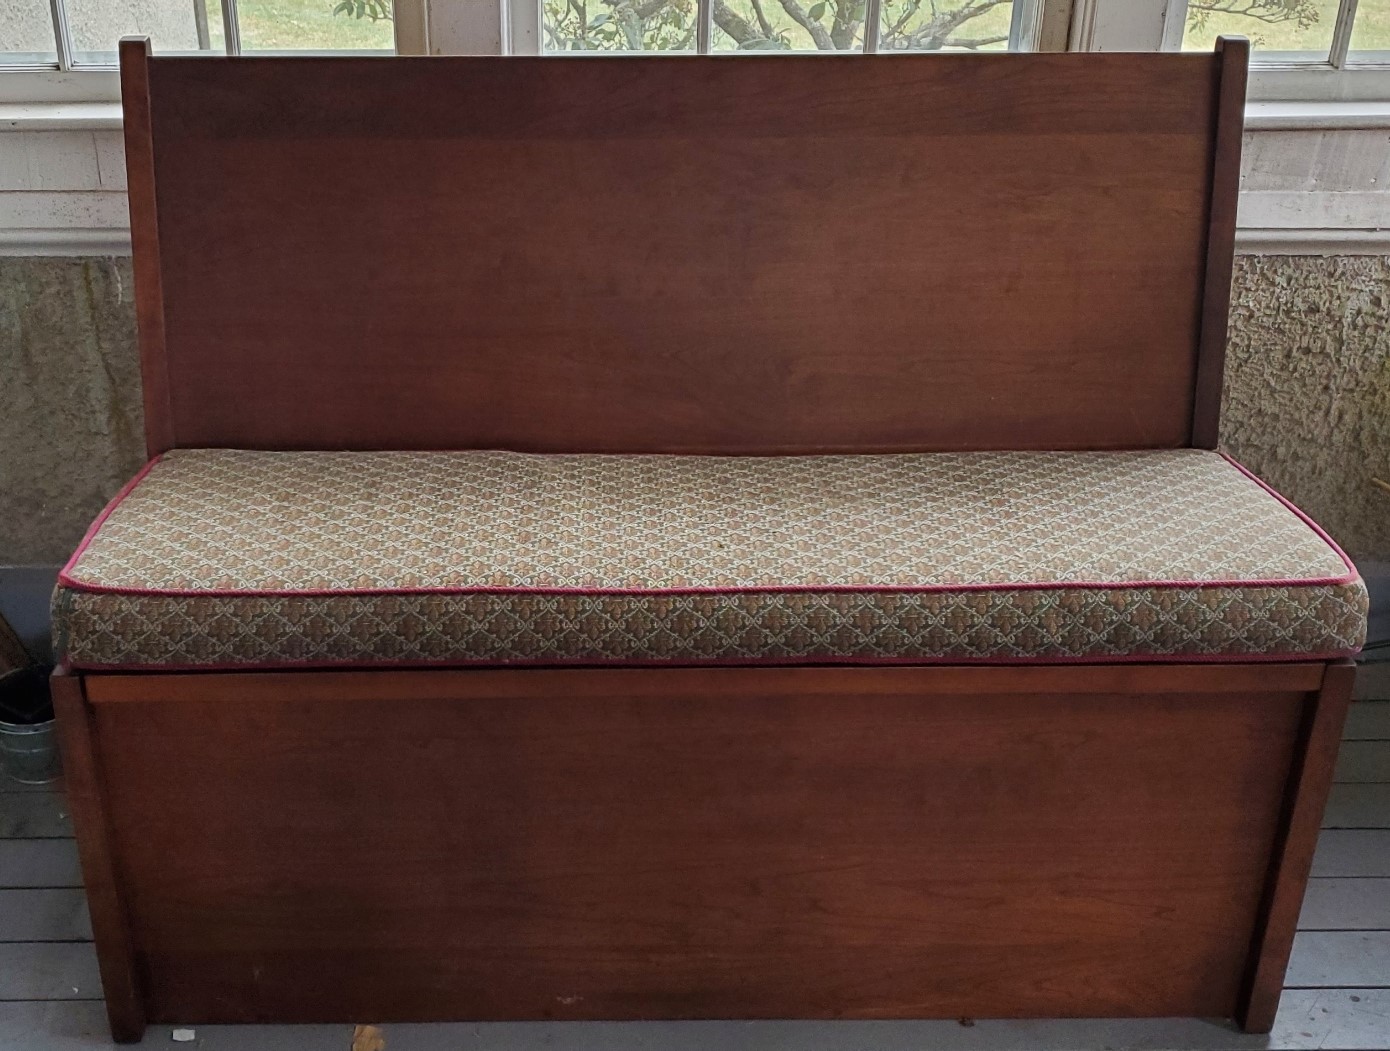
For the record, this cushion was built in the same way I intend to build the eyeball bolster – a slab of foam, wrapped in quilt batting, seamed into a permanent cover. But the eyeball bolster will have an additional removeable inside cover between the crochet and the permanent cushion. Crochet by its nature is rather see-through, with lots of small holes. The inner, removeable cover will be a heavy black cotton duck or canvas. Removeable just in case something is spilled on the bolster. It along with the decorative crochet cover will both be washable.
So even though I am almost done with eyeball assembly there’s still a lot of work to go on this piece.
Now on to other possibilities.
Thanks to the generosity of a long time friend, I find myself in possession of a set of twelve magnificent linen napkins. Never used. I had lucked into a similar but well-loved set of twelve at an estate sale this summer. I now have double the possibilities. First, both are eminently stitch-able:


The unused napkins are on the left, and the well worn ones are on the right. Counting threads and doing the math for the Penny Method the approximate thread count for the new set is roughly 40×40, and the old set is about 38×38 threads. Small, yes, but not impossibly so.
Now what to make….
I have many thoughts on this. First is the obvious, just embellishing one of the sets for obvious use as napkins. I’ve thought about doing a set with a big initial S in one corner, but each done in a different antique alphabet. This is a prime source for alphabets as magnificently ornate and over the top as anyone could desire.
The second possibility is a pieced tablecloth. There are all sorts of Renaissance examples of tablecloths and devotional pieces pieced together, some probably re-using earlier stitched fragments, others purpose-done. Some unite countwork pieces with darned net strips, others combine cutwork and other contemporary embroidery forms. Much to think about here and a lot of potential learning.
A third possibility also looms, for the well-used napkin pile. I have wanted to stitch a peasant style blouse for myself, using some of the more outre strip designs in my personal collection. Like dinos, for example. I am not quite sure how I would go about it, but I think with cleverness I could get a square yoke out of one or two napkins, a gathered body below that, and full 3/4 sleeves, also gathered. I have to mock this idea up with tissue paper to see if I have enough yardage, but I should.
I guess the moral of the story is that retirement is not idleness!
A BUSY DECEMBER
One of my periodic “where did I go” posts, reporting on everything and sundry that kept me from regular blogging.
Baking
First because I know there are cookie fiends out there just waiting for this year’s round-up, I present Cookie Plate 2022, arranged on the fused glass bison presentation dish given to us by my sister and brother in law. I use it in tribute to the resilience of my Buffalo, NY family and friends, enduring their second (and twice as bitter) lash of winter weather since Thanksgiving. May the lights and heat stay on and may the driveway finally learn to shovel itself!

Starting from the yellow and blue stars just above the bison’s head we have:
- Keto cutouts. I used this recipe this year, no “real” flour or sugar. I did make two enhancements, though. I put finely grated lemon zest in the cookie batter, and mixed the icing using powdered monkfruit based sweetener with lemon juice (and a dash of food coloring). Light and lemony. This dough worked relatively well for the simple star shapes, but it’s a bit on the cakey and fragile side, and would not be at its best if used for a cookie cut with an elaborate design, or with one of the plunger-style cutters that also embosses an impressed design. The icing too was a bit harder to handle than the confectioners’ sugar standard.
- Mexican Wedding Cakes. I subbed the monkfruit sweetener inside and used about a third almond flour in place of the regular all-purpose flour in this recipe, but dusted with confectioners’ sugar because the substitute doesn’t do that well for dusting. So I’d call these slightly slimmed down, but not keto.
- Keto peanut butter cookies. Last year’s recipe turned out rather poorly, so I tried a new one this year. Better results. Still a bit cakey-crumbly, but the taste and texture are better.
- Earthquakes, the name by which what most folk call chocolate crinkles are known in this house. Again not much seismic cracking this year, but the brownie-bite taste and texture were spot on. The usual recipe. Full octane – no slimming.
- Cinnamon bun swirls. This one is a specialty of the Younger Offspring. Clever fingers and exacting methods make those mathematically perfect spirals. These instructions but we skip the recipe author’s icing, The cookies are sweet enough as-is. Hint for avoiding the flat-tire look – slide the long rolls of this refrigerator cookie dough into the cardboard tubes from paper towels. They firm up nicely round without flattening that way.
- Triple Ginger White Chocolate Chip. My own invention. I love these, even though they are not chocolate. 🙂 I did slim these down a bit by using monkfruit brown sugar replacement instead of the real stuff. But the white chocolate chips probably make up for that little bit of virtue.
- Bourbon Balls. A family standard that I’ve made every year since I began baking holiday cookies from recipes more or less like this one. Since they start with crushed Nilla wafers and have a cup of bourbon in them they will never be full keto, but I did slim them a bit with sugar substitute. Note that these are also good with many other nut/cookie/liquor combos, with or without the cocoa. Chocolate wafer cookies/pecans/Chambord. Almond biscotti/almonds/amaretto. Nillas/hazelnuts/rum. One hint – they improve with long curing. Make these up right after Thanksgiving and put them in a tightly sealed tin. Then hide them until the end of December. Your forbearance in not gobbling them down right away will be rewarded.
- Jam thumbprints. Another contribution of Younger Offspring. This time the clever fingers fashioned heart shape wells, which were then filled with raspberry jam. A very buttery and light shortbread compliments that fruity goodness. Full octane. When I extract the recipe from the cookie artist I will post it here, but by the time this last cookie was baked, I was distracted and didn’t make a note of the source.
- French cocoa macarons with almond buttercream filling. Oh so good, and oh so sinful. Again Younger Offspring steps up to bat with authentic technique off a memorized recipe. Even the almond paste-based buttercream was extemporary. Obviously the Padawan has far surpassed the teachers.
- Chocolate chunk. This one started with the traditional old school Nestle’s Toll House original recipe (the one that still called for 1/8 tsp of water). No slimming and no nuts in this one, but about a third of the weight of chocolate chips was replaced by Trader Joes’ Cocoa Nibs. The remaining chocolate was chopped cold, making lots of chocolate dust, and tiny fragments. That really helps the flavor distribute itself throughout the whole cookie. The big hint on this one (aside from chopping) is to fridge the batter overnight, and roll it into uniform size balls rather than employing the two spoon/drop method. Much more uniform results.
- Yes there are 11 this year. We couldn’t cut a family fave to make the goal of ten. My Oysters. A simple hazelnut spritz with whipped bittersweet chocolate ganache filling. Slimmed a bit by using monkfruit sugar instead of about half of the regular white sugar, and a third almond flour instead of 100% all purpose flour, but it’s hard to call these virtuous.
I also made a keto lemon-chocolate swirl cheesecake, with a hazelnut/almond flour crust. I forgot to take a picture of that, and now it’s gone.
Not Baking
Aside from cookies, I had some knitting and crochet projects going.
First, as a favor to my mom, an old school knitter from the days of Knitting Ladies who sat by your elbow throughout design selection, customization, swatching, and execution to gauge. I didn’t do those earlier stage support functions but I did do the last and most important one – finishing. Taking the individually full-fashion knit pieces, seaming them together and adding final details like collars. Mom had completed but had not assembled two sweaters, intended for my nieces. I helped those projects over the goal. Both are adult size. Now that they’ve been bestowed, I can break silence and post them here.

Also with almost all of the squares complete, I have begun assembly for the I’ll Be Watching You sofa cushion.

More on this as I get more strips put together. Note that some rethinking happened. Due to color assortment challenges, we added two more units to the mix to make 12 individual color layouts, and upped the cushion width from 11 to 12 units. Needless to say that required a few more squares than I originally planned.
Other Accomplishments
Let’s see. I visited my mom in Florida the second week of December. We had a good time together, and even managed to hijack the Palm Beach area family for a dim sum brunch over the weekend. Why I have no pix from the week, I don’t know. I guess I tend to live the moment and not document unless I’m a spectator. But I think the visit was appreciated, productive, and satisfying. Next time I promise to be a better chronicler.
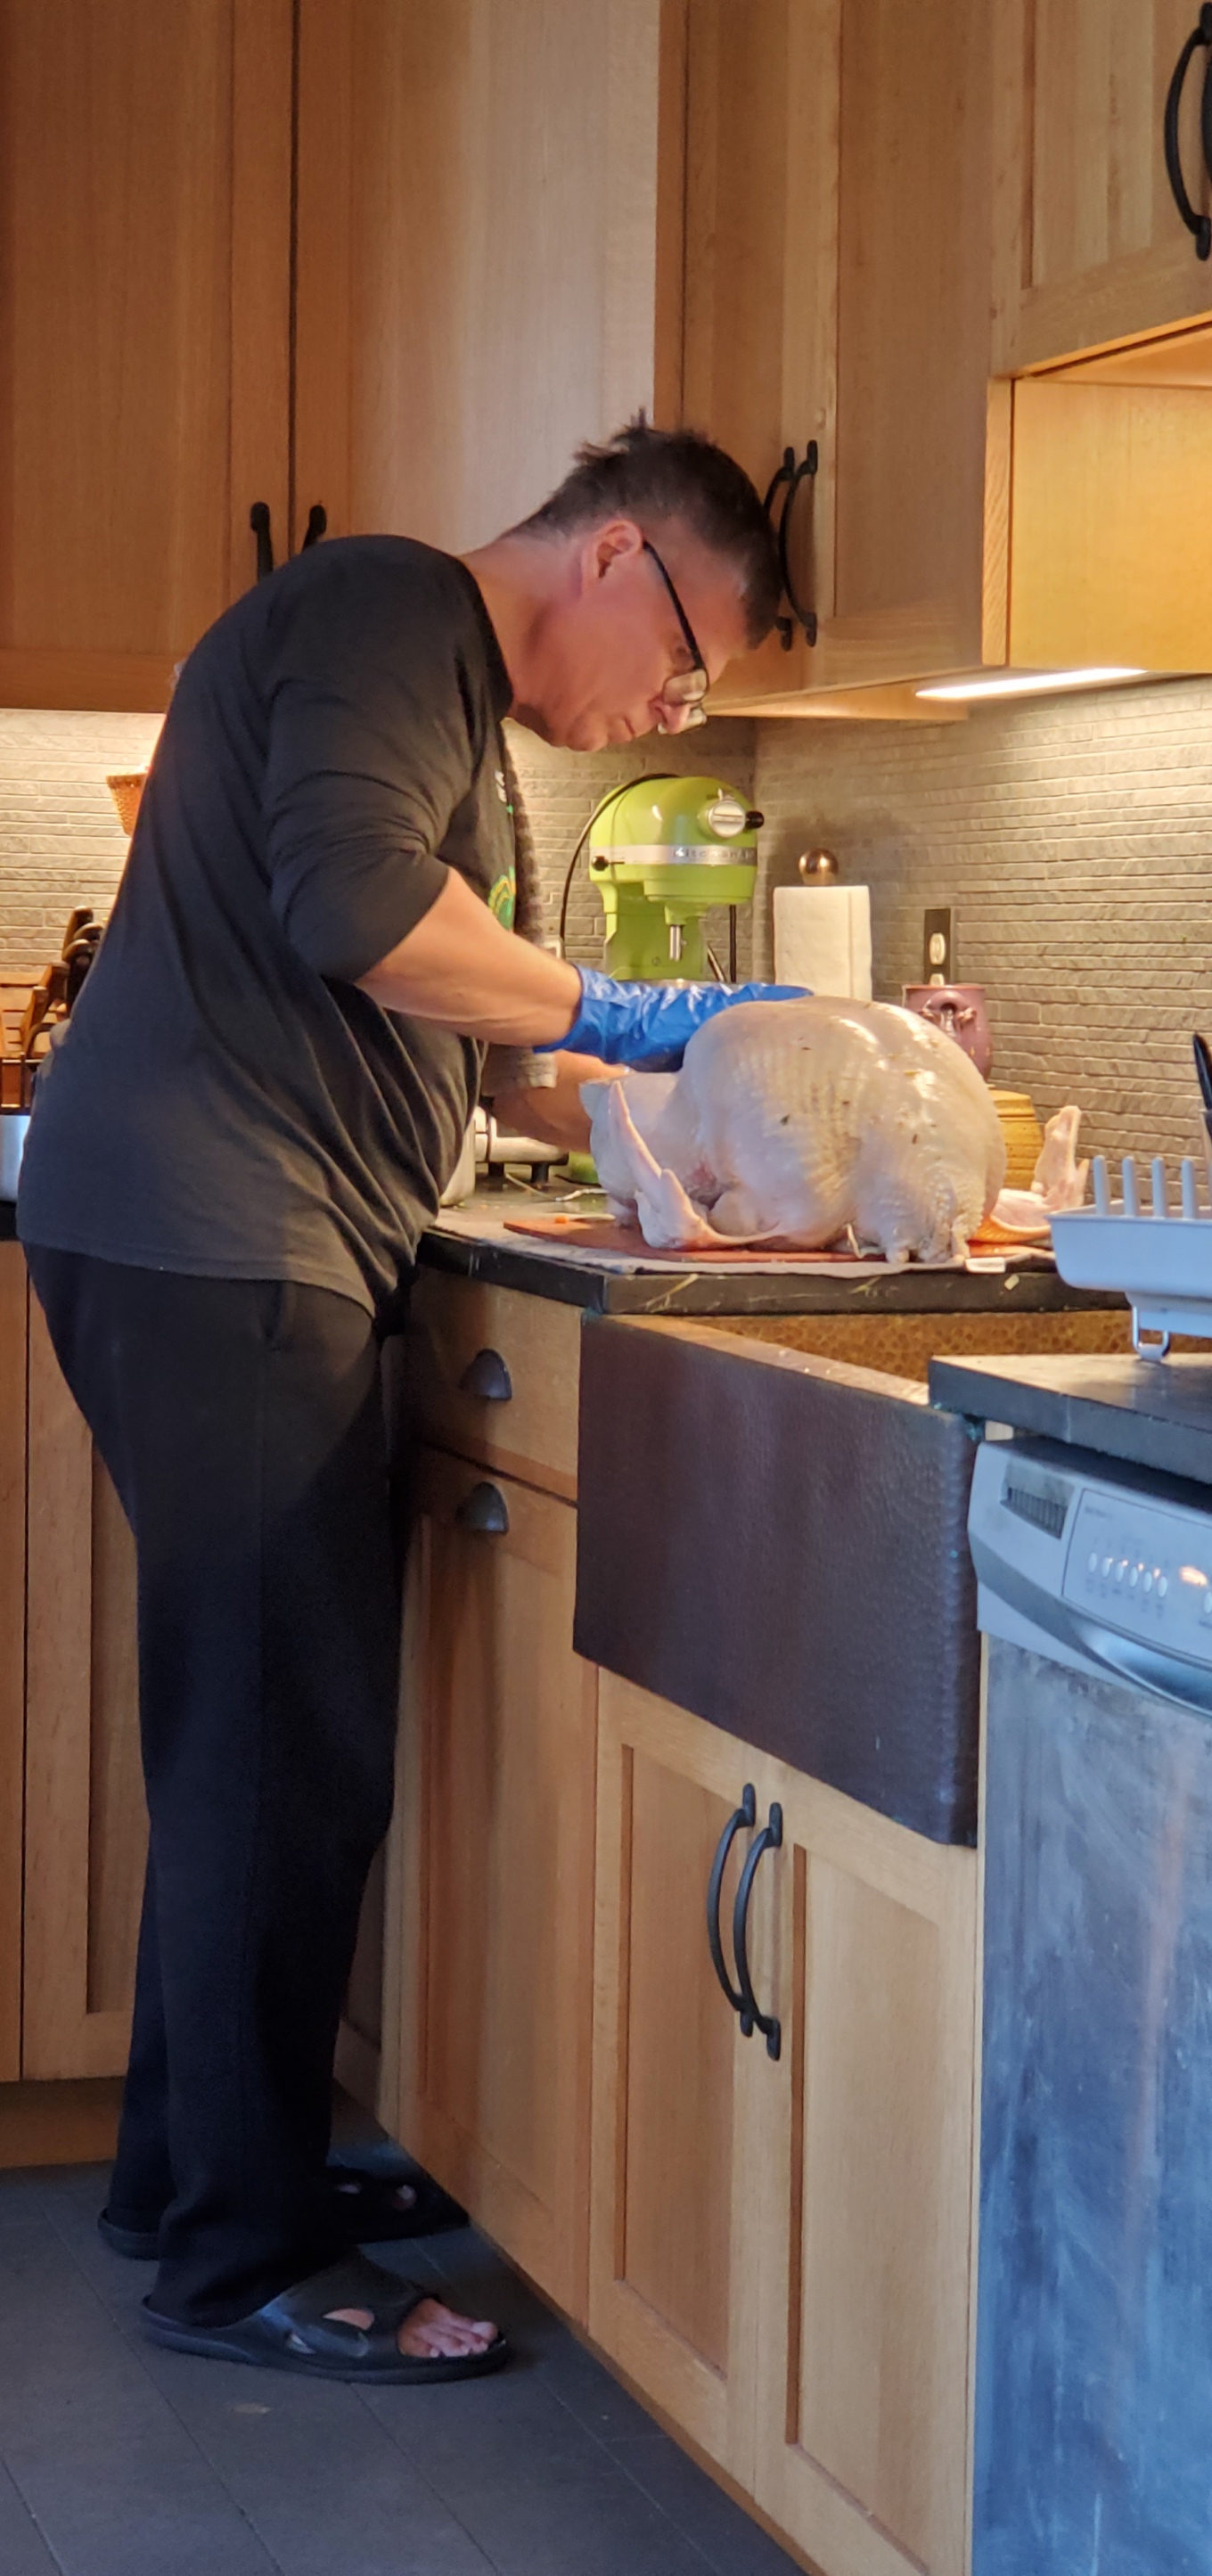
As spectator, I cheered on The Resident Male as he prepared an epic feast for Christmas Eve. His menu is here. When Henri, our Guest of Honor emerged from the oven, he had celebrity status. Everyone documented him.


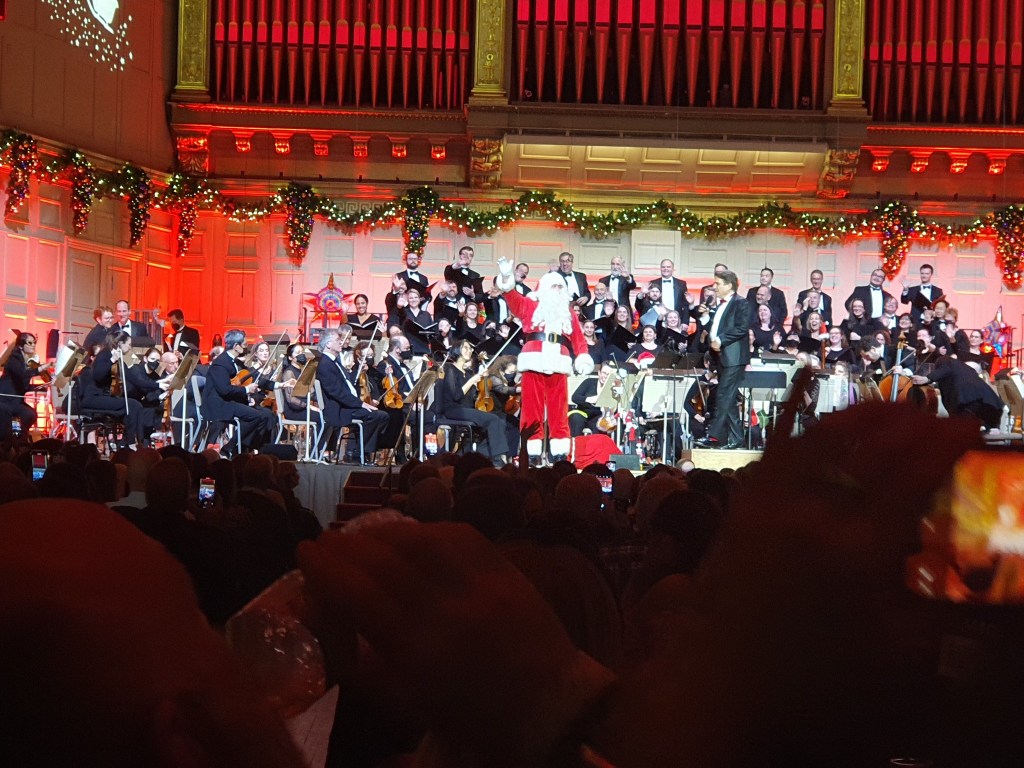
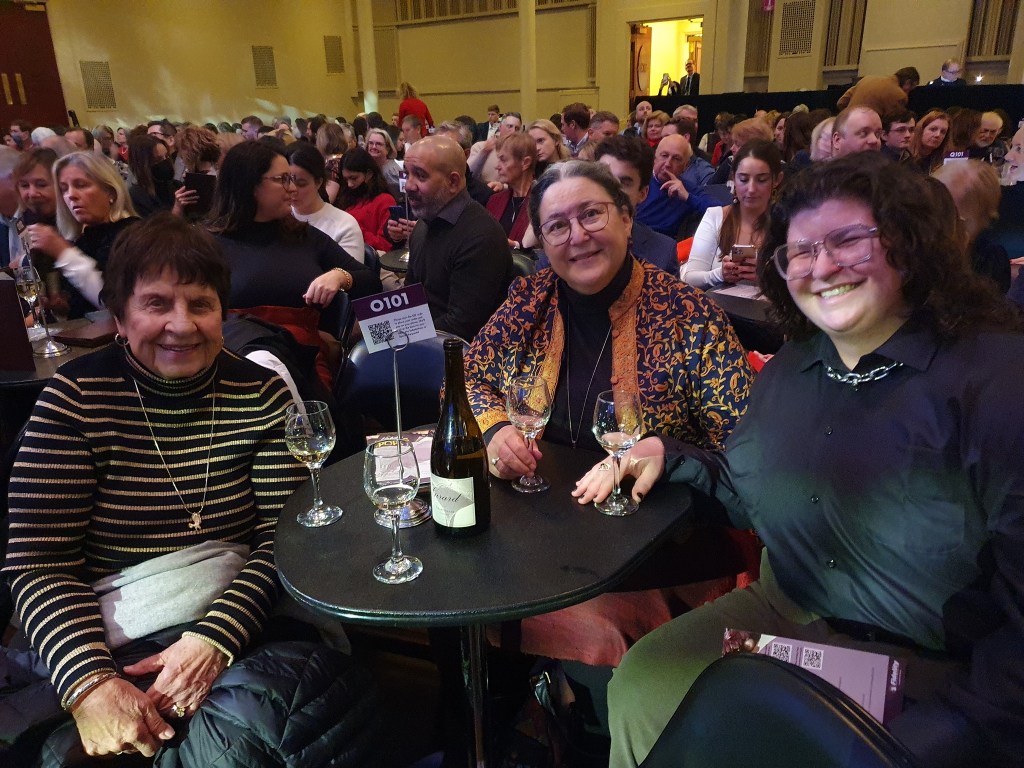
We also went to see a performance of The Boston Pops. It was a delight.

And as usual, we maxed out on holiday festivity, aside from food and drink. We lit candles (hard to see the fully illuminated menorah due to frost on the window). We did the tree. We had the fun of opening presents from each other. This year abetted by Fernando’s mom Carm, who is happy to be away from Lackawanna and the worst of the weather there.


EYE WITNESS TO PROGRESS
So. How is that eyeball cushion coming along? Faster than I expected.

Behold 90 of the completed 102 squares – that’s nine each of the 10 color combos. In total I will need 118, so I’m only about a week out from having them all. The designated recipient is here for a holiday visit, and with luck we will find time to do a placement for the front and back. That’s four rows of 11 squares across. I’ll take pix (just in case) and pin up the four courses, noting the order of the four. The back of the cushion will duplicate the front, and I will use up the rest to make the side edges, finishing out in a large rectangular block.
My plan is to slip stitch them together, assembling the strips of 11 as required, then slip stitching the long strips together for the two primary front and back sides of the bolster. Once I have the front and back, I will slip stitch together two more rows of 11, plus two of 4. However, instead of using slip stitch again to unite the front and back with the sides, I plan to make “piped” seams using I-Cord, knitting them together instead of crocheting. I’ve done this several times before, and the result is worth the effort. I’ll probably do that on something like US #2 or #3 DPNs (between 2.75 and 3.25 mm), I have some between sizes sets in that range, so I can experiment until I find the best fit.
I plan on using a zipper around three sides of one of the short ends, so the crocheted cover can be removed for washing. In any case, once I have the crocheted layer done and have an exact final measurement, I will build the inner bolster cushion (thick semi-rigid foam wrapped in quilt batting), encase it in a permanent inner cover (an old worn out bedsheet, repurposed), and sew a zippered “fashion lining” (black duck or cotton canvas). I need that lining because crochet isn’t uniformly dense, and there are little holes in the corners. I’d prefer they be backed by black, and whatever that black is – it should also be able to be removed for washing. So even when the crochet and knitting on this is done, the project itself will still be an ongoing effort.
Wish me luck. It’s been a while since I did a major cushion project, but this is much simpler than the knife edge, piped trim bench seat I did before. I’m sure this construction is not beyond me, but luck is always welcome. 🙂
In other news, like so many others we of Casa Magnifica had our own Thanksgiving celebration. Pies, turkey, sides, and the like. Just two pies this year due to it being a small crowd (pumpkin and chocolate pecan). And I share pix of The Resident Male tending to our turkey, which due to his care, skill, and watchfulness, was superb. Younger Spawn contributed to Pie Perfection again this year, crafting a pecan vortex of deliciousness, and an on-point pumpkin presentation, and along the way making a few key improvements to the basic recipes. I will be making additional notes on those soon to preserve those flashes of inspiration.

Oh, one last minor thing. If you have been following me via Twitter, apologies. I’m afraid that’s over. I no longer have a presence on that platform.
LOOKING EAST AGAIN
Back when we were doing the expat stint in Pune, India, I wrote about Kasuthi (aka Kasuti, Kashida), a blackwork cousin that deserves to be better known by Western double running stich aficionados. I recently stumbled across another sample of related stitching, this time from a bit further north.
The Hazara people, mostly in Afghanistan, but also present in Pakistan practice an interesting and related form of linear geometric stitchery. It’s hard to date beyond “traditional,” and given current geopolitics, deeper investigations are unlikely. But here is the limited info I’ve found, plus some examples, and some sources of additional information.
The Hazara are known for several forms of stitching, mostly but not exclusively counted styles using satin stitch, straight stitch, double running stitch and cross stitch, and is better known for phulkaris (large shawls often worked in geometric, counted straight stitches). These double running stitch pieces in particular are probably made by women of the Wardak Hazaras, who live mostly southwest of Kabul. This style is usually worked in cotton or silk on linen or cotton grounds. These double running stitch pieces are often finished out as small mats, bags, shawls, prayer cloths, and other covers.
First is the artifact that piqued my interest.

This is piece in the collection of the George Washington University Museum, Accession T-1240. They note it’s provenance as being Hazara from Afghanistan, probably sometime between 1880-1920. That mushy date range is the earliest and although it’s only semi-hard, is the only date I’ve seen for this style. Note the fields of diapered patterns stitched on the count on a not-so-evenweave ground. The designs skew east-west compared to north-south due to there being more ground fabric threads per unit measurement in one direction than the other. But skew or not I love the repetition and color usage. So I went looking for more.
This artifact is probably the best represented on line for the style, and shows up in most on-line photo collections of Afghan embroidery, although not always with attribution. It is nicknamed “The Snowflake Shawl” and was collected by Jania Mishra, the author of the art blog/sales gallery Woven Souls. She places it as Hazara, but does not opine a date. Still it’s clearly antique/vintage. Her write-up includes lots of close-up photos, and notes the relationship of this style of stitching to mathematical theory. Pop by her blog to truly admire the diverse detail of this piece.

More examples. On the left is a bandanna size prayer cloth that was sold by a textile/rug auction dealer, and on the right is what’s described as a Hazara napkin in the Galerie Ariana ethnic textiles sales site. (No affiliation with/endorsement of these sellers – I find dealers’ on-line photos and attributions an occasionally useful research supplement, although not all dealers’ listing data are of the same quality.)


What can we conclude about dissemination and influences?
Very little.
Double running is one of the simplest, oldest and most ubiquitous of stitches. The scholars of Kasuthi posit a vague “Persian origin” before adoption, mention of in literature, and refinement of the style in the Deccan area Chalukya dynasty courts of the mid 500s to mid 700s, and that dynasty’s later resurgences through the end of the 1100s, culminating in the disciplined style and vocabulary of traditional motifs that are known today through surviving examples dating to the 19th century. Overland trade routes have connected Northern India and Afghanistan and beyond going back to antiquity. The the flow of both peaceful and aggressive contact is also well known, as is historical trade that connected the northeastern African coast with India. Egypt’s Fustat region is another area where visually similar double running stitch artifacts from the Mamluk era (1200s-1500s) are found.
Is this another survival of some sort of time-lost tradition that also gave rise to Kasuthi, the Mamluk works, and by extension over time and geography (and by direct quotation noted by others as well as myself), the stepwise and geometric designs found in early European modelbooks at the dawn of the popular print era (early 1500s), and on to early European blackwork and strapwork? It’s tempting to speculate so, but we have absolutely no proof.
These Afghani pieces could also have been a product of later cultural influences, as waves of association washed back and forth along time’s shores. But the clear correspondences, whether they can be affixed to defined family tree, or are just casual correlations due to the limits of geometry and the simple stitching style itself, are to me are a source of endless fascination.
Here are a couple of sites with additional information on Hazara embroidery in general:
Source material for the Mamluk styles mentioned
- Marianne Ellis. Embroideries and Samplers from Islamic Egypt, Asmolean Museum, London, UK, 2001. ISBN1-85444-135-3.
- Ashmolean Museum Yousef Jameel Center for Islamic and Asian Art, Newberry Collection of Islamic Embroideries
And there are more traditional regional counted styles to explore in this area of cultural confluence. I promise to keep digging.
UNUSUAL FIND AND POSSIBLE USE
Sometimes it feels like everything I see is fraught with stitching purpose.
Yesterday Younger Spawn and I went to the local Burlington, MA H-Mart, for a general restock of kimchi, various sauces, and condiments since the options in Troy, NY for such things are less abundant and can pose a logistic challenge in an area with so little public transportation.
While we were shopping we wandered the housewares aisle. I’ve found all sorts of useful stuff in there, including the hand sickle we use to keep our giant grass in check. This time was no different.
I stumbled across a display of small mesh cloths of various sizes. If it is to be believed, Google Translate tells me this stuff is called Isambe Bozagi or Bojagi (various transliteration/translation platforms render it differently), and then translate it variously to hemp cloth (middle), and burlap (Chinese). But it’s clearly marked as cotton, and of domestic Korean manufacture.


Product information says that it’s about 33 x 34 cm and hemmed. That it’s food-safe, essential for steaming (especially dumplings, and sweet potatoes), can be used to cover food in the summer, and is used to strain soy products (possibly making tofu), and soups. It also says to wash separately and dry thoroughly before use.
All well and good. I do steam things on occasion and it might come in handy. But what caught my eye was the weave. I think it’s sideways in my penny photo, but note the doubled thread in one direction (probably the weft). That’s not unlike the woven ground used for Buratto embroidery – a stitched and darned form popular in the 16th and 17th centuries, stretching on to the 18th century. It’s a cousin to other better known darned mesh works done on knotted netting grounds or on withdrawn thread scaffoldings, but in Buratto’s case the ground was purpose woven as a mesh.
Here’s a bit in the Metropolitan Museum’s collection (Accession 076261 in case the link breaks) – 16th century, Italian. The ground is linen, not cotton, and the stitching is silk. The piece is about 13×4 inches (33×10 cm).

My Korean kitchen cloth’s mesh count is roughly 16.5 x 15 meshes per inch. Just a little bit finer than this, which is about 14 meshes per inch (counting height of the snippet and dividing by 4). And although it’s hard to make out, the structure can be seen in this ultra close-up.

There are places you can find buratto style grounds to stitch. Those resources are usually quite a bit more expensive. If you happen to have an H-Mart in your area (and they are a national chain here in the US, with more popping up every year), you may be able to luck into this wildly inexpensive cloth. It’s not perfect, but at the price it’s a wonderful tool for experimentation. I’m penciling playing with this stuff into my dance card, probably for some time next year, and may go back and get more.
Bonus Eye Candy and Background
Just for fun, here are some more examples so you can see the breadth of expression of this stitching family. There is a lot of variety in works done on buratto. Monochrome was common. Polychrome was common. Dyed grounds were common. Geometrics and florals were both common. Also the style went through several revivals, and was particularly prized during the “Indiana Jones” era of textile collecting. Many museums collections are based around those gleanings, and haven’t been revisited since their donation before WWI. As a result, many attributions are a bit “mushy” – there are certainly revival pieces marked as pre-1700s originals, and even the real experts (of which I am not one) have problems determining age without extensive forensic testing.

The one above is also Italian, 16th-17th century, and is in the collection of the Cooper-Hewitt Museum, accession 1971-50.198. No information on the museum’s page though as to size or scale.

The one above looks to have an indigo-dyed ground, stitched in white. Italian, 16th century, from the Met’s collection, accession 08.180.448. This one is about 3.75 inches tall, which makes its scale very close to the 14 meshes per inch of the Korean steaming cloth.

And a wild multicolor one 17th century Italian, also from the Met, accession 12.9.3. Many of these pieces just said “embroidered on net” or were lumped in with lacis, but lately there has been a move to divide those done on true knotted net (lacis) from those done on woven buratto fabric. The on-line descriptions are slowly being updated accordingly.
Although I can’t declare for certain, looking at the dates of the more elaborate, especially the ones with patterned infills, the style appears to have evolved in that direction over time. Here is a piece typical of that group. This 18th century piece is another gem of the Met, accession 12.8.3 in case the link breaks. But do note that multicolor is documented back to the 1500s.

And here are some links on the history of the style; some discussing its link to early modelbooks. Buratto was one of the stitching styles specifically named in modelbook prefaces as a suitable art for the designs they presented.
So there we are. A chance encounter in the housewares aisle turned into a rabbit hole of exploding possibilities. Good thing I’m retired. I might actually find the time to dance with all of these charming partners lined up on my card. 🙂
MINOR ADVENTURE
Off tomorrow to assist Younger Offspring’s migration to a new apartment. After graduation comes employment – in this case, done remote from home. And the current place (above a bar on a main street) was not quite as conducive to quiet productivity as might be desired.
The spawn is past the years when Mom-rescue is needed. I’ll not be schlepping furniture, but trusty company and someone with a van plus tons of laundry baskets in which to transport house plants will be appreciated. As a result I’ll be mostly off line until late in the holiday weekend.
Oh. And while Mom-rescue isn’t on the performance list, Mom-pride is. I gotta show off. The artwork here is Younger Offspring’s – a few quick pieces dashed off to frame the perfect moving mindset.

EXPLORING A BLACKWORK SHORTCUT
Back from my first in-person SCA event in a long time. I went to “Aisles of March” – what can be best described as a historical-recreation-item “craft fair” for those unfamiliar with the organization. It was a group-specific gathering at which dozens of merchants displayed wares, selling everything from whole garments of historical design and cut; to accessories, jewelry, jewelry findings/stones; the components to make clothing (including hand-dyed yarns and yardage); armor; wooden and metal table implements and specialty crafting tools (embroidery frames, weaving looms and the like); camping implements (open hearth cooking tripods and accessories); research and how-to books; and even spices and fragrances. There was also a certain amount of ceremony including SCA royal presence, and awards given out for mastery of specific arts, or for service to the organization and its constituent groups.
But I wasn’t there to attend court, or to shop. I was there to help The Apprentice and household sell their products – brilliantly hued hand-dyed silk and wool threads and yardage prepared with researched, historical recipes; bead jewelry reproductions of various eras (Viking age, late Roman Empire, Venetian), and sturdy linen by the yard. Some of this is also available on Etsy. Obvious affiliation disclosure – The apprentice is the proprietor of that Etsy shop.
While I was helping out I also had an opportunity to sell a few copies of The Second Carolingian Modelbook in person. And that gave me a chance to chat with folk interested in counted embroidery, and blackwork in specific. One thing several people mentioned was the difficulty of drafting out the freehand patterns for inhabited blackwork – the Elizabethan style characterized by heavy outlines filled in with counted or freehand stitched fills, usually in black but occasionally embellished with metal threads.
I understand that challenge. My ancient underskirt was an exercise in freehand pencil drawing, modeling flowers and foliage after group of historical artifacts including a cushion cover repurposed from a dress in the collection of the Art Institute of Chicago, Accession 1955.1221; and a panel from an embroidered sleeve held by the National Museum of Scotland, Accession A.1929.152 (other fragments of the same work exist in the Metropolitan Museum of Art and other institutions). Not everyone has the patience or confidence to do that kind of freehand drawing.

So, I set to thinking about what pre-drawn resources might be available.
Spoonflower and other print-to-order textile/wallpaper houses offer designers the chance to get their patterns printed on a variety of media, and sold by the yard. I had ordered wallpaper from them a while back.
There are thousands of prints in Spoonflower’s active catalog – among them several adapted from Elizabethan embroidery. Note that these are NOT my offerings, I have nothing posted there. I just went browsing among their current listings and picked two that were likely candidates – the ones with the most historically representative designs at offered at the largest scale. Then I went to the fabric choice area and picked two different fabrics, both possible choices for counted or surface work, and ordered two eight-inch swatches. This is what I received:

The design on the left is shown in several reference books, and is one I included a thumbnail of in my very first hand-drawn booklet on blackwork, issued in 1978. It’s vaguely similar to one in Trevelyon’s Miscelleny, but as soon as I find my now-packed-away booklet, I’ll insert the specific source. The one on the right is a simplified and very recognizable version of a standard Elizabethan scrolling floral design, of the type rendered in blackwork or polychrome stitching, often with metal thread embellishments.
I requested my sample of the one on the left (the darker one) be printed on what Spoonflower sells under the name Cypress Cotton Canvas. The one on the right was printed on their Belgian Linen. Here are zooms, with a penny for ease of thread count calculation:


Note that the cotton canvas (left) isn’t really countable, but it has a dense weave structure that might be amenable to surface work. However I am not a textile history expert, and I don’t know if fabric of that structure, even if it were not cotton would be appropriate to the period of the design. The linen however is plain tabby weave. By counting threads occluded by the penny I get 17 horizontal threads x 21 vertical threads. Factoring in the penny’s standard width of 0.75 inch, we can compute a thread count of approximately 21 x 26 threads, but I can’t tell which is warp and which is weft due to the lack of selvedges. Skew but easily counted and stitched.
BUT
My first reaction to both of these samples is that the motifs on them are quite small in scale for easy stitching. Even on the uncountable canvas, I would have preferred that design be imaged about a quarter to third again bigger to make it easier to work. This is also very true for the scrolling flower design printed on linen. It might do for non-counted polychrome treatment with a very simple stitch used for the stem; or for speckled freehand blackwork, again simple outlines and a scattered stitch, shaded infilling. But for fancy counted, geometric, diapered fills, there just isn’t enough real estate inside most of the flower and leaf motif segments to make such stitching worthwhile.
The next step of course is hands-on. It won’t be any time soon (I have a massive to-do queue), but I do intend to secure the edges, launder, iron and give both a try anyway, to see how the fabrics and printing perform. If the stitching goes well I might finish them out into small sweet bags. Or not. This is just an idle experiment.
Again, I am not endorsing or promoting the source, the products, or the designers who offer their patterns at the source. I paid full price for my swatches. But I am trying to help out those who are looking for some sort of assistance in starting their own blackwork projects. While these items are not exactly optimal, they or similar pieces might be learning tools that could jumpstart creativity, and help someone reach towards a previously unattainable goal of making something visually period-appropriate. And that in turn might help them advance towards less “factory-modern” ways of getting there.
Stay tuned. Eventually I will cycle back to this experiment, do the wash test, and play with these some more.
